Odoo 19 Social Marketing is a powerful module within Odoo that enables businesses to streamline their digital marketing efforts across multiple social media platforms. It allows users to schedule posts, manage campaigns, and monitor engagement from a single dashboard. With integration into the broader Odoo ecosystem, it connects marketing activities with CRM, sales, and analytics for better decision-making. The tool supports real-time tracking of audience interactions, helping businesses refine content strategies and improve effectiveness. Odoo 19 introduces enhanced automation features, making it easier to plan and publish content consistently. It also provides detailed reporting dashboards that visualize performance metrics. Marketers can collaborate efficiently, assign tasks, and manage workflows seamlessly. Overall, it serves as a centralized hub for social media management, improving productivity and engagement outcomes for businesses of all sizes in a scalable way globally integrated platform.
Open the Social Marketing module from the Odoo 19 dashboard.
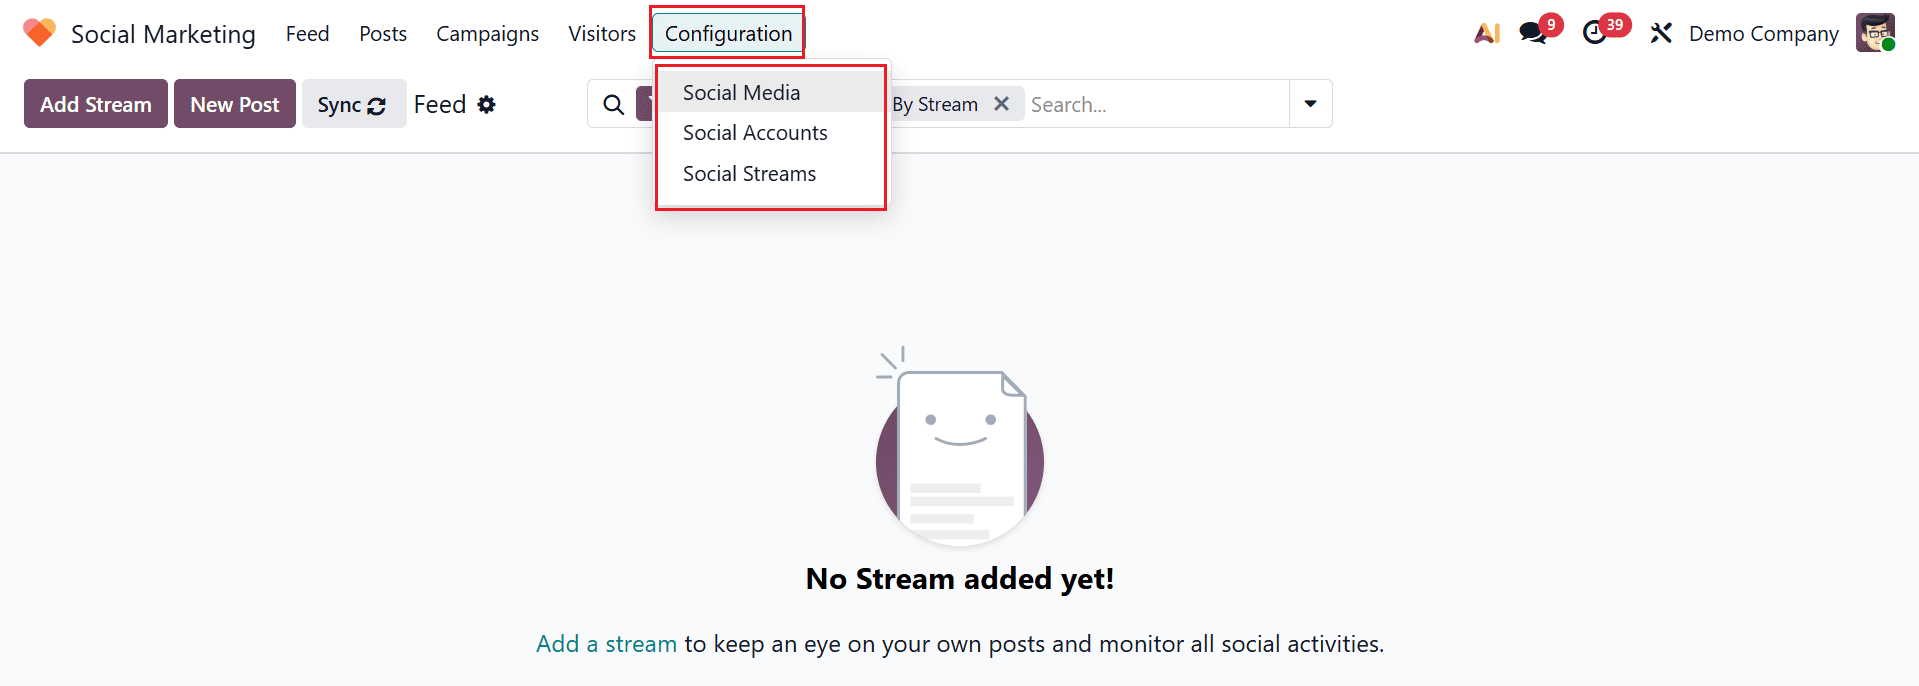
The module consists of five menus: Feed, Post, Campaigns, Visitors, and Configuration.
1. Feed
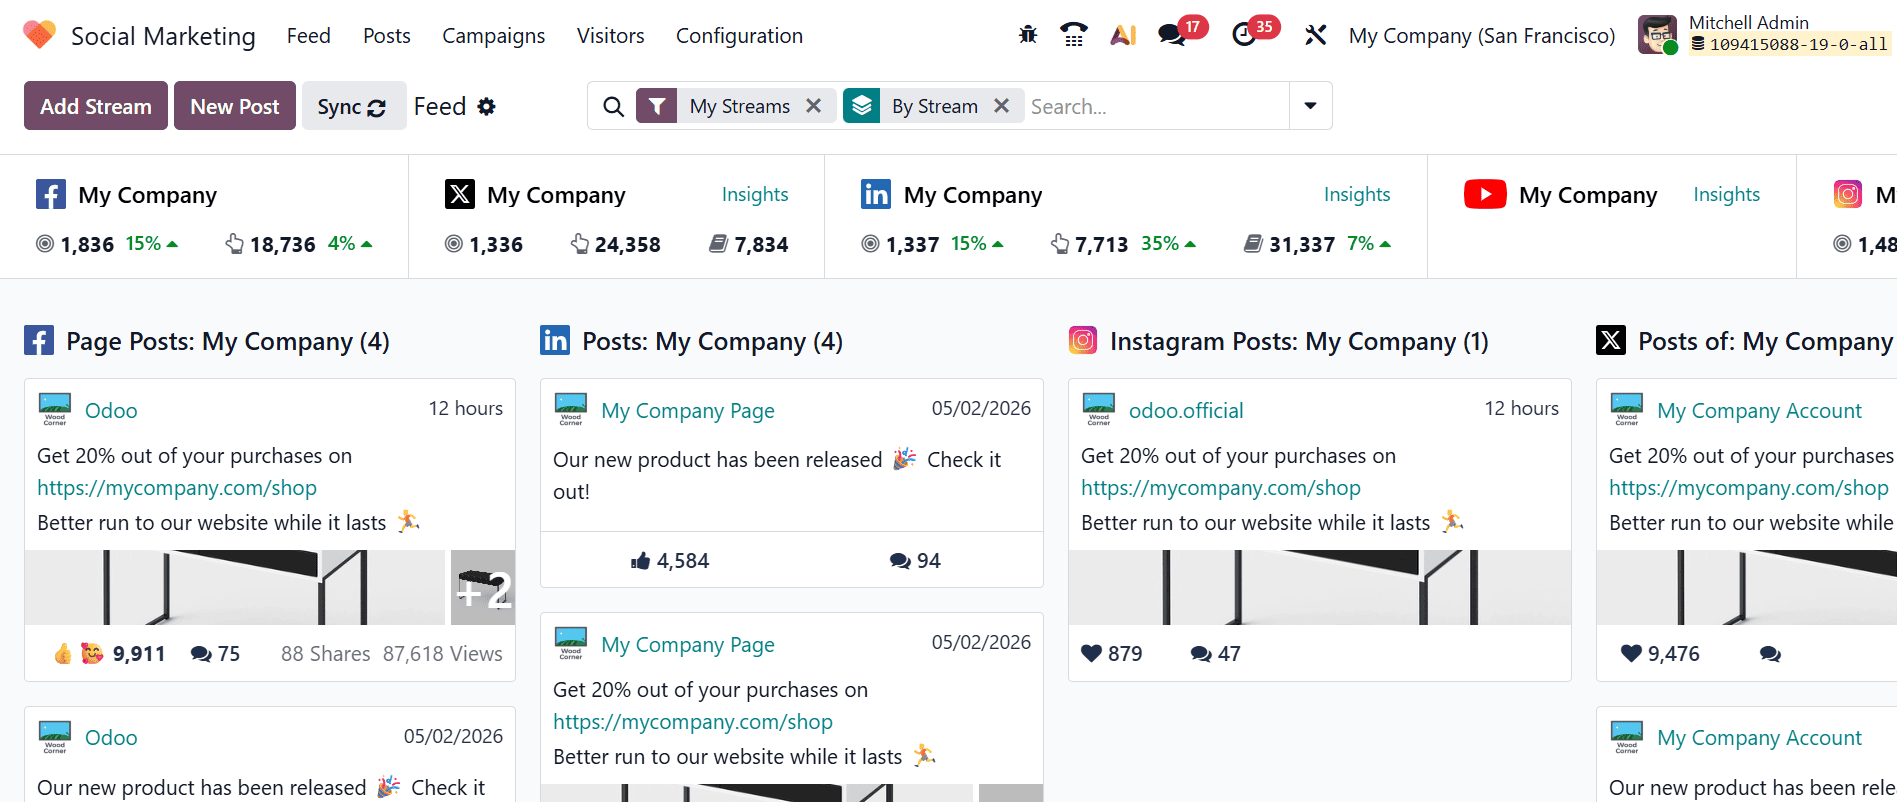
In the Social Marketing module, Feed is the default dashboard view. The main dashboard displays all the connected social media streams, including Facebook, X, LinkedIn, YouTube, and Instagram. Each stream is displayed in a column layout, showing real-time insights such as the number of followers, reach, impressions, and audience engagement.
Under each column, posts are organized as cards. Each card displays key engagement metrics, such as views, shares, likes, and comments, helping you analyze the performance of the post. You can also interact with comments directly by replying, liking, or converting them into leads.
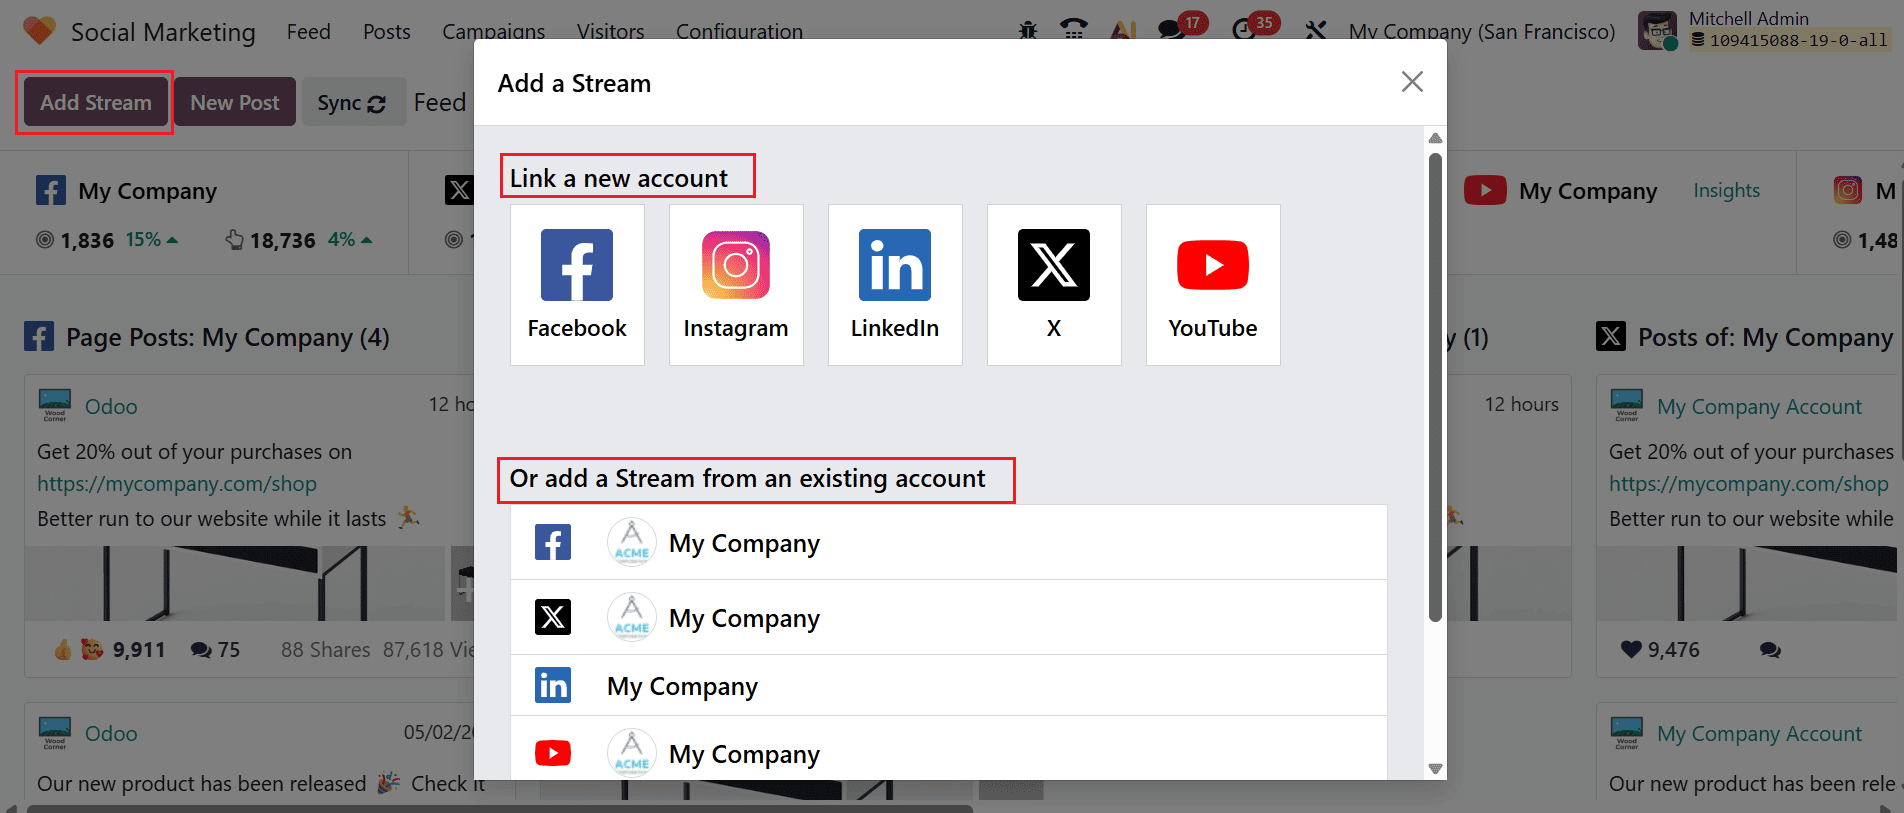
When you click the Add Stream button, a pop-up window will appear. From there, you can either link a new account or add a stream from an existing account.
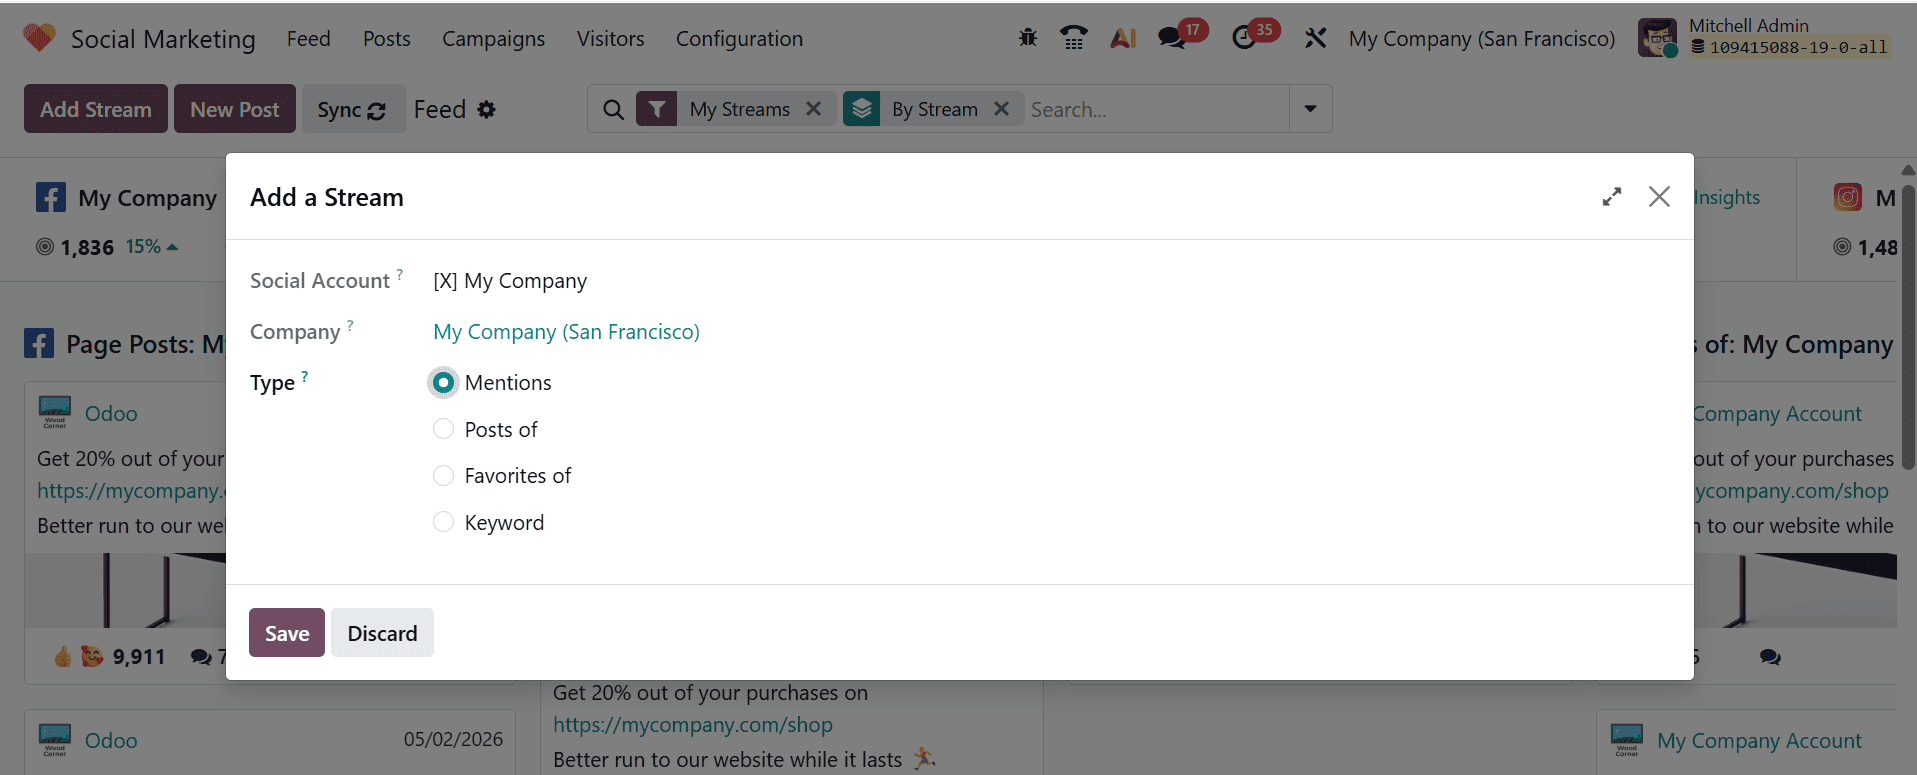
A new pop-up screen will appear where you select the type of stream of the account, such as Mentions, Posts of, Favorites of, or Keyword.
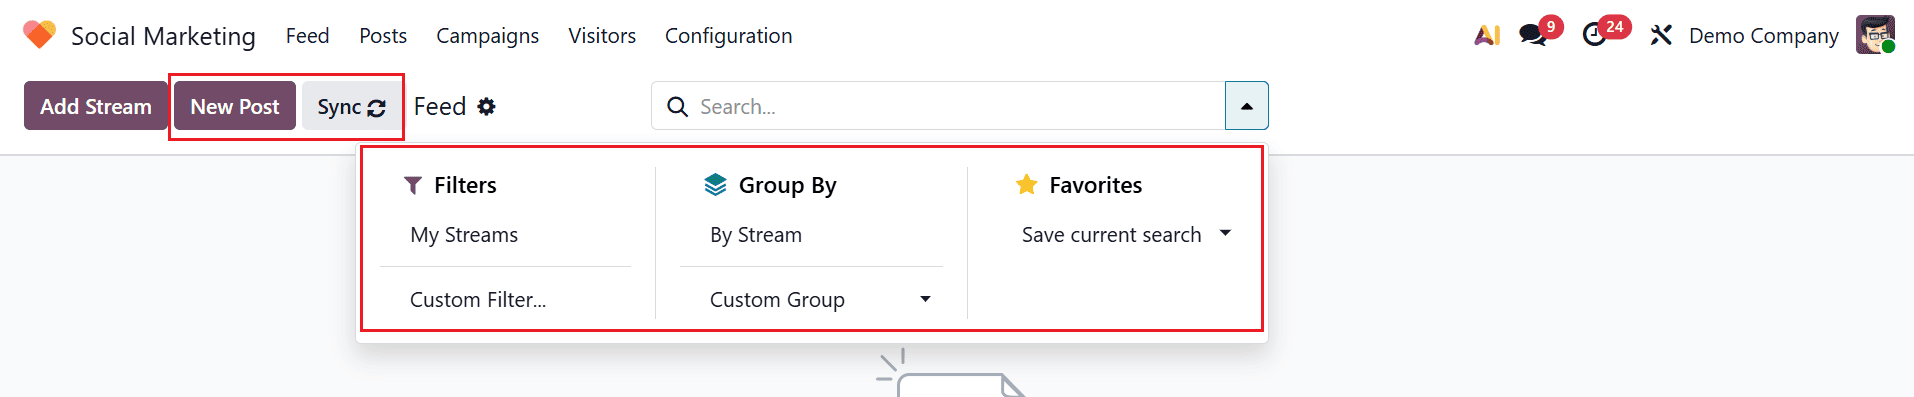
The New Post button lets you create and publish posts directly from the Feed dashboard. You can use the Synchronization option to refresh the module and load the latest updates. The search bar drop-down provides additional controls such as Filters, Group By, and Favorites for better organization of the feed. The feed can be filtered using My Streams, Custom Filter, or Ask AI to display specific content. You can sort the feed by selecting either By Stream or Custom Group. To streamline your workflow, save frequently used filters under Favorites for quick access whenever needed.
2. Posts
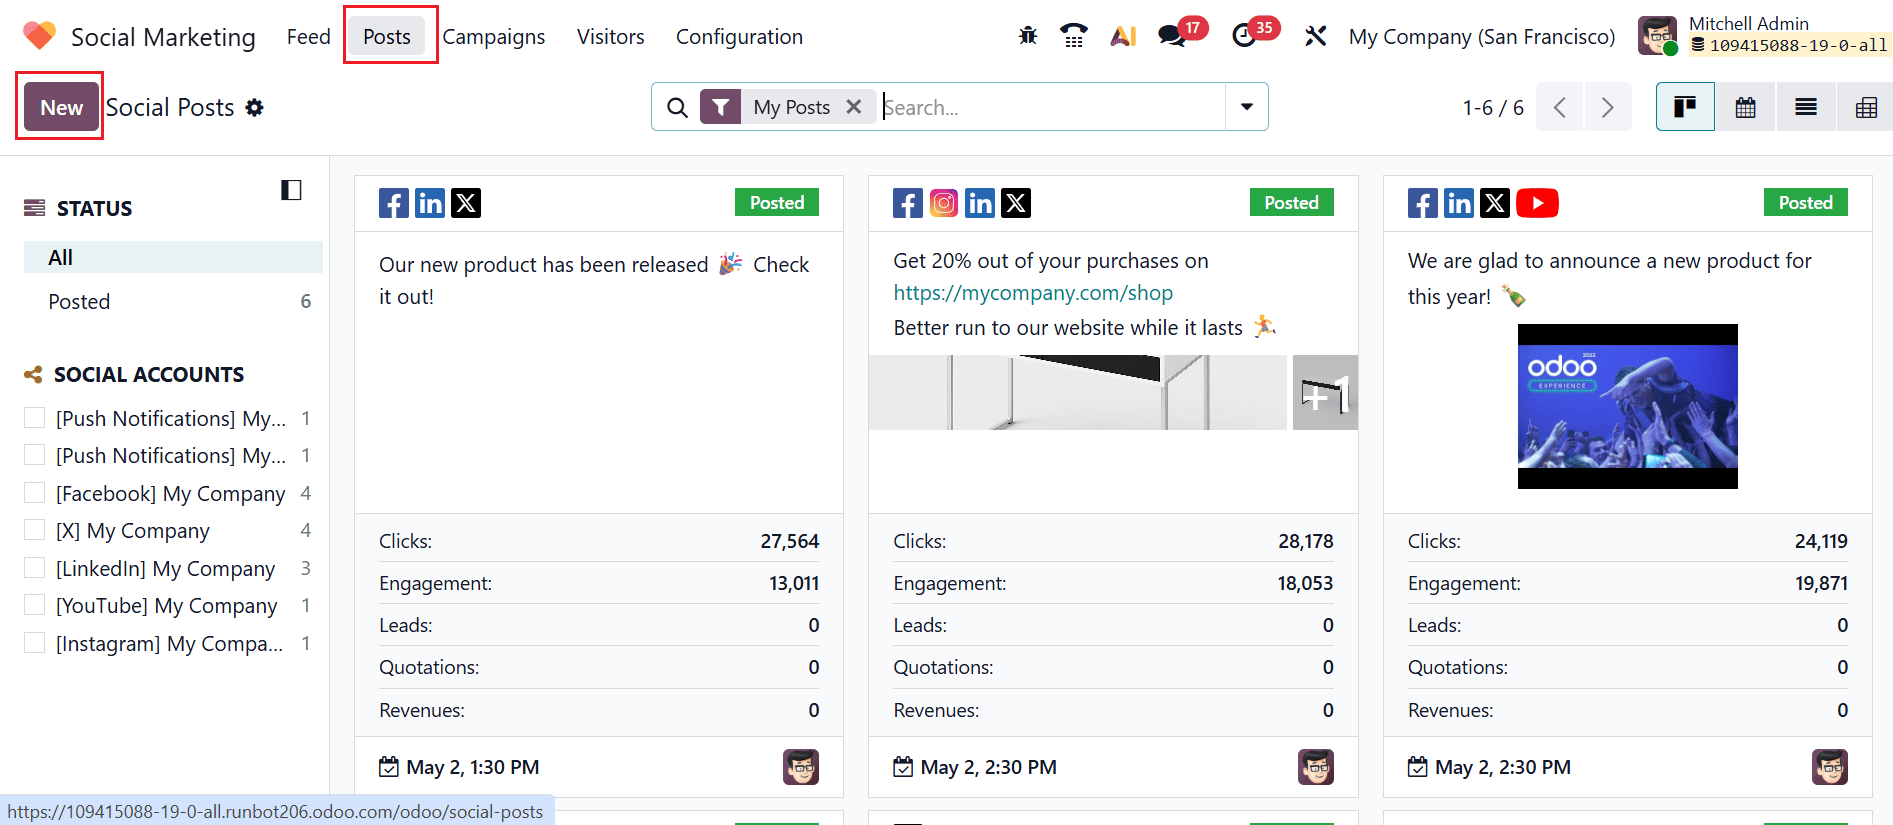
Under the Posts menu, you can see all the created posts arranged in a kanban view. This section offers a centralized space to manage and publish posts such as product launches, promotions, events, and other business communications. The left-panel of the window shows the status of the post and the social accounts from which the post was published. Click on the New button to create and publish a new post.
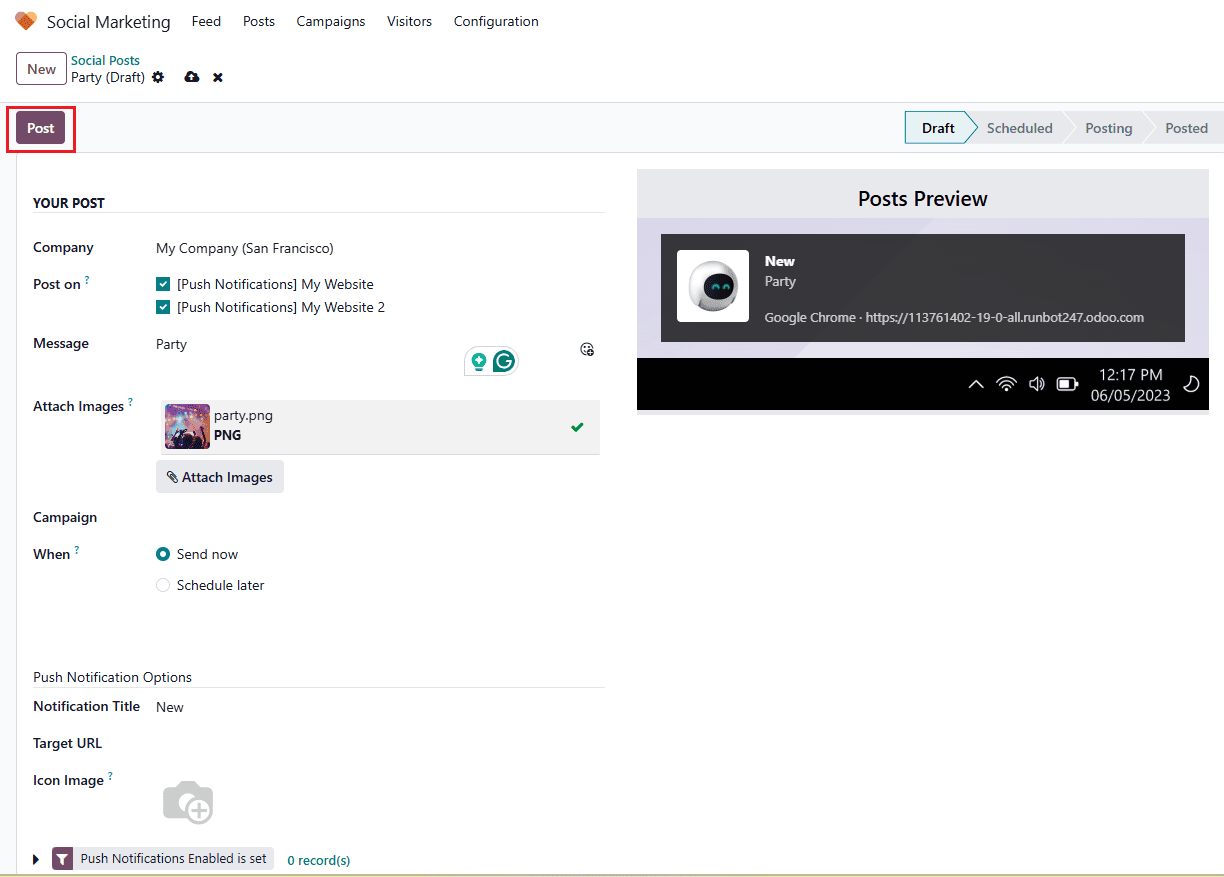
Click the New button to create and publish a post. A new window will open where you can select the company in the Company field and choose the account in the Post on field to publish the post. In the Message field, enter the post content and add images using the Attach Images option. Use the Campaign field to link the post to an existing campaign or create a new one by selecting Create or Create and Edit. In the When field, choose Send Now to publish immediately or Schedule Later to schedule the post for a future date and time. When Schedule Later is selected, a calendar pop-up will appear, enabling you to choose the desired date and time for publishing the post.
Use the Notification Title field to enter the text that will appear as the push notification title. In the Target URL field, provide the webpage URL where users will be redirected upon clicking the notification. In the Icon Image field, upload or select an image to be displayed with the browser notification. Finally, click the Post button to publish the content.
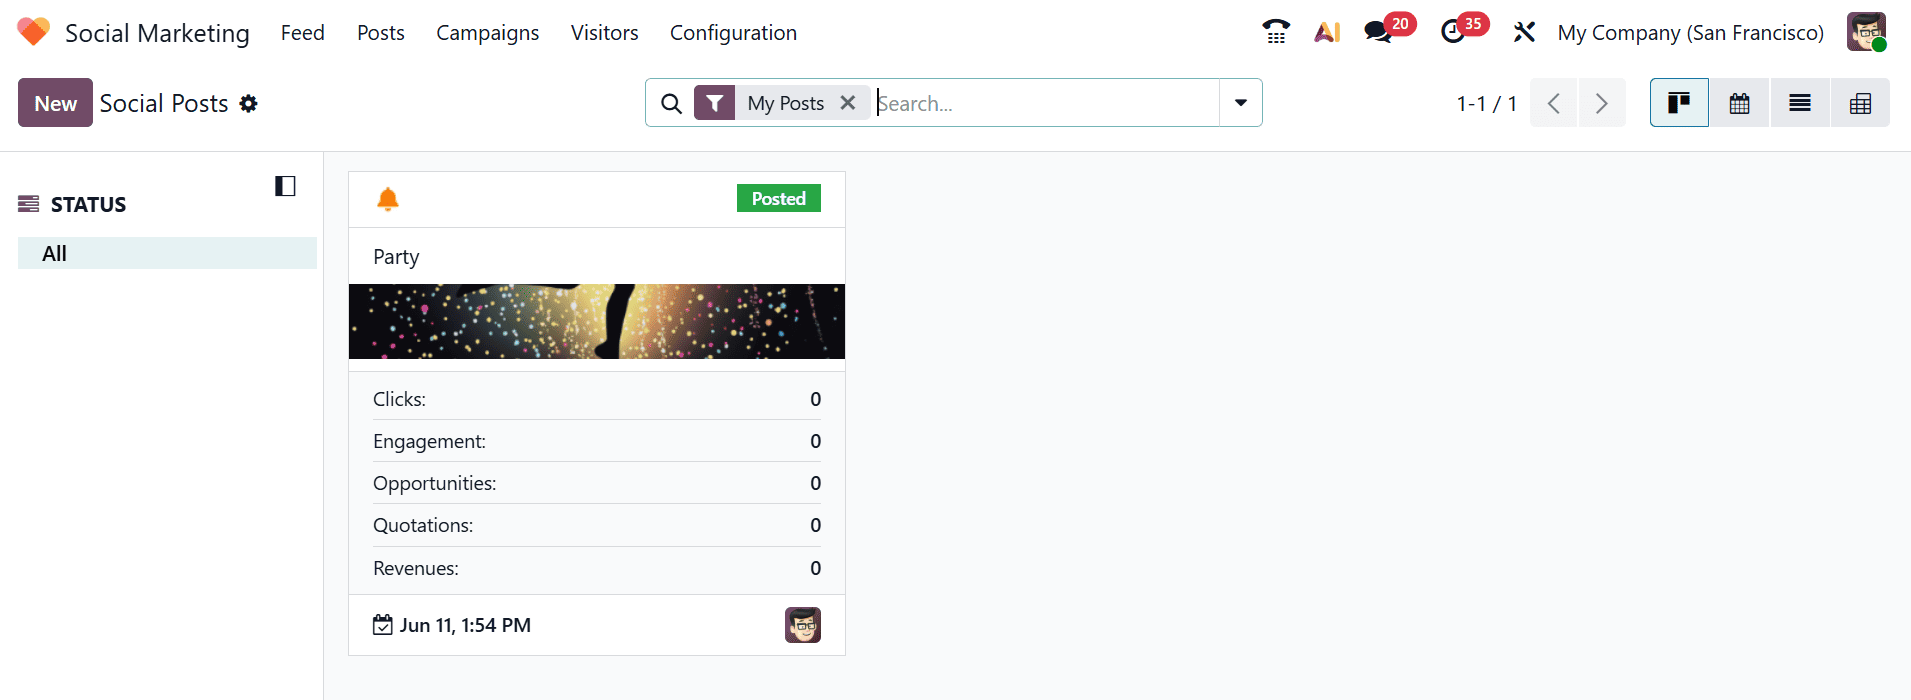
Here, you can see the newly published post in the dashboard.
3. Campaigns
In Odoo 19 Social Marketing, campaigns are used to categorize and manage social media posts related to a specific marketing strategy or promotion. They provide a centralized way to monitor the effectiveness and engagement of all posts associated with a campaign.
Campaigns are organized in a Kanban view, where each column represents a stage in the workflow, such as New, Schedule, Design, and Sent.
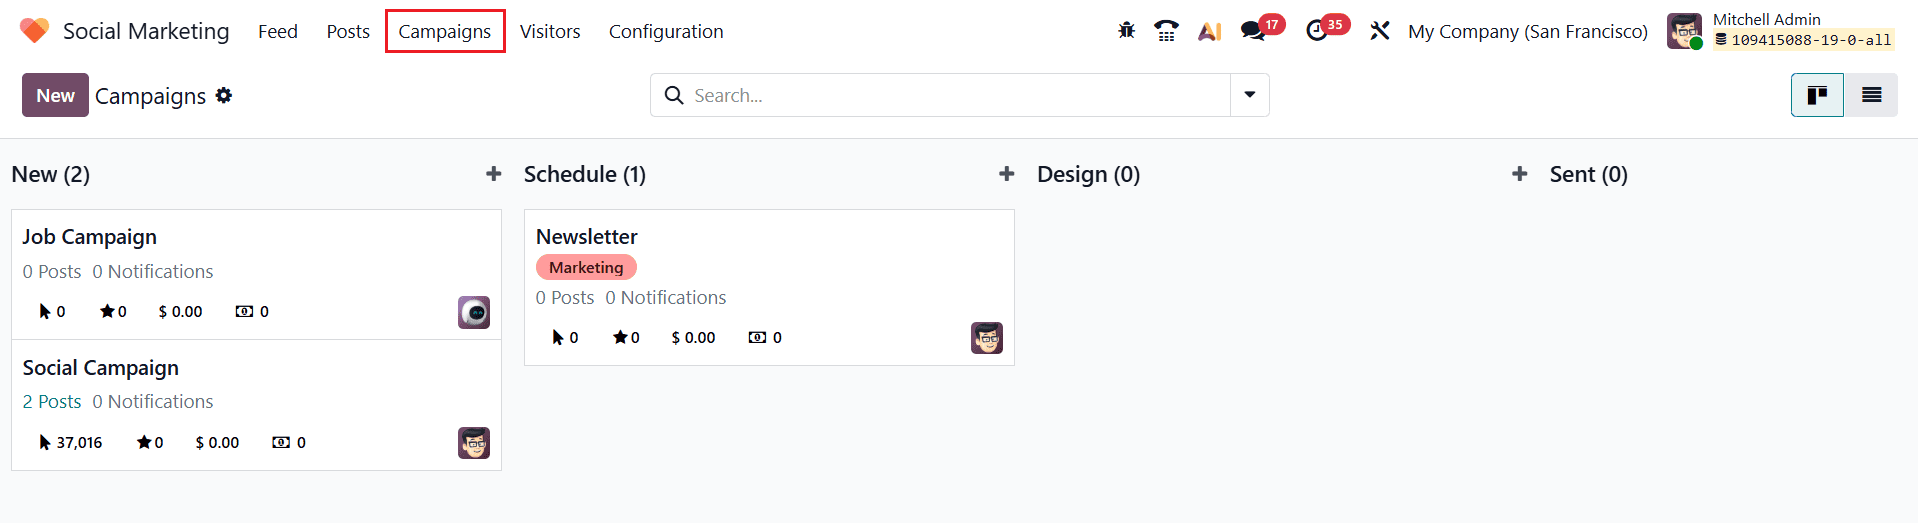
You can quickly add a new campaign to each stage by clicking on the + icon and then fill the details such as Campaign Name, Responsible, and Tags. Use the Add button to save the campaign and the Edit button to update it. You can also click on the New button to create a new campaign.
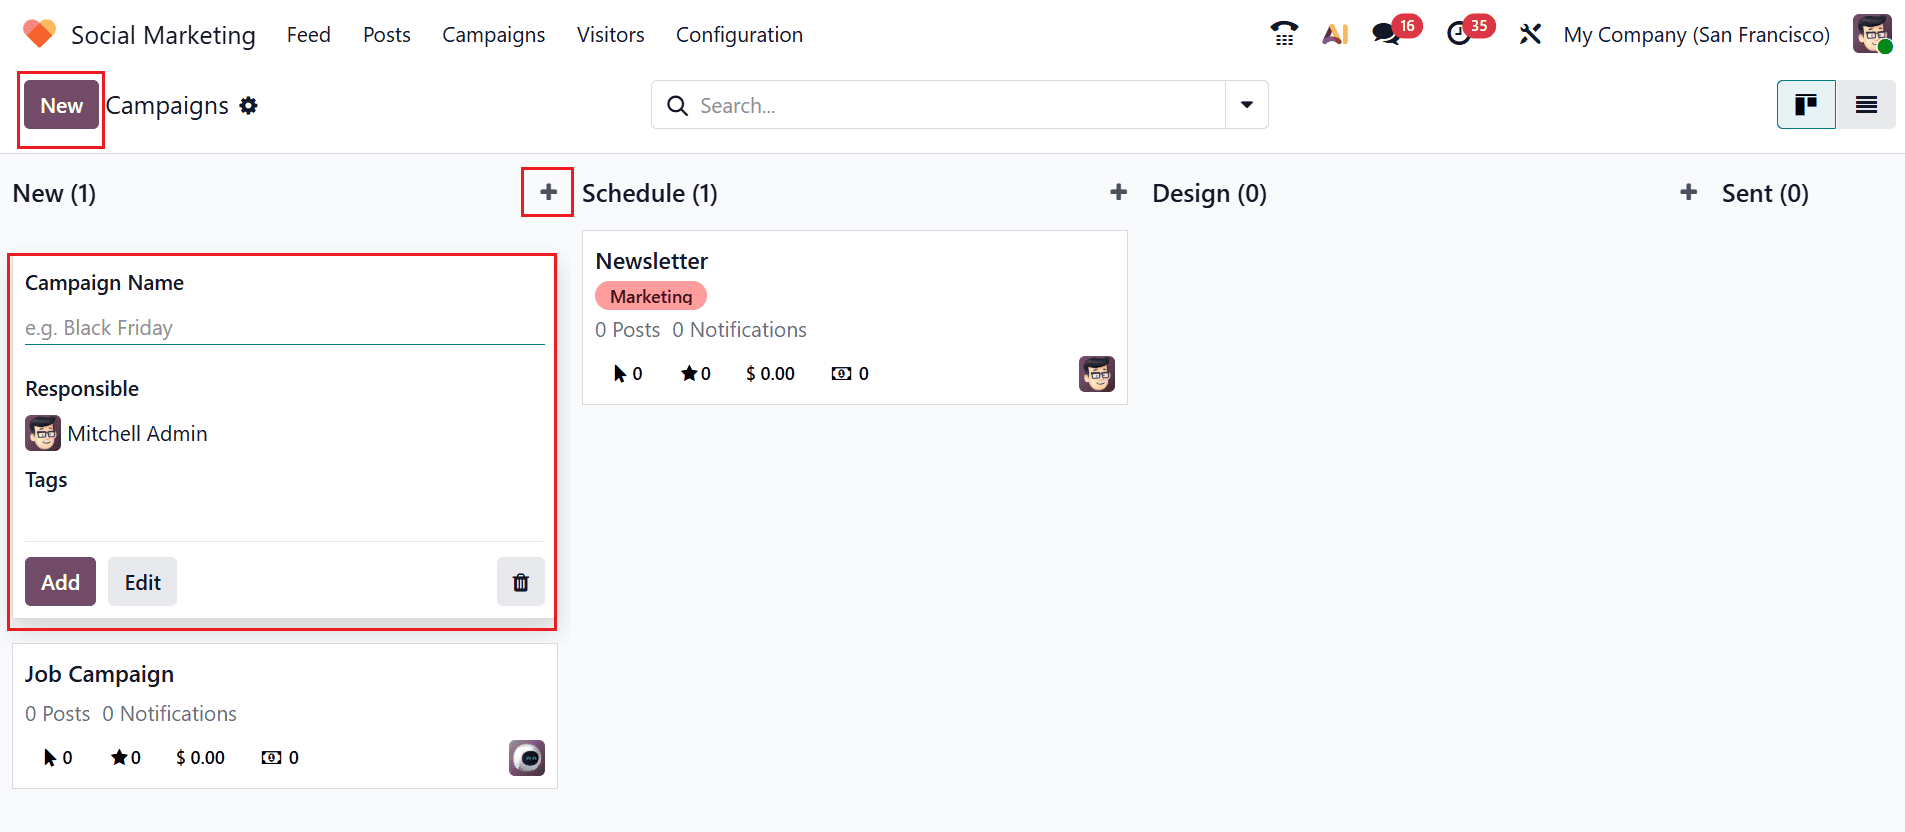
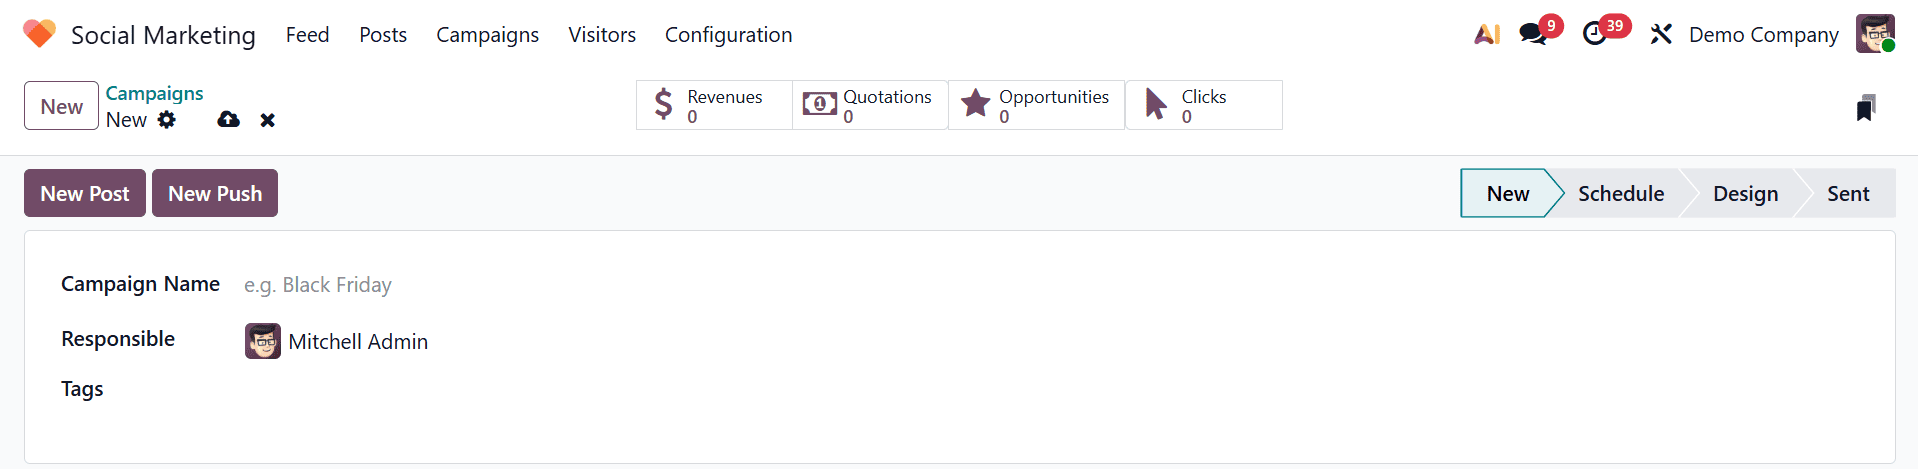
To create a new campaign, click the New button. This opens a form where you can enter key details, including the campaign name, the responsible person, and relevant tags. Use the Add Post button to publish the campaign as a new post on the selected social media account. To send a push notification related to the campaign, click the Send Push button.
Here, you can see four smart tabs: Revenues, Quotations, Opportunities, and Clicks. Revenues, which show the total income generated from campaign-related sales; Quotations, which indicate the number of quotations created through the campaign; Opportunities, which display the number of leads and opportunities generated; and Clicks, which represent the total number of times users clicked the campaign link.
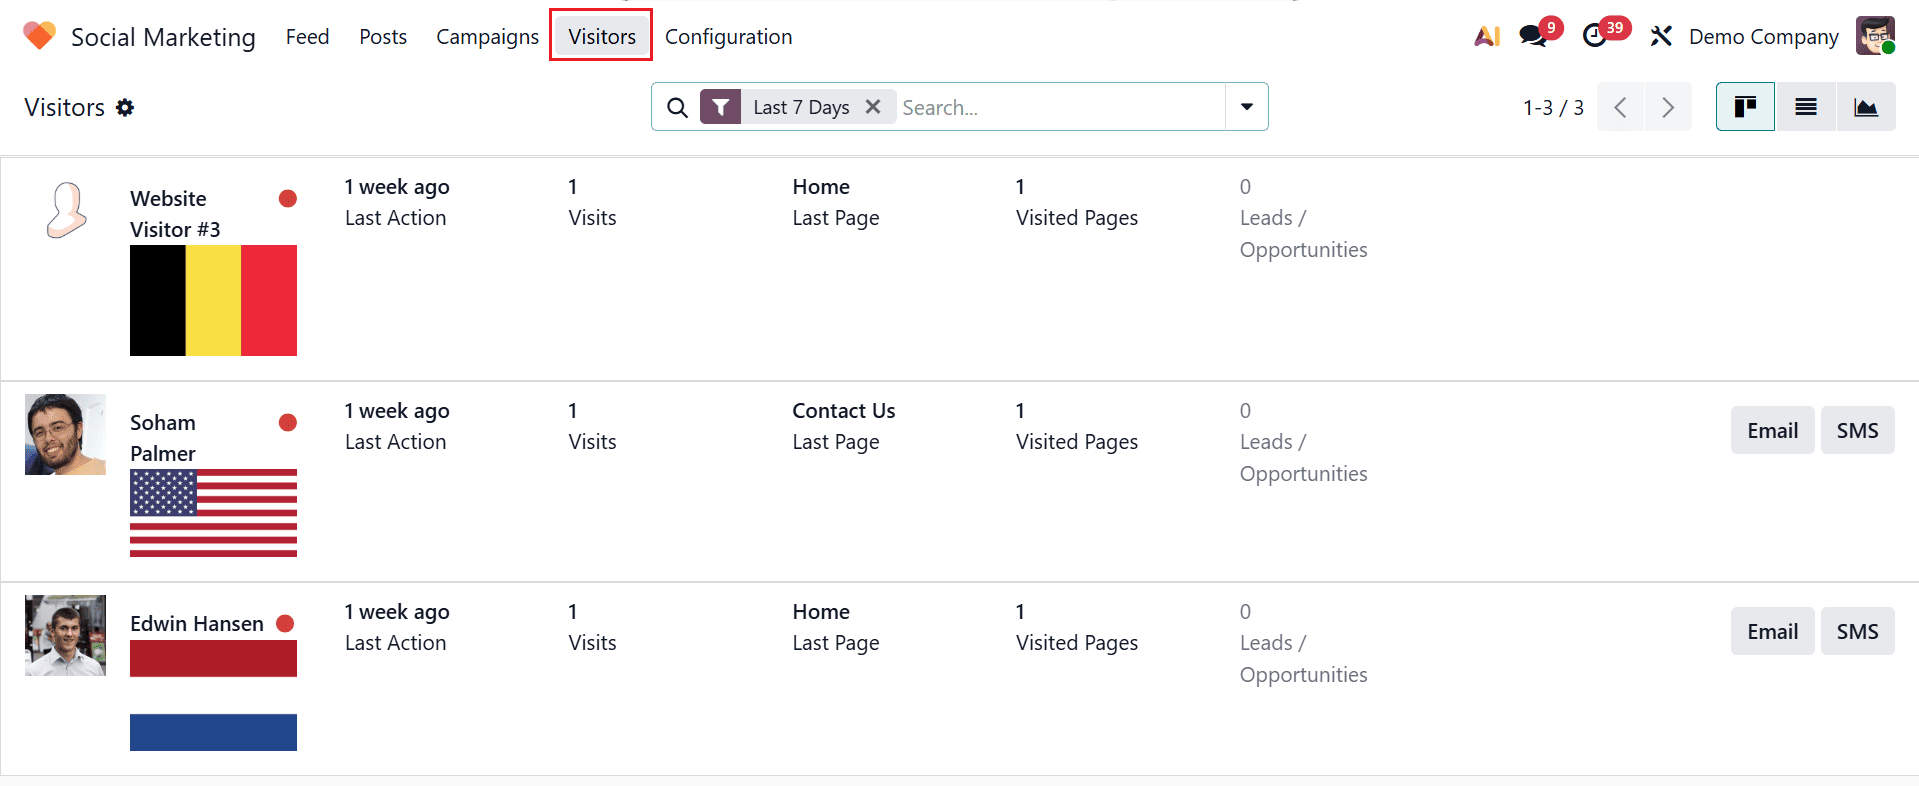
4. Visitors
Under the Visitors menu, you can view the number of users who have viewed or accessed content linked to a social media post or campaign. You can view detailed visitor information such as last activity, number of visits, number of pages visited, number of leads or opportunities generated, the last page viewed, and the visitor’s online or offline status. Visitors can be converted into leads based on their activity, as they can engage through email and SMS.
5. Configuration
In the Configuration menu, you will find three options: Social Media, Social Accounts, and Social Streams.
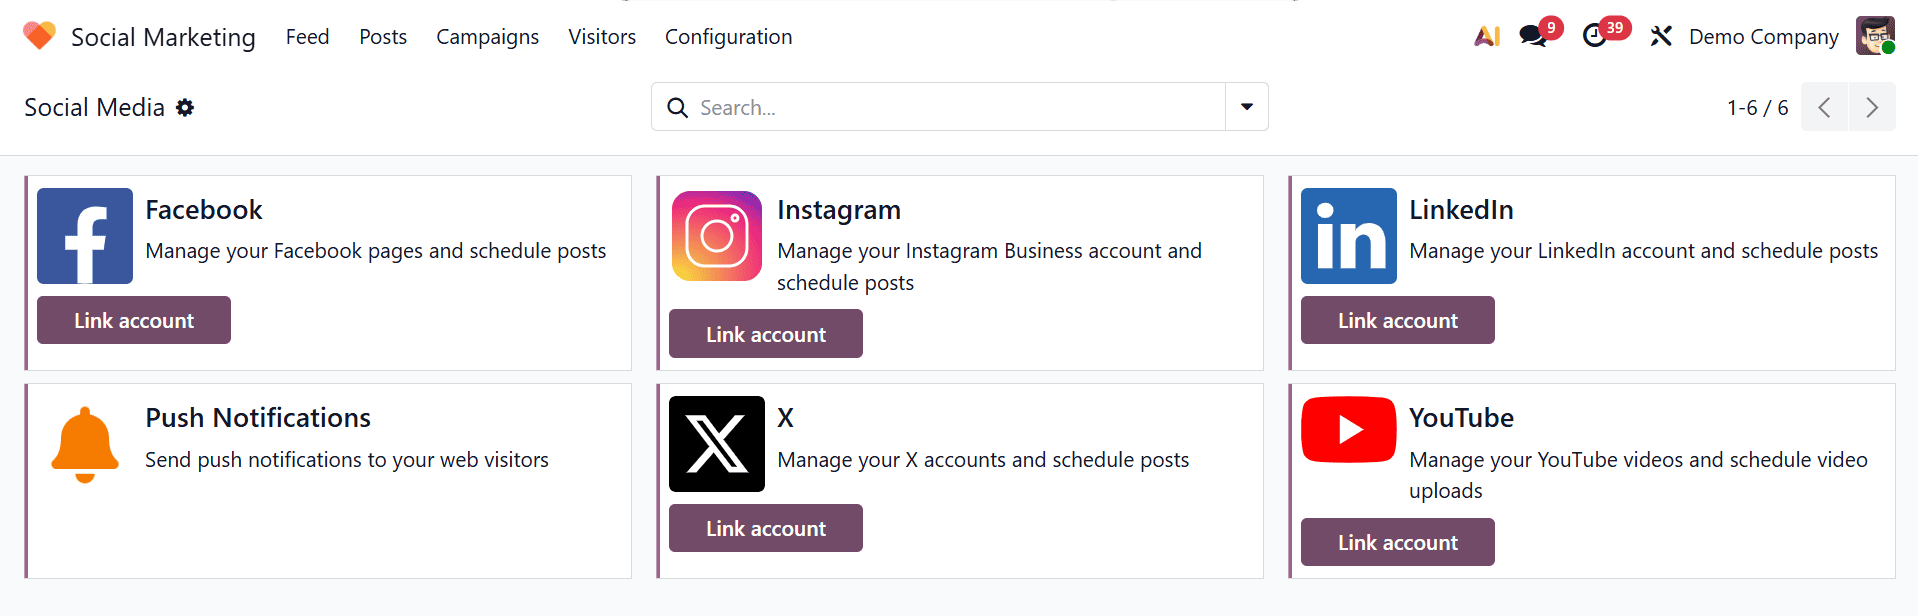
5.1 Social Media
In the Social Marketing module of Odoo 19, the Social Media section allows you to connect platforms like Facebook, Instagram, LinkedIn, X, and YouTube. Accounts can be linked using the Link Account button, while the Push Notifications feature enables sending real-time alerts to web visitors.
5.2 Social Accounts
Social Accounts list all connected profiles with details like name, handle, platform, creator, and company.

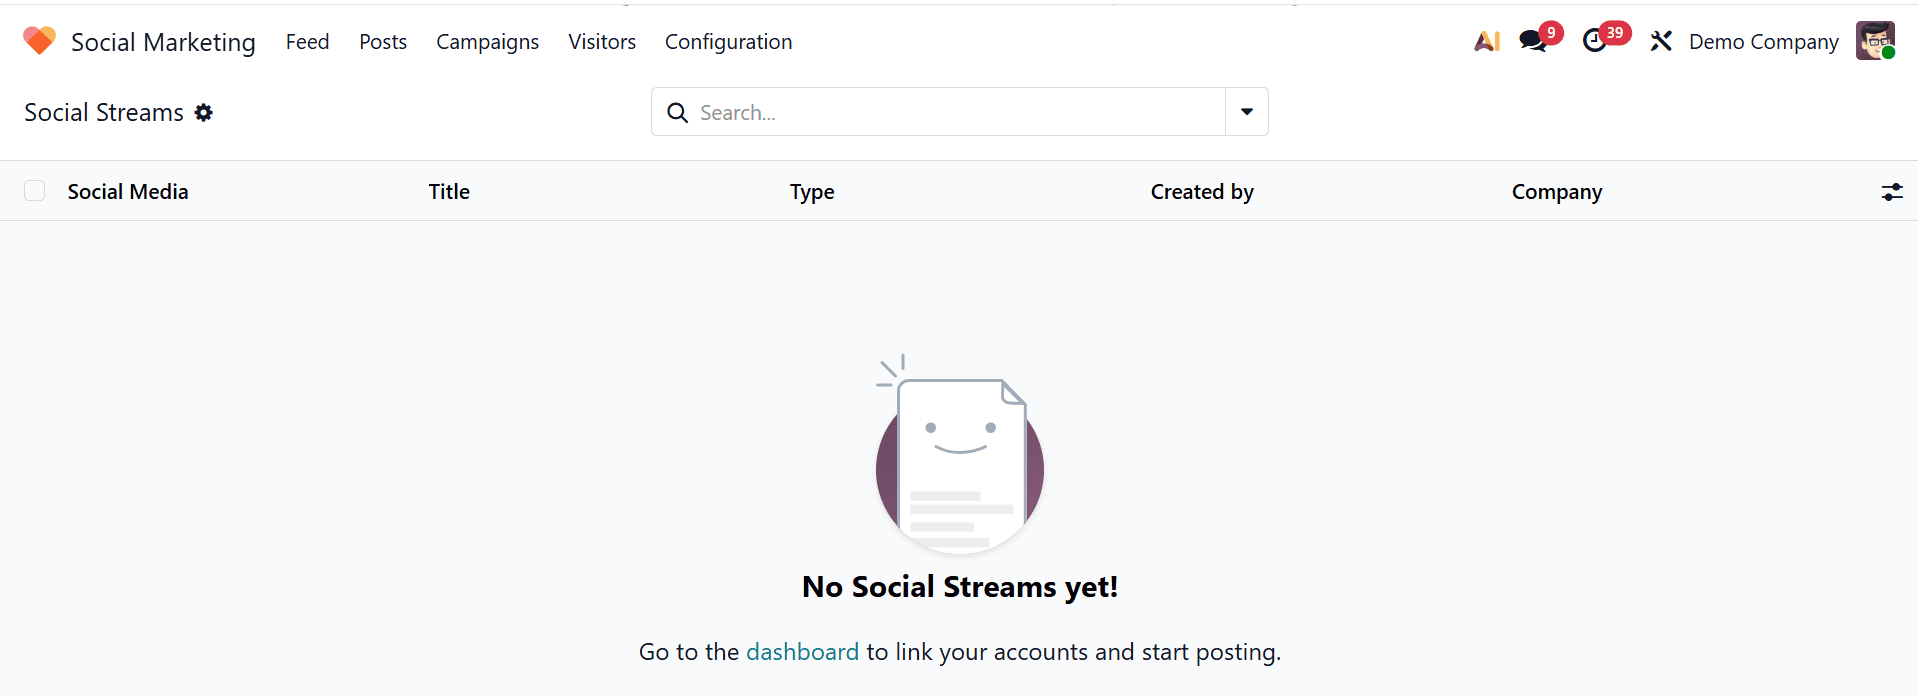
5.3 Social Streams
Social Streams provide a real-time feed of posts, comments, mentions, and interactions from connected accounts, showing information like social media, title, type, creator, and company.
Odoo 19 Social Marketing delivers a comprehensive solution for managing and optimizing social media strategies within a unified business environment. By combining scheduling, analytics, and automation, it reduces manual effort while increasing marketing efficiency. Integration with Odoo ensures that marketing teams can align their activities with sales and customer relationship processes. The platform empowers businesses to make data-driven decisions through detailed performance insights and engagement tracking. It enhances collaboration among team members and supports consistent content delivery across multiple channels. With advanced automation tools, organizations can maintain a strong online presence and improve audience reach. Overall, it is a valuable tool for businesses aiming to strengthen their digital marketing capabilities and achieve scalable growth in an increasingly competitive online landscape.
To read more about Overview of Integrating Social Media with Odoo 18's Social Marketing Module, refer to our blog Overview of Integrating Social Media with Odoo 18's Social Marketing Module.