Managing Appointments becomes easier when you can control when customers can book and how long each Appointment lasts. Odoo 20 Appointment module provides various options to organize Appointment schedules according to your availability. You can create Appointment types, set the duration of each appointment, decide how often booking slots are created, and define days and times when customers schedule appointments.
Odoo 20 also allows you to manage bookings, handle appointments, and set how early customers can book or cancel appointments. Also helps you configure time zones and choose whether the Appointment takes place at a physical location or through an Odoo discussion video call.
This blog will explain how to configure Appointment types, duration, and availability in Odoo 20.
Create an Appointment Type in Odoo 20
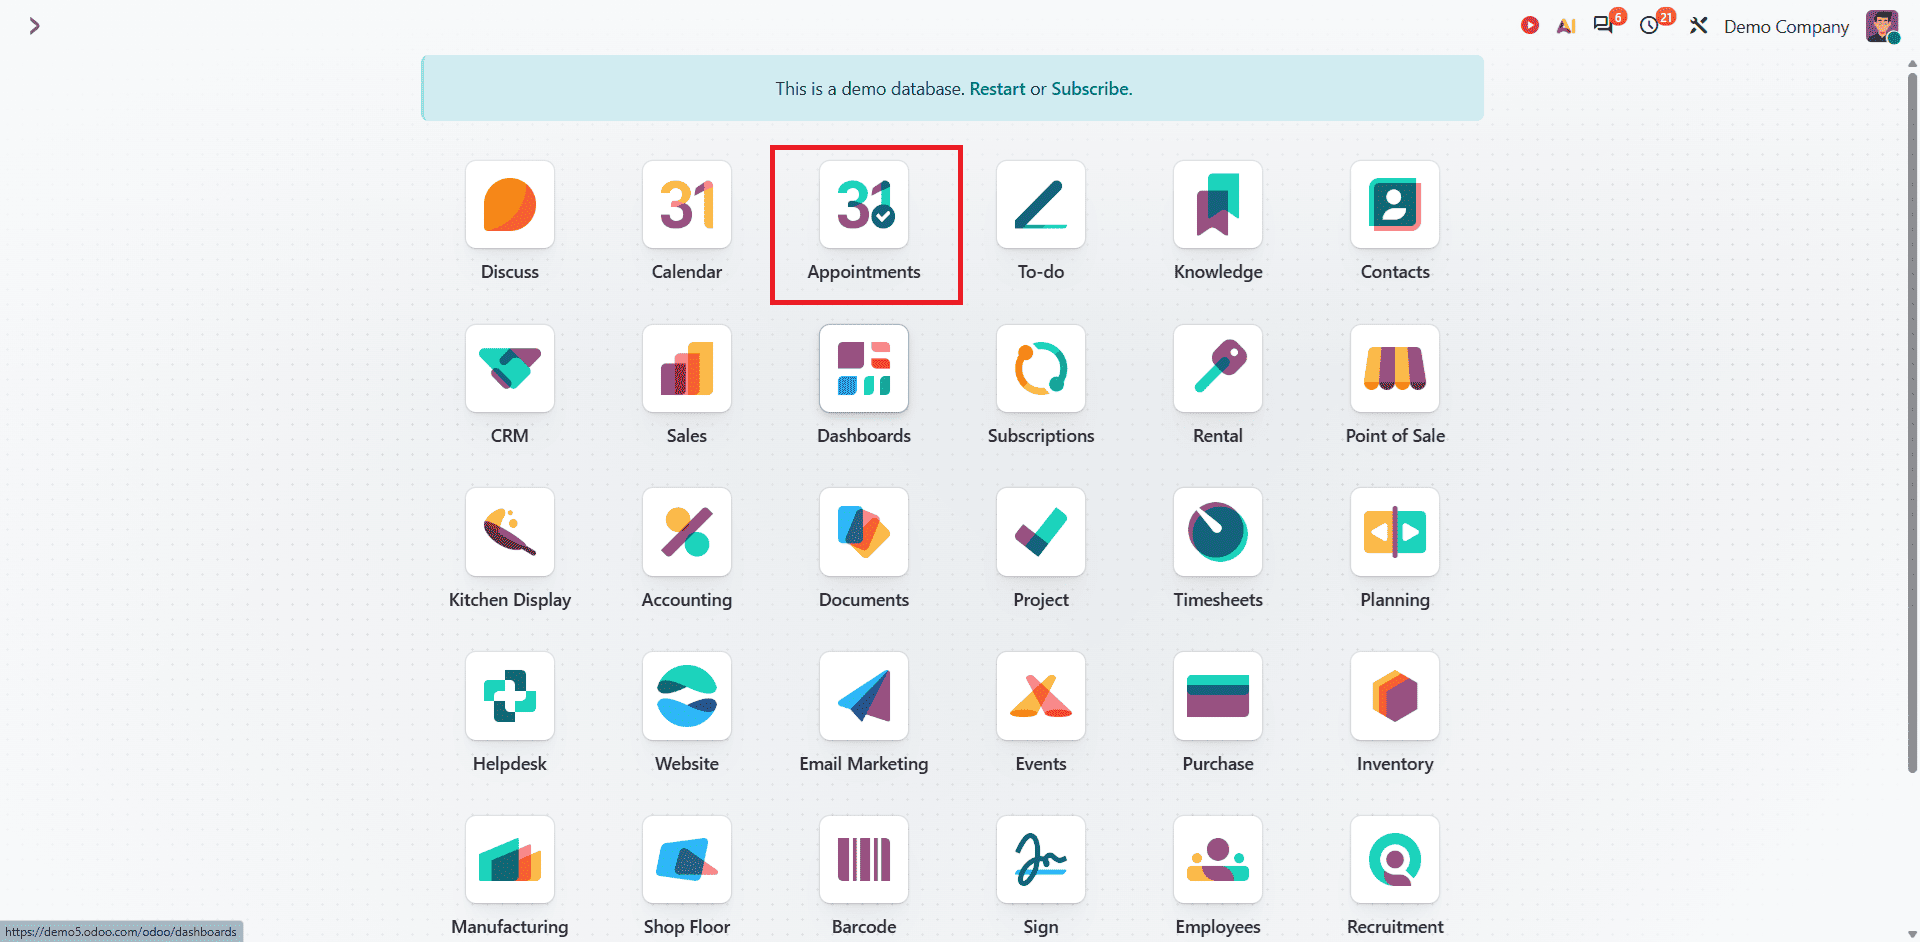
To create an Appointment type in Odoo 20, go to the Odoo dashboard and open the Appointment module as shown below:
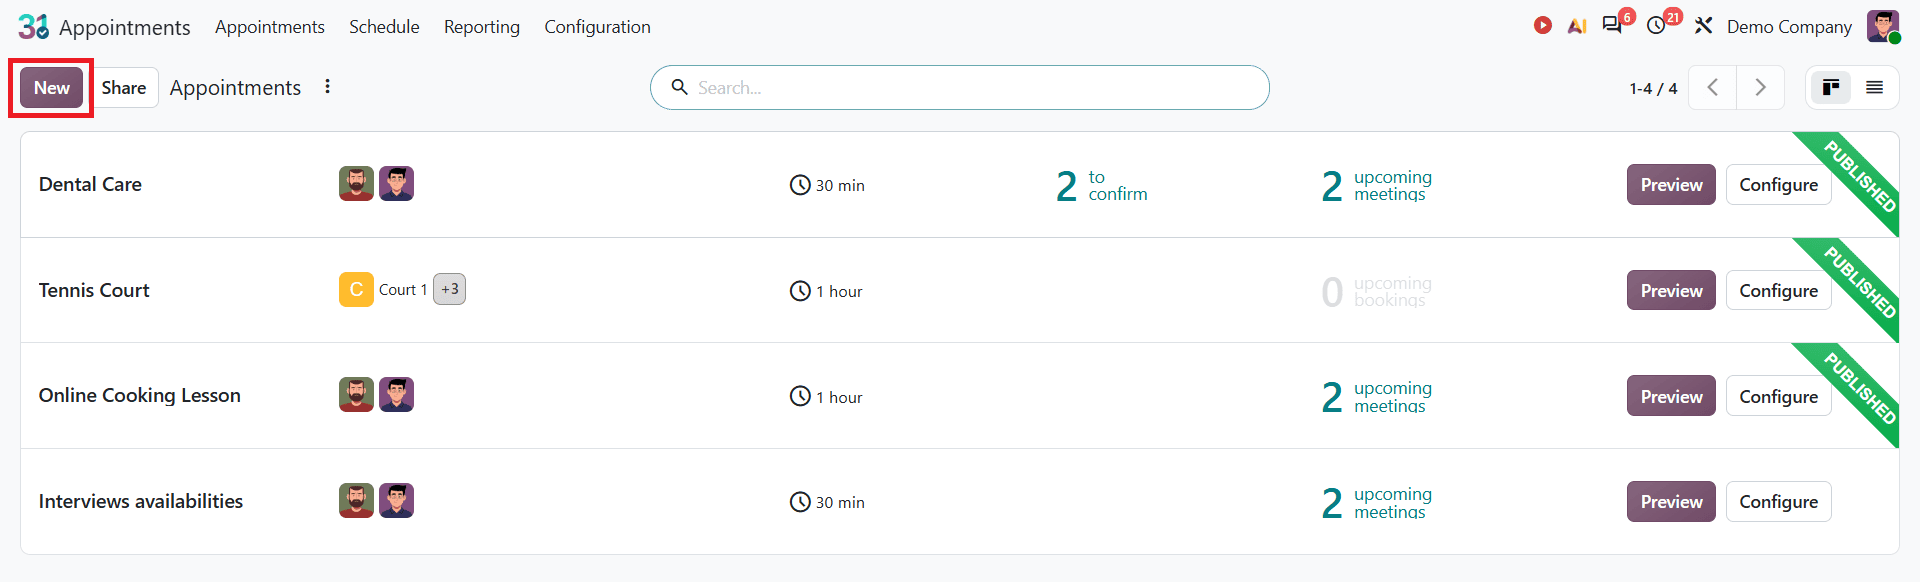
Once you open the Appointment module, the Appointment dashboard will display the available Appointment types. Click the New button to create a new Appointment type.
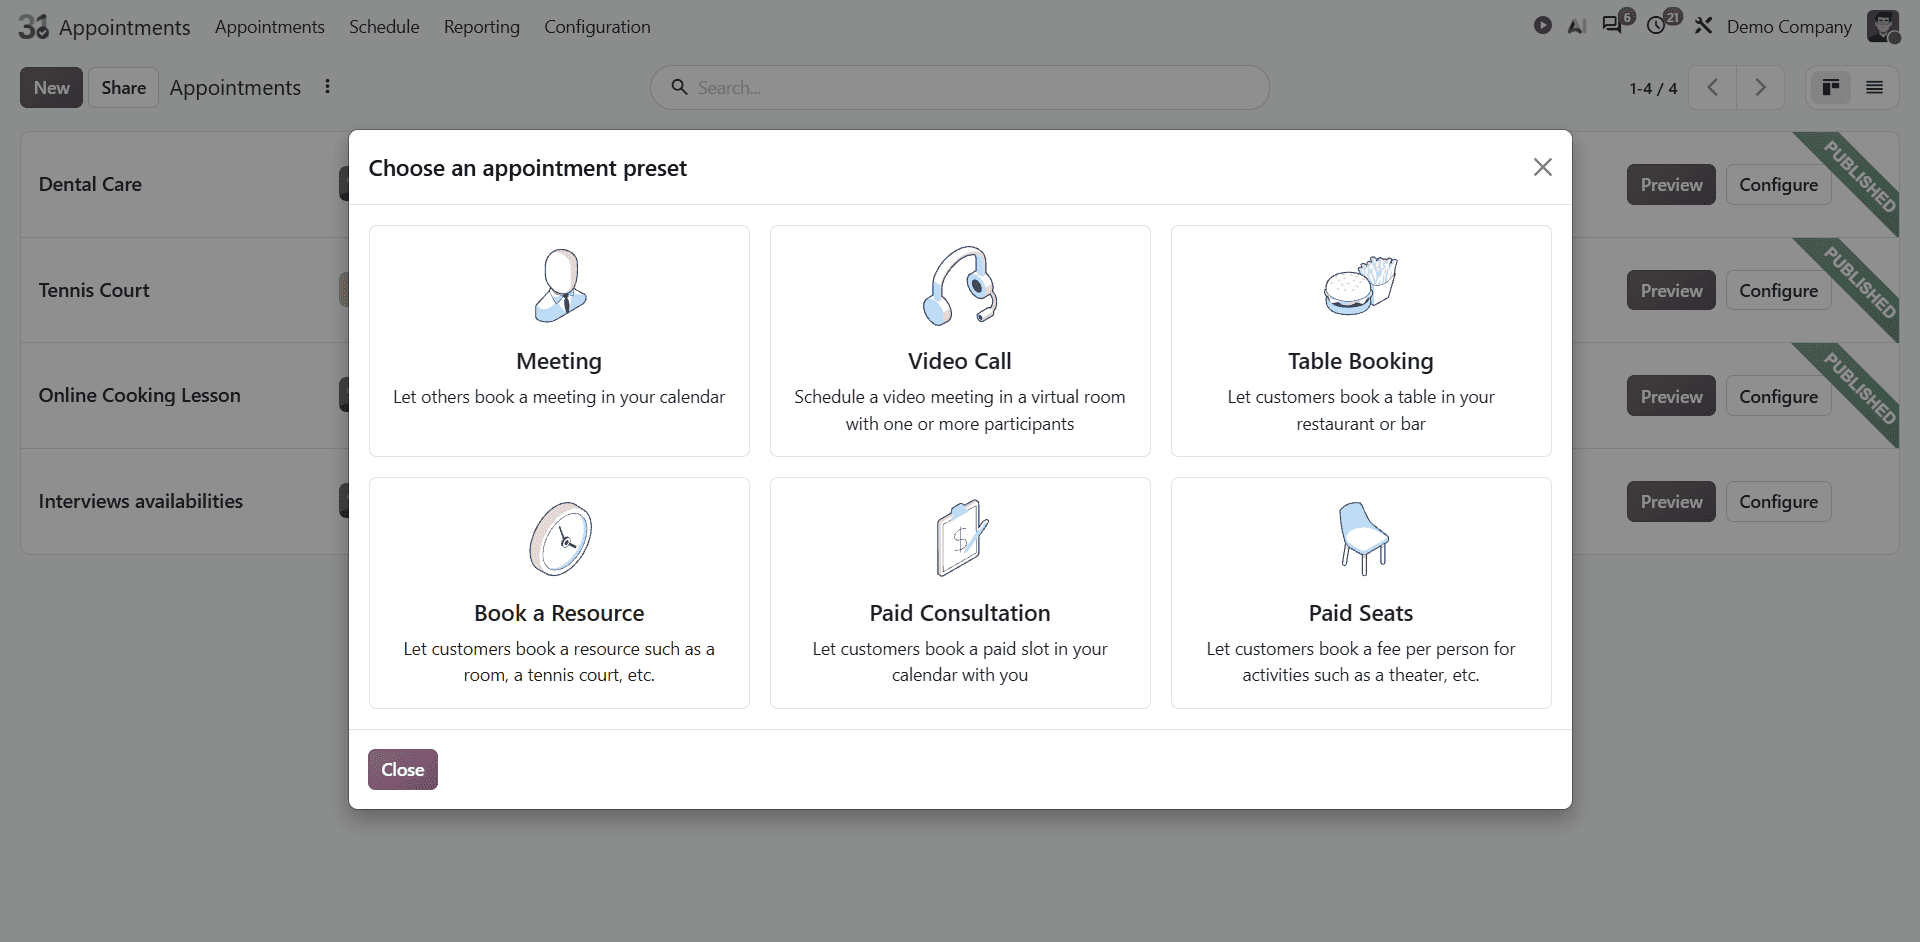
When you click on the New button, a window will appear with a different Appointment preset. These presets allow you to choose a predefined Appointment template that matches your requirements. Select a preset to configure your Appointment according to the type you want to create.
After selecting the preset as Meeting, Odoo automatically fills in details such as availability, schedule, and duration. You can modify these settings and configure the basic Appointment details according to your requirements.
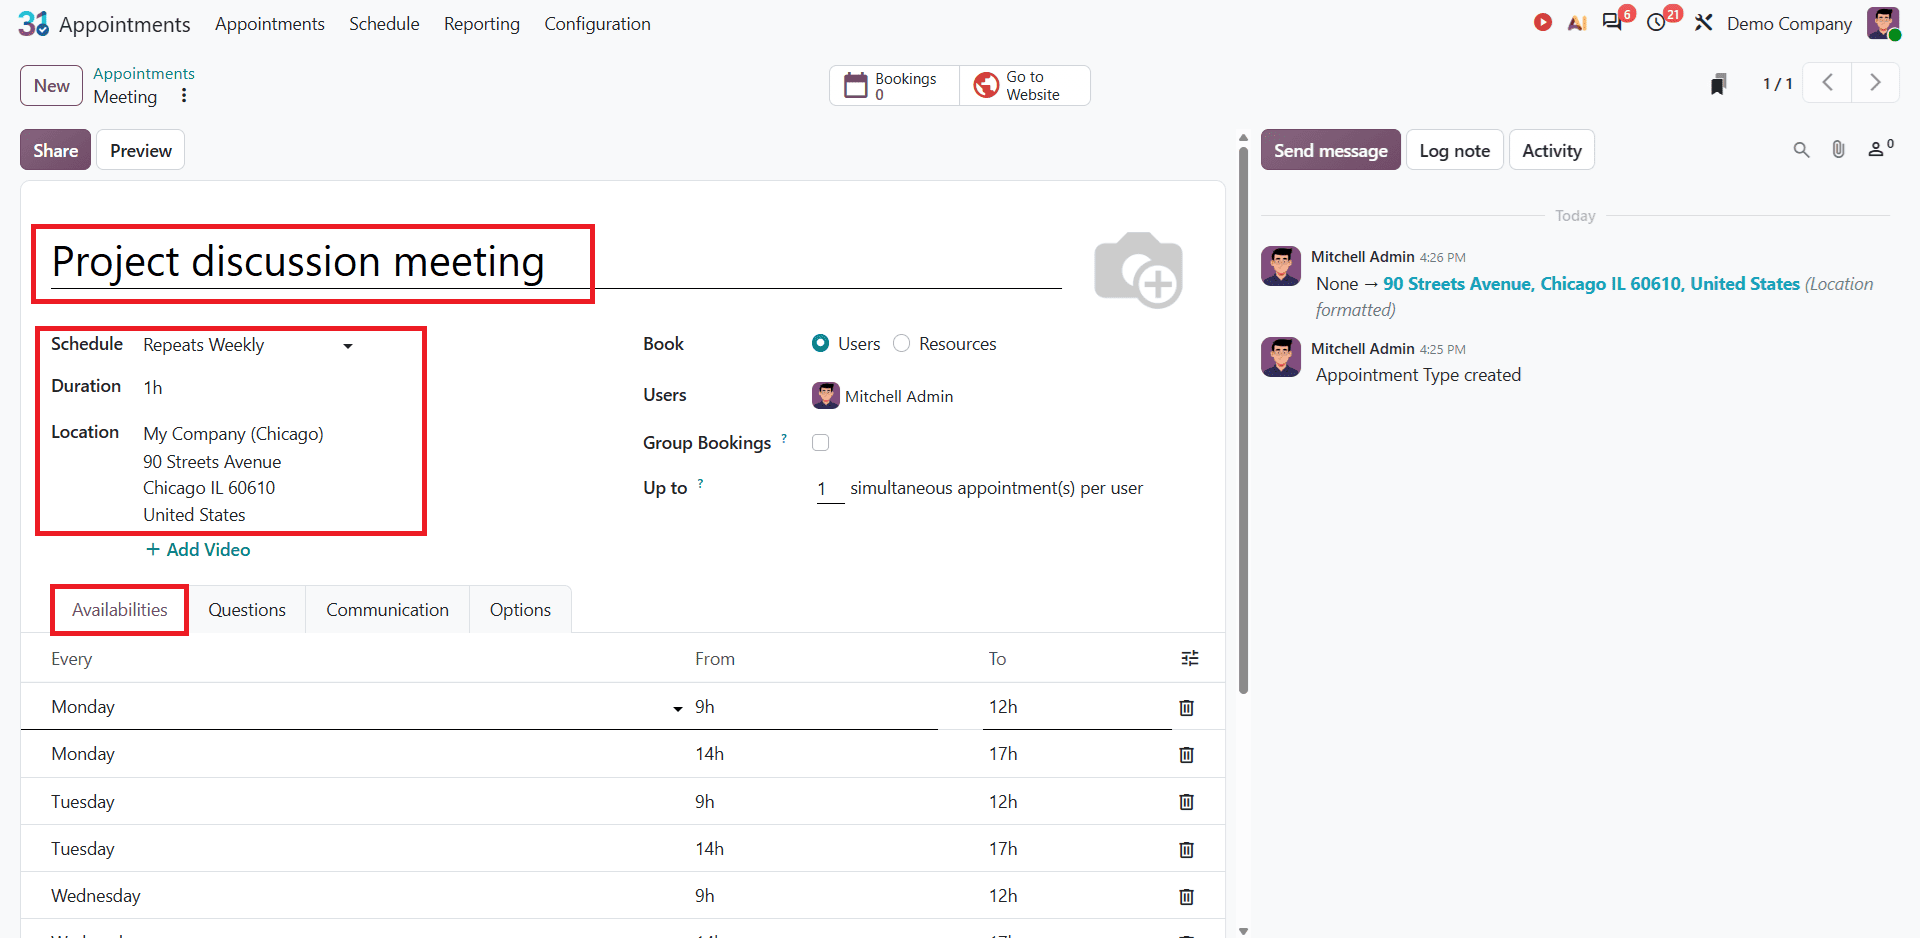
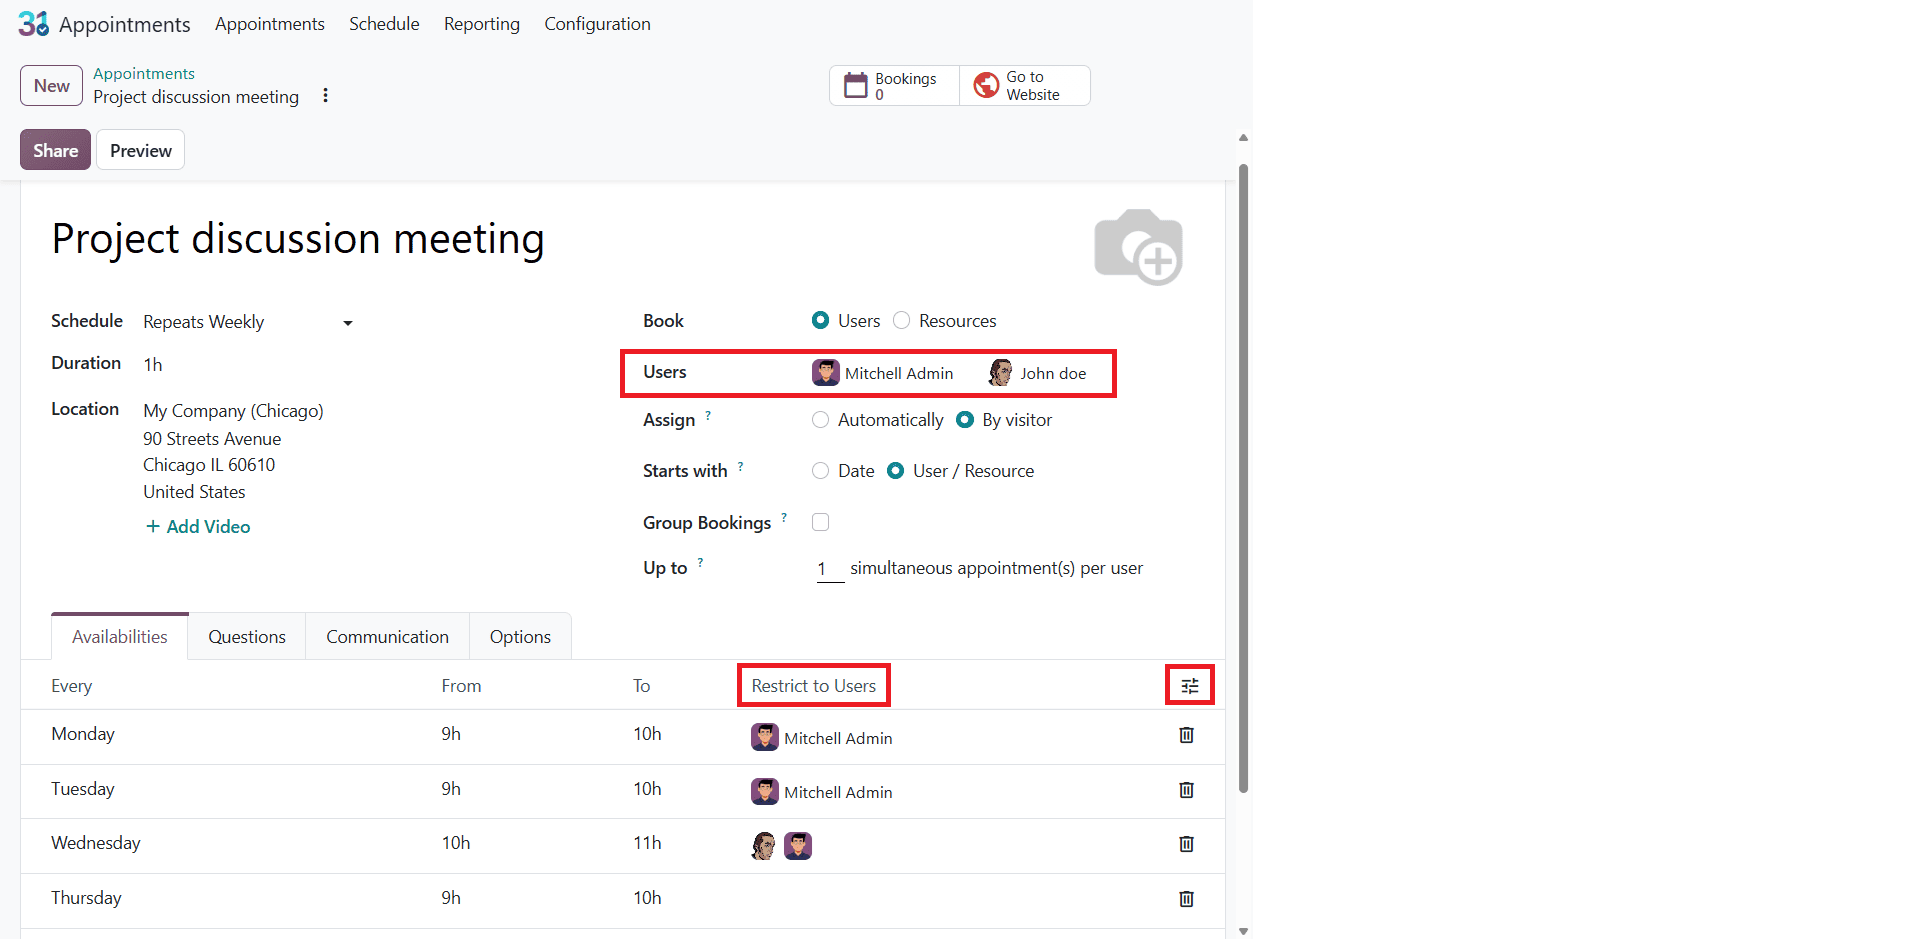
The Appointment title helps identify the appointment type and is displayed to customers when they access the booking page. For example, in the image above, Project discussion meeting is used as the Appointment title.
In the main configuration view, you can define how long meetings last and how far in advance they can be booked by using Duration. This helps you organize the schedule according to the time required for each meeting.
In the Schedule field, you can configure the appointment as Repeats Weekly or Does not repeat, depending on your preference. Next, move to the Location field to specify where the appointment takes place. Depending on the available option, you can select a location such as a physical address or an Odoo Discuss video call. This helps customers know where the Appointment will take place or how to join an Online meeting.
When you set your Schedule to Repeats Weekly, you can configure the available time for booking under the Availability tab. Each row specifies a recurring time window during which customers can book appointments. Multiple entries per day are also allowed, so you can configure it as per your requirements.
Select your Availability as Users or Resource to identify people-based booking or location-based booking. When you select User, you can add users who are responsible for handling the Appointments. Odoo considers the availability of selected users when customers book an appointment. You can add multiple users based on your requirements and manage their appointment schedules accordingly.
The Restrict to Users option allows you to specify which users are available to handle appointments during a particular time slot. If the option is not visible in the Availability tab, click the settings icon on the right to enable the option.
Configure Booking Options
After configuring Availability, move to the Option tab. This section provides additional settings to control how customers can book and manage Appointments.
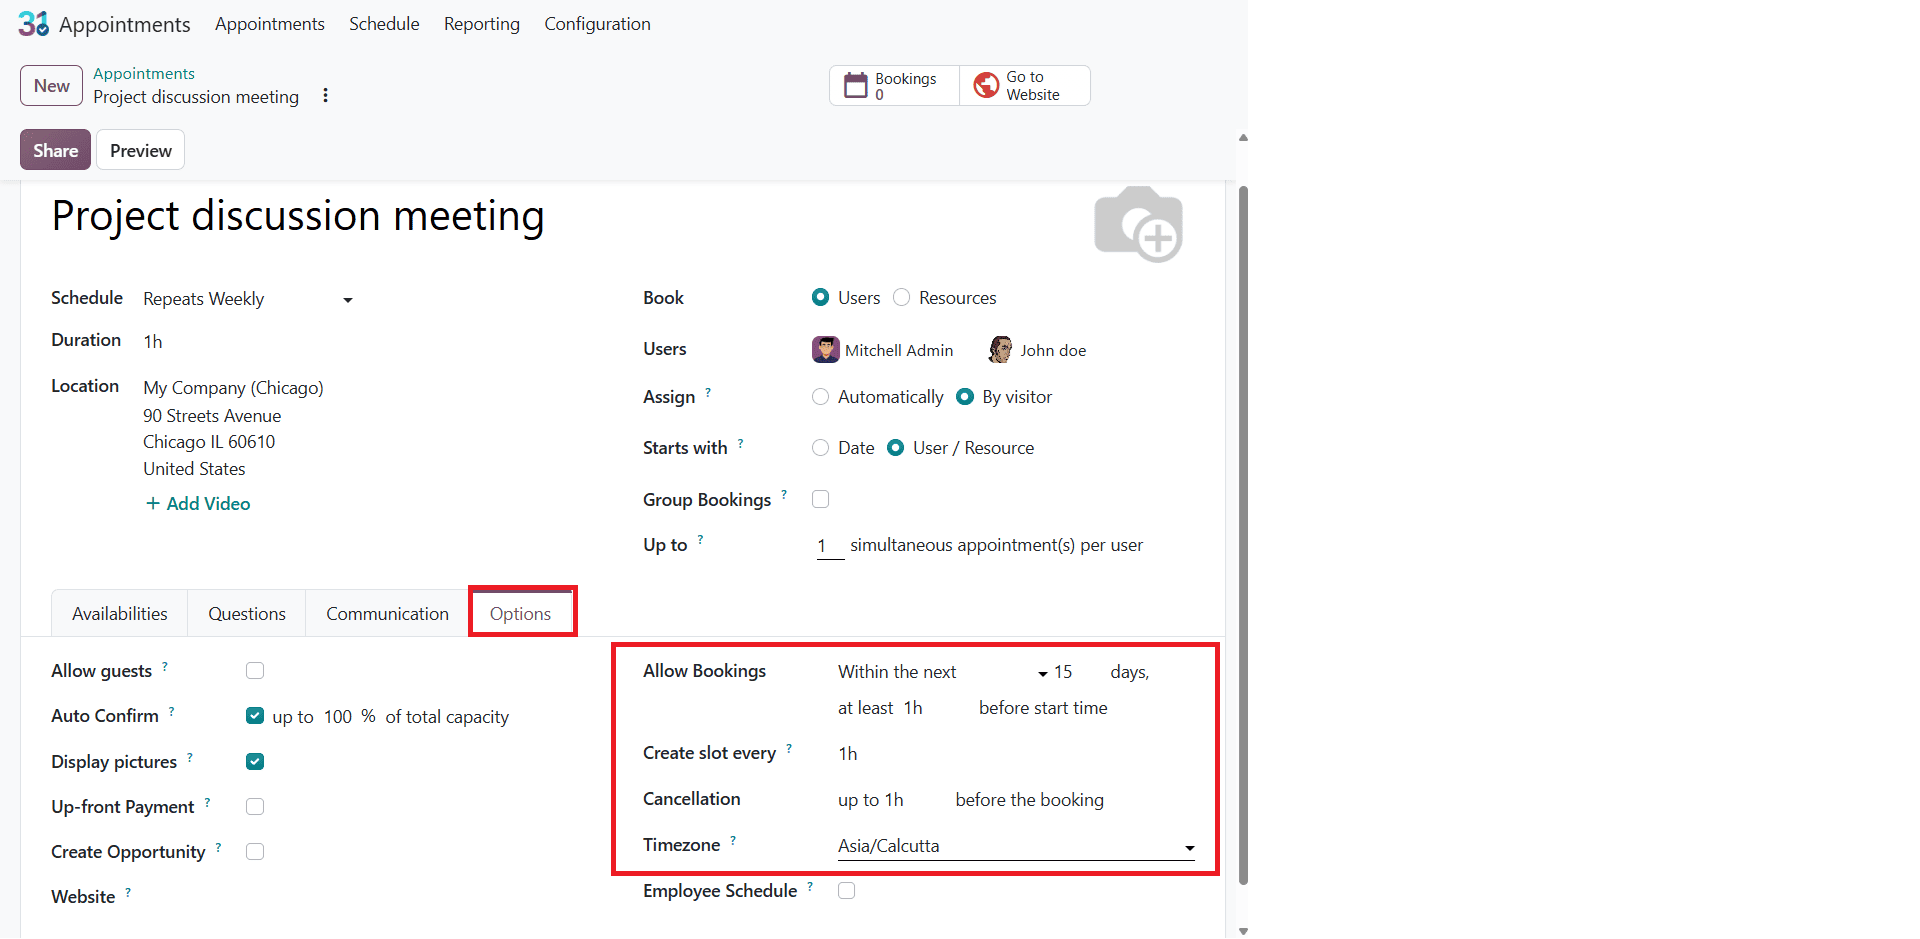
Under the Option tab, Odoo 20 provides additional settings to manage appointment bookings. You can set how far in advance customers can book an appointment, specify the minimum notice required before the start time, and determine how frequently available booking slots are generated. These settings will help you to organize Appointment schedules according to your requirements.
Allow bookings: The Allow booking option controls the booking window by specifying how far in advance customers can schedule an Appointment and sets the minimum notice required before a session begins. For example, if you set the booking period to within the next 15 days and require at least 1 hour before the start time, customers can book appointments scheduled within that period, provided they book at least 1 hour before the session begins. This helps prevent last-minute bookings if you set the closing time early.
Create Slot Every: The Create slot every option determines the interval between available appointment slots. You can set the time interval according to your scheduling requirements. For example, if you set the interval to 1 hour, the available booking slots are generated at hourly intervals, allowing customers to choose a suitable time for their Appointments.
Cancellation: The cancellation option allows you to specify how long before an appointment starts a customer can cancel their booking. For example, if you set the cancellation notice to 2 hours, customers must cancel their appointments at least 2 hours before the scheduled start time. This helps establish a cancellation policy and gives you time to manage your schedule when a customer can cancel an Appointment.
Timezone: The Timezone field specifies the time zone used for appointment scheduling. It helps ensure that Appointment times are displayed according to the selected time zone. Especially when customers and employees are located in different regions.
You can also restrict Appointment booking to customers from specific countries using the Allowed Countries field. This helps limit bookings according to your geographical service requirements. If you do not want to restrict booking by countries, you can leave this field empty.
Configuring Appointment types, duration, and availability in Odoo 20 helps businesses manage their schedule more effectively. By setting weekly availability, defining appointment duration, and controlling booking and cancellation limits, you can make the scheduling process more organized and convenient for customers. In Odoo 20, you can set a booking window and specify how much time must remain before the scheduled appointment. This helps manage availability and prevents last-minute bookings.
These settings help to ensure Appointment schedules are organized according to your requirements. With the right configuration, the Odoo 20 Appointment module makes it easier to manage and maintain an organized schedule.
To read more about How to Simplify Appointment Scheduling with Odoo 19, refer to our blog, How to Simplify Appointment Scheduling with Odoo 19.