Odoo is a powerful ERP system that allows you to organize and manage all company processes and data in multiple seamless ways. The Kanban view provided by Odoo is a real-time data visualization tool that effectively transforms database records into interactive cards and provides a quick and clear overview of any pipeline or project. In this article, you will find a practical solution for building a Kanban view for your desired model from scratch in Odoo 20.
The Kanban view
The Kanban View is a type of view in Odoo that helps users manage tasks and workflows in a clear and organized way. By using columns, Odoo organizes different stages of a process, while cards are used to represent individual records or tasks, which can be moved between these stages to update the stage of each record or task. By using this approach, users can monitor progress, control ongoing work, and achieve greater efficiency within the system.
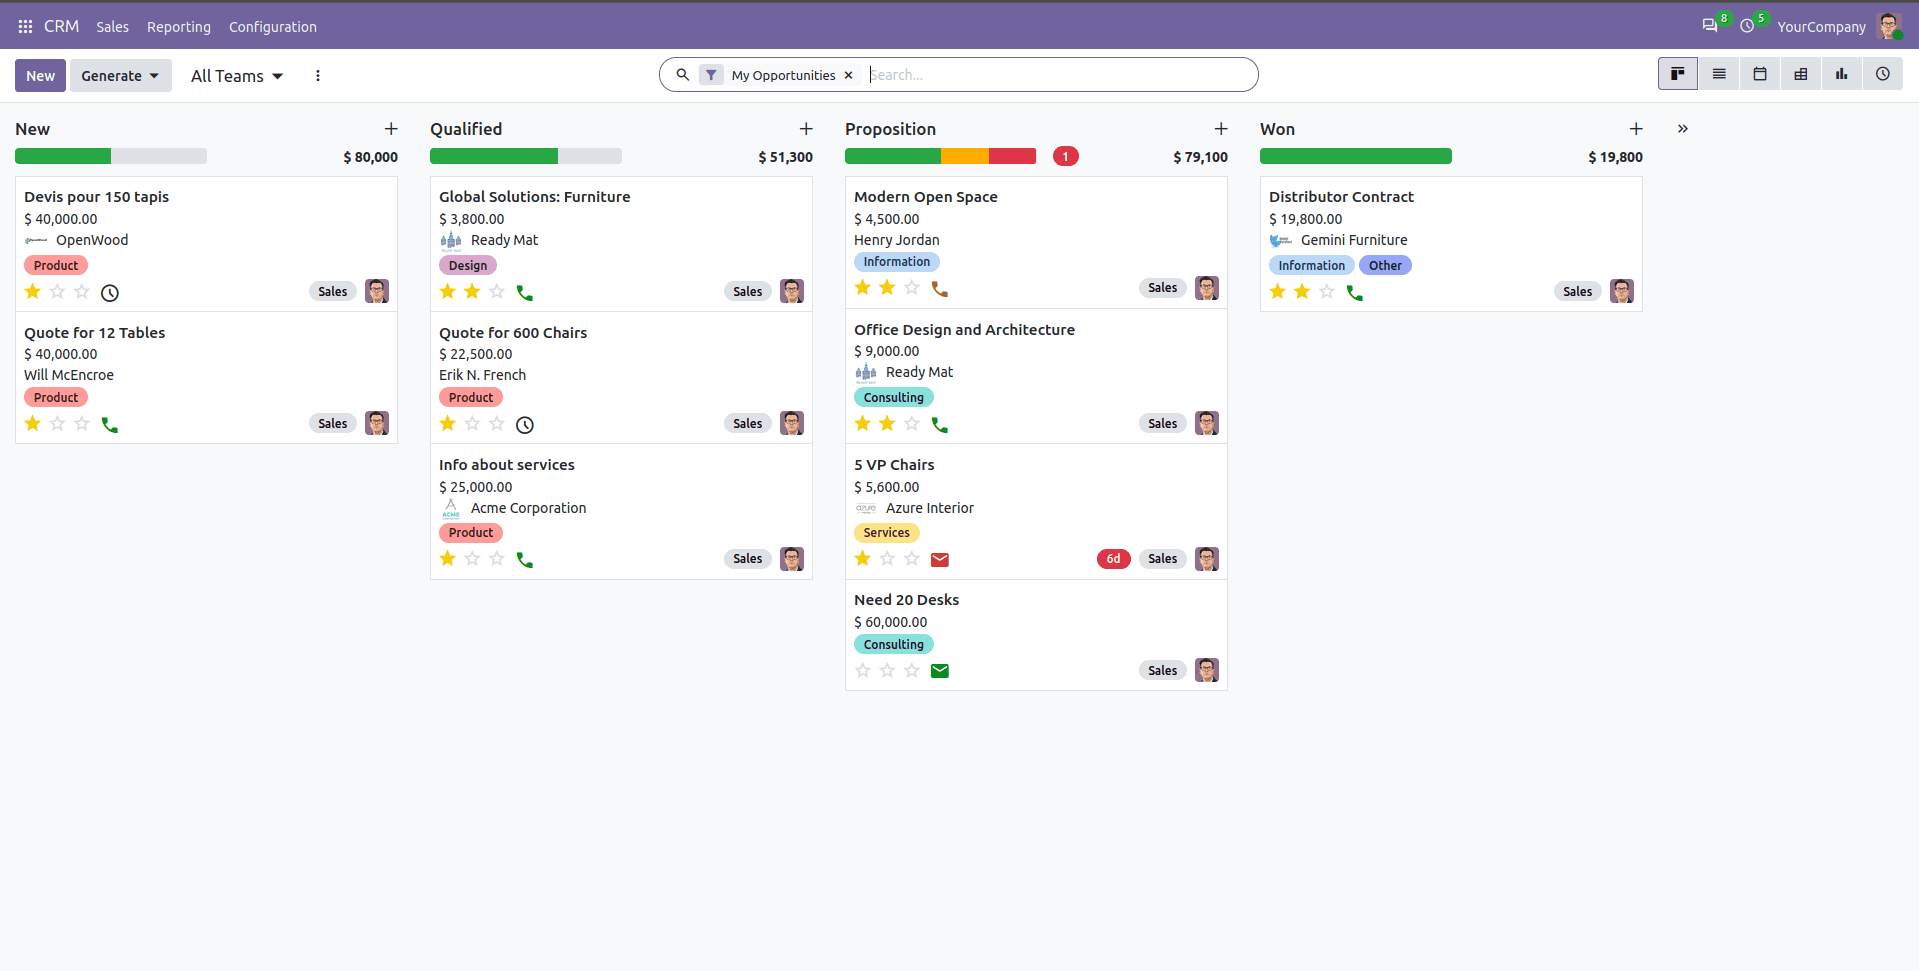
Let’s dive into the steps for creating a Kanban for your model.
1. Model Definition
In Odoo, a 'model' defines a record and its business logic. Here, we will demonstrate how to create a Kanban view for the test.model. You can define a model of your own to meet your requirements. Here, we are using some basic fields lik name, description and stage.
from odoo import fields, models
class TestModel(models.Model):
    _name = 'test.model'
    _description = 'Test Model'
    name = fields.Char(string='Name', required=True)
    description = fields.Text(string='Description')
    date_order = fields.Date(string='Date')
    state = fields.Selection(
        [
            ('draft', 'Draft'),
            ('in_progress', 'In Progress'),
            ('done', 'Done'),
        ],
        string='State',
        default='draft',
    )
    activity_state = fields.Selection(
        [
            ('overdue', 'Overdue'),
            ('today', 'Today'),
            ('planned', 'Planned'),
        ],
        string='Activity State',
    )
2. View Definition
Now, we can define the Kanban view. In the views directory we create an XML file (e.g., test_model_views.xml) and define the kanban layout. Odoo reads this file and understands how the records should appear in the interface.
<?xml version="1.0" encoding="UTF-8" ?>
<odoo>
    <!-- Kanban View Definition-->
    <record id="test_model_view_kanban" model="ir.ui.view">
        <field name="name">test.model.view.kanban</field>
        <field name="model">test.model</field>
        <field name="arch" type="xml">
            <kanban default_group_by="state" sample="1" quick_create="false">
                <progressbar field="activity_state"
                             colors='{"planned": "success", "today": "warning", "overdue": "danger"}'/>
                <field name="state"/>
                <templates>
                    <t t-name="card">
                        <div class="d-flex mb-2 justify-content-between align-items-center">
                            <field name="name" class="fw-bolder fs-5"/>
                            <field name="date_order" class="text-muted"/>
                        </div>
                        <div class="text-muted mb-2">
                            <field name="description"/>
                        </div>
                        <footer class="pt-1">
                            <field name="state" widget="label_selection"
                                   options="{'classes': {'draft': 'info', 'in_progress': 'warning', 'done': 'success'}}"/>
                        </footer>
                    </t>
                </templates>
            </kanban>
        </field>
    </record>
    <!-- Window Action that opens the kanban view -->
    <record id="test_model_action" model="ir.actions.act_window">
        <field name="name">Test Model</field>
        <field name="res_model">test.model</field>
        <field name="view_mode">kanban</field>
        <field name="help" type="html">
            <p class="o_view_nocontent_smiling_face">
                Create your first test record!
            </p>
        </field>
    </record>
    <!-- Menu Item to trigger the action -->
    <menuitem id="test_model_menu"
              name="Test Model"
              sequence="10"
              action="test_model_action"
              parent="kanban_view_root"/>
</odoo>
Now, we have completed the creation of the Kanban view in Odoo 20. A snapshot of the Kanban view from this is given below.
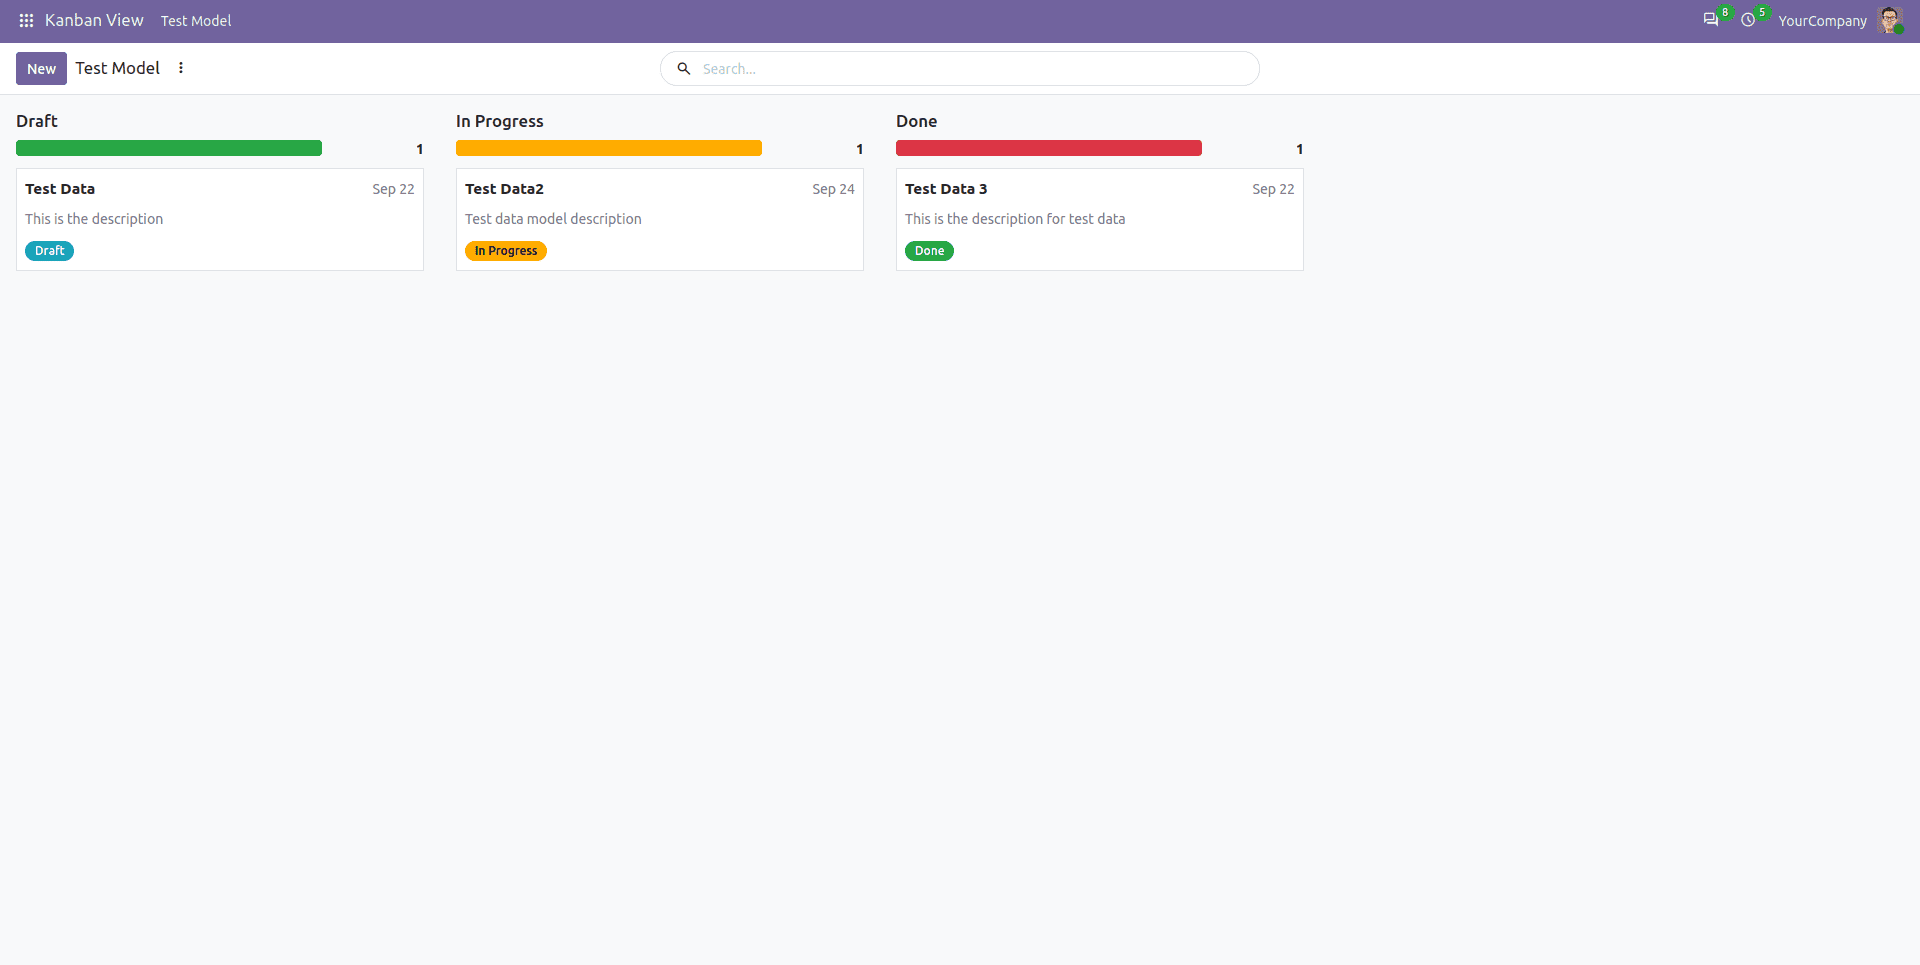
Creating a Kanban view in Odoo 20 can help improve workflow visibility and make it easier to manage records efficiently. By following the steps outlined above, you can build and customize a Kanban view according to your specific business requirements. Whether you are managing projects, tracking sales activities, or organizing other business processes, Odoo’s Kanban view provides a flexible and user-friendly way to visualize and manage workflows.
To read more about How to Create Kanban View in Odoo 19, refer to our blog, How to Create Kanban View in Odoo 19.