Odoo 20 Calendar allows users to manage their businesses flow into a single platform. It helps users to organize meetings, manage schedules, and coordinate events with their colleagues. In addition to creating personal Calendars, share calendars with other team members and control how they manage access.
This blog explains how to create and share Calendars with colleagues in Odoo 20, configure Calendar access roles, and customize Calendar colors. It also covers how to share Calendars that can be used for team and resource scheduling.
Create a New Calendar in Odoo 20
Creating a new calendar helps you to organize meetings and schedules efficiently. It allows you to manage your appointments, check availability, and keep track of your schedule in one place. You can also customize the Calendar according to your requirements and share it with your colleagues for better coordination.
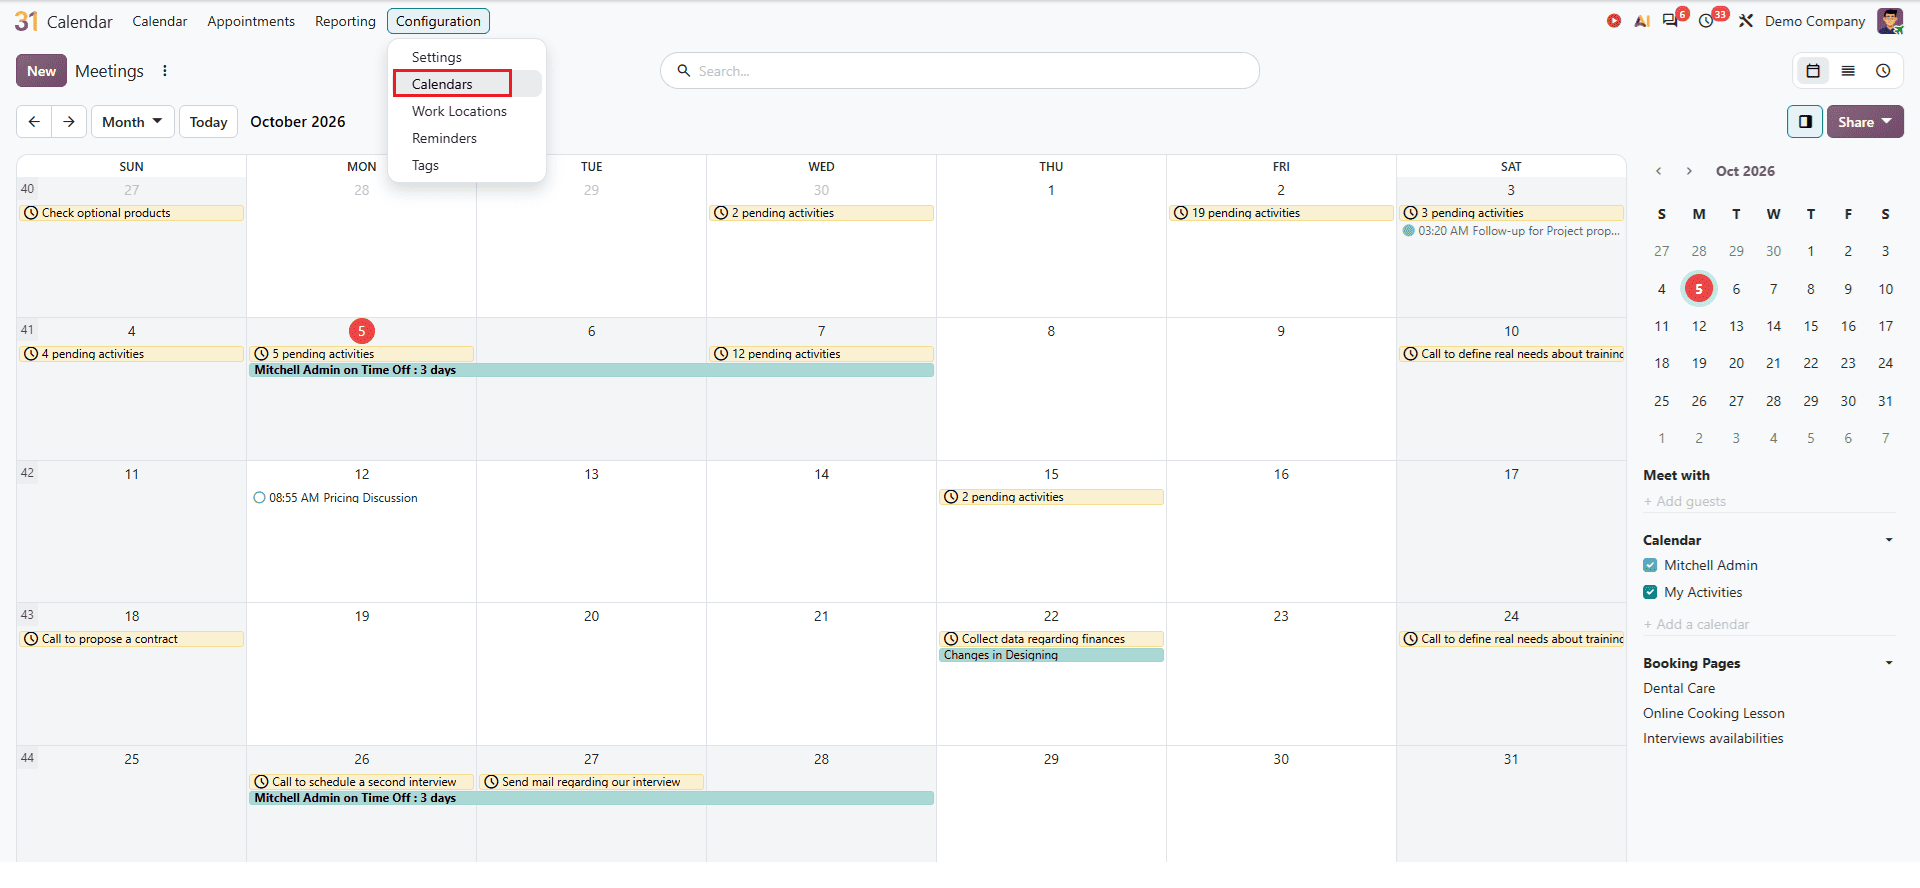
To create a new calendar in Odoo 20, open the Calendar module, go to the Configuration, and open Calendars.
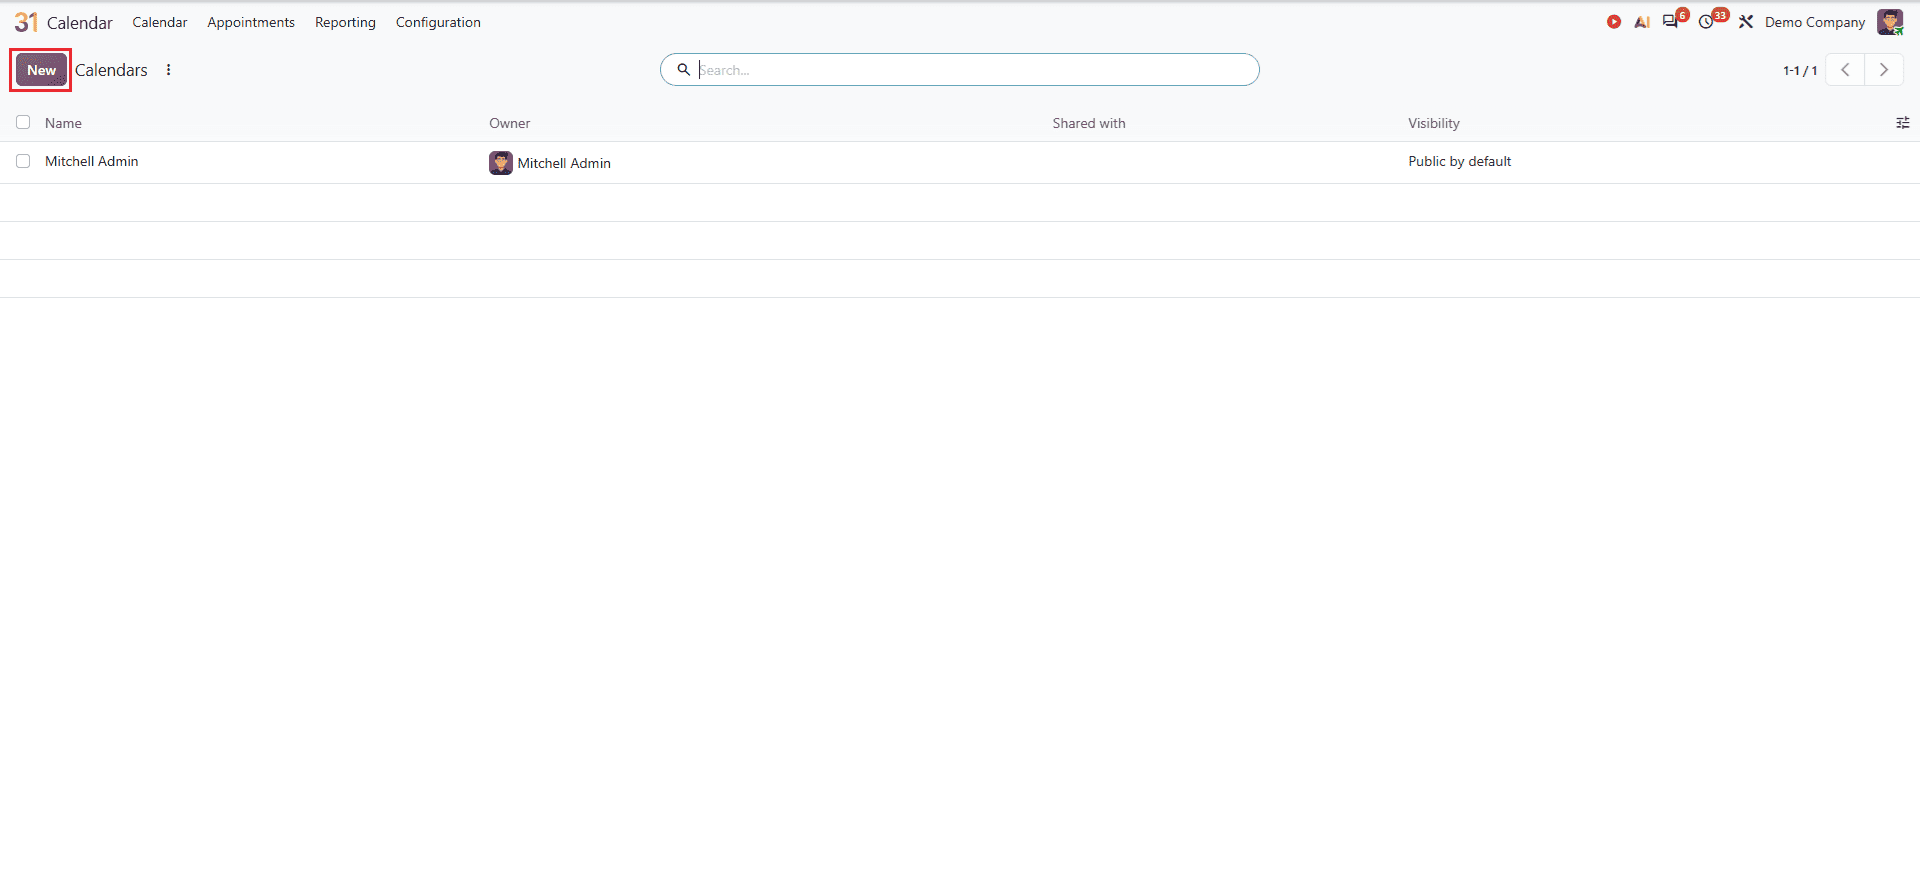
You can see a window like the one given below. Click the New button to create a new Calendar.
A new window will open like this.
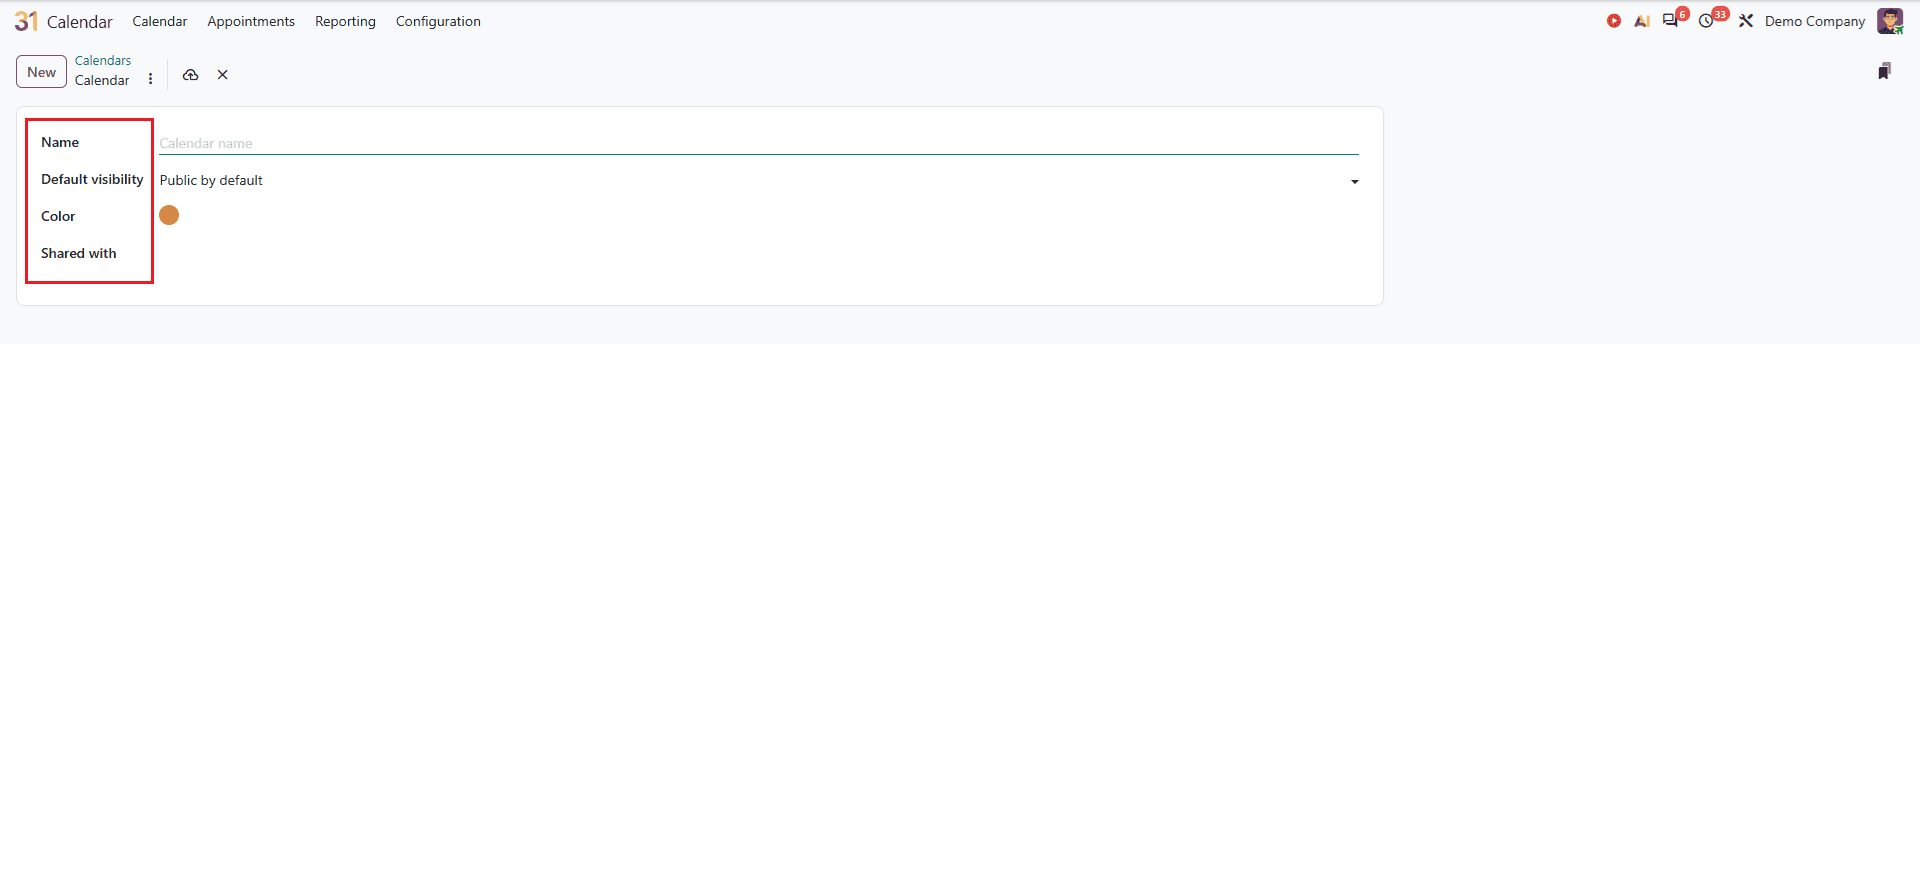
You can enter the required details such as Name, Visibility, Color and Shared with whom you want to.
Name: Enter a name that you want to create.
Default visibility: This option determines who can access or see the schedules you create. It provides options like Public by default, allows anyone to access, Private by default restricts access to authorised users; Internal users only limits access to employees and Shared Calendars only allows access to calendars specifically shared with users.
Color: You can select a color for the Calendar, it will help you to quickly identify the Calendar when multiple Calendars are displayed together.
Shared with: select the users or colleagues with whom you want to share the Calendar. You can define their access role based on the level of permission they require. You can also create and invite new teammates or users.
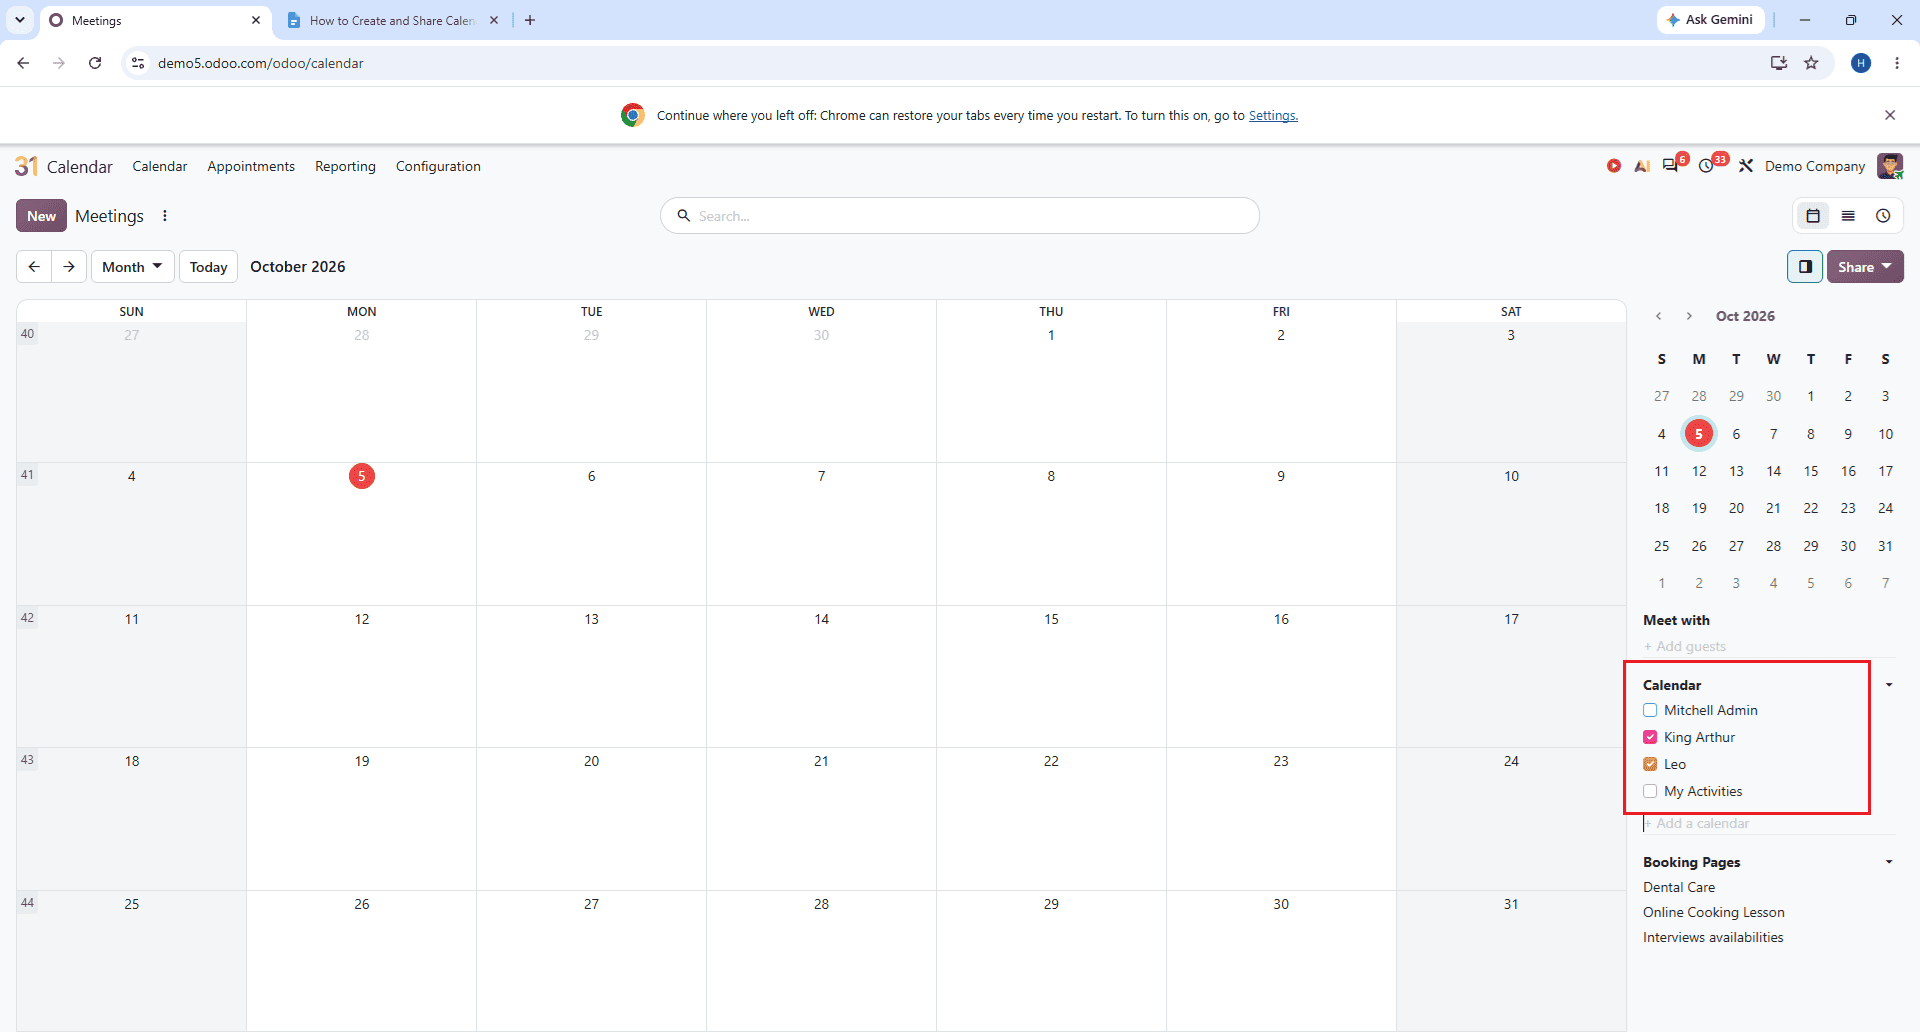
After saving this, go to the Calendar dashboard and you can see your created Calendar. You can click on the Calendar you want to view schedules in the dashboard. Also, you can hide events you do not want to show on the calendar view just by clicking the box.
Schedule a Meeting in the Created Calendar
Once the Calendar is created, you can schedule meetings directly in it. To do this, go to the Calendar dashboard and click a date you want to schedule. Then a pop-up window will appear, and you can select your calendar as given below:
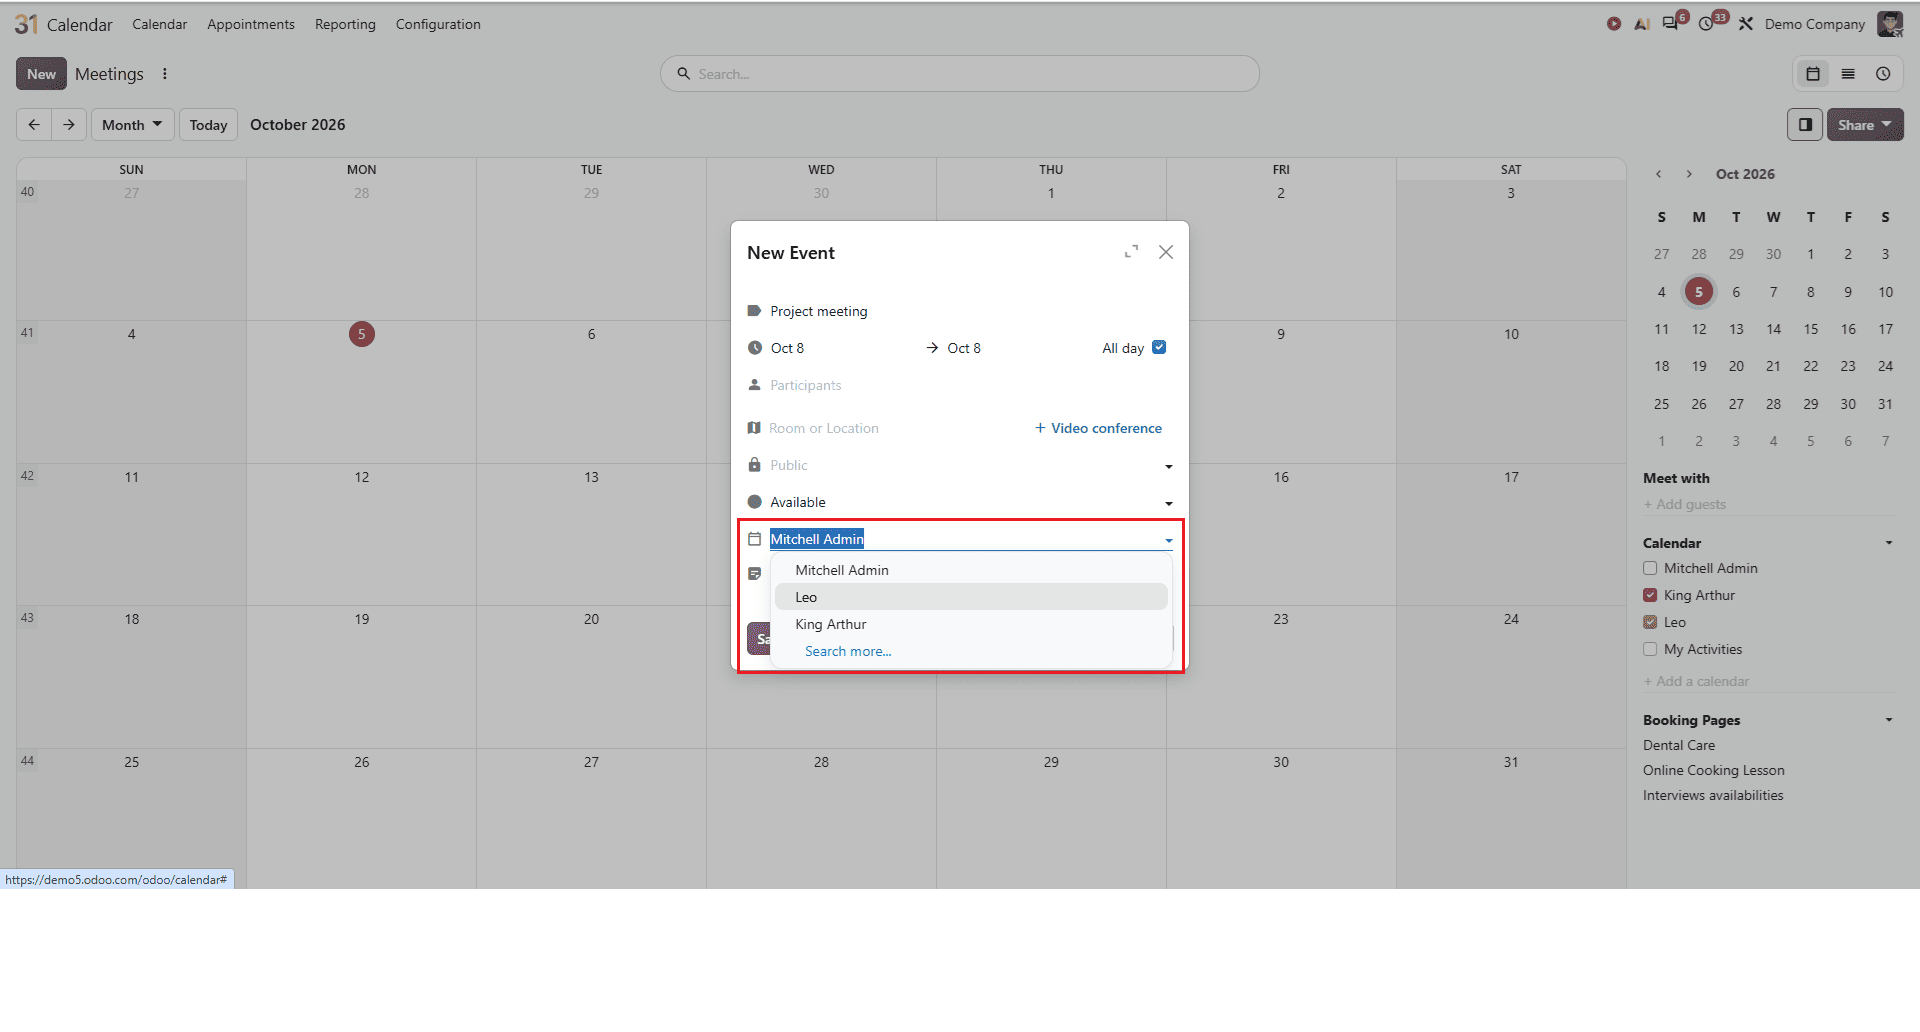
After that, set up your meeting and events as per your requirements. It will show on the Calendar view.
Share The Calendar With Colleagues
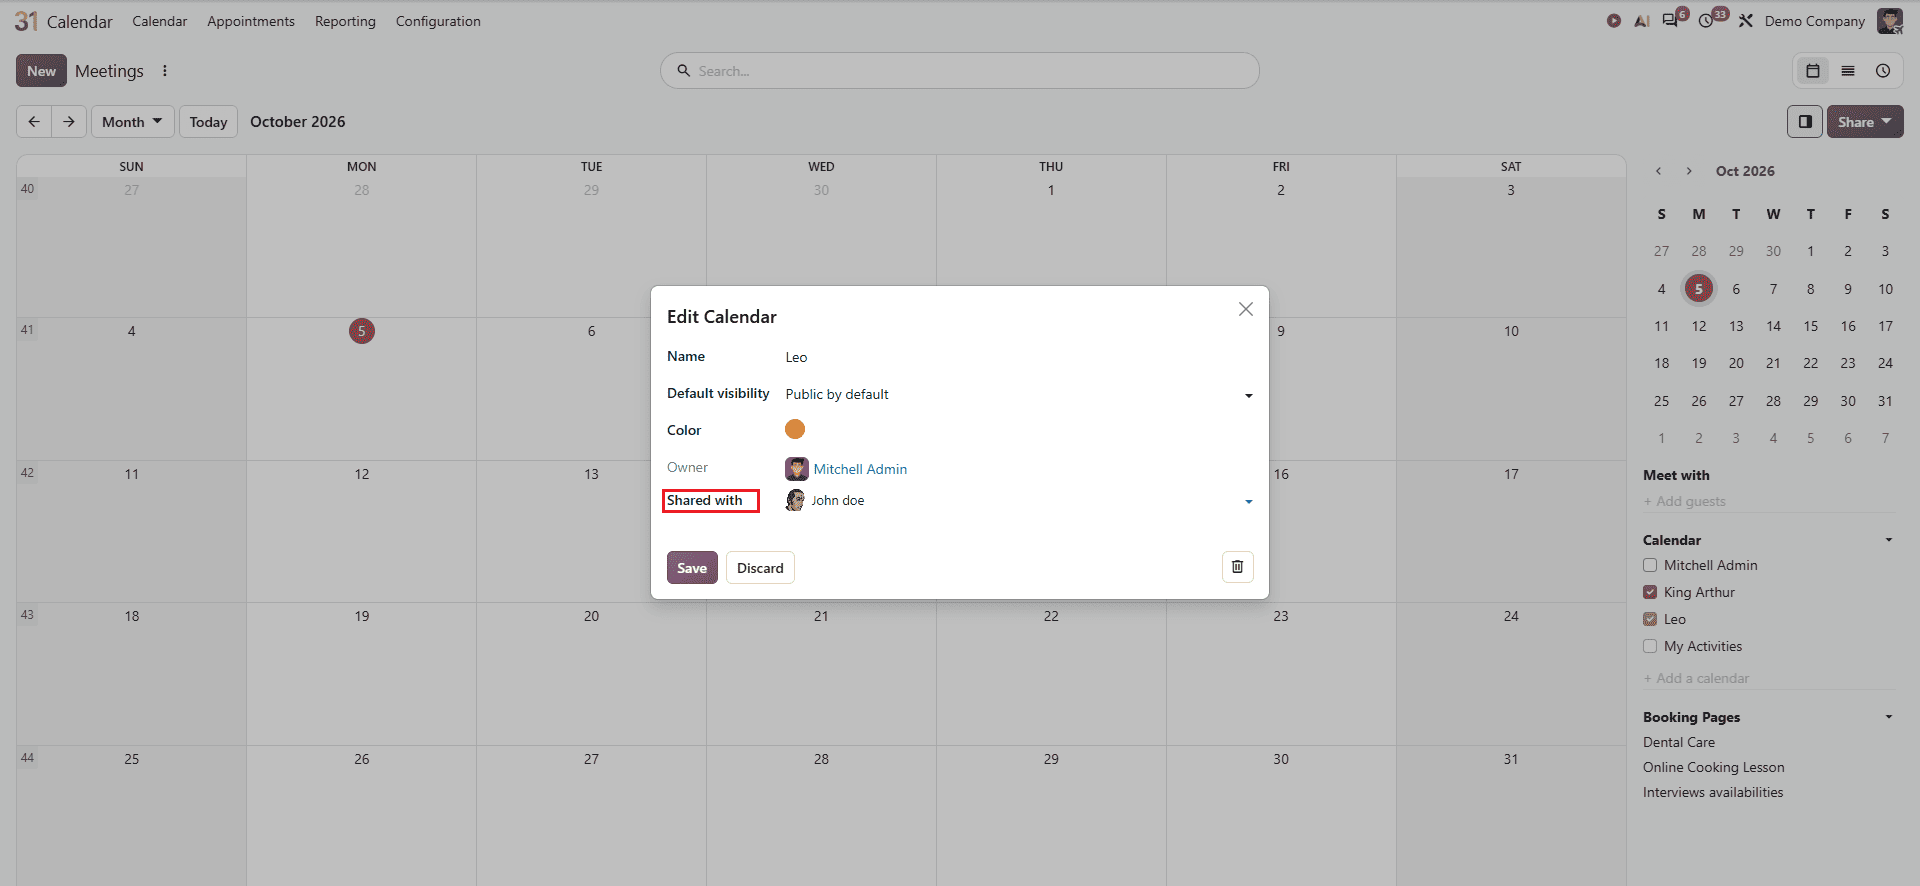
Odoo 20 allows you to share a Calendar with other users and provide them with access according to their assigned permissions. To share your Calendar with colleagues, open the Calendar view, select your Calendar and open it for editing. You can also access the Calendar from configuration Calendar.
The image below is from the Calendar view and,
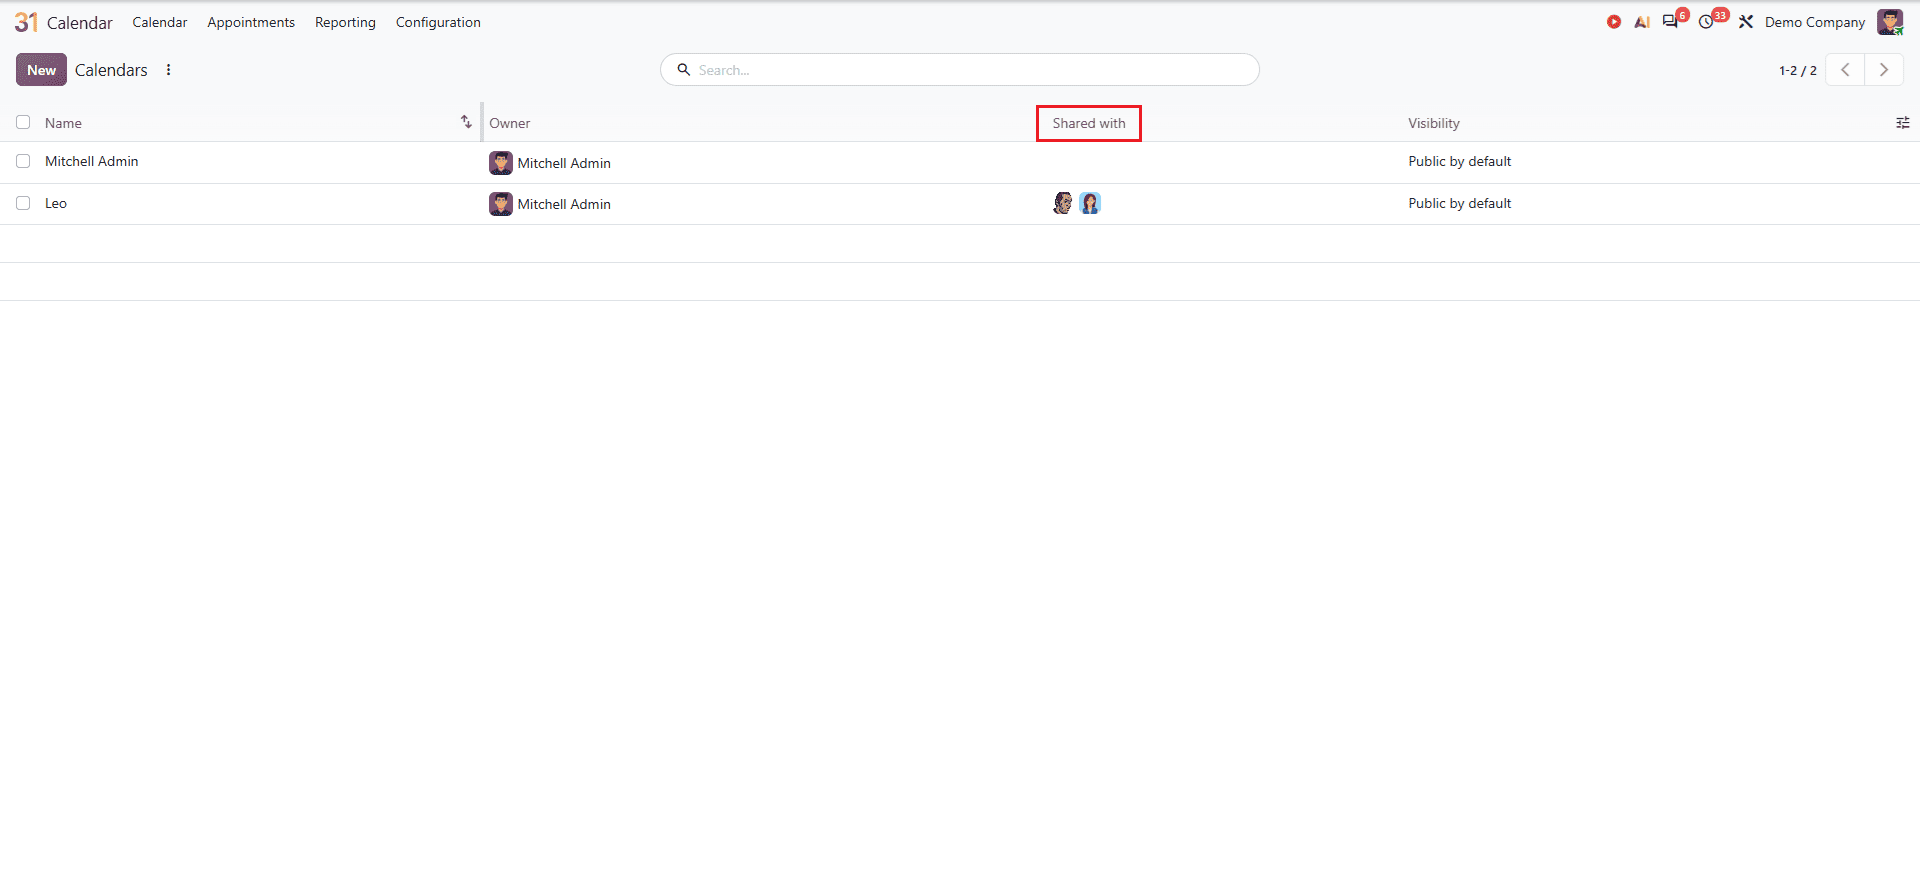
This is the given image view from the configuration Calendar.

In both views, you can see the Share with option and you can add your colleagues or users with whom you want to share the Calendar. After adding the required user and saving the Calendar, the shared user can access the Calendar according to the permissions provided to them.
You can add multiple colleagues or team members to the same Calendar through the Share with option, allowing everyone who has been added to access the shared Calendar. You can see the view as shown below:
The owner of the Calendar is responsible for managing it, while the visibility option determines who can access or view the schedule in the Calendar. By configuring these options along with the Shared with field, you can control access to the Calendar according to your requirements.
Manage Calendar Color And Visibility
Once the Calendar is created, its selected color is displayed in the Calendar view, making it easier to distinguish it from other Calendars. You can also use the check box next to a Calendar in the side panel to show or hide its events from the Calendar view.
The Calendar side panel allows you to control which Calendar are displayed in the view. Select the checkbox next to a Calendar to display events, or clear the checkbox to hide them. This makes it easier to view specific Calendars when multiple Calendars are available.
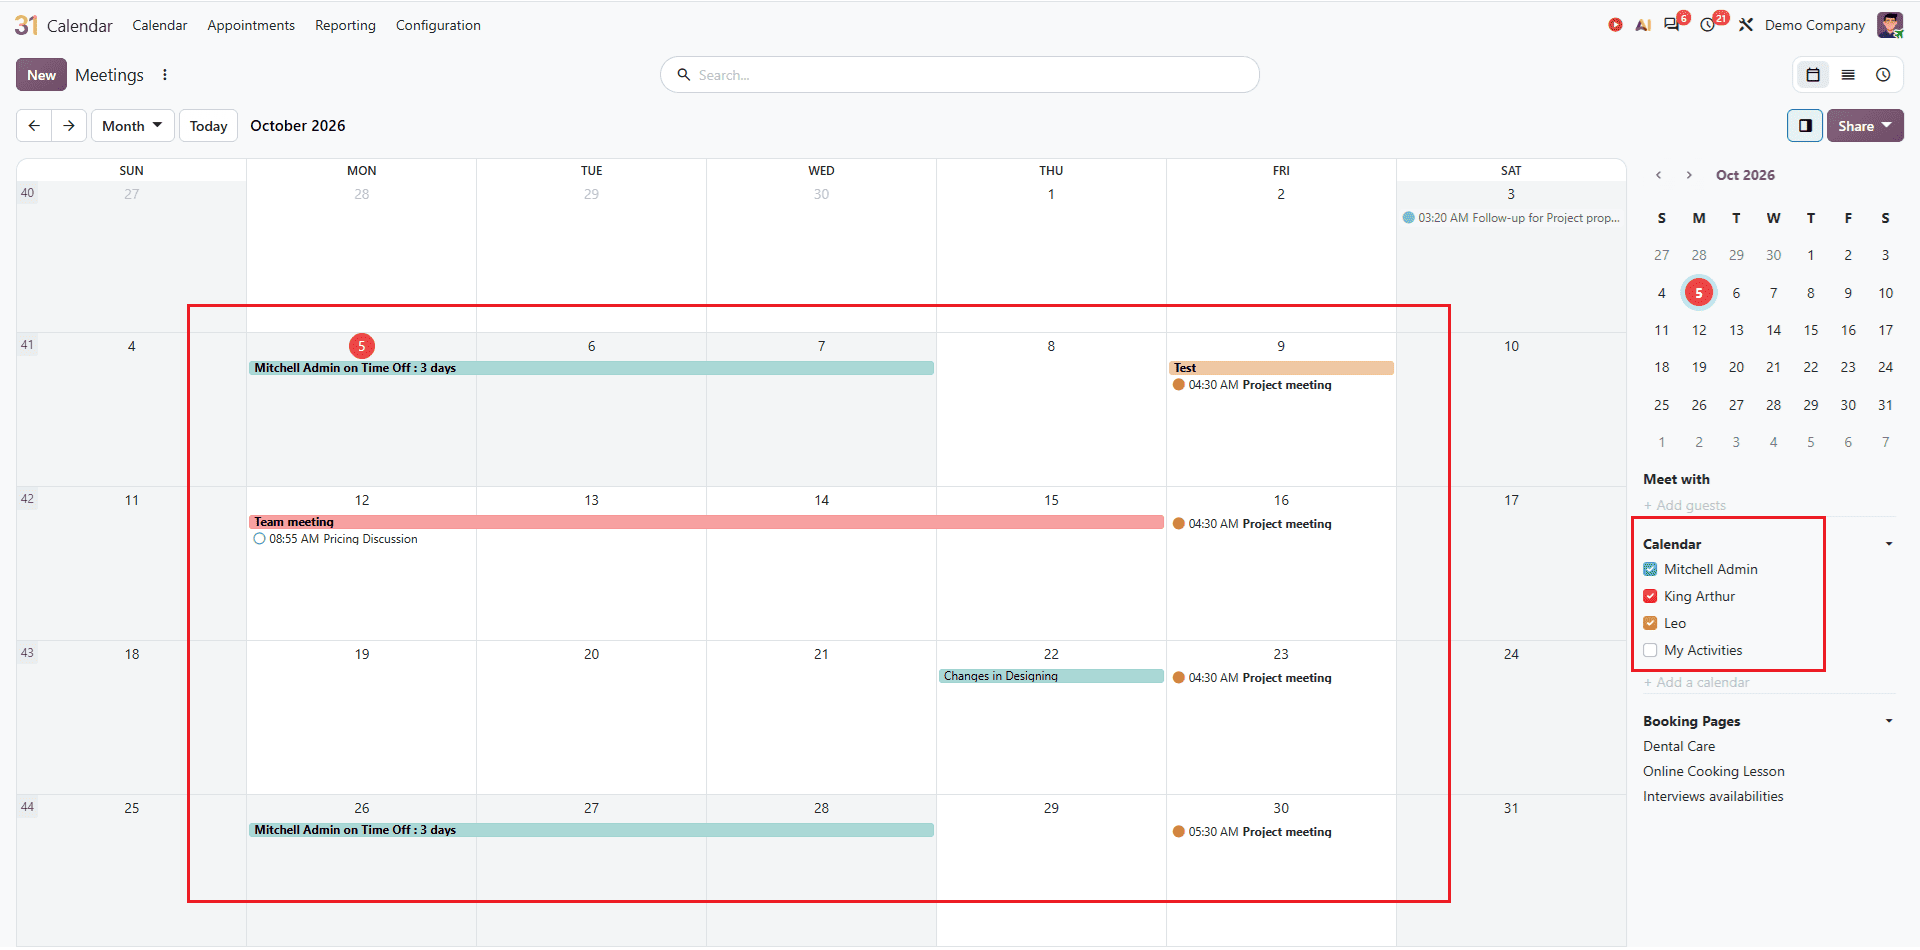
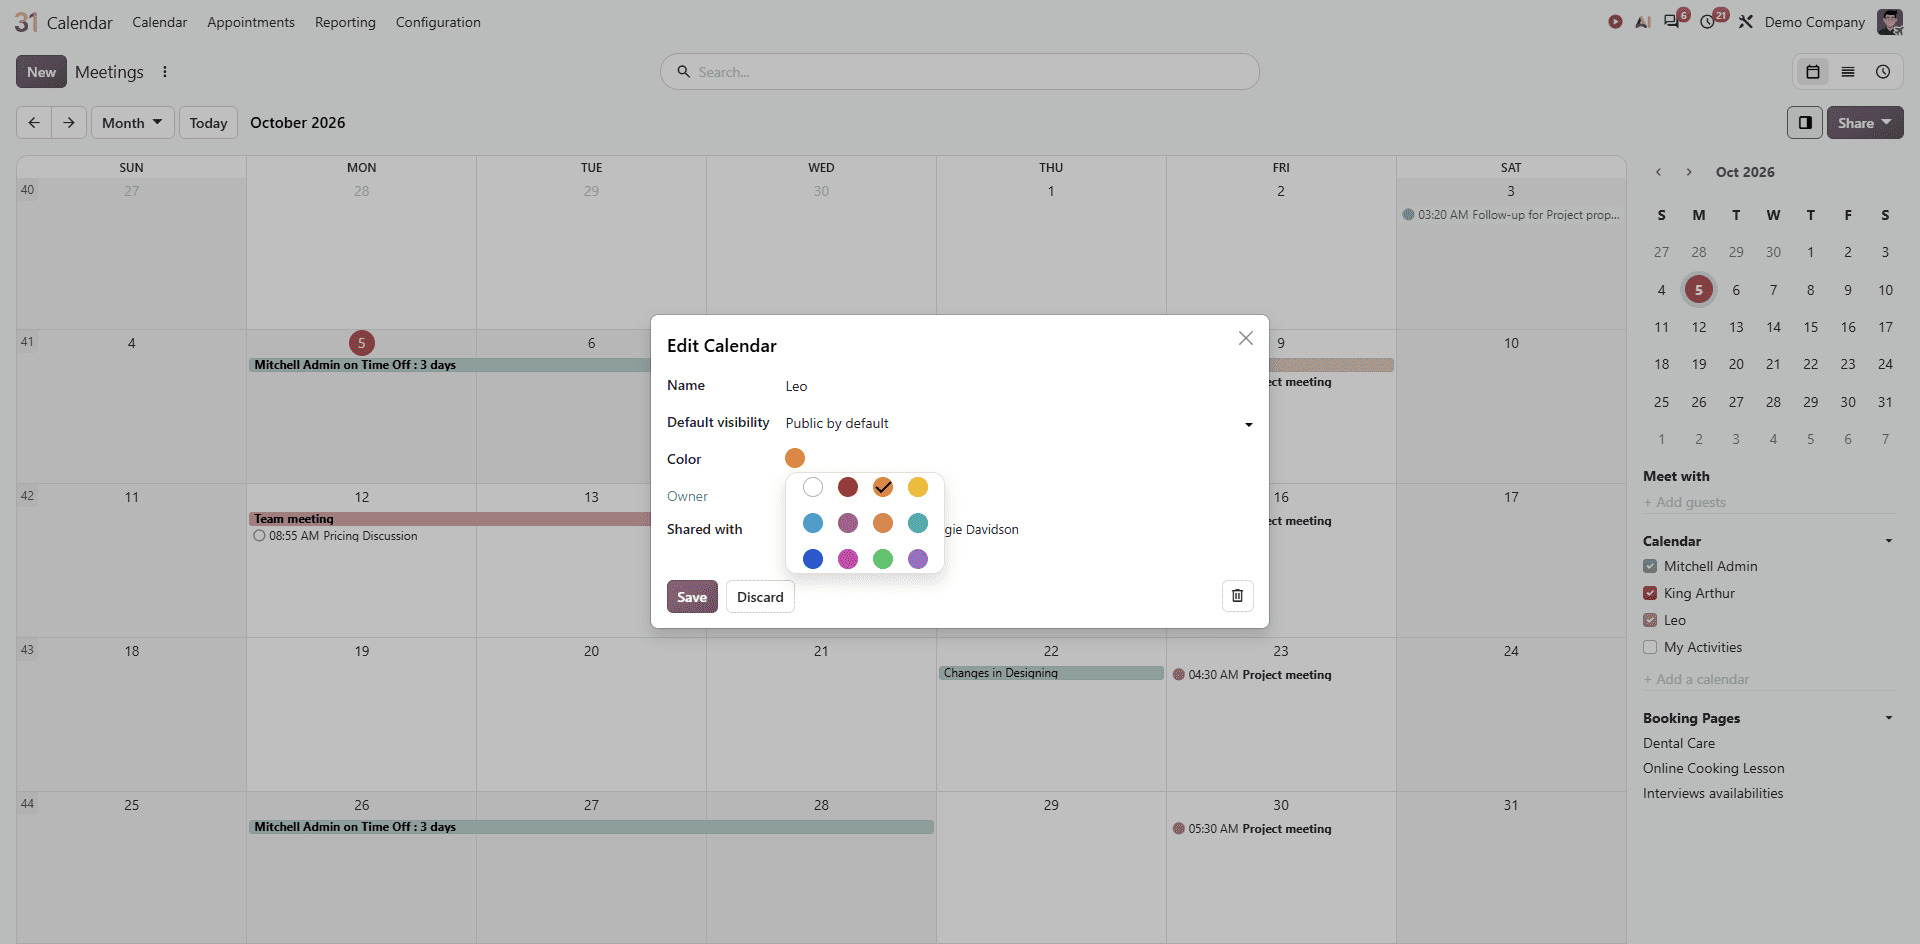
To change your selected color, select your Calendar and open it to edit. Then you can choose a color you want to show on the views. It can be seen in the Calendar view as shown below:
Odoo 20 Calendar provides a simple way to create, organize and share schedules with colleagues. By configuring Calendar visibility, sharing it with the required users, and customizing colors, you can manage schedules more effectively. Shared Calendars can be used for team and resource scheduling. A team Calendar can help members coordinate meetings, events, and manage shared resources in one place, making scheduling and collaboration easier.
To read more about How to Create Recurring Meetings and Edit Series in Odoo 20 Calendar, refer to our blog, How to Create Recurring Meetings and Edit Series in Odoo 20 Calendar.