Manually doing this for large amounts of business data is time-consuming and very error-prone. Odoo 19 solves this problem with a built-in Data Import feature that works directly in the web interface, so no technical knowledge is needed.
You can quickly import data from other systems, add multiple customers, or import product information from a spreadsheet. The import tool also assists by automatically matching columns, checking for errors in real time, and showing clear messages when something goes wrong.
What Is Data Import via UI?
Odoo 19 has a built-in Data Import via UI that works directly in the browser. Users can import data from CSV or Excel files into different modules such as Contacts, Products, Sales Orders, Employees, and Inventory.
This method is simple and does not require any coding. Users just need to prepare the file, open the import screen, match the columns, review the data, and then import it.
| Characteristic | Detail |
| Access Method | All standard Odoo modules |
| Supported Formats | CSV (.csv) and Excel (.xlsx, .xls) |
| Modules Supported | All standard Odoo modules |
| User Level Required | Standard internal user with create rights |
| Validation | Real-time pre-import error detection |
| Error Handling | Row-level error reporting with correction workflow |
How to Access the Import Feature in Odoo 19
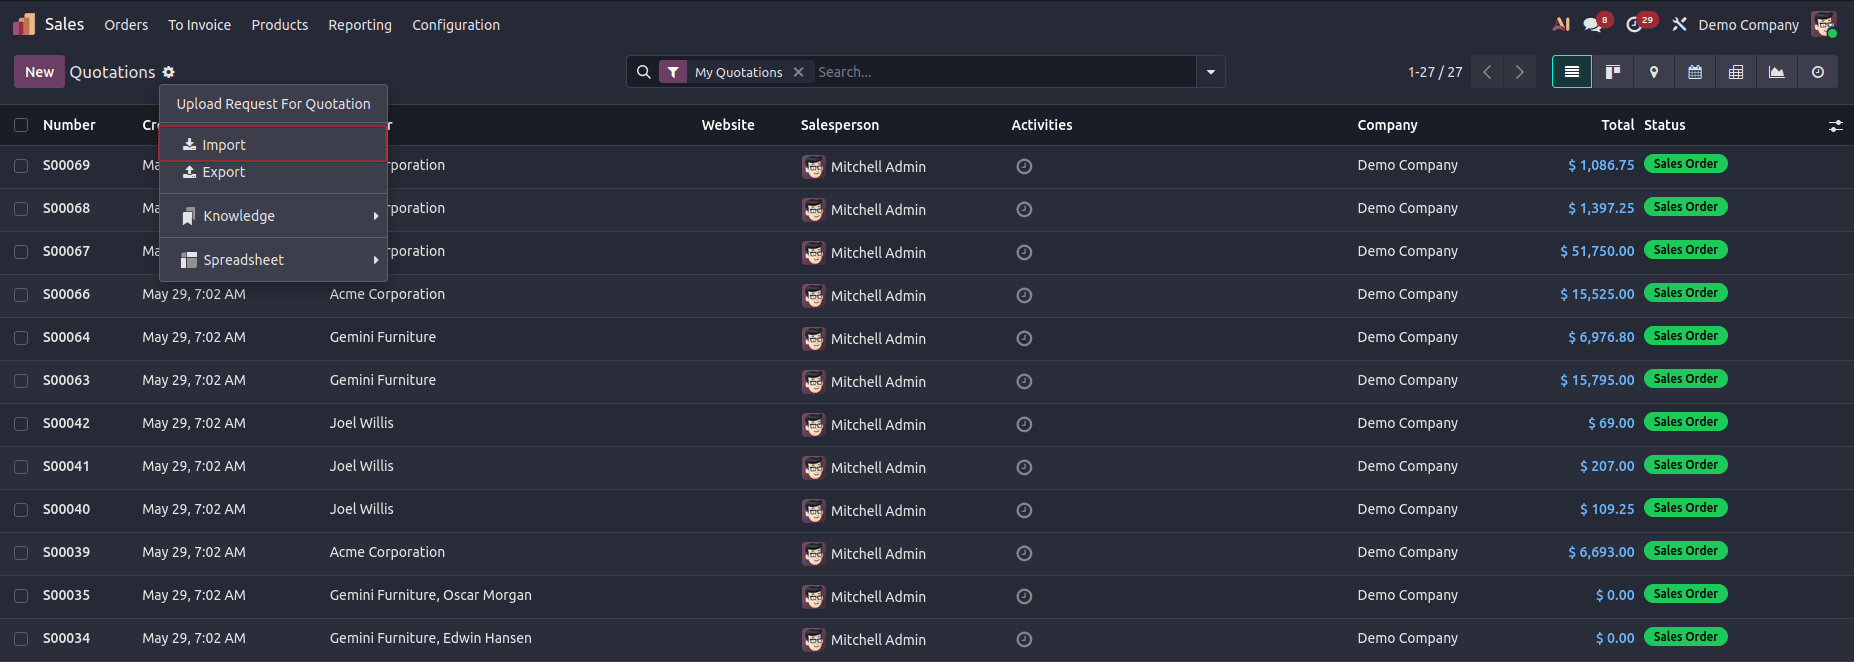
The import option is available in the list view of most modules in Odoo 19. Follow the steps below to locate and access this feature.
Navigate to the module (e.g., Contacts, Inventory, Sales).
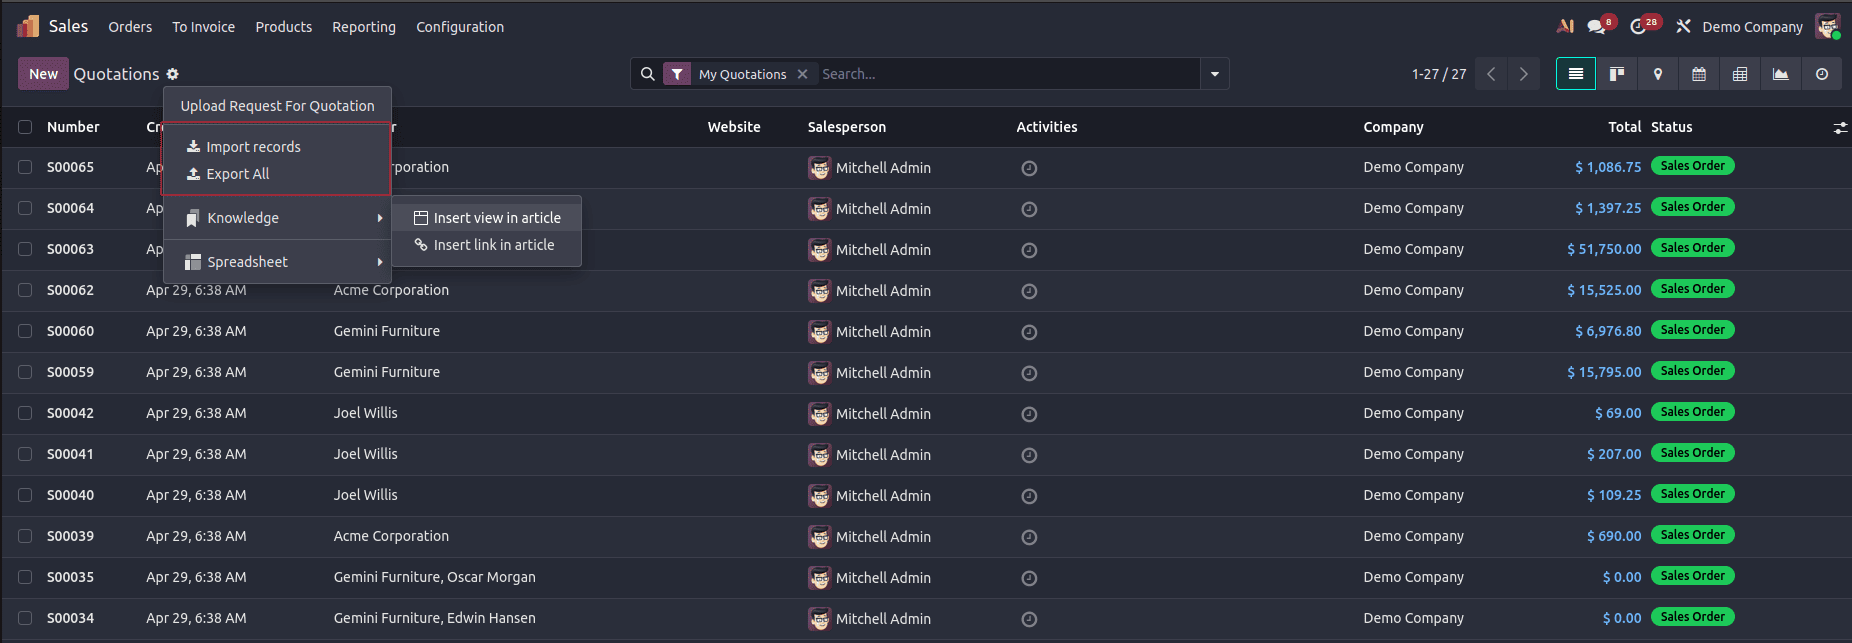
- Click the Action menu (gear icon or ?) in the top toolbar. From the dropdown, you will see options like “Import Records” and “Export Records.” Click on “Export Records” to proceed
- Click the Export button in the export wizard to export all available records.
Exporting existing records is a useful way to obtain a template for imports. The exported file contains the correct column structure and field names expected by Odoo, making it easier to prepare data for import.
Users can remove unnecessary columns, update existing values, or add new data while keeping the required format intact. This reduces mapping errors and helps ensure a smoother import process.
Using Export Templates
When exporting data, users can select the fields they want to include in the file. If additional information is required during a future import, extra fields can be added from the Available Fields section before exporting. The selected field configuration can also be saved as a template and reused later, eliminating the need to manually select the same fields each time.
Using export templates helps maintain consistency and speeds up recurring import and export operations.
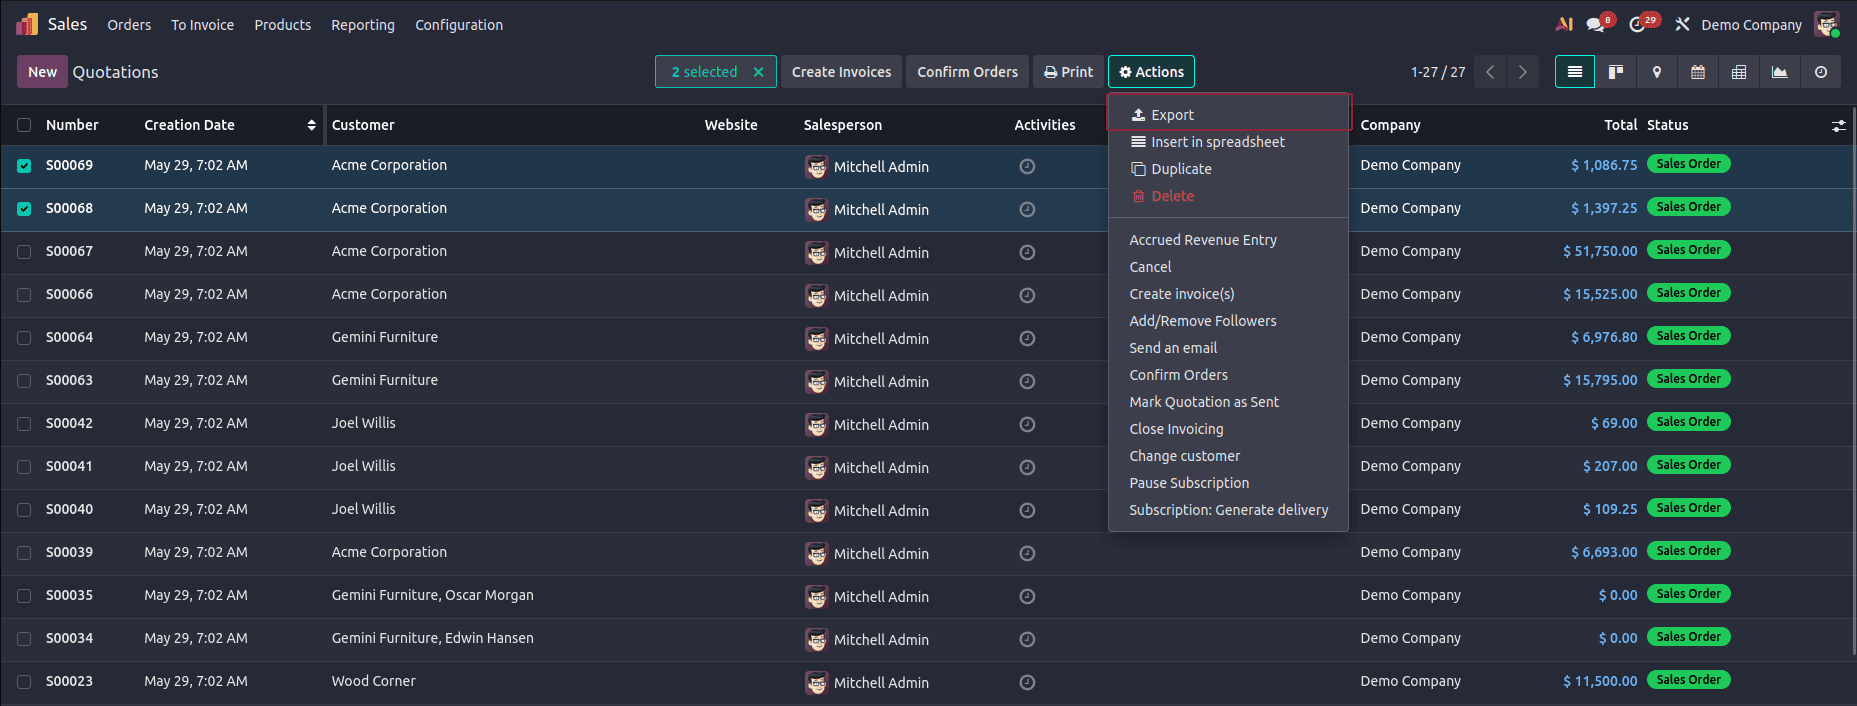
The Export option allows users to download data from the selected records.
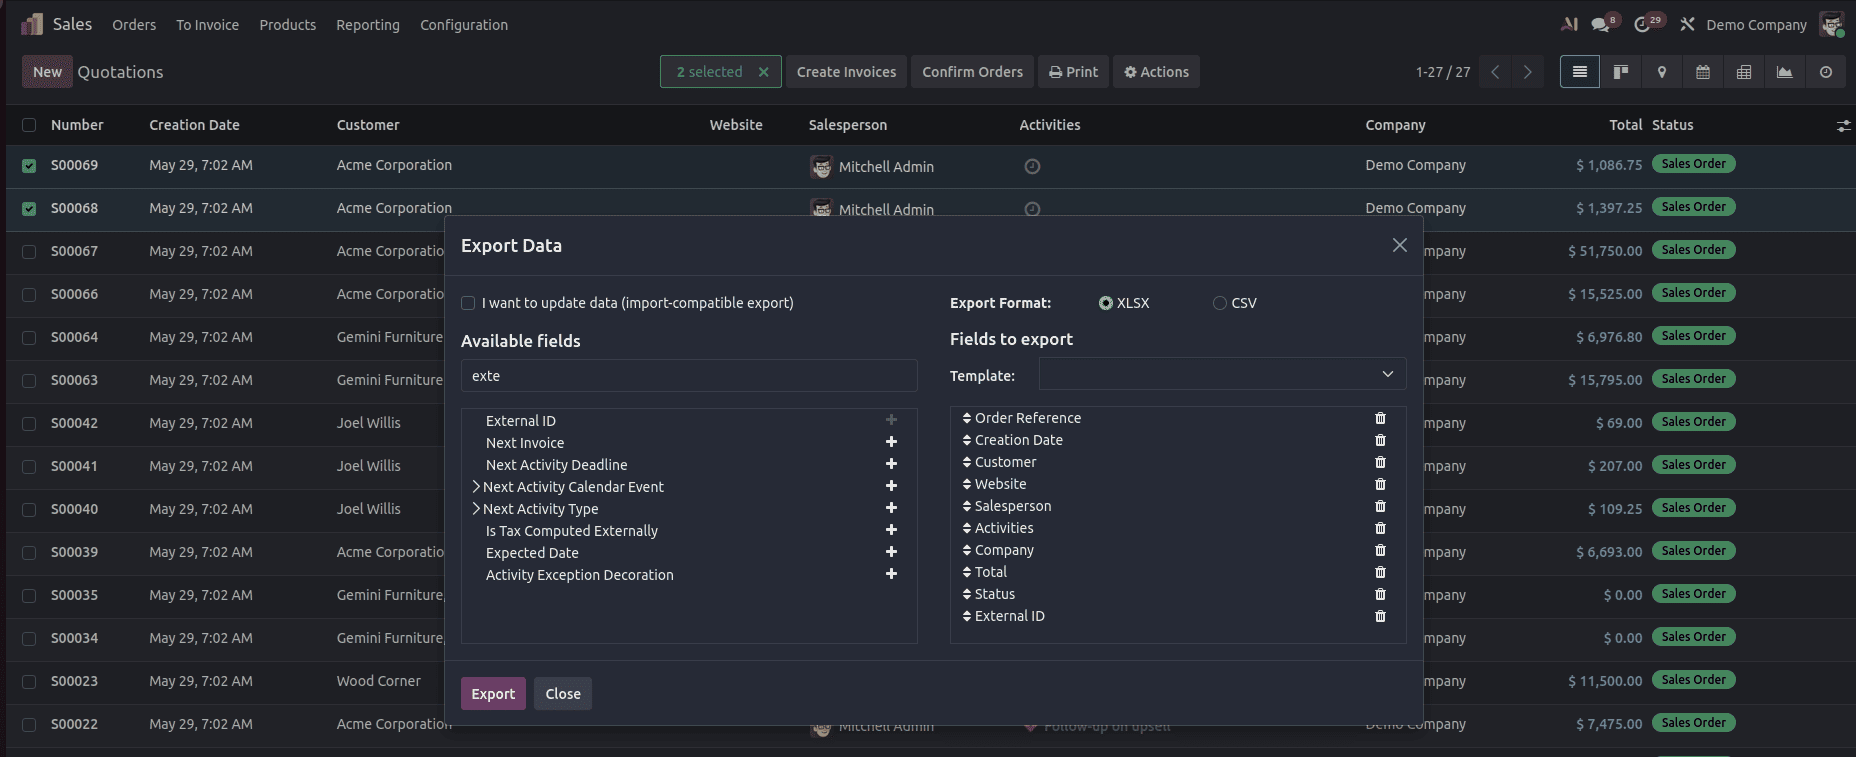
Available Fields:
The Available Fields section on the left displays all fields that can be exported for the selected model. Users can search for specific fields and add them to the export list by clicking the + icon next to the field name.
Fields to Export:
The Fields to Export section on the right contains the fields that will be included in the exported file. In this example, fields such as Order Reference, Creation Date, Customer, Website, Salesperson, Activities, Company, Total, and Status have been selected for export.
Export Format:
Users can choose the format of the exported file. Odoo supports both XLSX and CSV formats, with XLSX currently selected in the screenshot.
Import-Compatible Export:
The "I want to update data (import-compatible export)" option generates a file that includes additional identifiers required for future imports. This is useful when records need to be exported, modified externally, and then re-imported into Odoo to update existing data.
Template:
The Template dropdown allows users to save and reuse field selections for future exports, eliminating the need to manually select the same fields each time.
Export Process:
After selecting the required fields and export format, clicking the Export button generates and downloads a file containing the data from the selected records.
After exporting the data, users can use the file as a template by adding new records or updating existing ones while keeping the same column structure. Once the changes are made, the file can be imported back into Odoo.
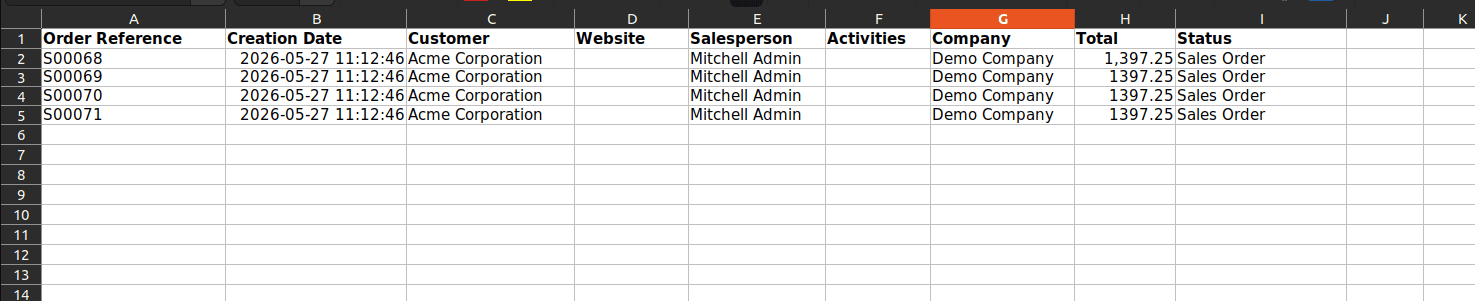
The exported XLSX file can also be used as a template for importing data into Odoo, as it already contains the correct field structure and column headers required for the import process.
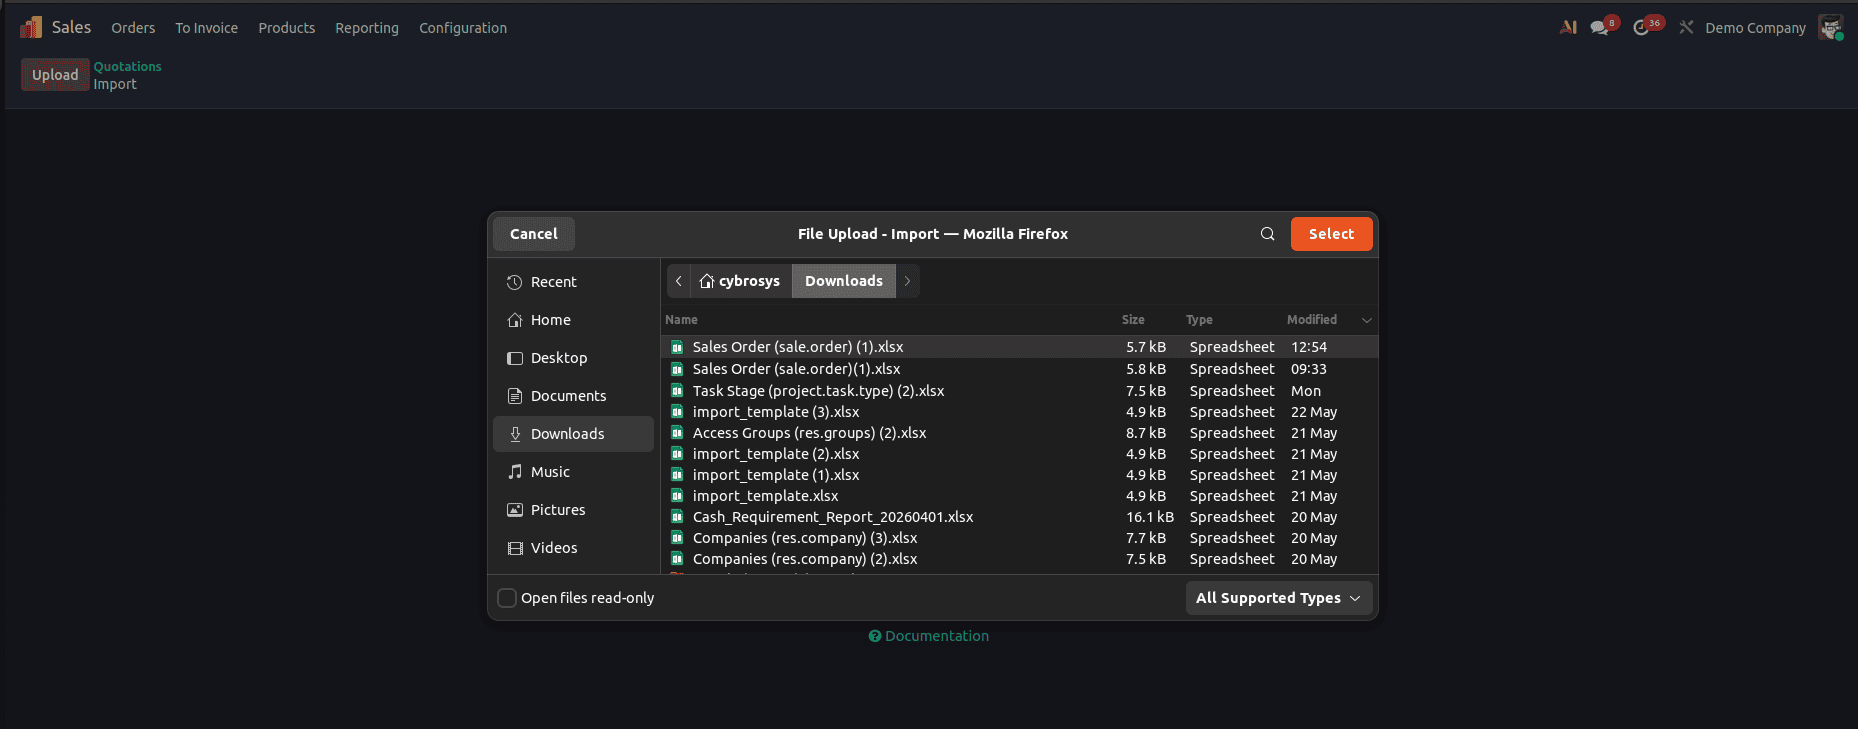
Click on Upload and select the exported or appropriate file from your system.
Once the file has been uploaded, click the Test button to validate the data and check for any errors or inconsistencies before proceeding with the import.
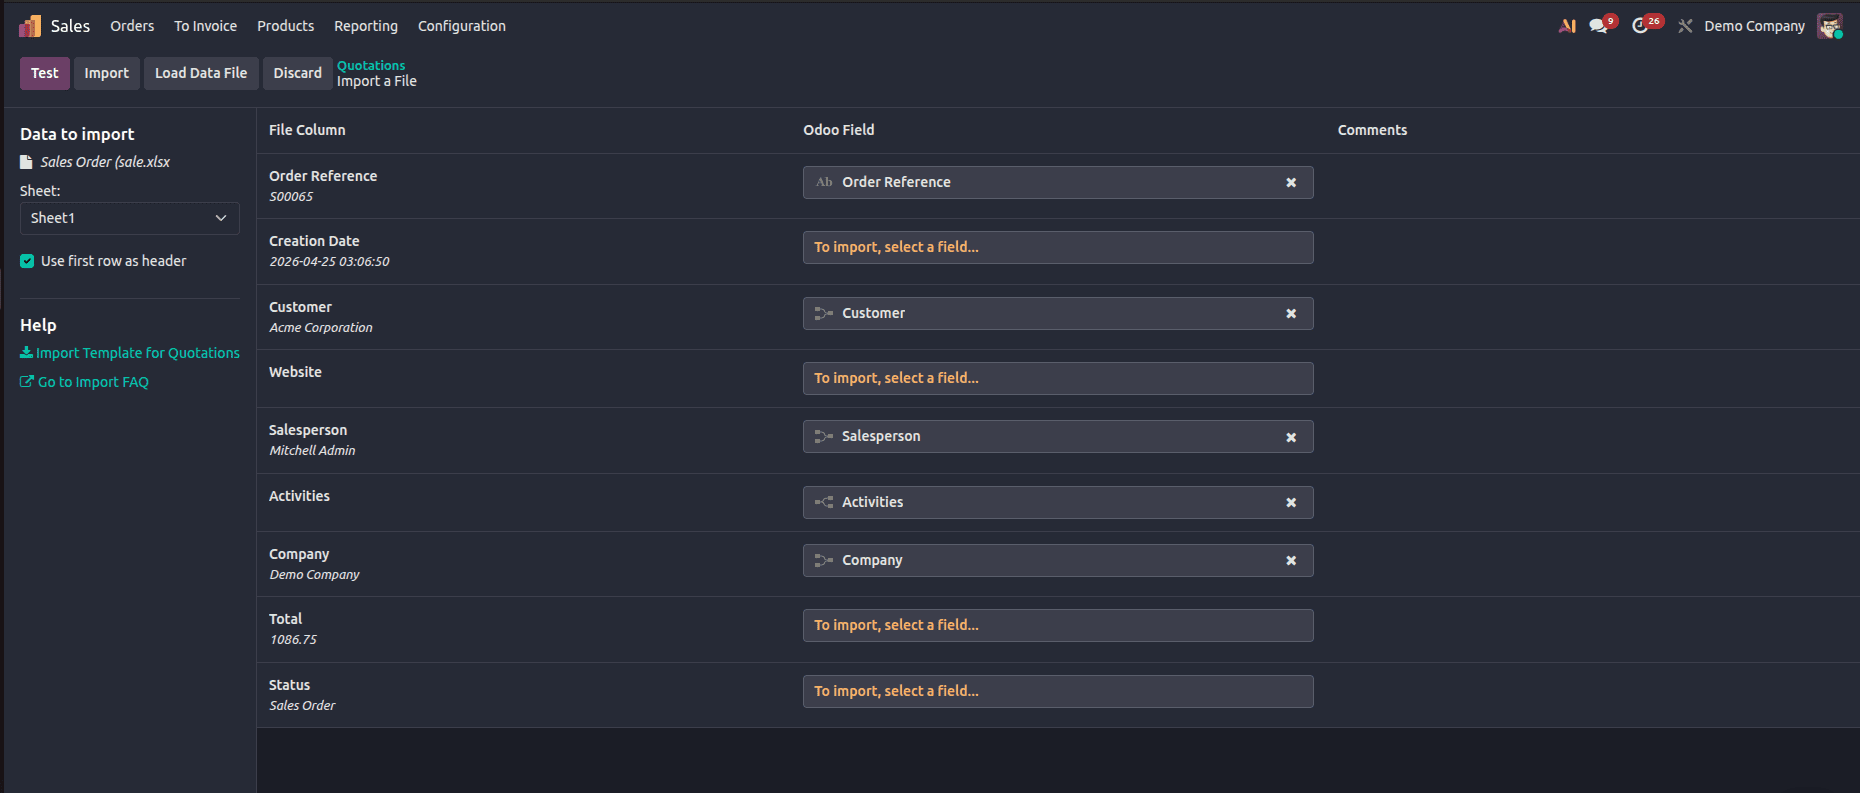
Before proceeding with the actual import, click the “Test” button to ensure your data is accurate and properly formatted. In Odoo 19, this step is essential to avoid errors during the import process.
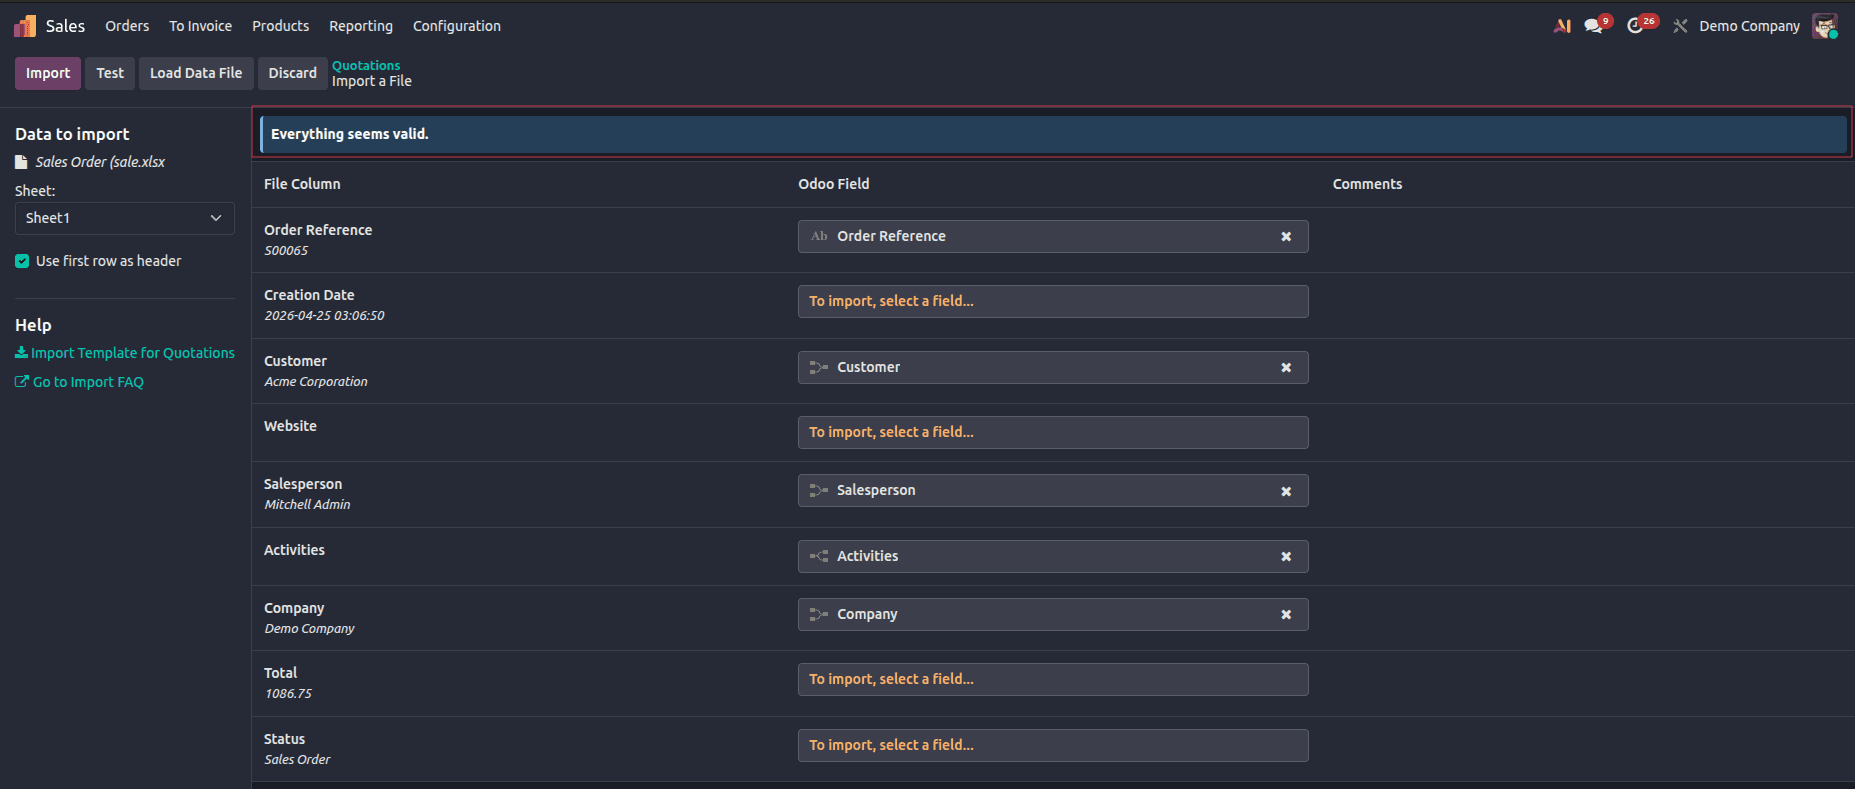
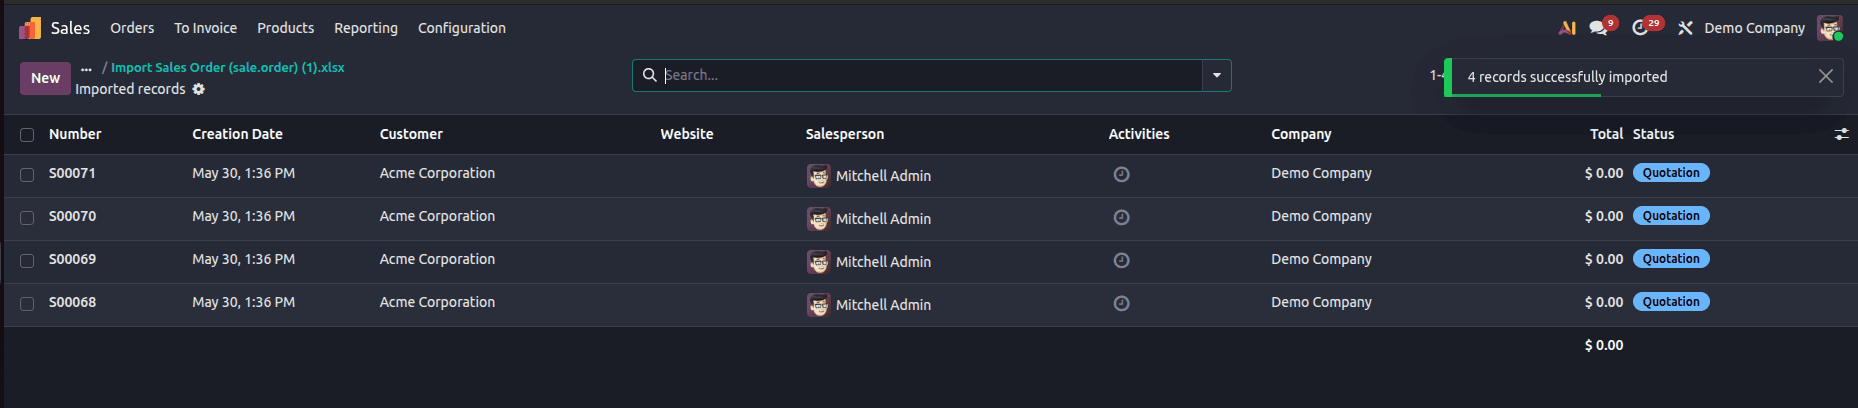
Once validation is complete or after reviewing and confirming the results, click the “Import” button to proceed. After the import is completed successfully, a confirmation message will be displayed. You will also have the option to review or download the imported file for reference.
Preparing Your Import File
The most important part of a successful import is getting the files ready correctly. A file that is well-structured saves time when mapping and makes mistakes less likely.
Supported File Formats
| Format | Extension | Best For |
| Comma-Separated Values | .csv | Simple flat data, any spreadsheet |
| Excel Workbook | .xlsx | Complex data, formatted sheets |
| Legacy Excel | .xls | | Older Excel | files (Odoo 97-2003 support)
|
Using External IDs
External IDs (also called XML IDs) are unique reference codes used to identify records across Odoo. Using them in your import file helps Odoo:
- Update existing records instead of creating duplicates.
- Link related records correctly (e.g., linking an invoice to an existing customer).
- Re-import data without creating conflicts
If there are errors, Odoo will tell you exactly which rows and columns are wrong. You may:
- Download the file with errors, correct errors in your spreadsheet application and upload again.
- Correct values directly in the preview using the inline correction interface (where available).
- Examine the error message that is shown for each bad row.
| Common Error | Cause | Fix |
| No matching record found | Related record (e.g. country, category) does not exist | Correct spelling or create the record in Odoo first |
| Invalid date format | Date does not match configured format | Change date format in file options or reformat dates |
| Required field is empty | A mandatory field has no value | Fill in the required column in your file |
| Duplicate external ID | Same External ID used in multiple rows | Ensure each External ID is unique |
| Value is not a number | A numeric field contains text or special chars | Clean up the column to contain only numeric values |
Odoo 19 provides a simple yet effective way of uploading and managing a large volume of data through the Data Import feature. It features an easy wizard interface, automatic column matching, real time validation, and clear error messages to help you import data seamlessly.
If you prepare your file correctly, use external IDs, and follow the steps in this guide, you can import data into any module without writing code.
To read more about The Ultimate Guide to Data Import and Export in Odoo 19, refer to our blog The Ultimate Guide to Data Import and Export in Odoo 19.