Odoo 18 Studio is a powerful customization tool that allows users to tailor their Odoo database according to specific business needs, all without writing a single line of code. With its simple and intuitive interface, Studio makes it possible to create new fields, modify existing views, design custom reports, and even build entirely new applications. This flexibility means businesses can adapt Odoo to their workflows quickly and efficiently, ensuring the system supports their day-to-day operations instead of forcing them to adjust to a fixed structure. From minor layout adjustments to more advanced process configurations, Odoo Studio puts customization directly into the hands of functional users, eliminating the dependency on technical development for most changes.
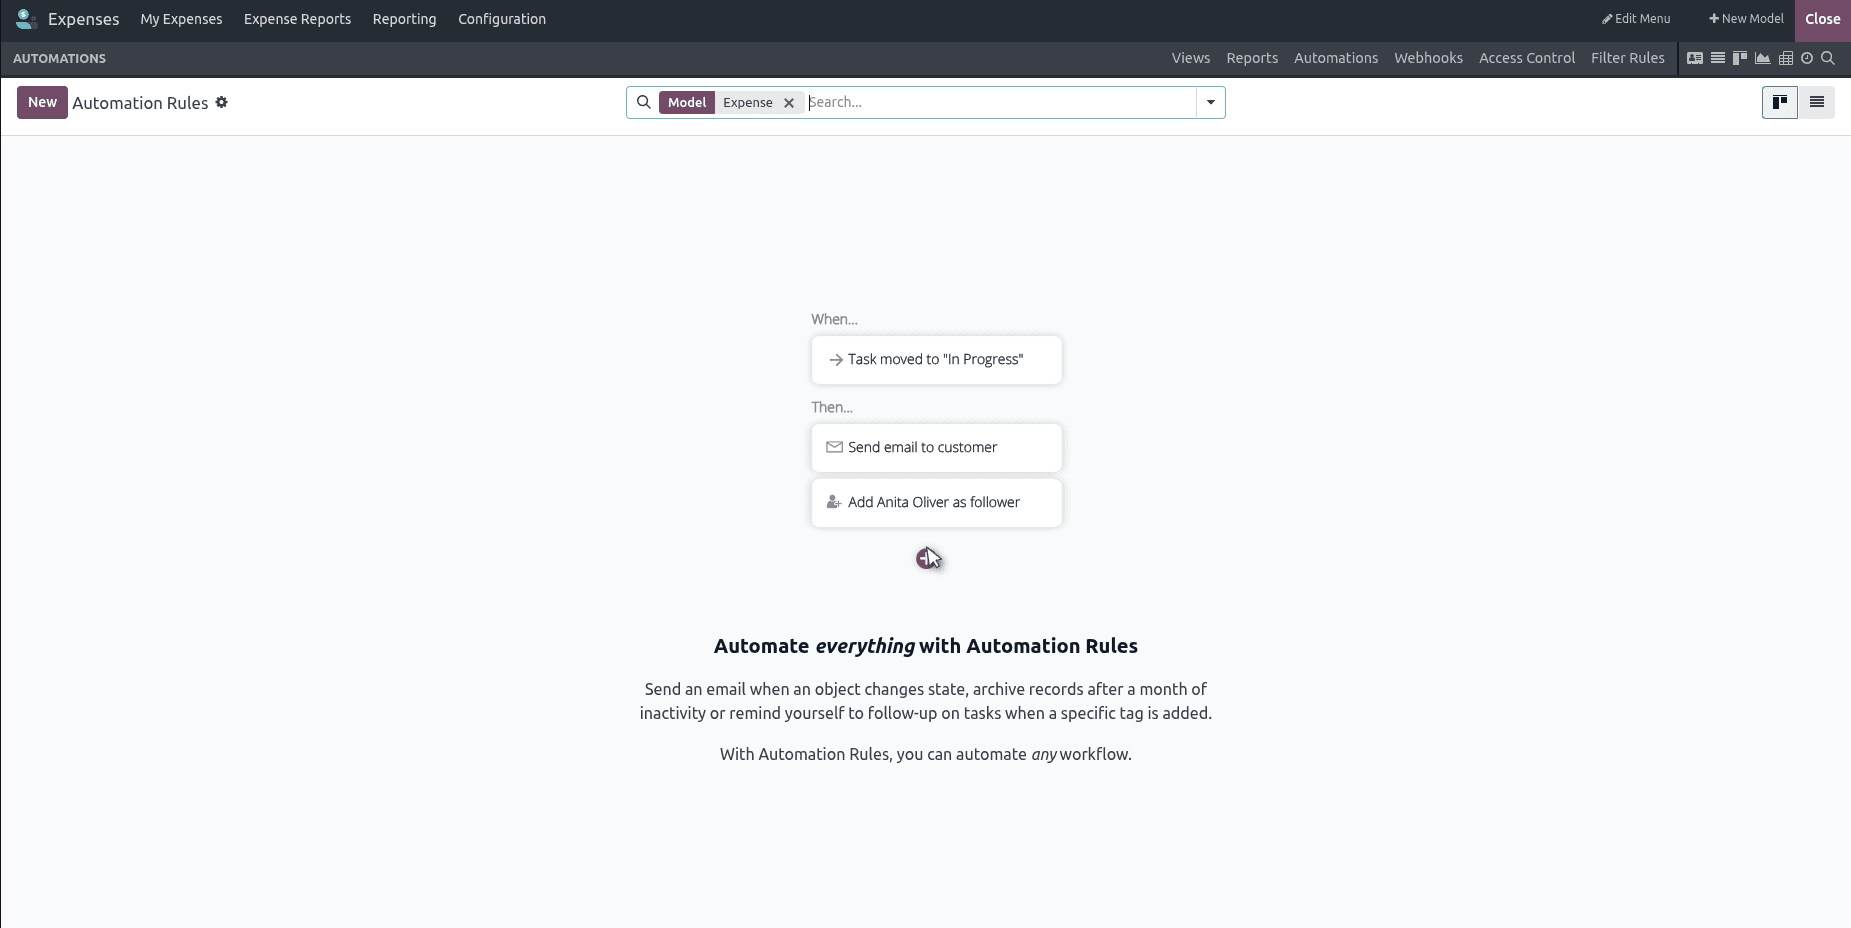
Among the wide range of features available in Odoo Studio, Automation and Filter Rules stand out as tools that significantly enhance productivity. Automation enables the system to perform specific actions automatically when certain conditions are met, such as sending an email reminder, scheduling a follow-up activity, or updating a record field. This not only saves time but also ensures important tasks are never missed.
Filter rules, on the other hand, allow you to set default filters, search parameters, or groupings so that users are presented with the most relevant records the moment they open a view. By applying filter rules, teams can save time, reduce unnecessary navigation, and maintain consistent data views across the organization. Together, these features streamline daily operations, reduce repetitive work, and help users focus on the tasks that matter most.
In this blog, we will explore the two functionalities—Automated Actions and Filter Rules—available in the Odoo 18 Studio module. The “Automated Actions” feature helps you trigger specific processes without manual intervention, while the “Filter Rules” menu allows you to add additional filtering options and default views to different menus in various Odoo applications. We will walk through the configuration process step-by-step, with supporting screenshots, to help you implement these features effectively in your own system.
Creating a New Automation Rule
One of the key advantages of the Odoo 18 Studio module is the ability to configure automated rules without manually updating multiple records or fields. This feature is especially useful when working with applications containing large volumes of data, as it allows you to trigger actions in the background whenever certain conditions are met.
To demonstrate the process, we’ll walk through creating a new automation for the Expenses module. You can follow the same approach in any other module according to your needs.
Begin by navigating to your Odoo dashboard and clicking the Toggle Studio icon in the top-right corner.
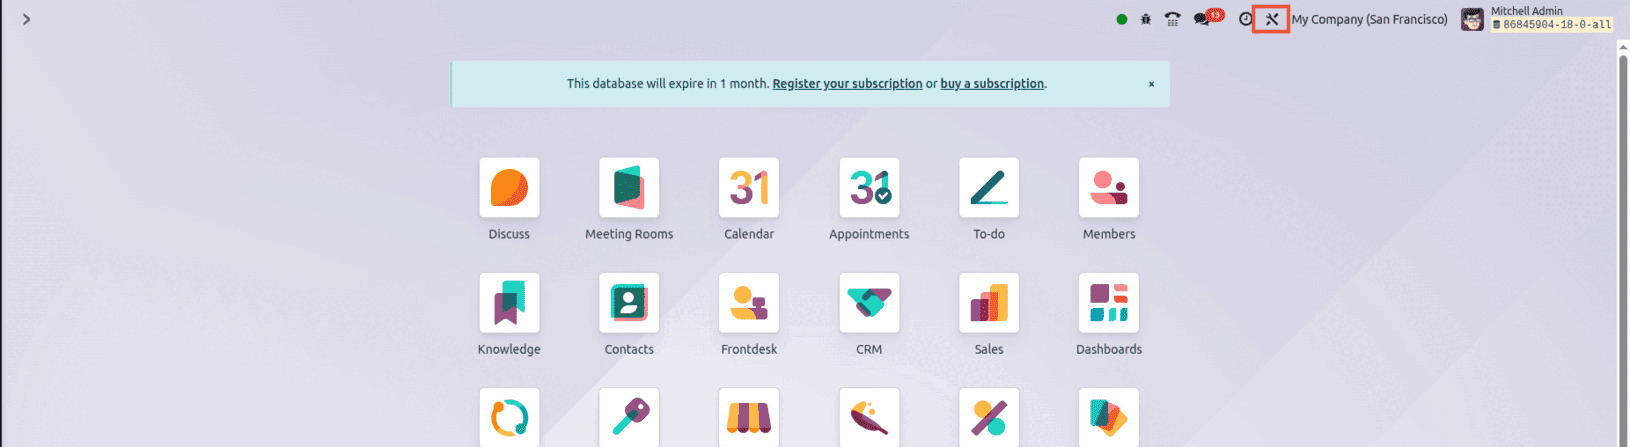
This button opens the Studio editing interface, where you can create a brand-new application or customize an existing one.
In our example, we will create a new application to showcase automation and filter rules. Once the Studio interface opens, click the “+” button to add a new application.
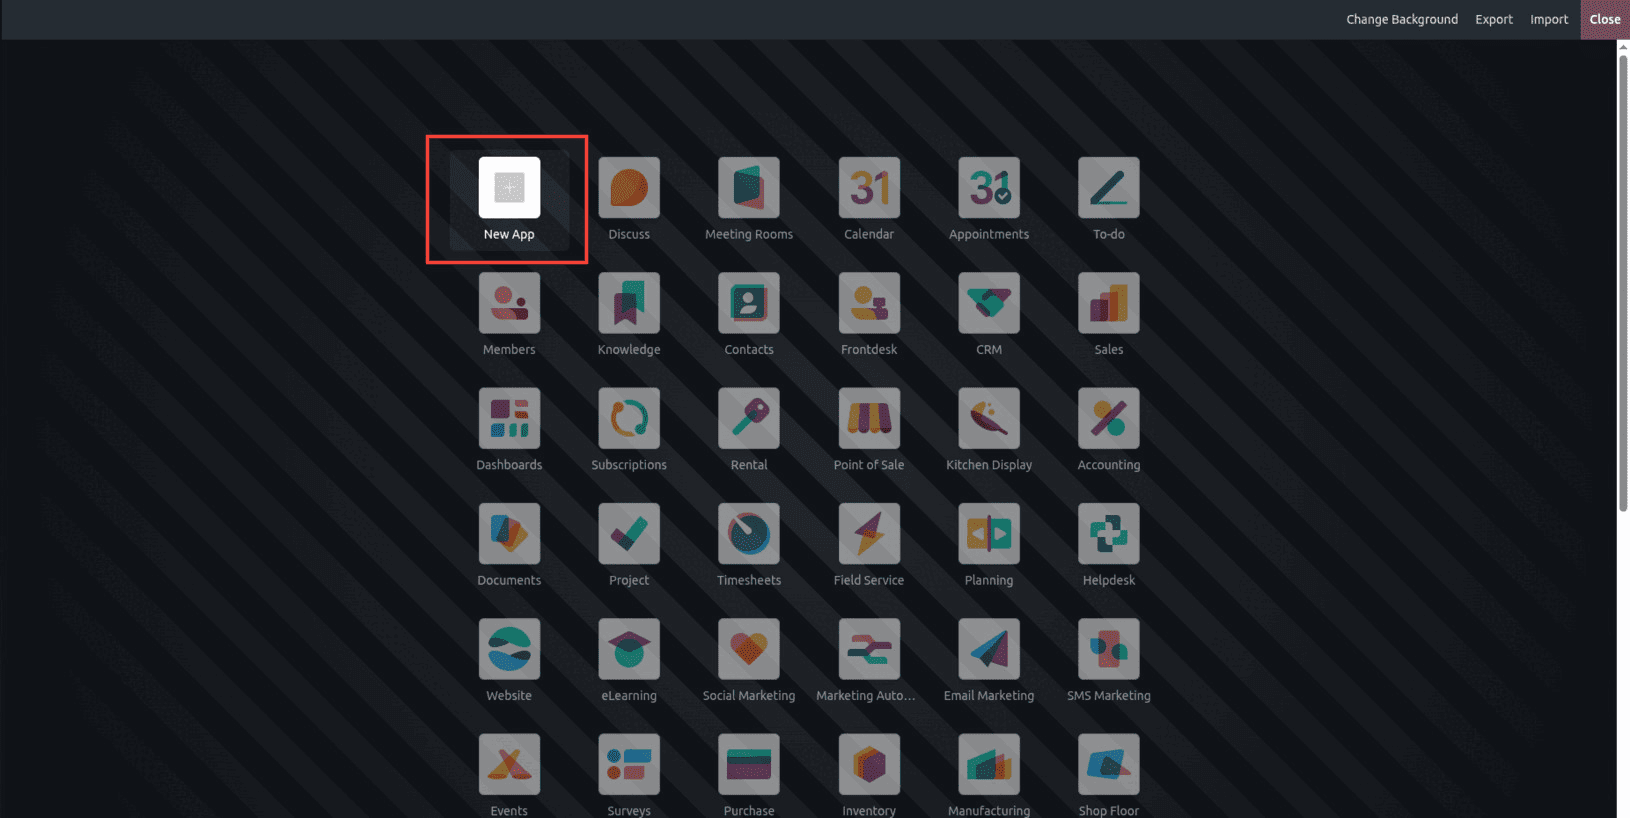
After clicking the “+” button, you’ll be guided through the application setup process.
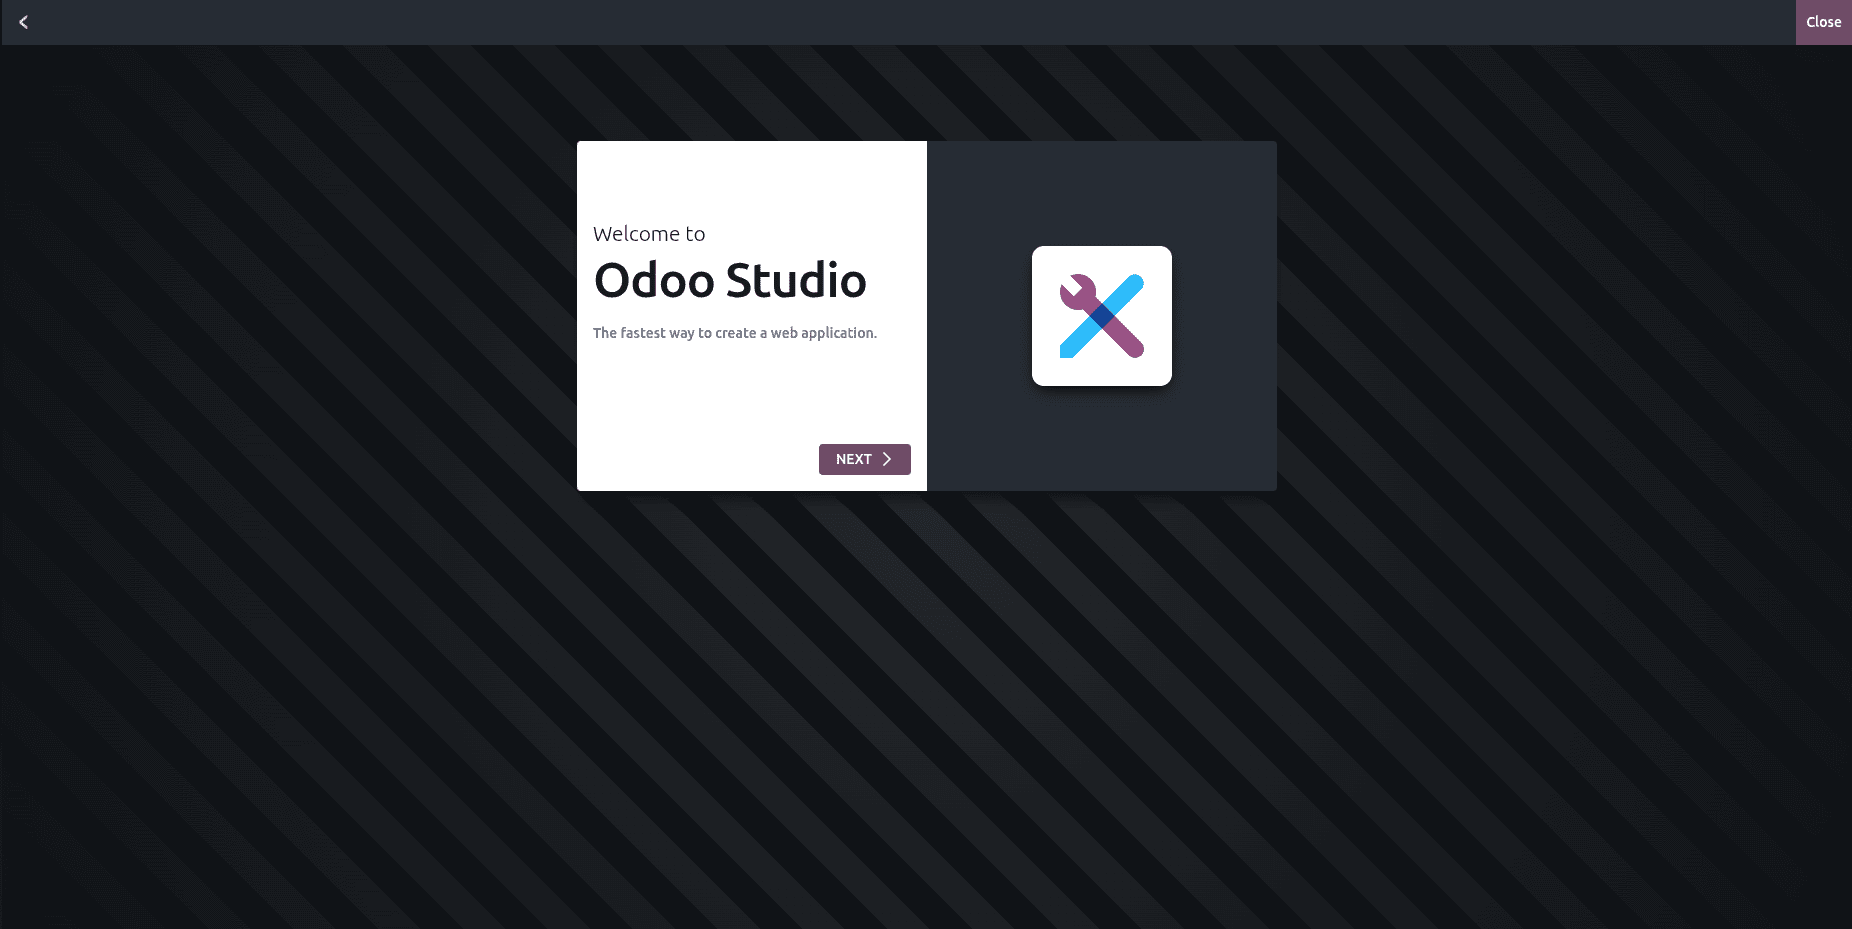
Click Next to move forward.
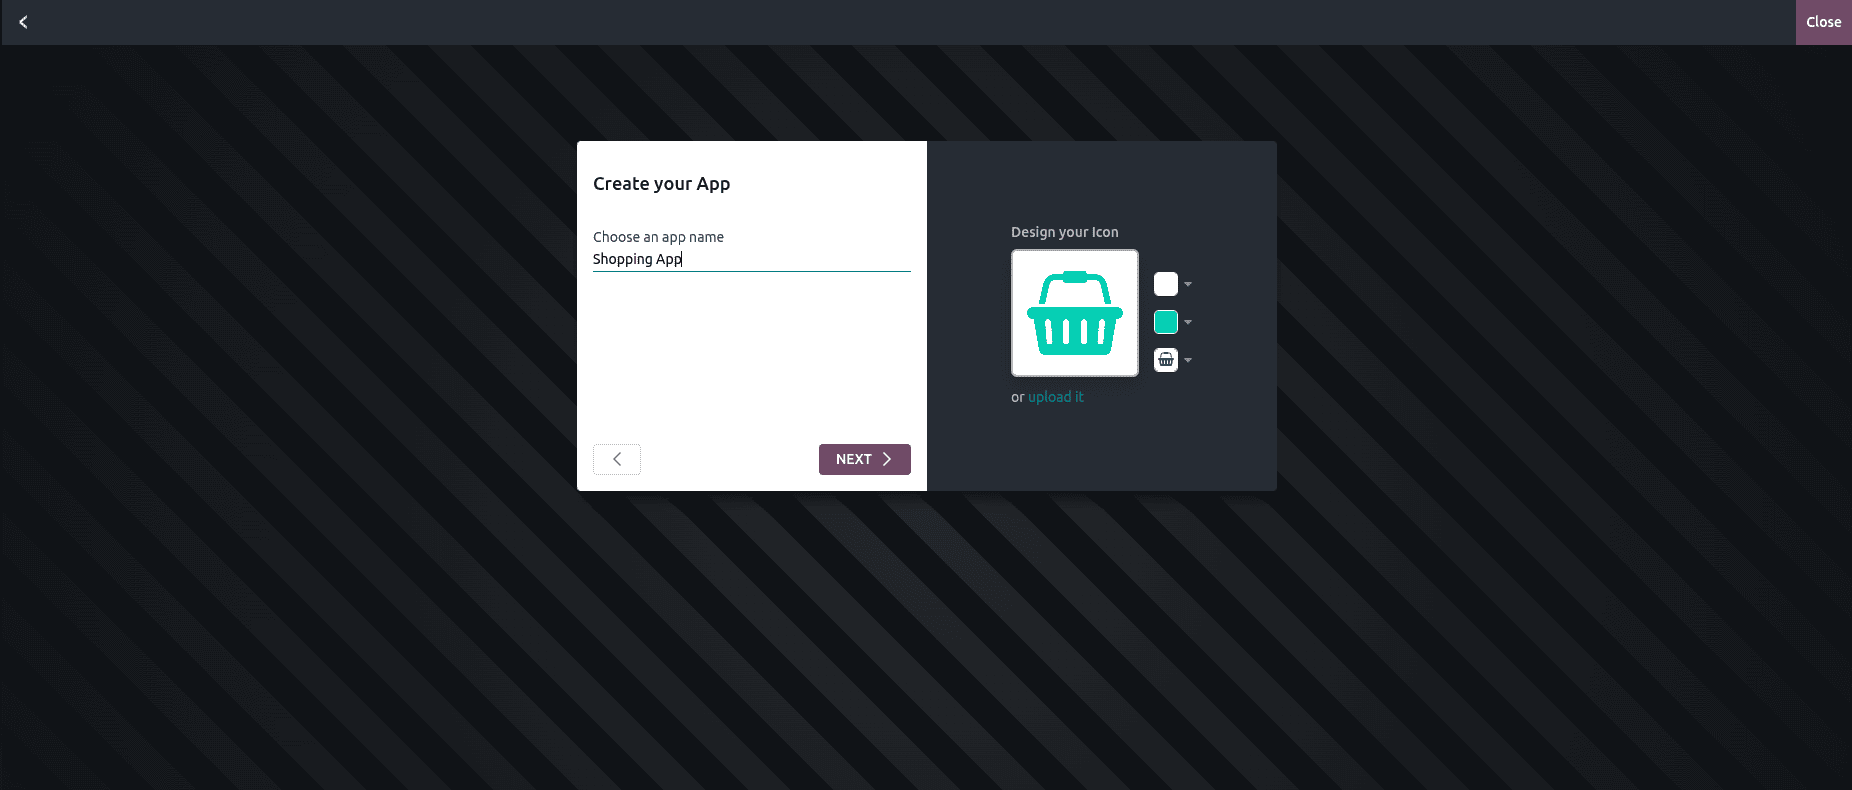
Here, you can enter details such as the Application Name and select an Icon that will represent your app.
Next, choose your application’s main menu and select the Application Model. You can either link to an existing model or create a new model from scratch.
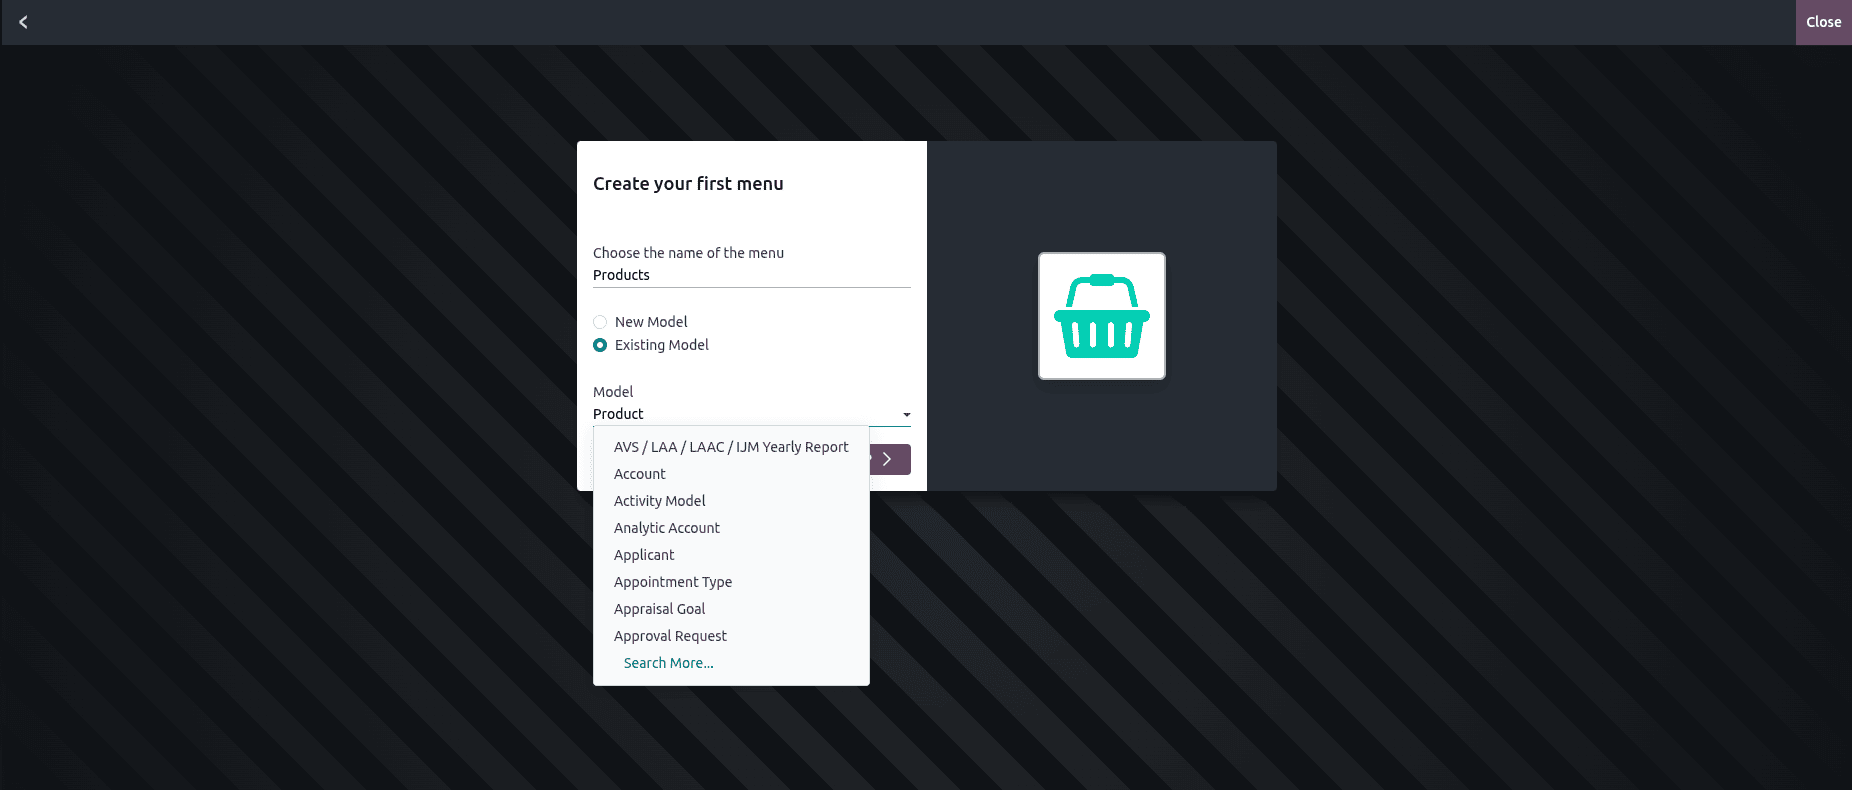
In this example, we will opt for a new model so we can fully customize it later.

Provide a clear First Object Name for your model — this will act as the main record type for your app.
If you choose to create a new menu, a pop-up will allow you to select the features and field types you want to include.
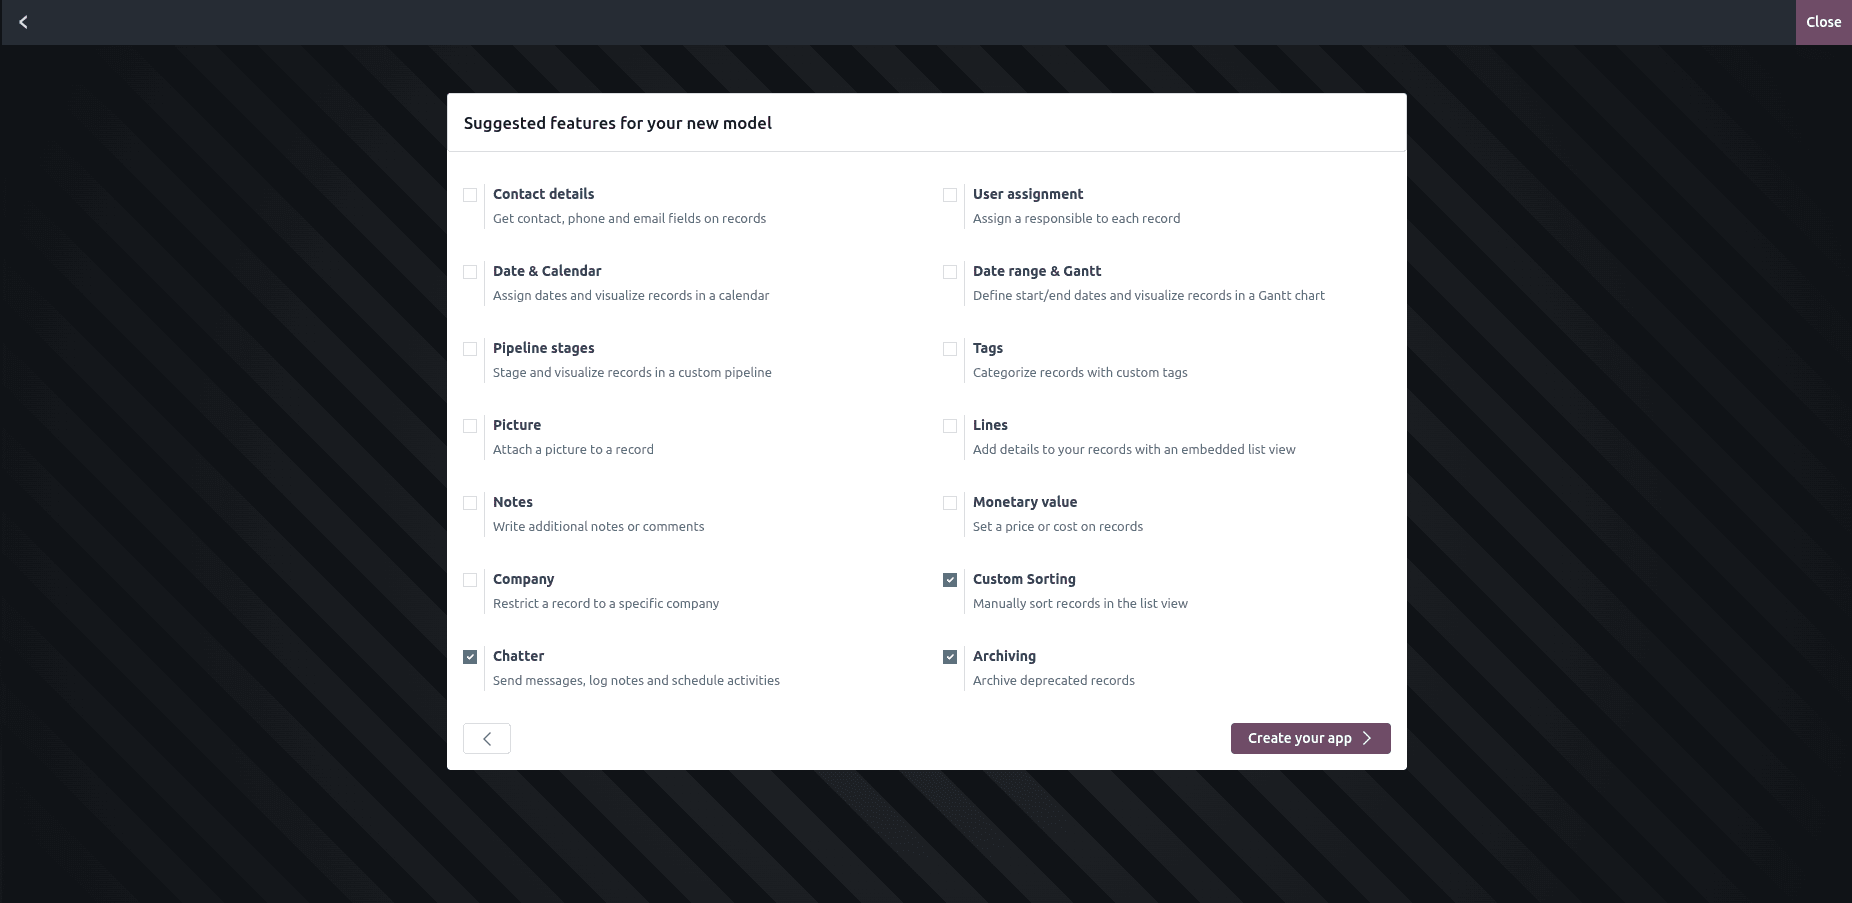
Once you’ve completed these setup steps, click Create. Odoo will now save your model data and generate the initial version of your application.
Opening your new app will show a default form view, ready for customization.
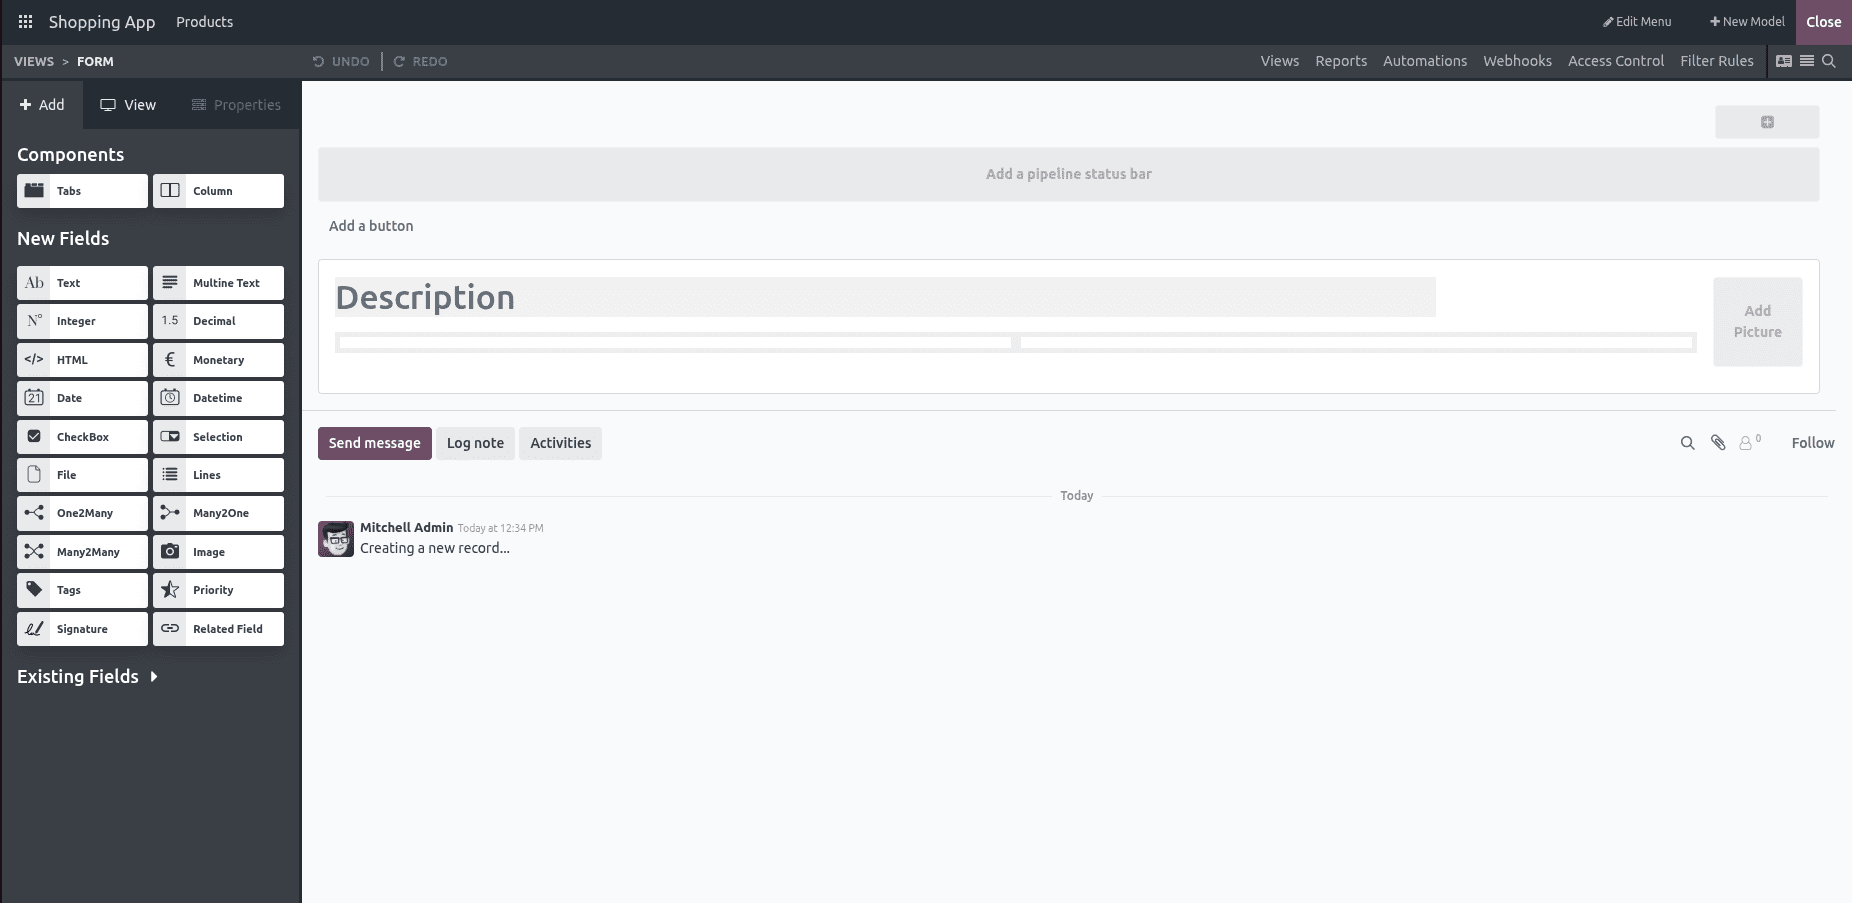
If your app has only one menu for now, you can create additional ones by clicking the + New Menu button at the top right of the menu bar.
Creating Pipeline Stages and Applying Automation
In this section, we will walk through the process of creating pipeline stages in Odoo 18 Studio and then configuring automation rules to streamline workflow transitions.
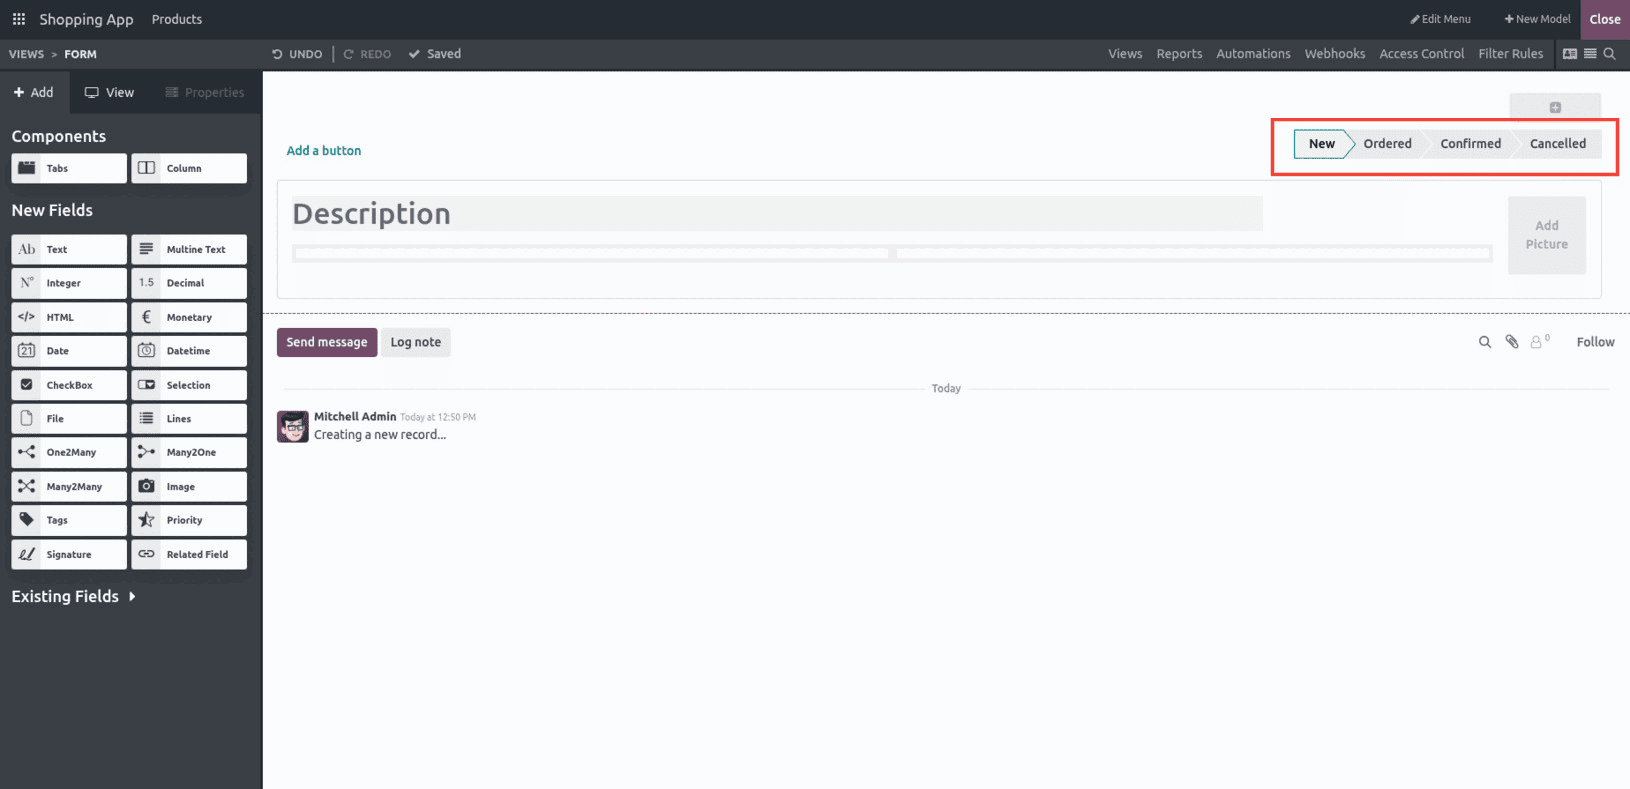
Pipeline stages act as the checkpoints in a process flow, helping you track progress more effectively. For this demonstration, let’s create four stages — New, Confirmed, Ordered, and Cancelled — and then apply automation so that certain actions happen automatically when the stage changes.
To begin, navigate to the form view where you want to add stages. At the top of the interface, click on the “Add a pipeline status bar” button.
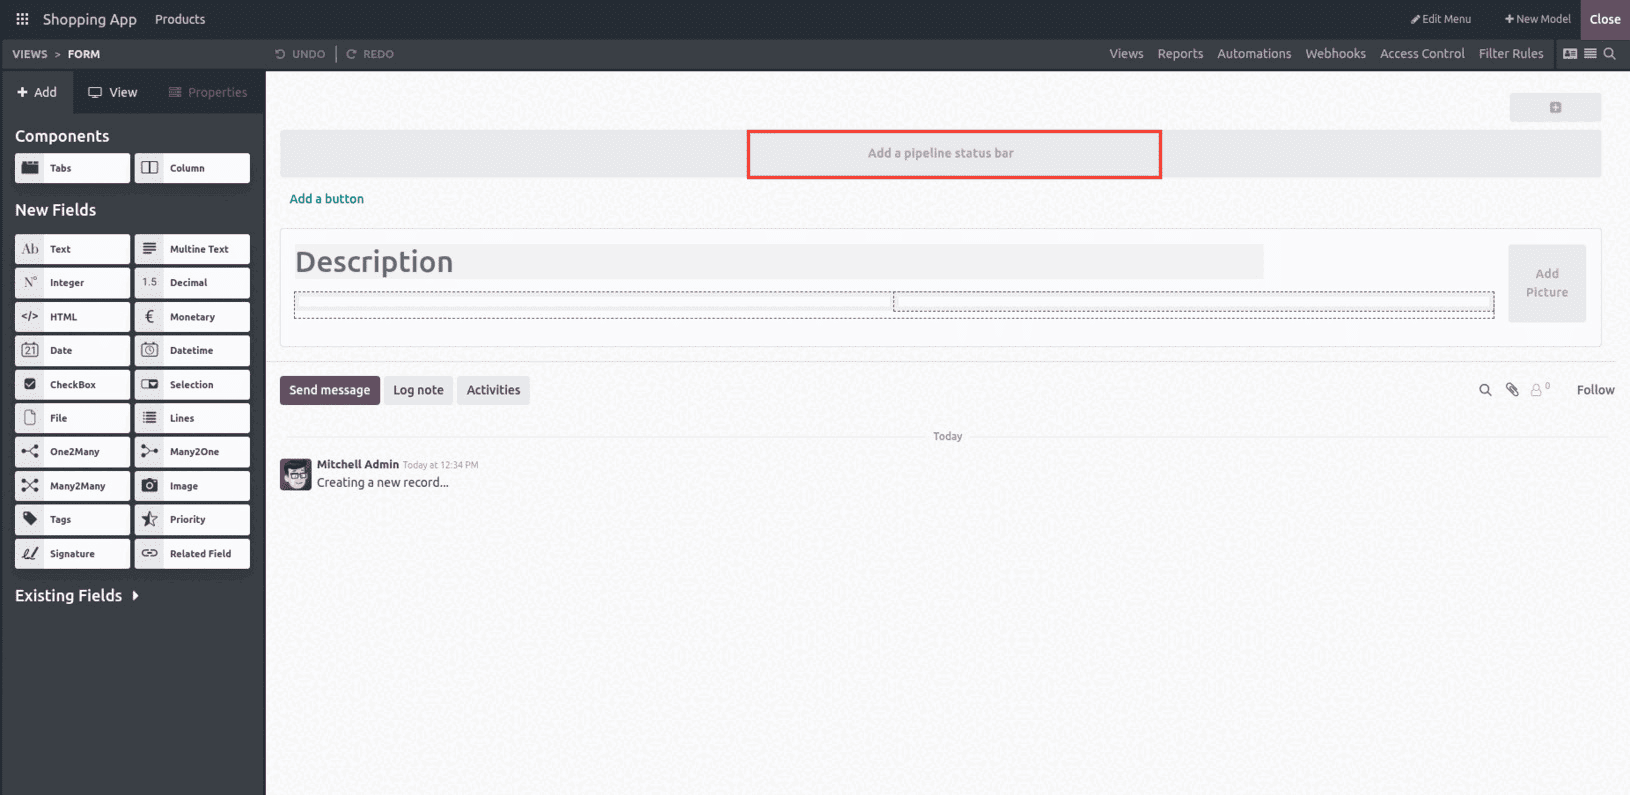
A Field Properties pop-up window will appear. Here, type the required stage names directly into the list.
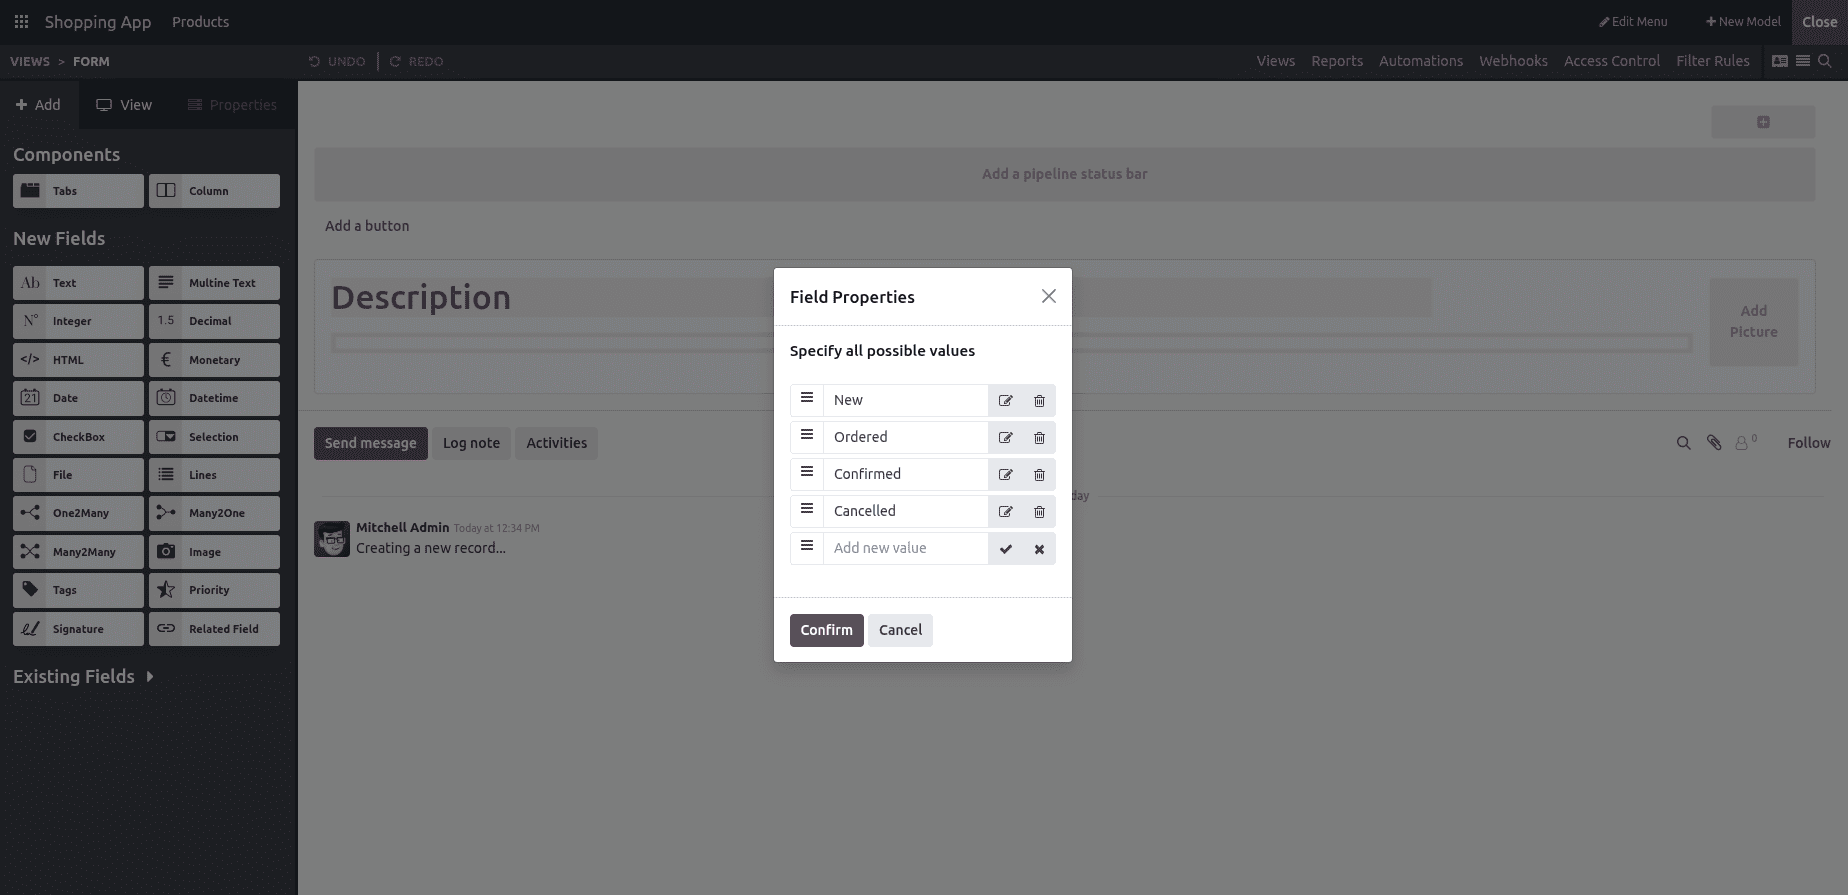
You can edit an existing stage by clicking the edit icon, or create new ones by selecting “Add new value”. For this example, we have added New, Ordered, Confirmed, and Cancelled as our stages. Once done, click CONFIRM to save.
Setting Automation Rules
One of the most powerful features of Odoo Studio is the Automation property, which allows you to create rules that perform specific actions based on predefined triggers. While automation can be applied to any field across Odoo, here we will focus on automating pipeline stage transitions.
After adding your stages, click on one of the stage fields to open its editing options on the left sidebar.
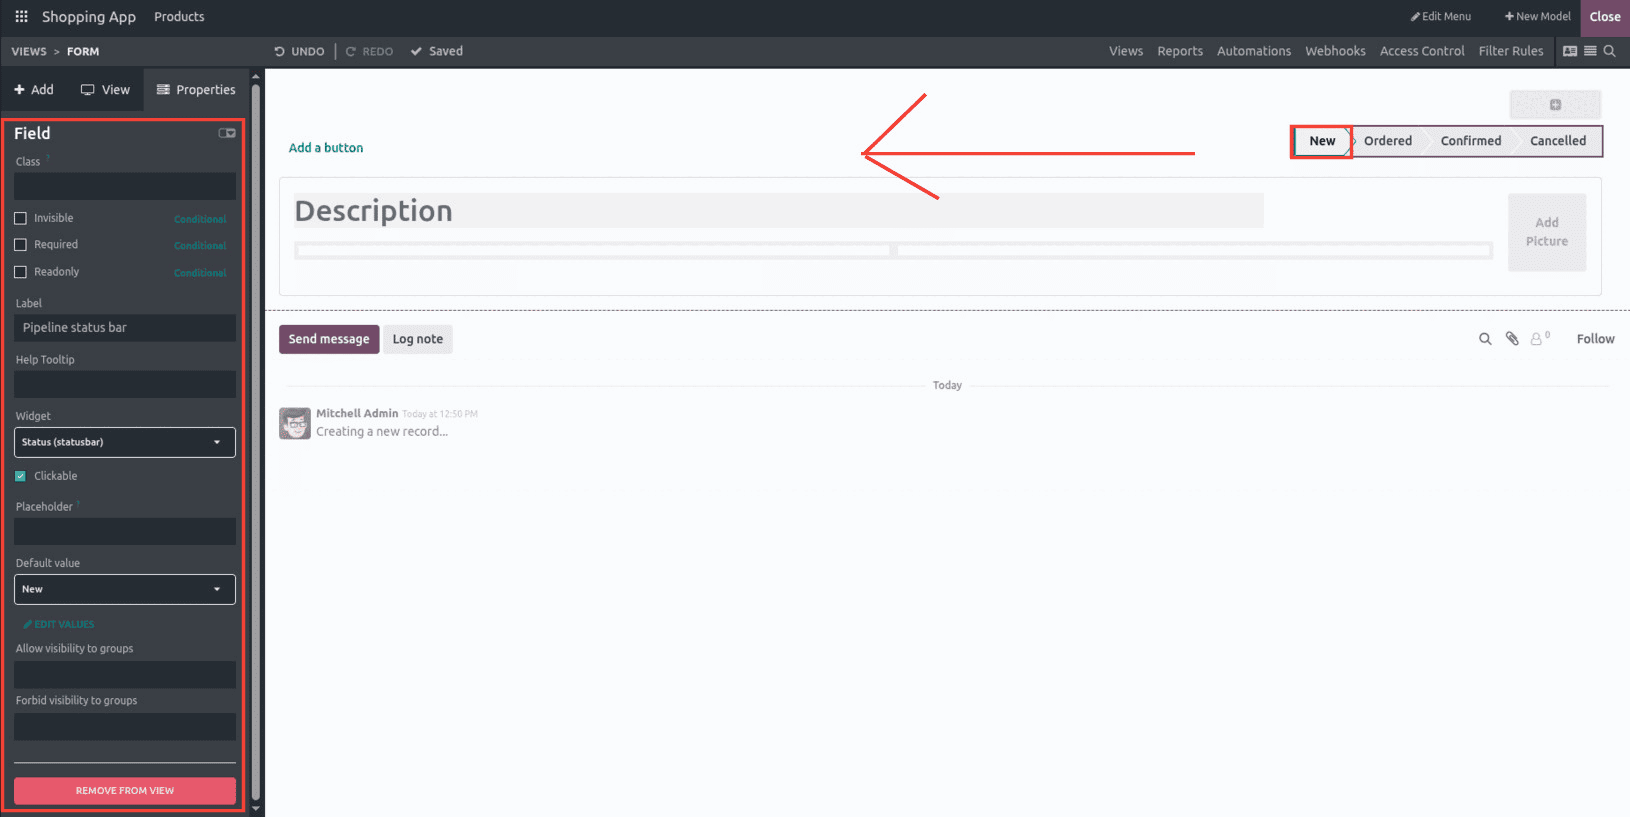
From there, select the “Automation” tab. This opens the Automated Actions dashboard, which initially will be empty.
Click NEW to create a new automation rule. This opens a configuration form where you can define the Action Name, choose the Model.
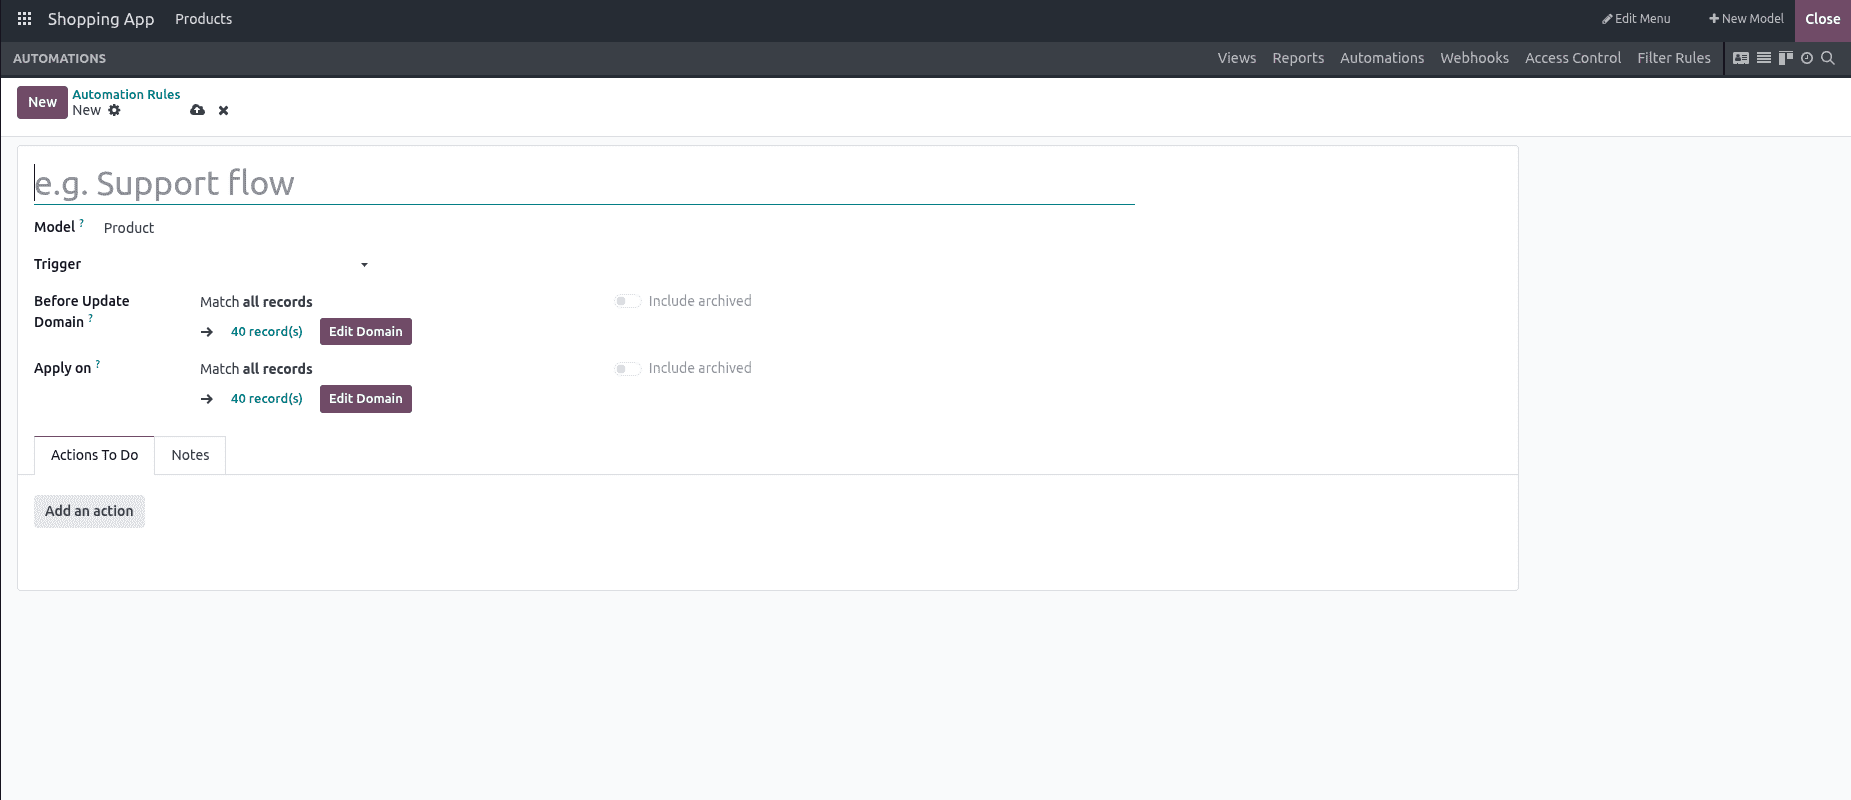
Below that, you will find several important fields to configure. We can go through them one by one.
Triggers
In Odoo 18 Studio, triggers are the starting point of any automation rule. They define the exact condition or event that will cause your rule to run. Think of a trigger as the “when” part of the automation — for example, When a field changes, When a record is created, or When an email is received. The right trigger ensures your automation happens at the right time without unnecessary execution.
When setting up automation, Odoo provides several trigger options grouped by their nature — Value Updates, Email Events, Timing Conditions, Custom Actions, and External Events. Each has its own role and is useful in different scenarios.
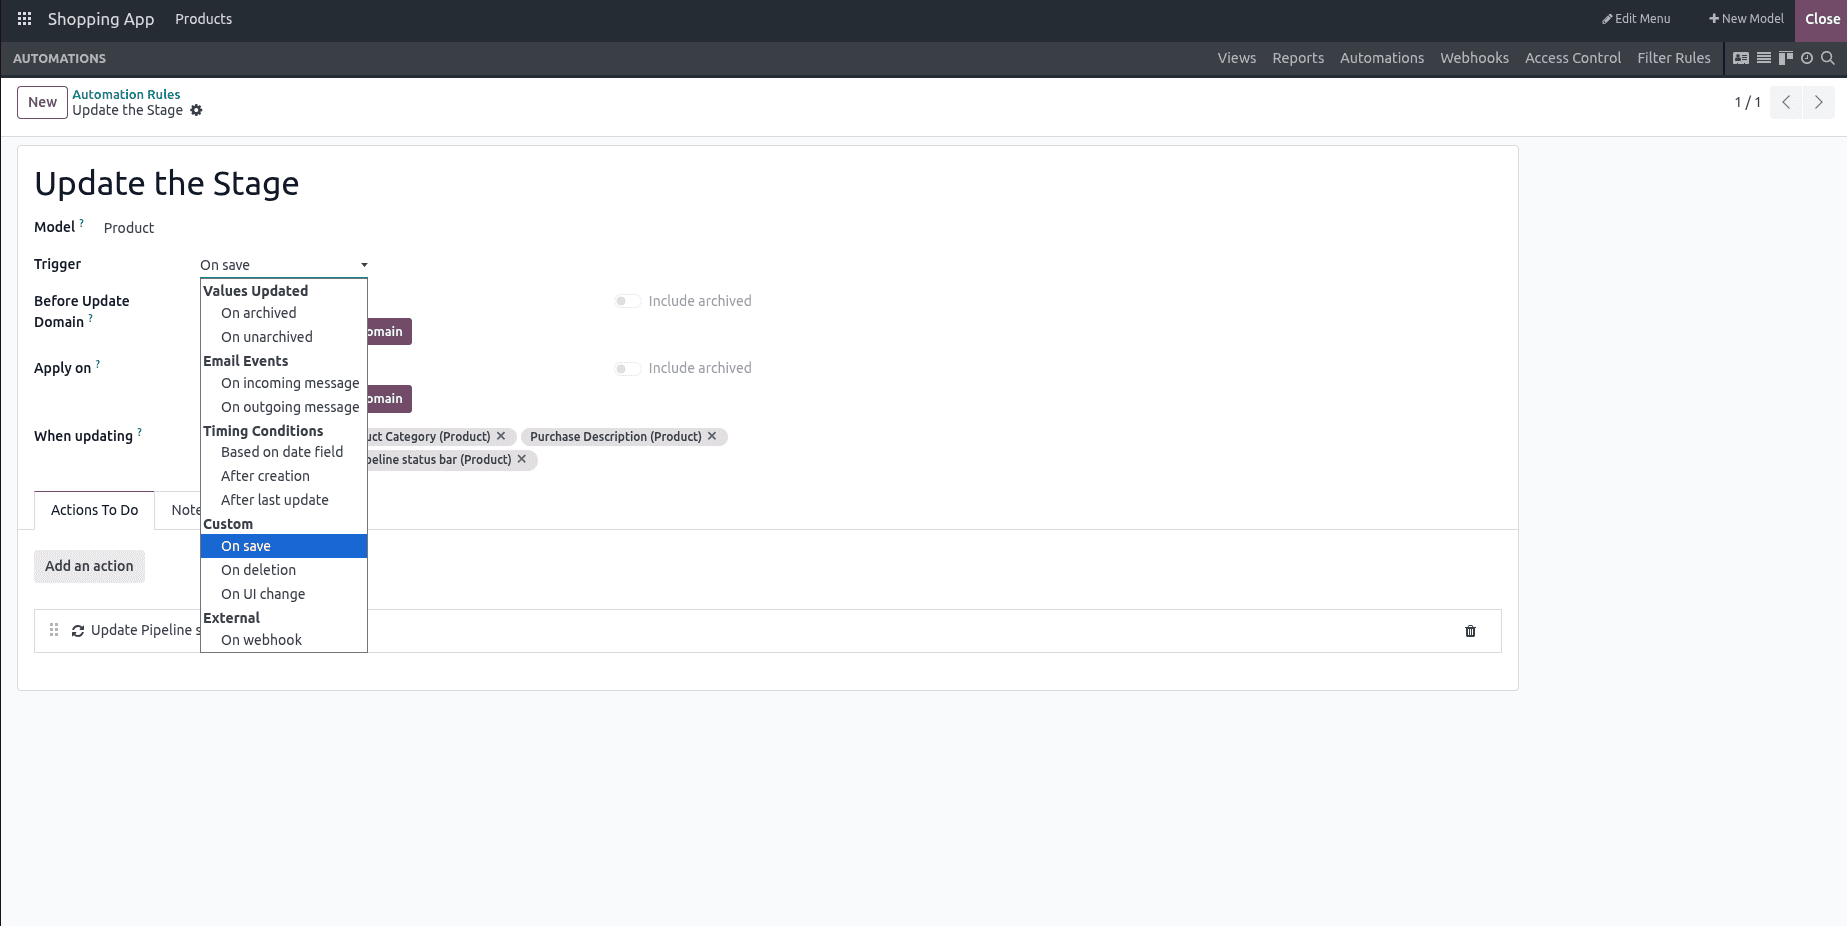
- Values Updated
- On archived / On unarchived: Fires when a record is archived or restored.
- Ideal for workflows that need to react when records are activated or deactivated.
- Email Events
- On incoming message: Executes when the record receives a new message (email or chatter).
- On outgoing message: Executes when an email or message is sent from the record.
- Useful for CRM or Helpdesk automations where communication triggers actions.
- Timing Conditions
- Based on date field: Runs relative to a specific date/time field, like 3 days before a deadline.
- After creation: Fires right after the record is created.
- After last update: Runs after any field changes on the record.
- Custom
- On save: Executes every time the record is saved.
- On deletion: Fires when the record is deleted.
- On UI change: Triggered by a field change made directly in the user interface (without needing to save).
- External
- On webhook: Executes when an external system sends data to Odoo via a webhook.
Action To-Do
The Actions To Do tab in Odoo automation rules defines what should happen when the specified trigger conditions are met. It allows you to choose from a variety of predefined actions, ranging from updating existing records to sending notifications or executing custom code. This flexibility ensures that business processes can be automated to respond instantly to changes without manual intervention.
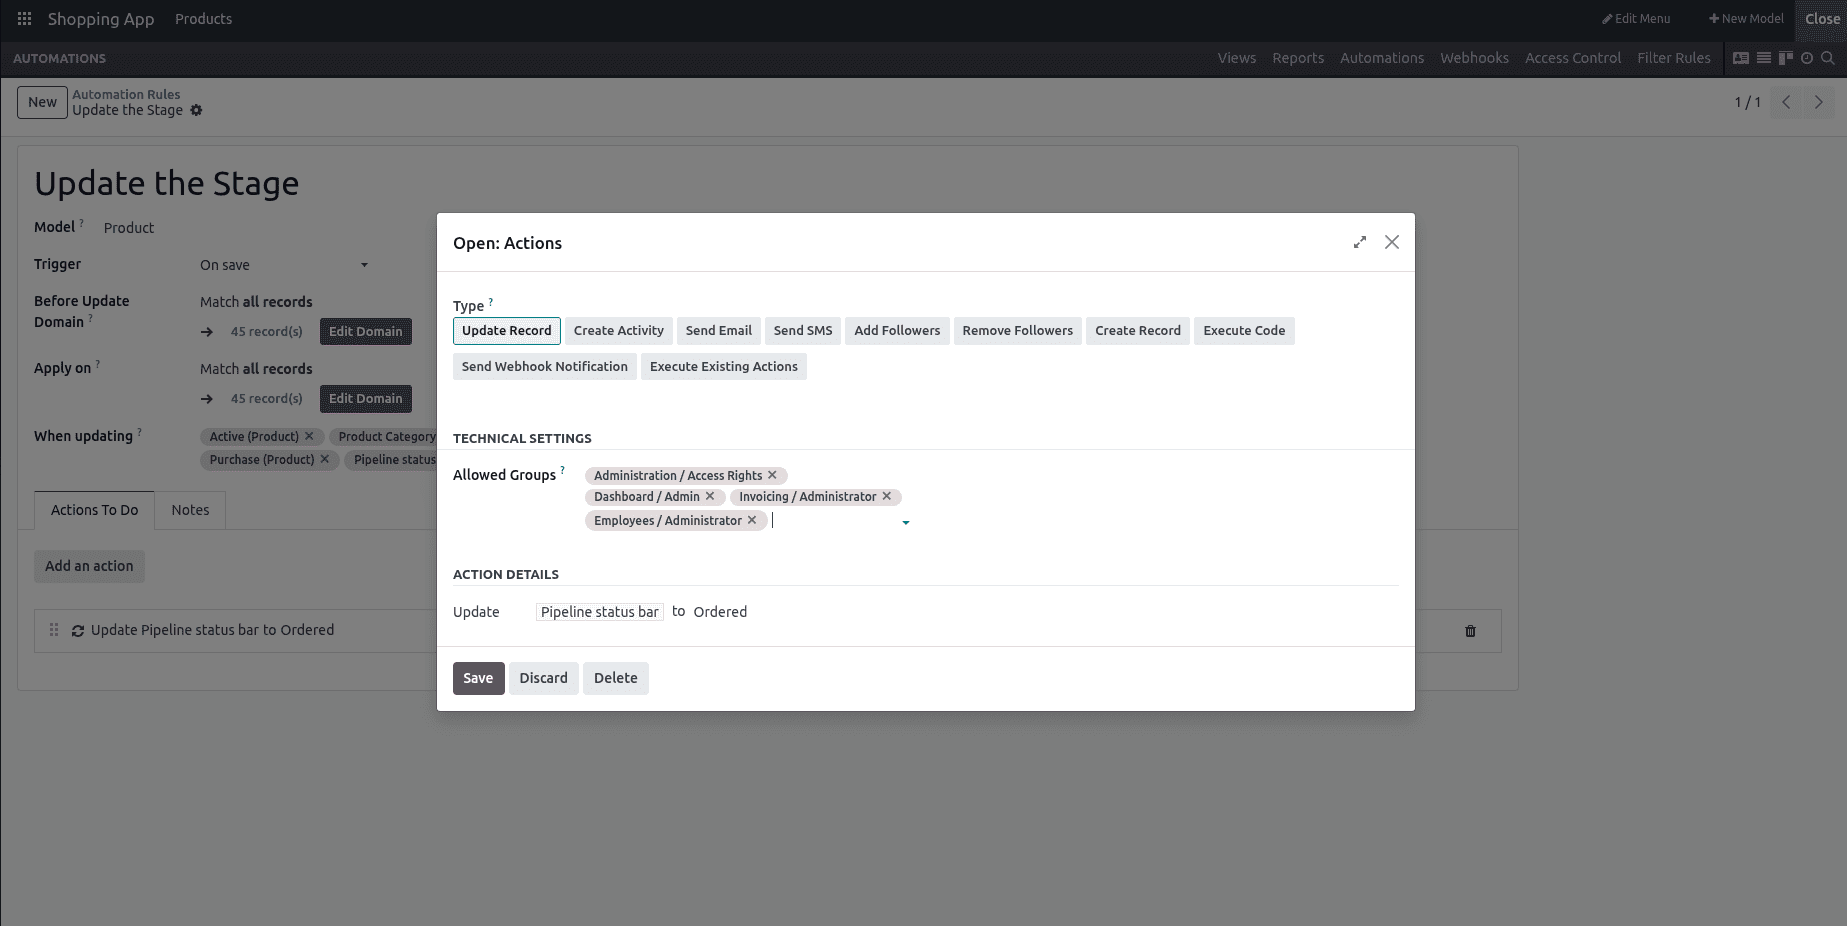
You can choose from various action types depending on the outcome you want.
Update Record – Modify the values of specific fields in an existing record.
Create Activity – Schedule a to-do, meeting, or follow-up linked to the record.
Send Email – Automatically send an email to the relevant contact(s).
Send SMS – Send an SMS notification or alert.
Add Followers – Add users as followers so they receive updates about the record.
Remove Followers – Remove users from the follower list of the record.
Create Record – Generate a new record in the selected model.
Execute Code – Run a custom Python code snippet for complex actions.
Send Webhook Notification – Send data to an external application or service via webhook.
Execute Existing Actions – Reuse an already configured action instead of creating a new one.
By carefully selecting the right actions, users can streamline workflows, reduce repetitive tasks, and ensure timely updates across the system.
Trigger Fields
This field allows you to choose exactly which fields Odoo should monitor for changes in order to trigger the automation. It is a many-to-many field, so you can select multiple fields from the related model—in this case, the Product model.
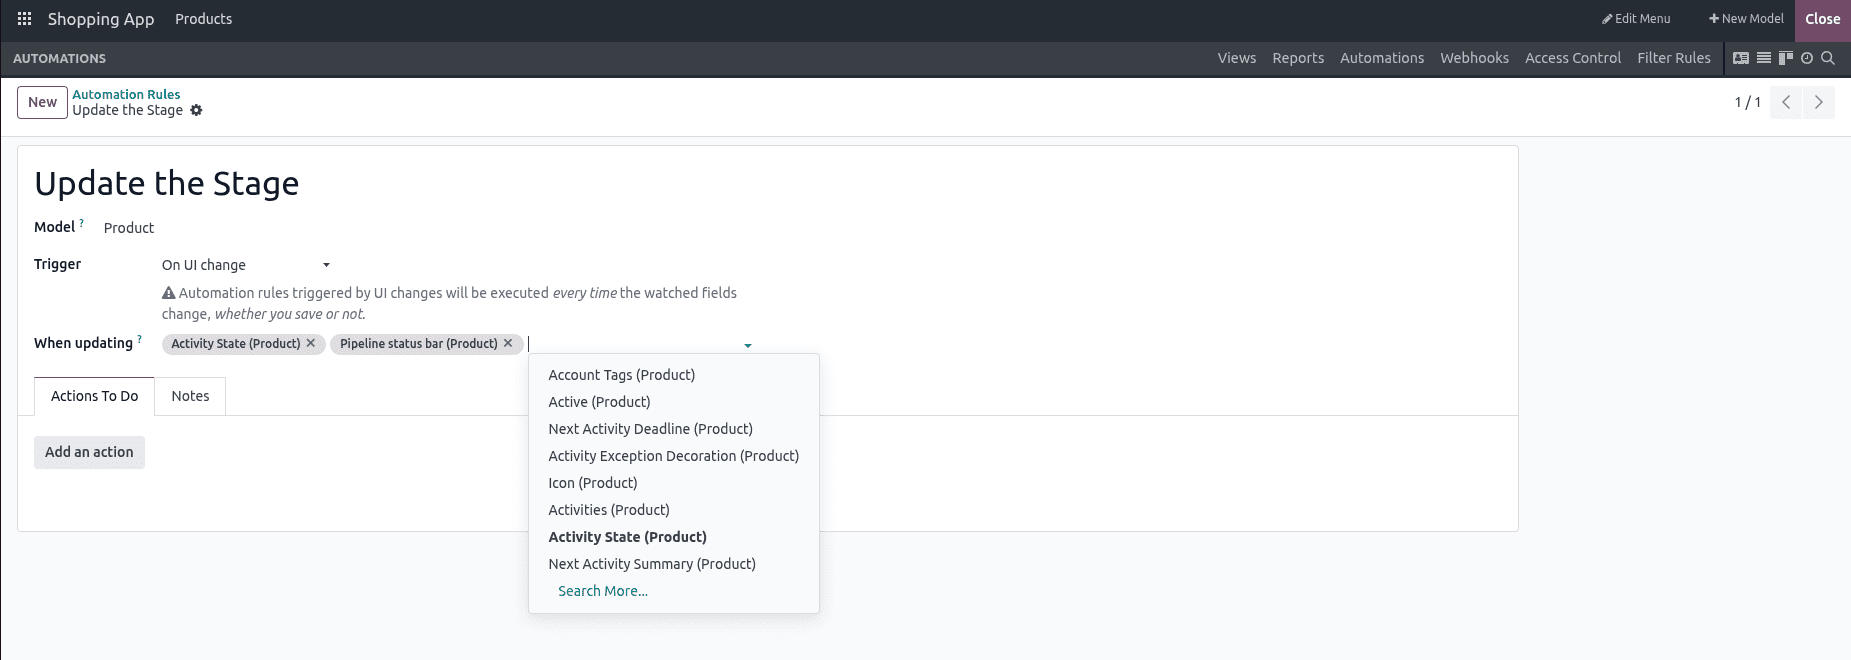
Each selected field appears as a tag (for example, Activity State (Product) or Pipeline Status Bar (Product)). The automation rule will execute only when any of these chosen fields are updated. This lets you narrow the trigger down to specific changes instead of firing for every edit on the record.
Notes
The Notes tab is a simple yet useful space to store additional information related to the automation rule.
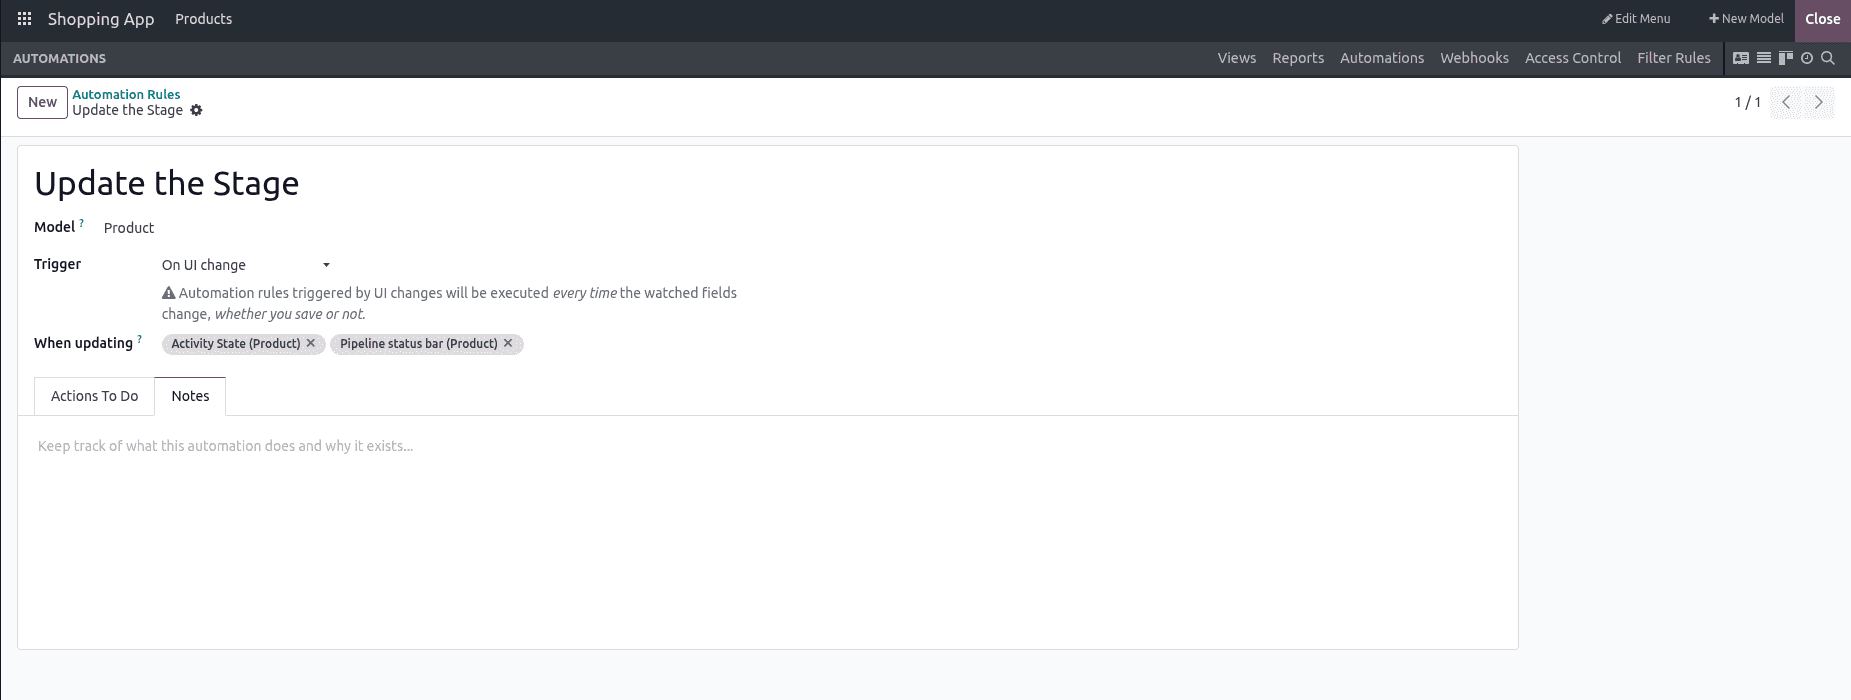
Here, you can jot down reminders, special instructions, or contextual details that may help other users (or your future self) understand why the rule was created and how it should be maintained.
Once all configurations are complete, save the automated action using the Save icon. Once the automated action is configured, it is important to verify that it works as expected. In our example, the automation was set to update the State field to Ordered whenever a product record is created or updated.
Create a new product record. Before saving, you will notice that the State field is set to New.
Save the record. Immediately after saving, the State field will automatically change to Ordered without any manual update.
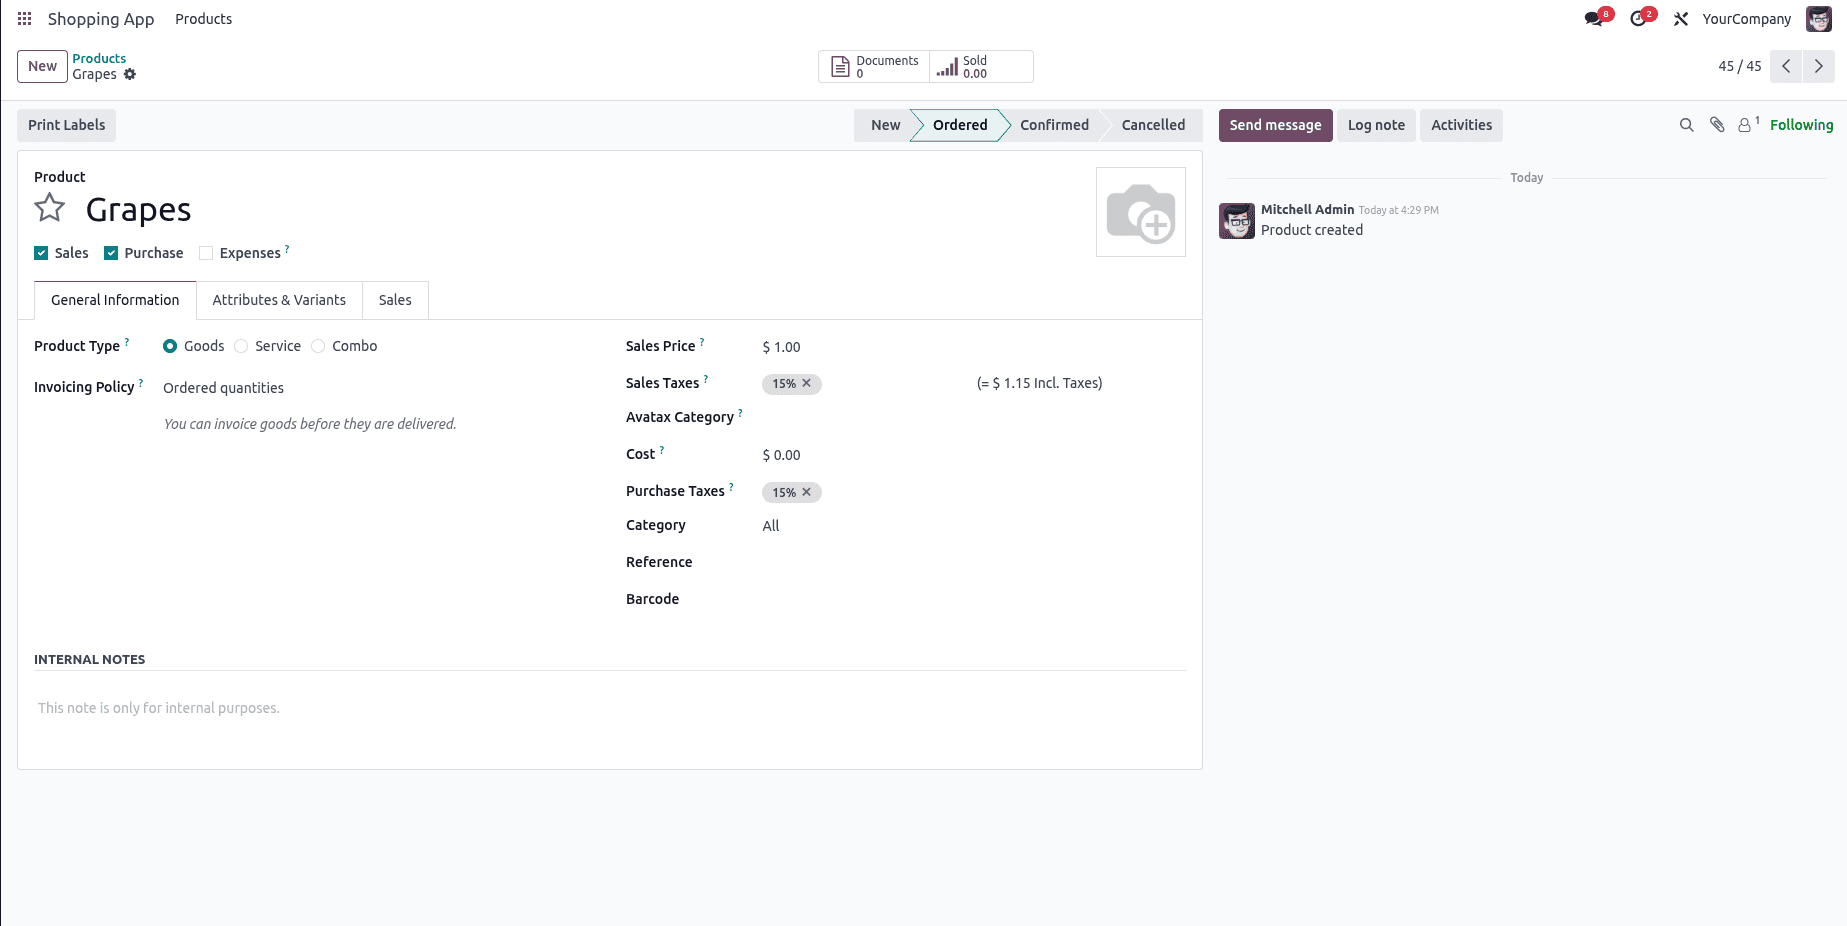
This confirms that the automated action has been triggered successfully and the rule is working as intended. The same logic can be applied to other fields and models, depending on your business requirements.
Creating and Applying Filter Rules
The Filter Rules feature in Odoo Studio is a powerful tool that allows you to create custom filters for any module in your application. This is especially useful when you want to quickly access specific records based on certain conditions, without manually applying filters every time.
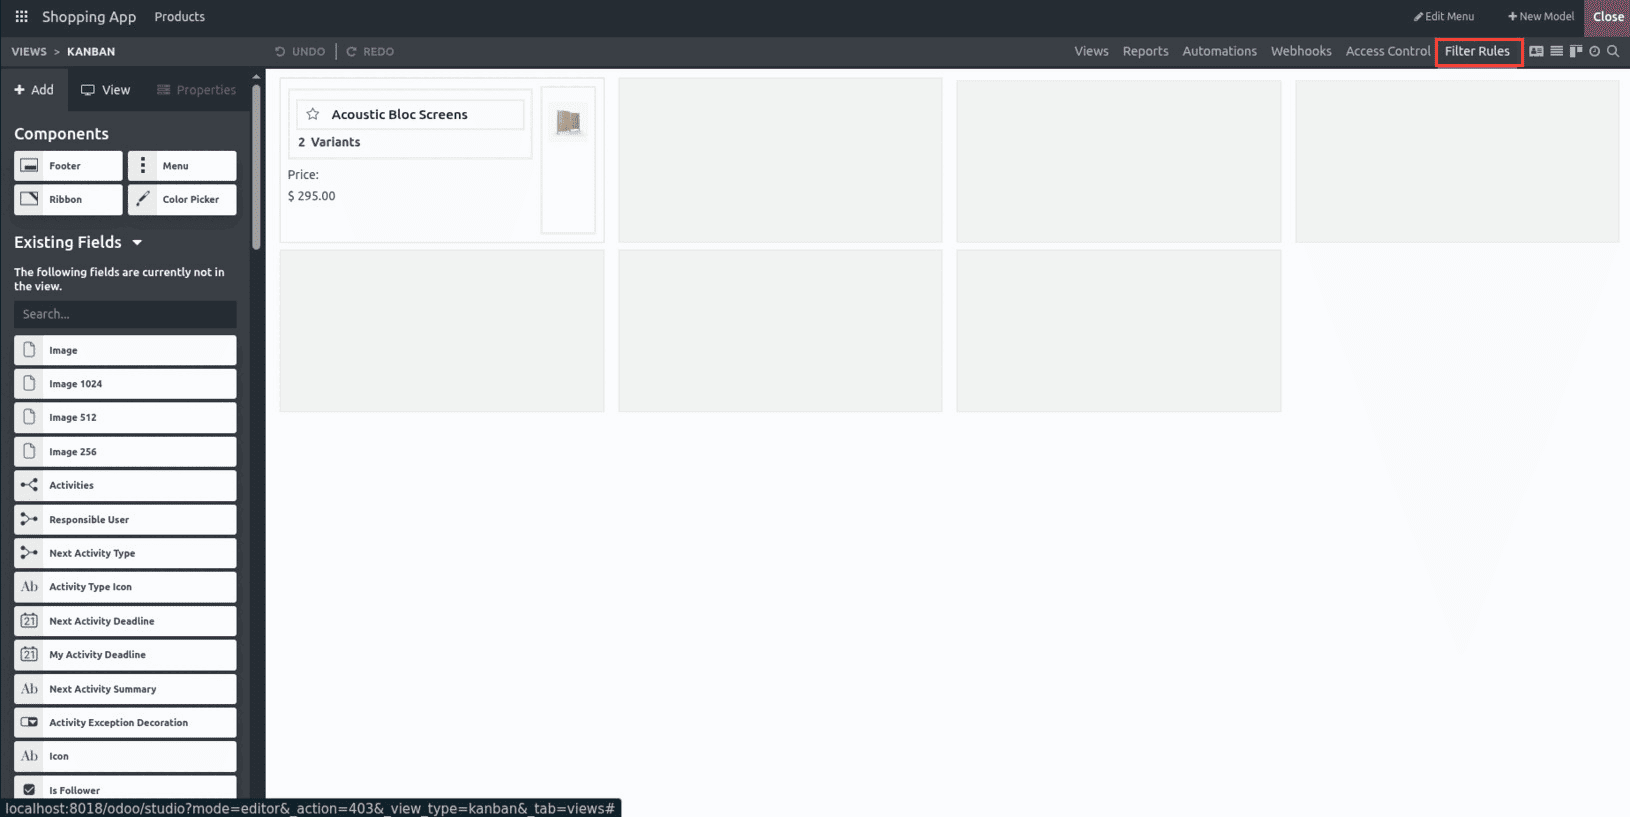
To access this option, open the Studio module for your desired application and navigate to Filter Rules.
You will see a dashboard displaying the following columns: Filter Name, Model, User, Default Filter, Action, Domain, Context, and Sort.
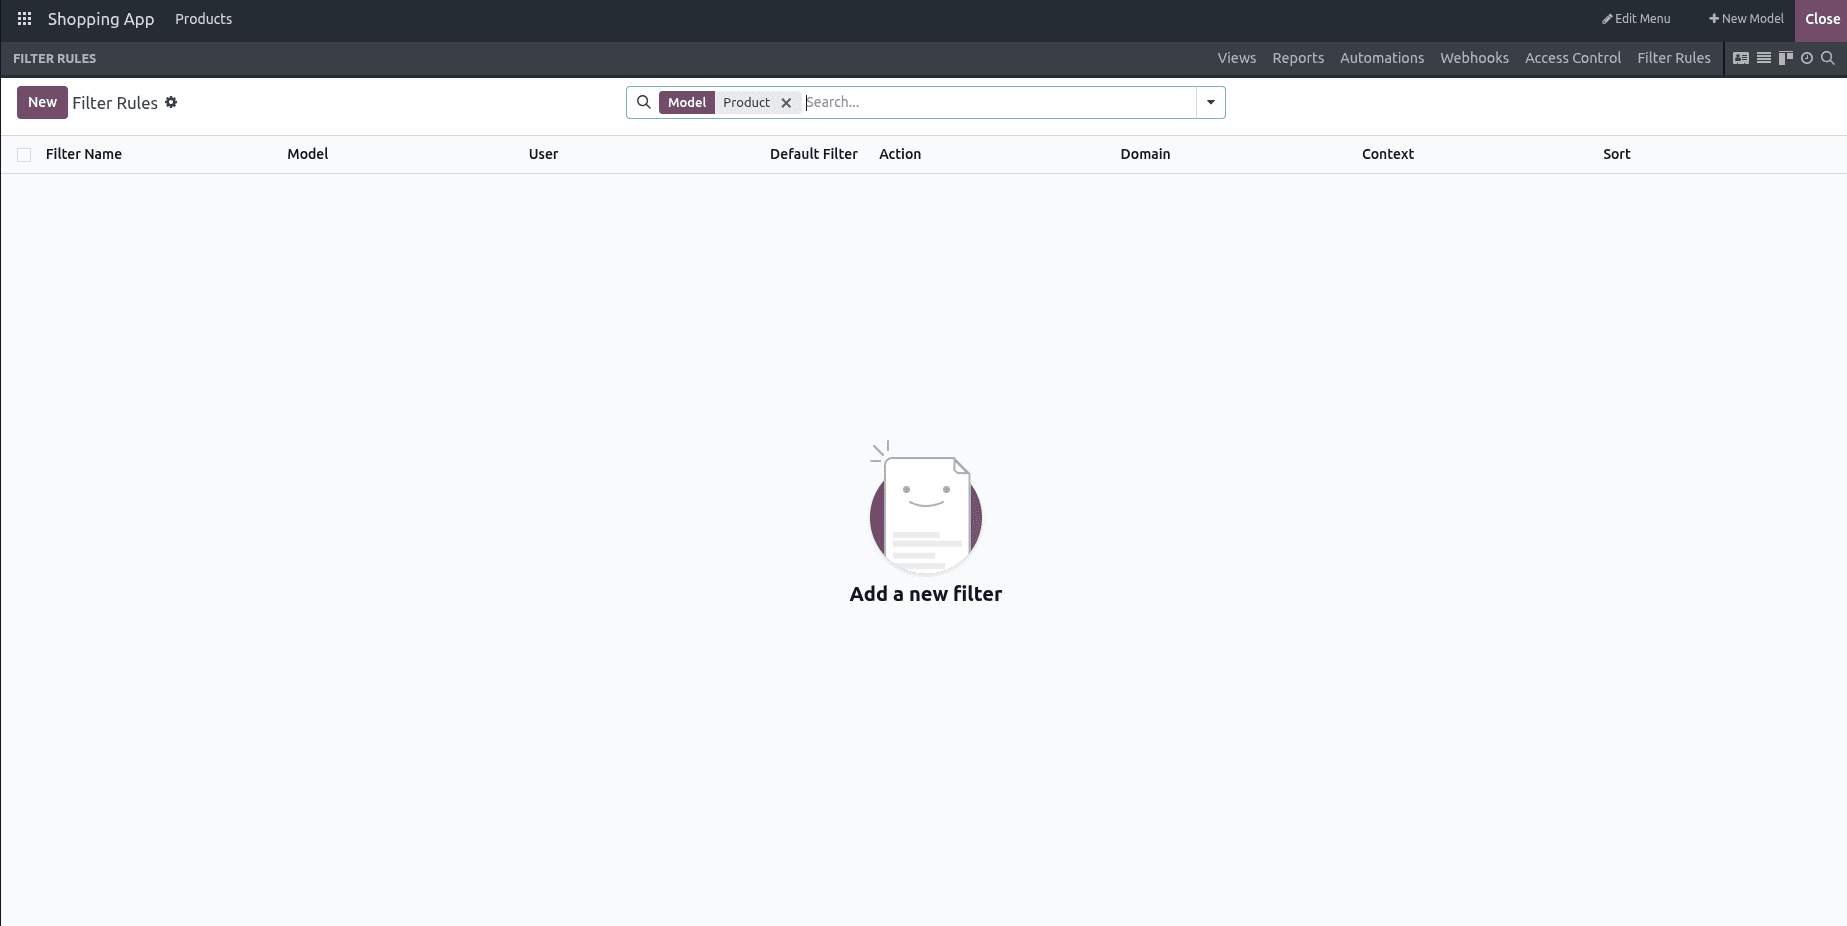
In our example, there are no existing rules, so we’ll create one by clicking New.
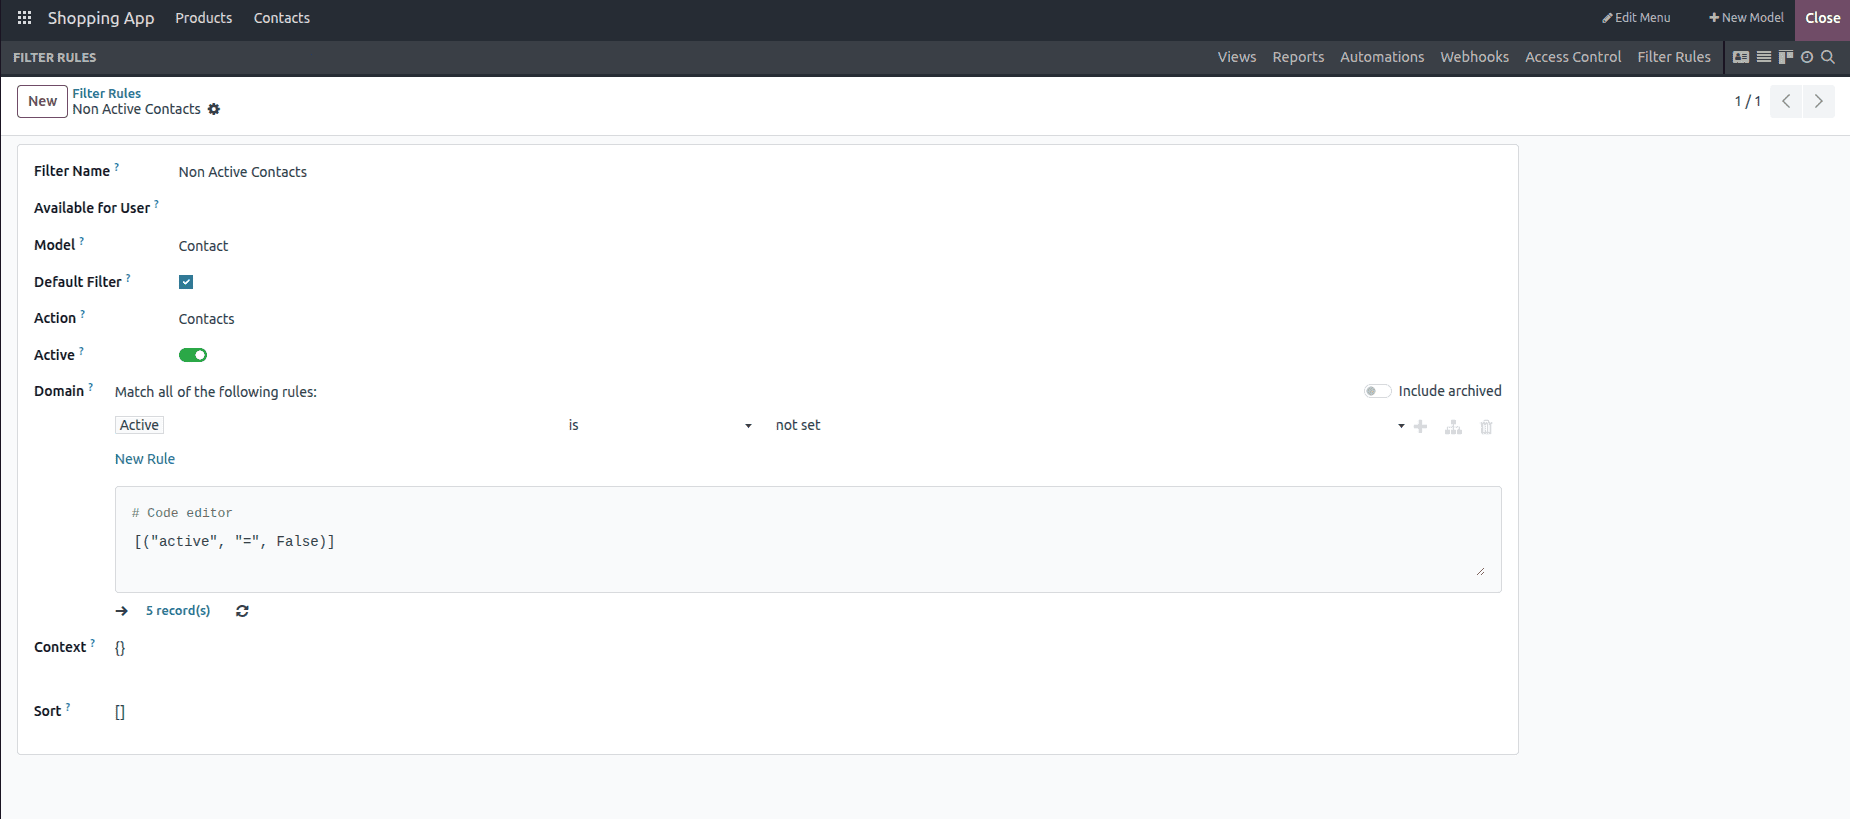
In the form view that appears, we can give the filter a meaningful name, restrict it to a specific user if needed, and let the system auto-detect the model based on the active application. If we want the filter to apply automatically whenever the menu is opened, we can enable the Default Filter option. We can also choose the menu to which the filter will apply, turn the filter on or off, and define our filtering criteria in the Domain field.
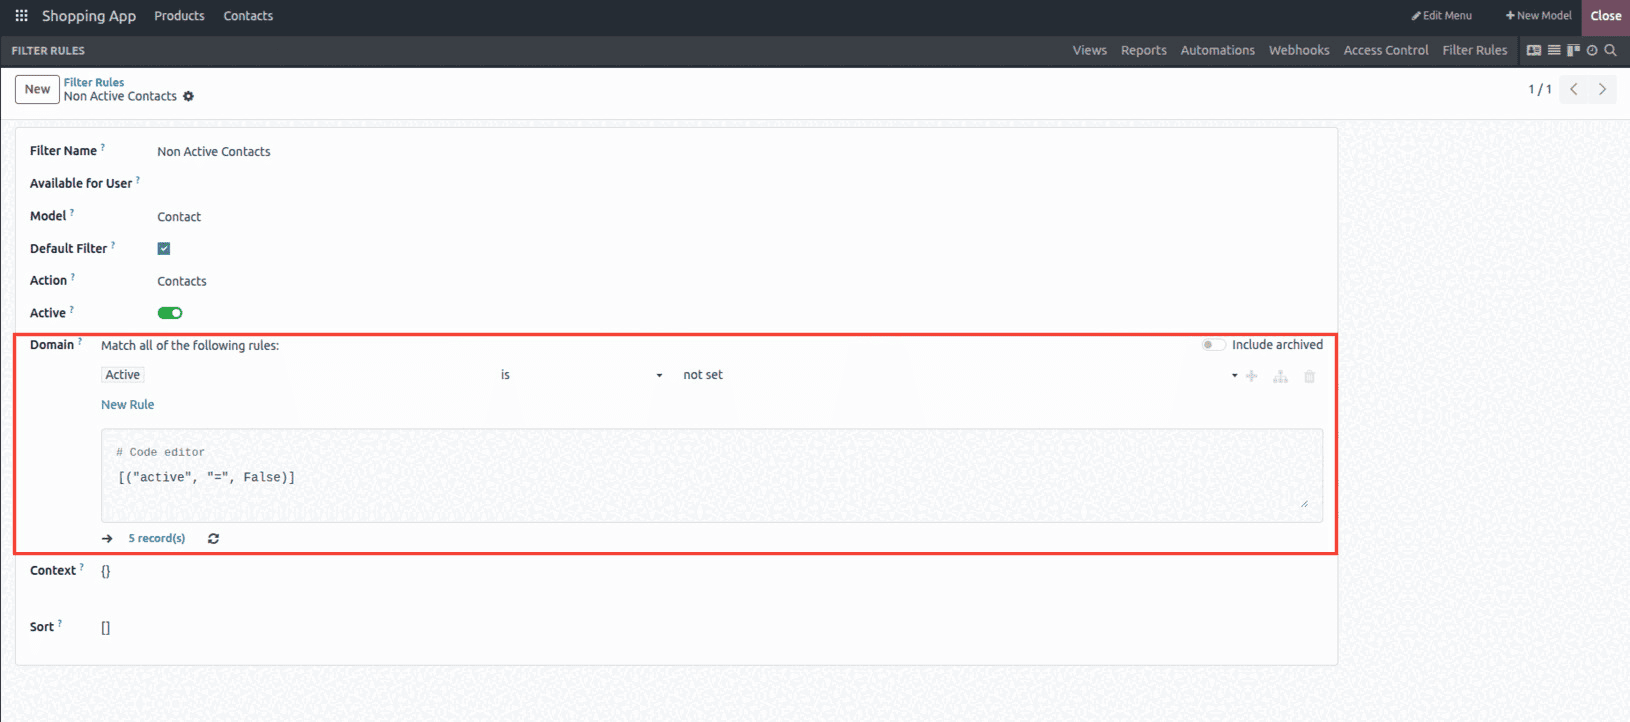
The Domain section contains the actual filtering conditions—in this example, it’s set to only match contacts where the active boolean is “not set,” effectively listing all contacts that haven’t been set to active.
The Context field can be used to pass additional parameters or context values when the filter is applied, while the Sort field allows you to define the default ordering of records when the filter is active..
After saving the filter, navigate to the Contacts list view to test it. You should now only see contacts that are inactive, which confirms that the rule is working as intended.
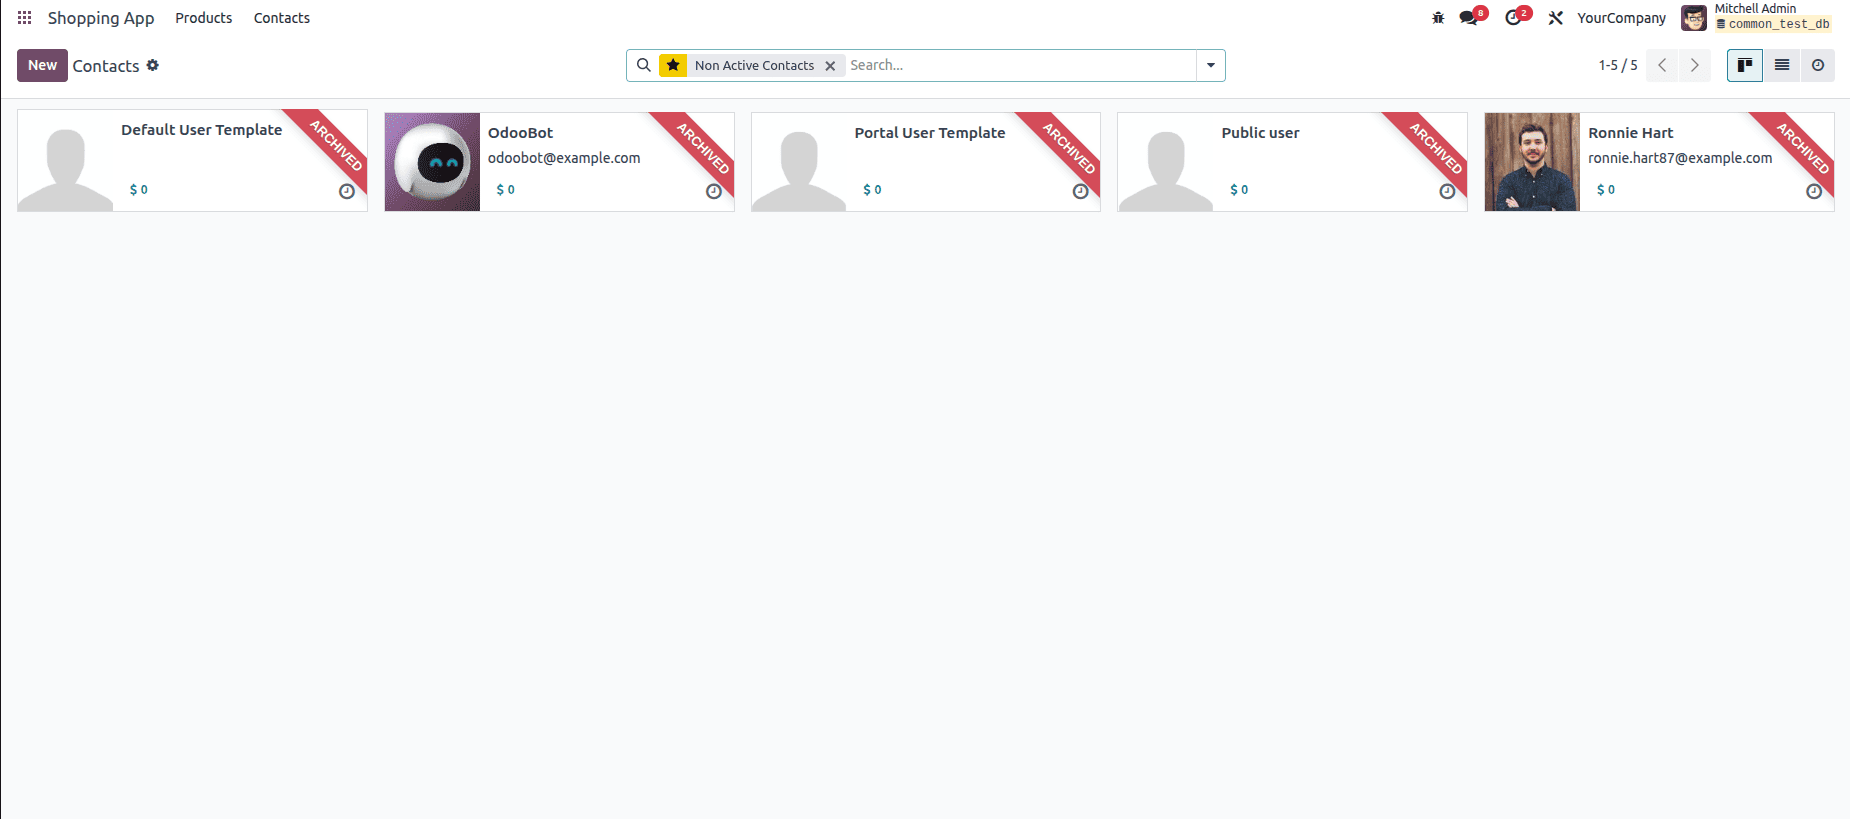
This kind of custom filter is especially useful when you want to quickly identify archived contacts without manually applying search filters each time. Instead of repeating the process, you can save it once and reuse it whenever needed. By creating custom filters, users can tailor Odoo’s search and navigation to their needs.
Conclusion
The Studio module in Odoo 18 gives businesses the flexibility to design workflows that perfectly match their needs. By setting up automation rules, repetitive tasks can be handled seamlessly, ensuring consistency and saving valuable time. At the same time, custom filters and saved searches make it easier to manage and access specific records without the hassle of repeated manual effort. Together, these features empower users to streamline operations, reduce errors, and maintain better control over their data. Ultimately, Odoo 18 Studio makes it possible for organizations to adapt the system to their own processes instead of adjusting their processes to fit the system.
To read more about How to Customize Views & Reports in Odoo 18 Studio, refer to our blog How to Customize Views & Reports in Odoo 18 Studio