Managing job openings is an important part of the recruitment process in any organization. Businesses need a proper way to define available positions, specify salary expectations, and organize vacancies to make hiring easier. Odoo 20 Recruitment helps companies manage these details from a centralized platform and makes the process easier by allowing users to create job positions with configured details such as salary ranges and tags.
In this blog, we will explore how to create a job position in Odoo 20, configure salary ranges, and use tags to organize job openings efficiently.
Create a New Job Position in Odoo 20
The Odoo 20 Recruitment module provides dedicated job positions to manage available vacancies within an organization. It displays existing job openings along with their application details, making it easier for recruiters to monitor the hiring process.
To create a new job position in Odoo 20, open the Recruitment module from the Odoo 20 dashboard. The recruitment dashboard shows the default view of job positions and includes existing vacancies along with the number of new applications, applications in progress, and applicants to recruit.
Click the New button in the upper-left corner to create a new job position, as shown below.
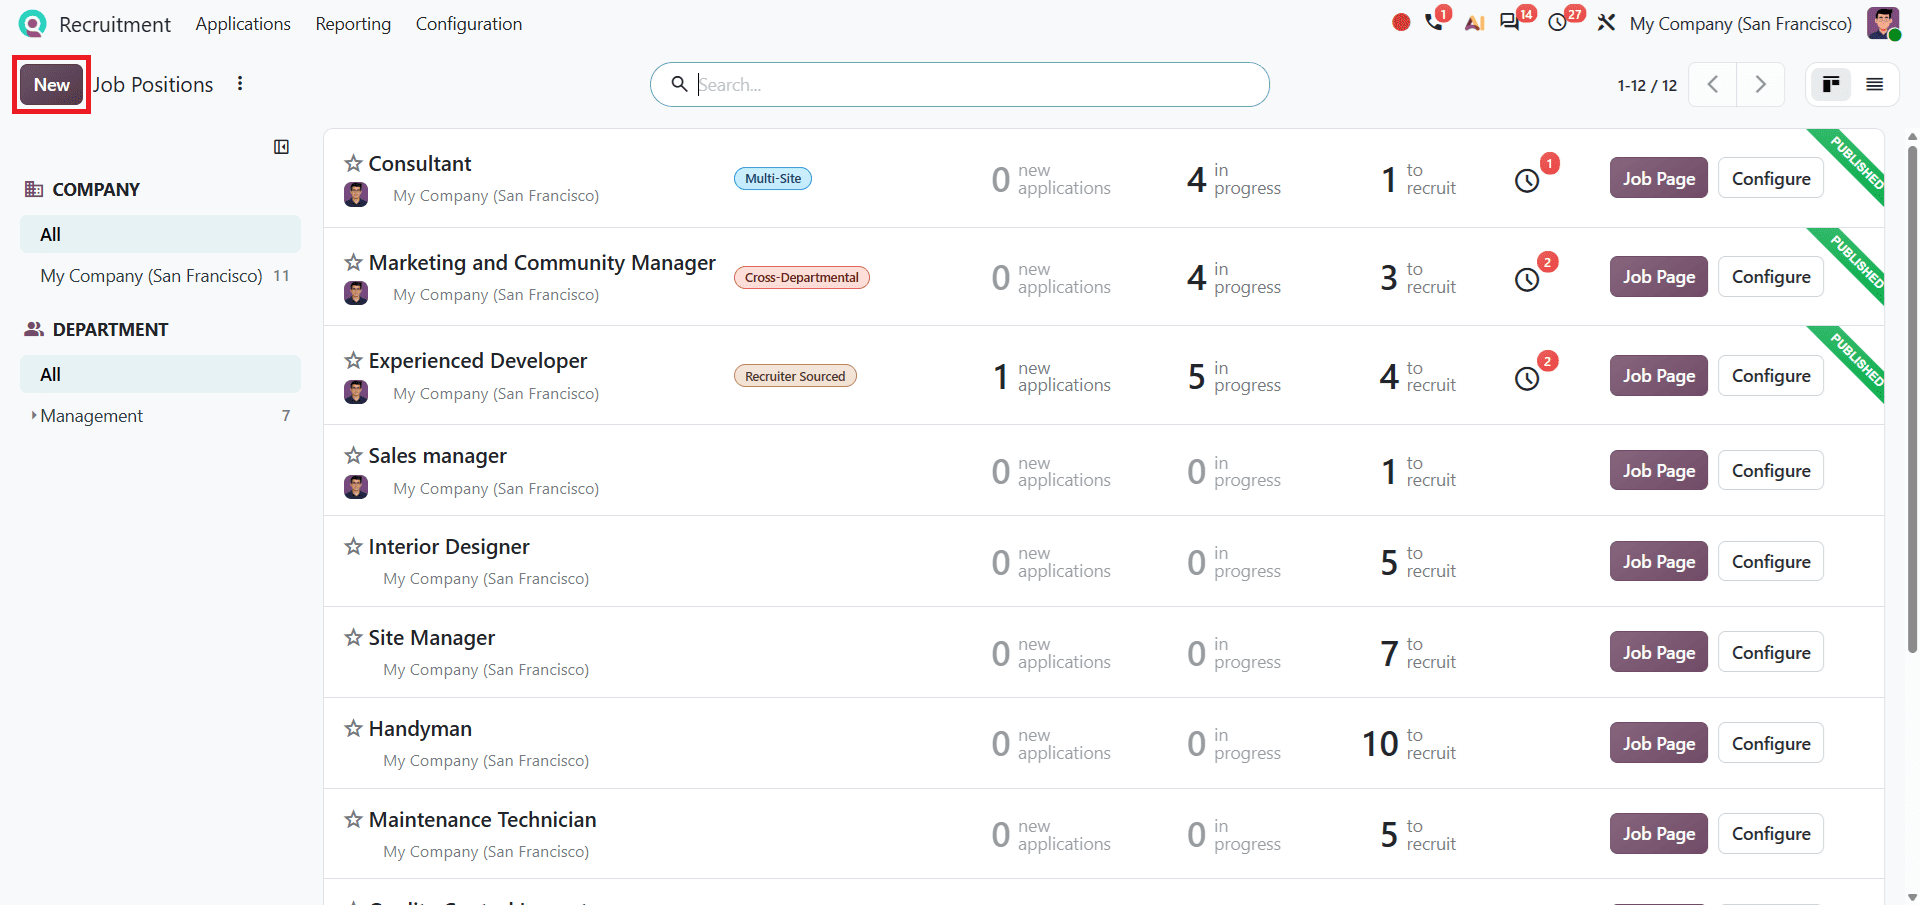
This opens a form where you can enter the necessary details and configure the vacancy according to your recruitment requirements. After opening a job position, Odoo 20 displays a form containing different fields to configure the vacancy. Enter the job position that you want to recruit for. Then configure other tabs according to your requirements.
The Details tab includes information related to the Hiring Process, Job, and Contract.
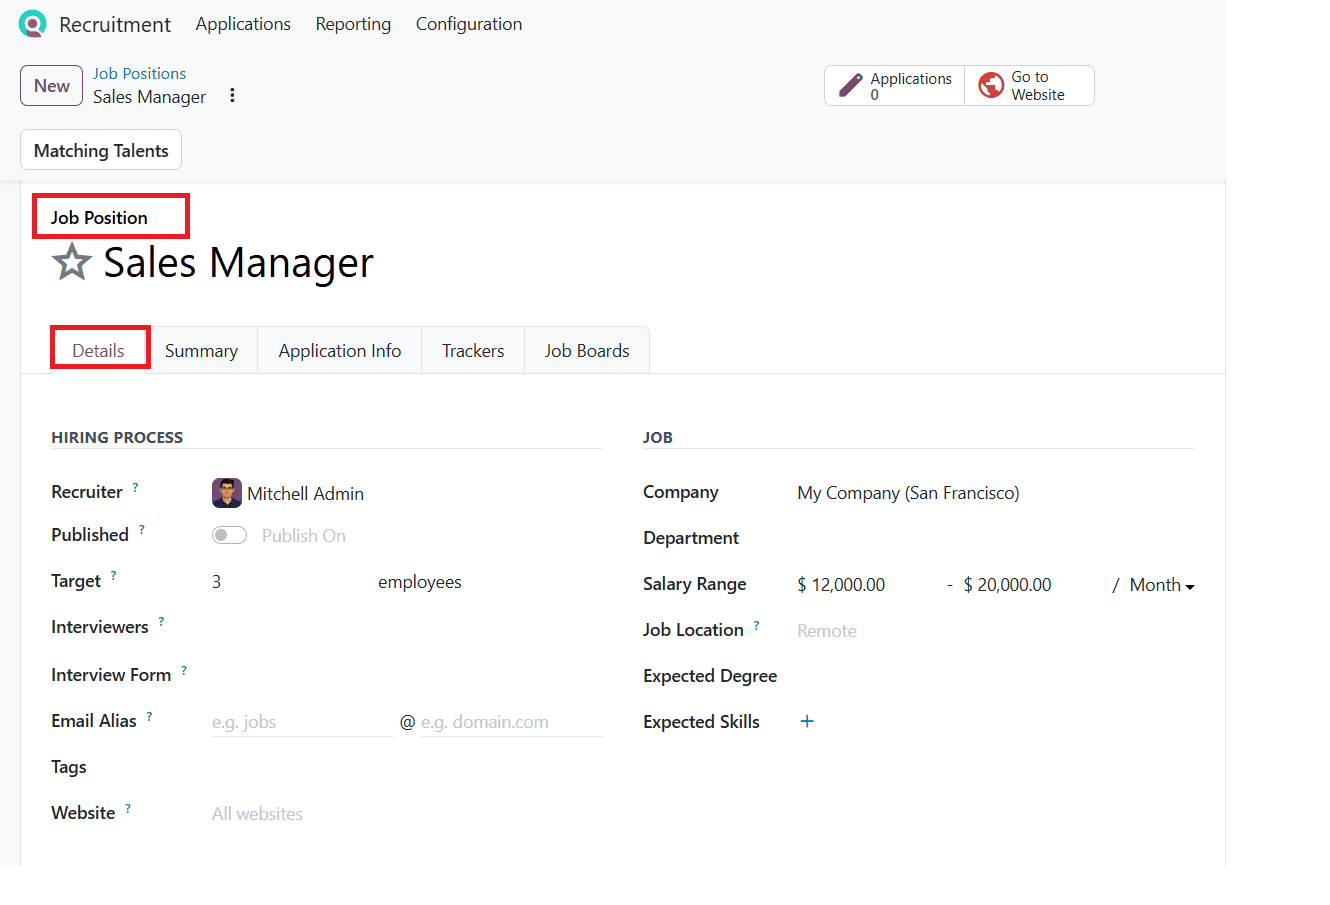
Under the Hiring Process section, you can assign a recruiter, set the target number of employees, add interviewers, and select an interview form. You can also publish the job position on the website using the Published option. The Email Alias field allows you to configure an email address for receiving applications.
Under the Job section, you can specify the company and department associated with the vacancy. You can also define the salary range by entering the minimum and maximum salary amounts and selecting the payment period, such as hour, week, month, or year, etc.
Other available fields include Job Location, Expected Degree, and Expected Skills. These details help describe the requirements and expectations for the position.
The Contract section allows you to configure the Employee Type, Working Schedule, and Contract Template according to the vacancy.
Set Salary Ranges for Job Positions
Odoo 20 allows recruiters to define a salary range for each job position. Under the Job section, the Salary Range field provides options to enter both the minimum and maximum salary offered for the vacancy.
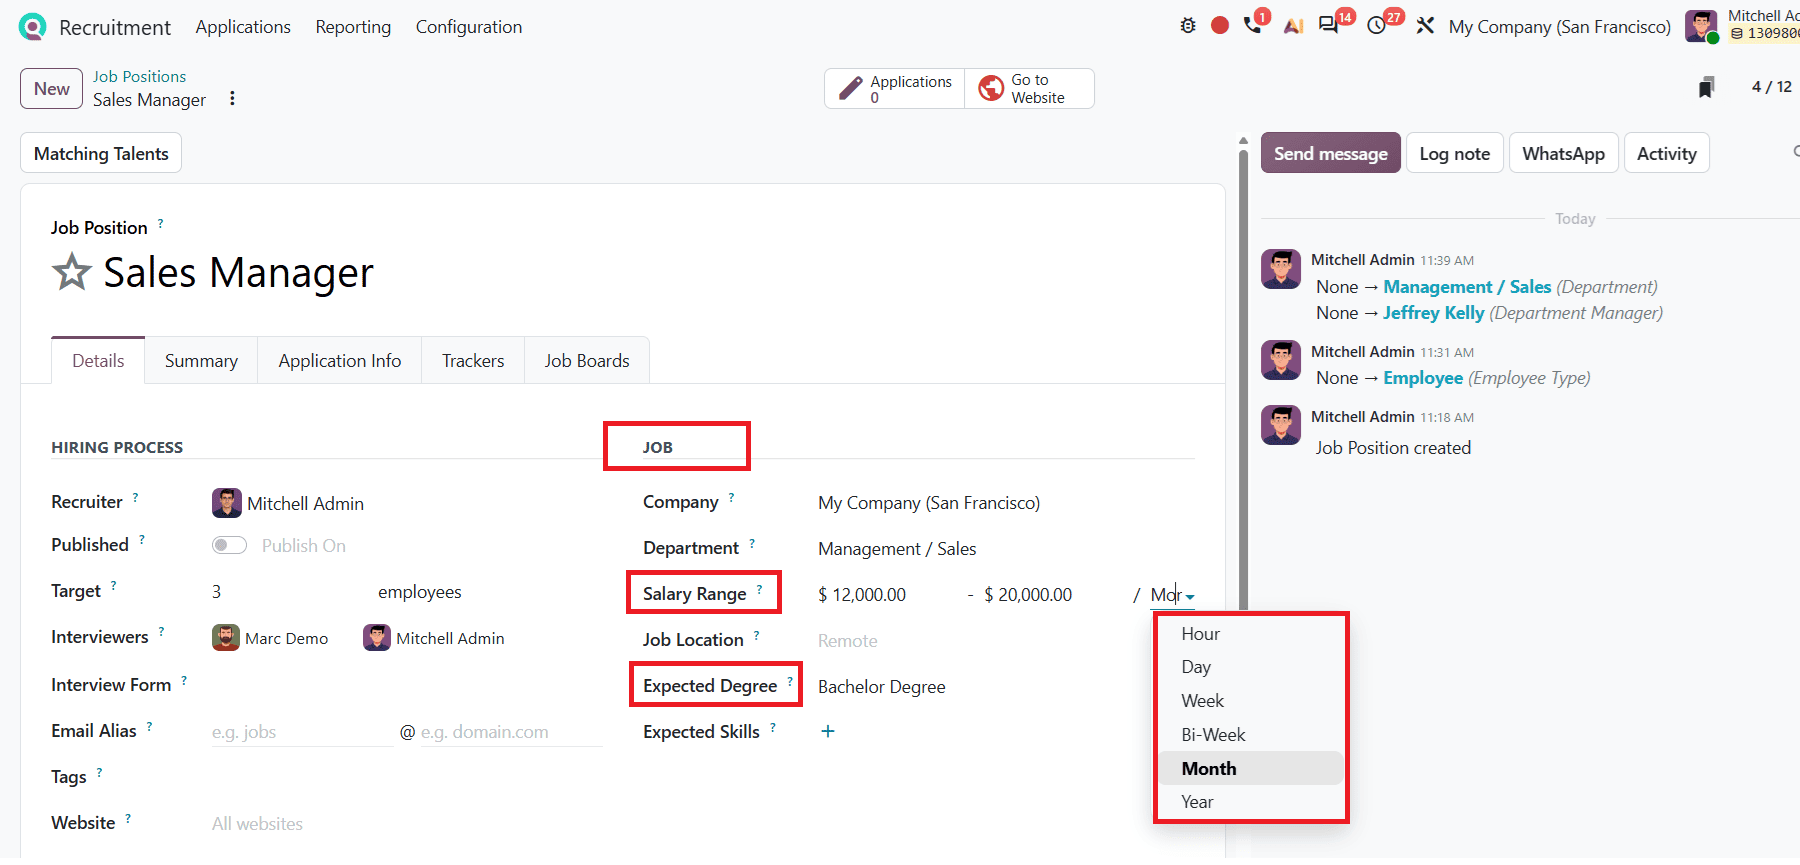
You can also select the payment period based on the organization's requirements. The available options include Hour, Day, Week, Bi-week, Month, and Year.
For example, when creating a Sales Manager position, a company can set a minimum salary of $12,000 and a maximum salary of $20,000 per month. This helps applicants understand the expected compensation before applying for the position.
The Expected Degree field allows recruiters to specify the educational qualification required for a particular job position. For example, for a sales manager position, a recruiter can require a Bachelor's degree. They can select an existing qualification or create a new one based on the organization's requirements. This helps recruiters communicate the educational requirements to potential applicants.
The job position form also includes additional tabs to configure information related to the vacancy, such as,
Summary: This tab lets you provide a detailed description of the job position. Recruiters can include information about the company, job responsibilities, role expectations, and the qualifications required of candidates. This helps applicants understand the position before submitting their application.
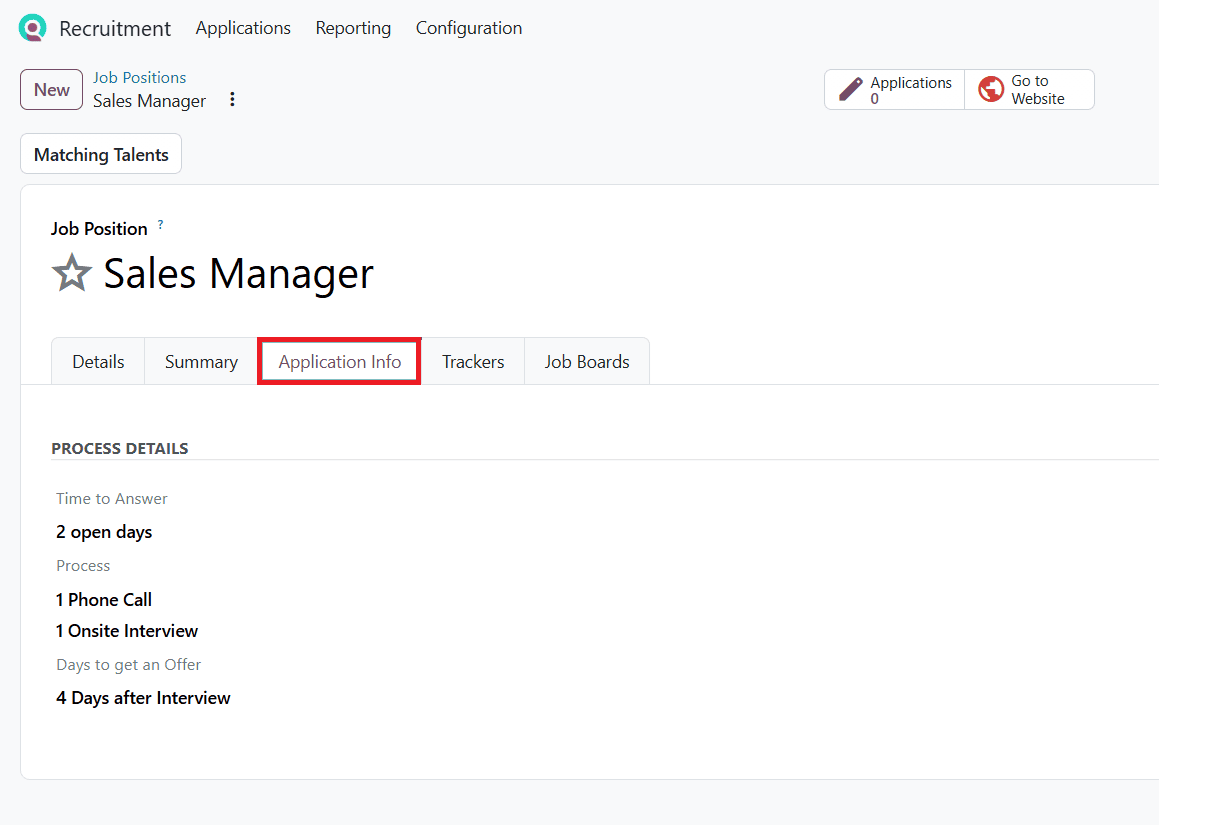
Application Info: The Application Info tab contains a Process Details section that displays information about the recruitment timeline on the job position's website. It helps applicants understand the different stages of recruitment and when they can expect updates from the company.
Trackers: The Trackers tab helps recruiters organize the links used to promote a job opening on different platforms. These tracking links help identify where applicants are coming from. By comparing the results from different sources, recruiters can understand which platforms are bringing more applications and decide where to focus their recruitment efforts. Before creating trackers, first publish the job position on the company website.
Job Boards: Odoo 20 provides a Job Boards tab to keep track of job listings shared through job boards. Whenever a job position is shared on a job board, its listing details automatically appear in this tab. This helps recruiters view and manage the job postings shared outside the company's website from one place.
Configure Job Tags
Odoo 20 allows you to organize job positions using tags. Under the Details tab of a job position form, you can find the Tags field, where you can select existing tags to categorize the vacancy. To create a new tag, navigate to Configuration and, under Job Position, select Job Tags.
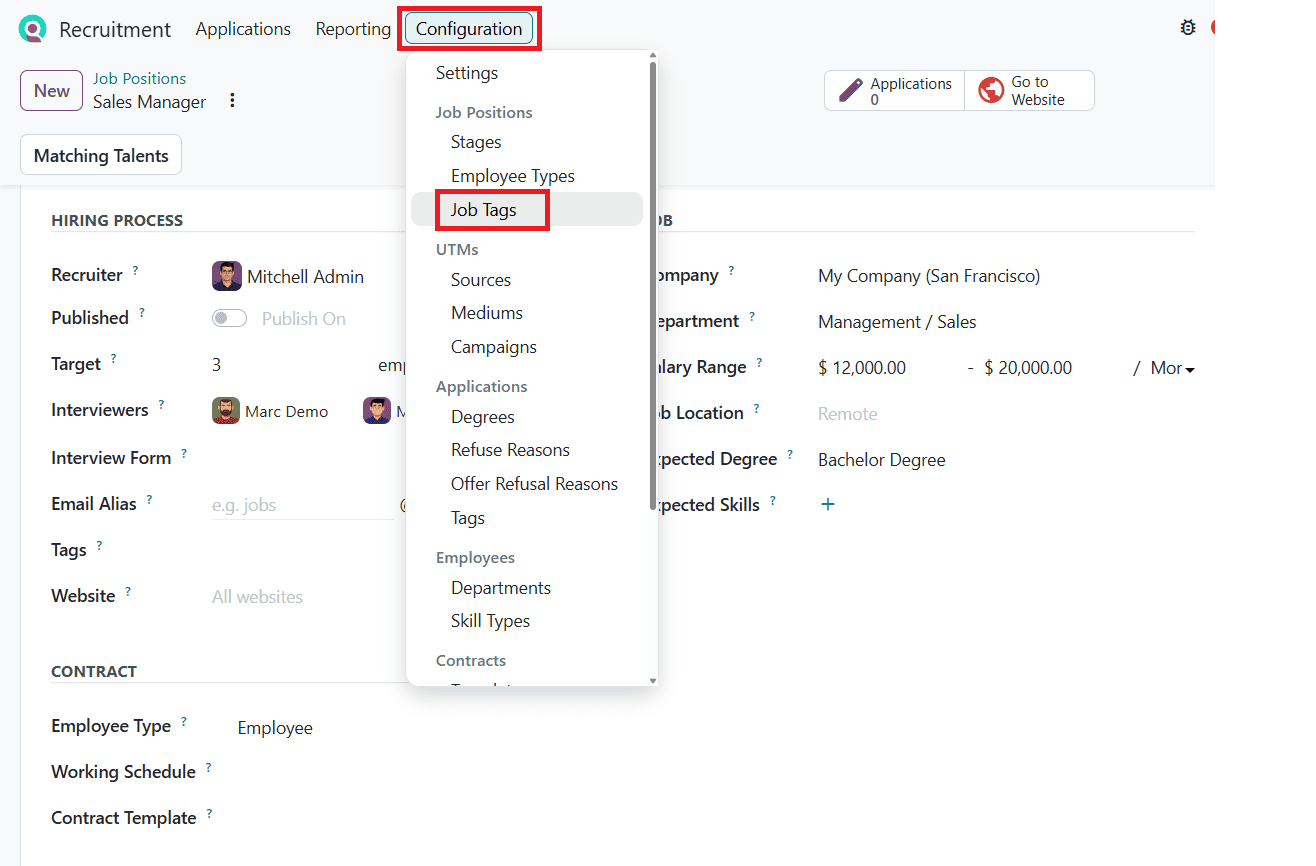
A window will open as shown below.

In this window, click the New button and enter the Tag Name. From here, you can create and manage tags according to your organization’s requirements. Once created, these tags can be selected when configuring a job position.
Publish a Job Position on the Website
After configuring the job position, recruiters can make the vacancy visible to potential applicants through the company website. Under the Hiring Process section of the Details tab, enable the Published option to publish the job opening.
Odoo 20 also allows recruiters to schedule the publication of a job position by specifying the date and time. This helps organizations prepare vacancies in advance and make them available on the website at a planned time.
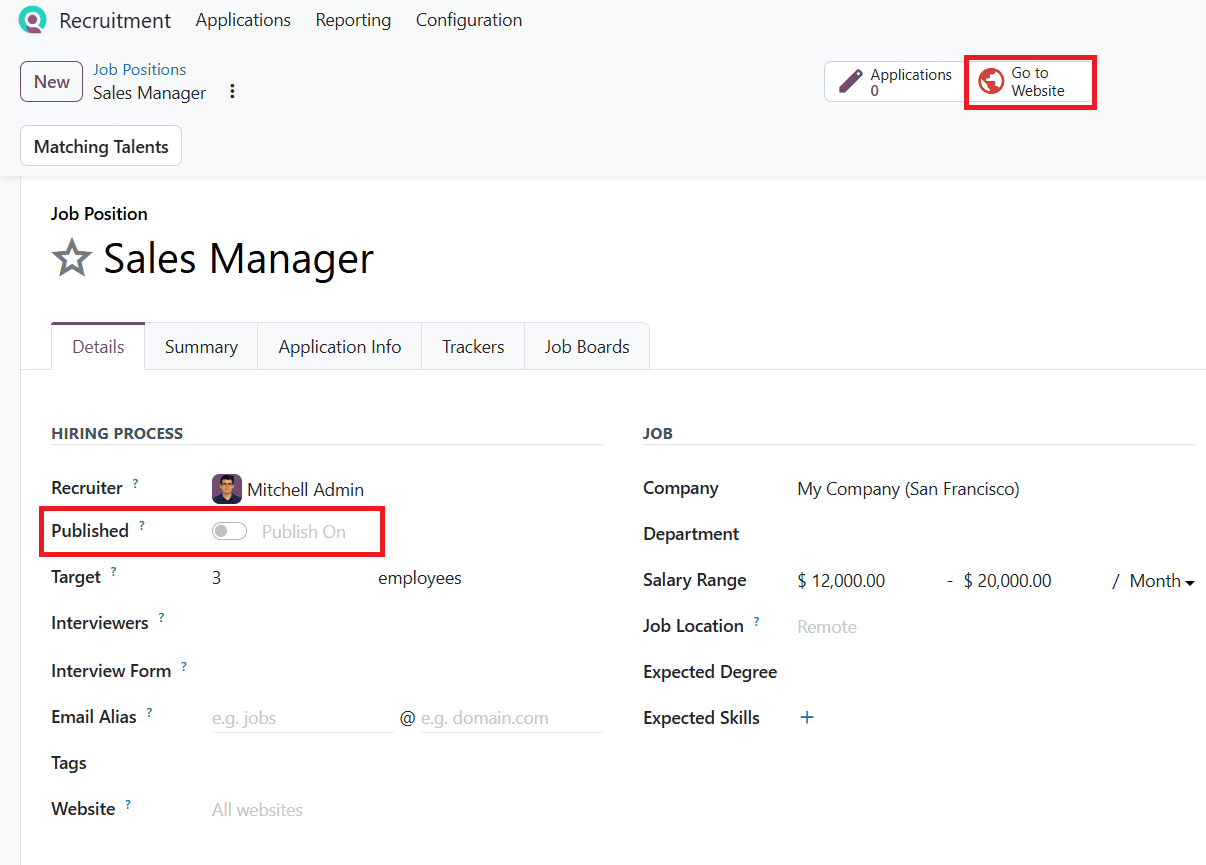
To preview the published vacancy, click the Go to Website button. This allows recruiters to check how the job description and other details appear to potential applicants.
Your website view will be displayed as shown below.
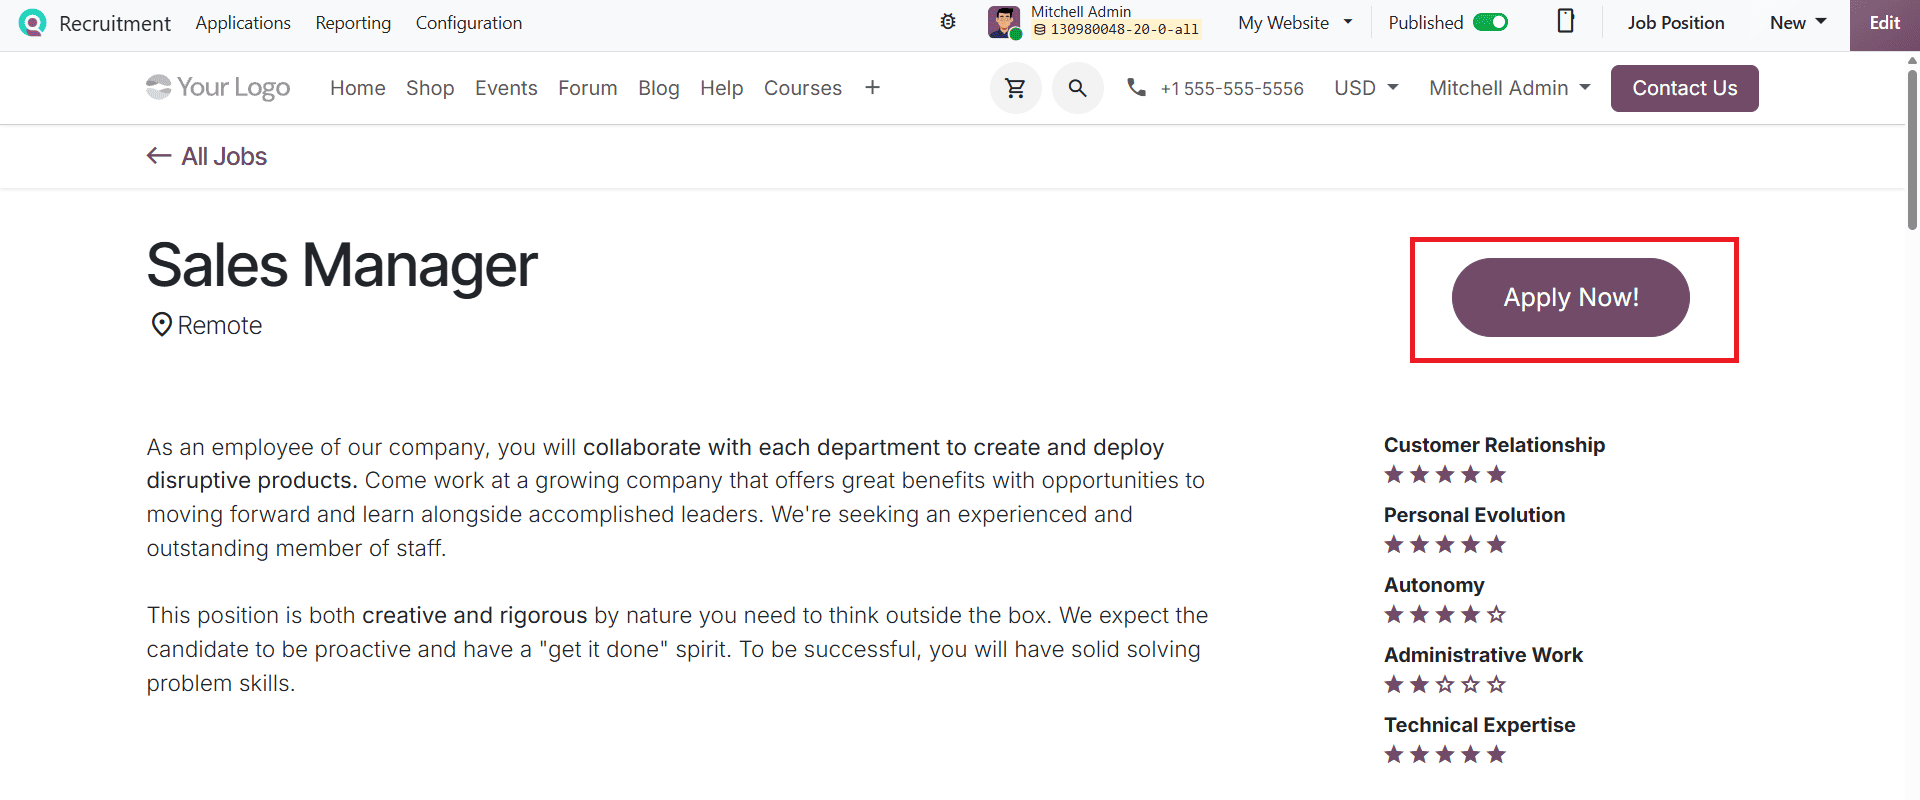
You can see the job position and summary of the vacancy. Click Apply Now to open the application form, as shown below.
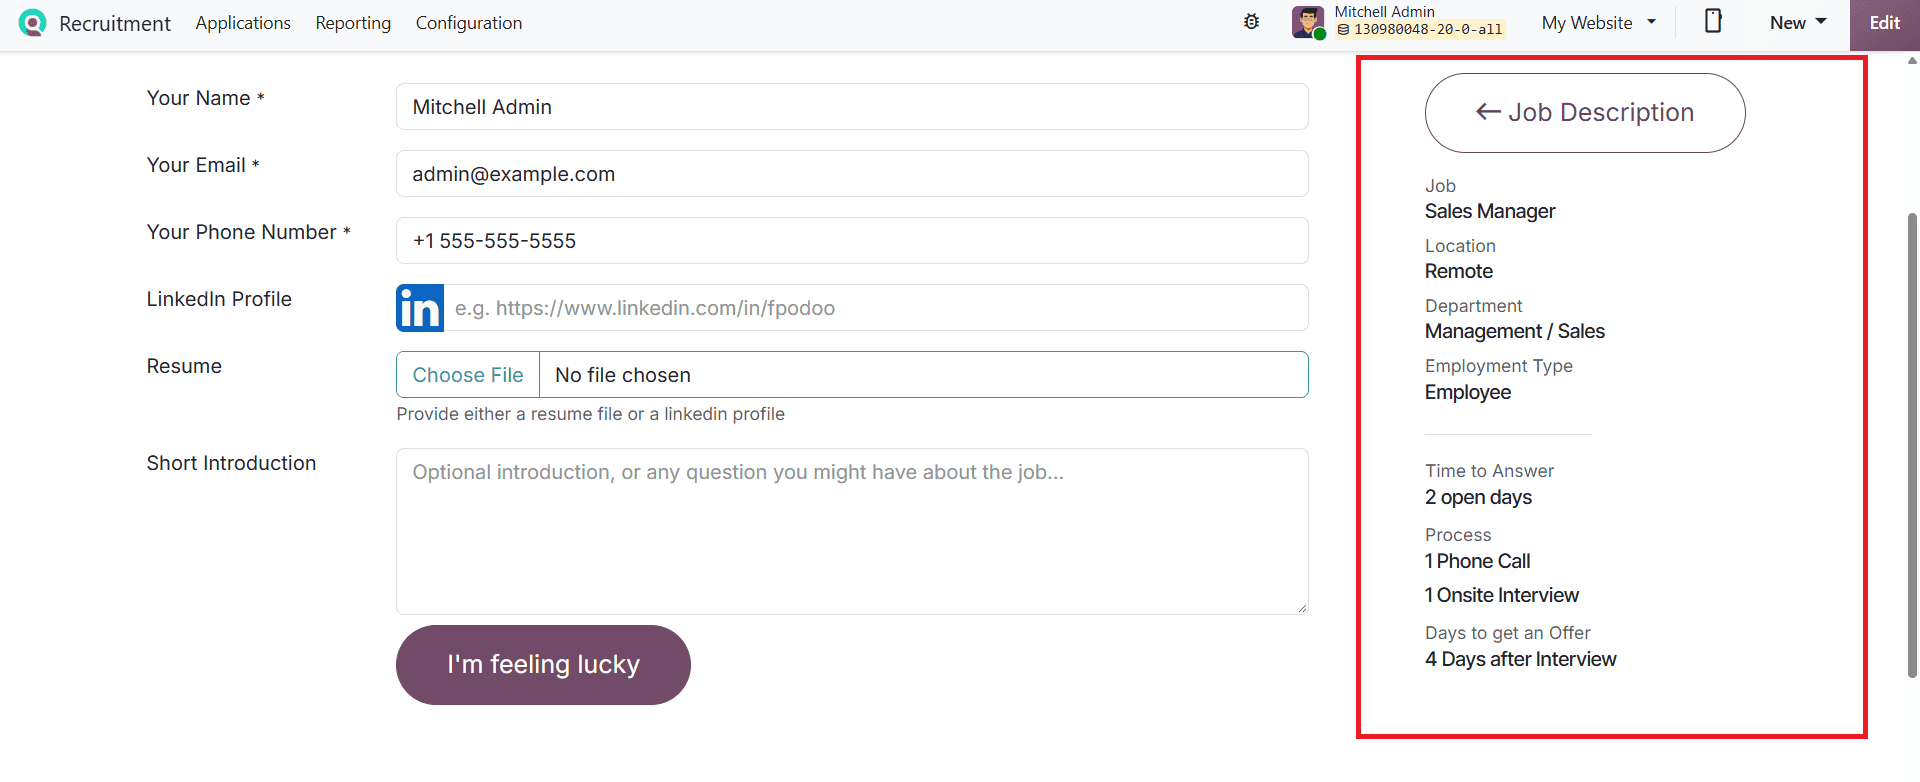
Applicants can enter their details in the left section, while they can view the job description and other vacancy details on the right. Click the 'I'm feeling lucky' button to submit the application.
After submitting the application, recruiters can view the applicant under the corresponding job position in the Recruitment dashboard. Click the respective job position to open its applicant view. The newly submitted website application appears in the New stage of the Kanban view, allowing recruiters to track incoming applications.
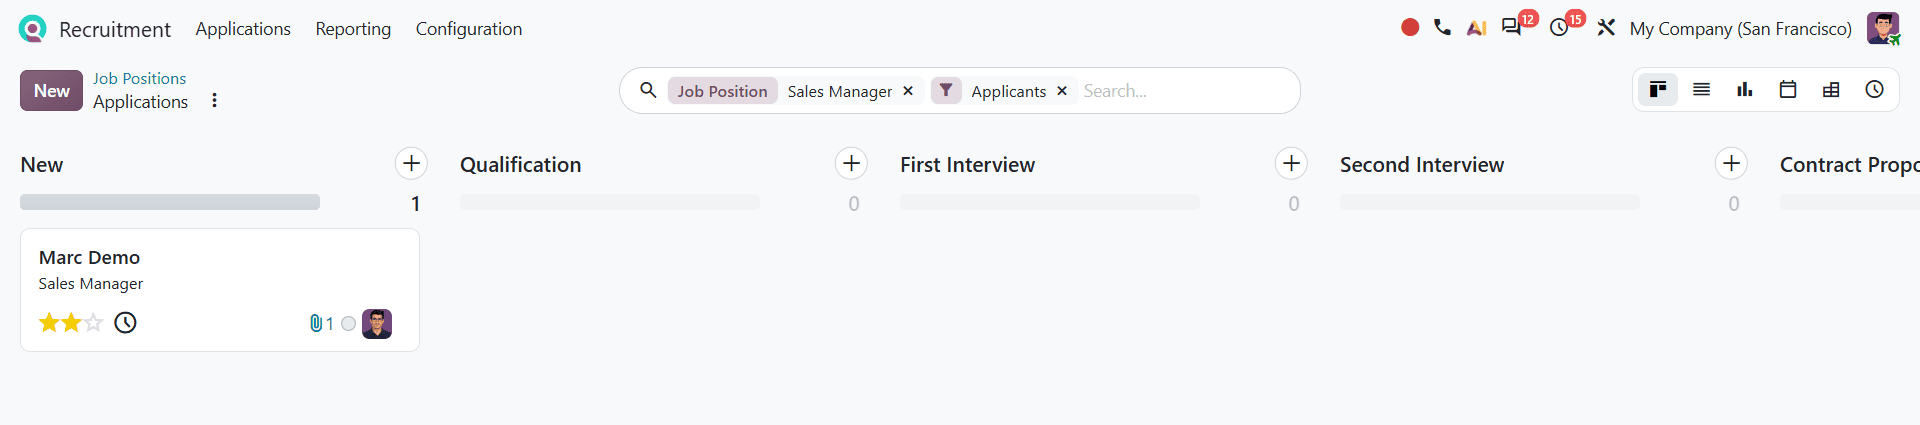
To view an applicant's application details, click the corresponding applicant card. This opens the applicant's record, where recruiters can view the submitted information. The applicant’s record also displays the application source in the Medium section under the Details tab. For applications submitted through the company website, the source is identified as Website, as shown below.
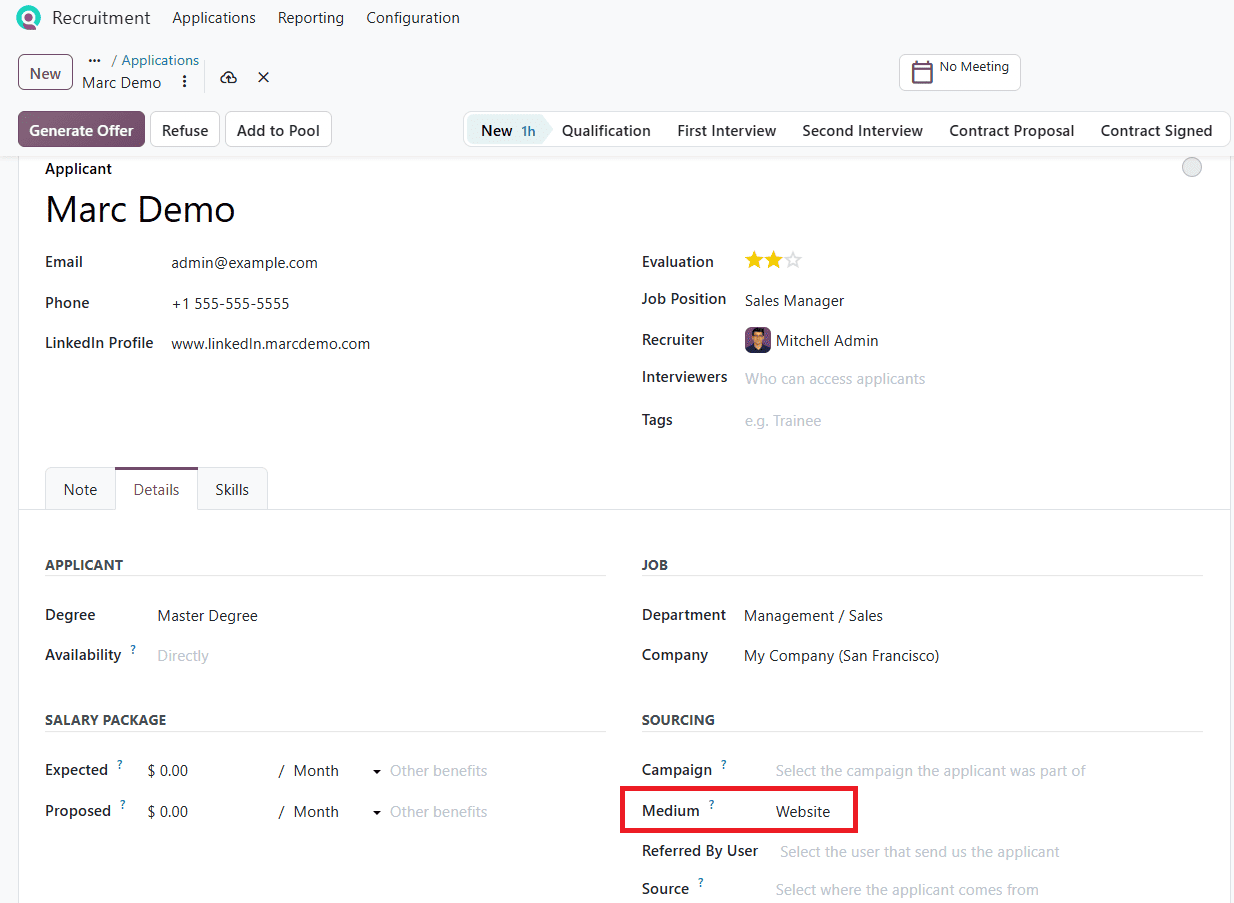
This helps recruiters identify where the application originated.
Odoo 20 Recruitment makes it easier for businesses to create and manage job openings from one place. By configuring job details, setting salary ranges, and adding relevant tags, recruiters can organize vacancies according to their hiring requirements. Features such as website publishing and recruitment tracking also help businesses reach potential applicants and manage the hiring process more effectively.
To read more about How to Define and Manage Job Positions in Odoo 19, refer to our blog, How to Define and Manage Job Positions in Odoo 19.