For better control and management of products in inventory, the product should be properly sorted according to product characteristics, storage requirements, and stock movements. This means that products with expiration dates should be organized so that the oldest stock is picked first, helping to reduce waste. Products that are frequently used should be located in convenient storage spaces to boost efficiency. Also, products whose storage is dependent on certain temperatures should be stored accordingly.
Products with varying storage needs should be kept separately to facilitate good storage and handling of goods. This will go a long way in ensuring the safety of the products. Products like foods and chemicals should be separated for better organization and maintenance.
Managing all these processes manually can be time-consuming and effort-intensive. Odoo Routes and Rules help simplify inventory operations by automating these processes, reducing manual work, and improving efficiency.
Routes and Rules of Odoo can be very helpful in simplifying inventory management. While routes provide directions for the movement of goods inside warehouses and the supply chain, rules create stock moves through the defined routes under certain situations.
Let us look at how this is done in Odoo 19.
To use Route & Rule in Odoo, we need to enable Multi-Step Routes from the Settings of the inventory module.
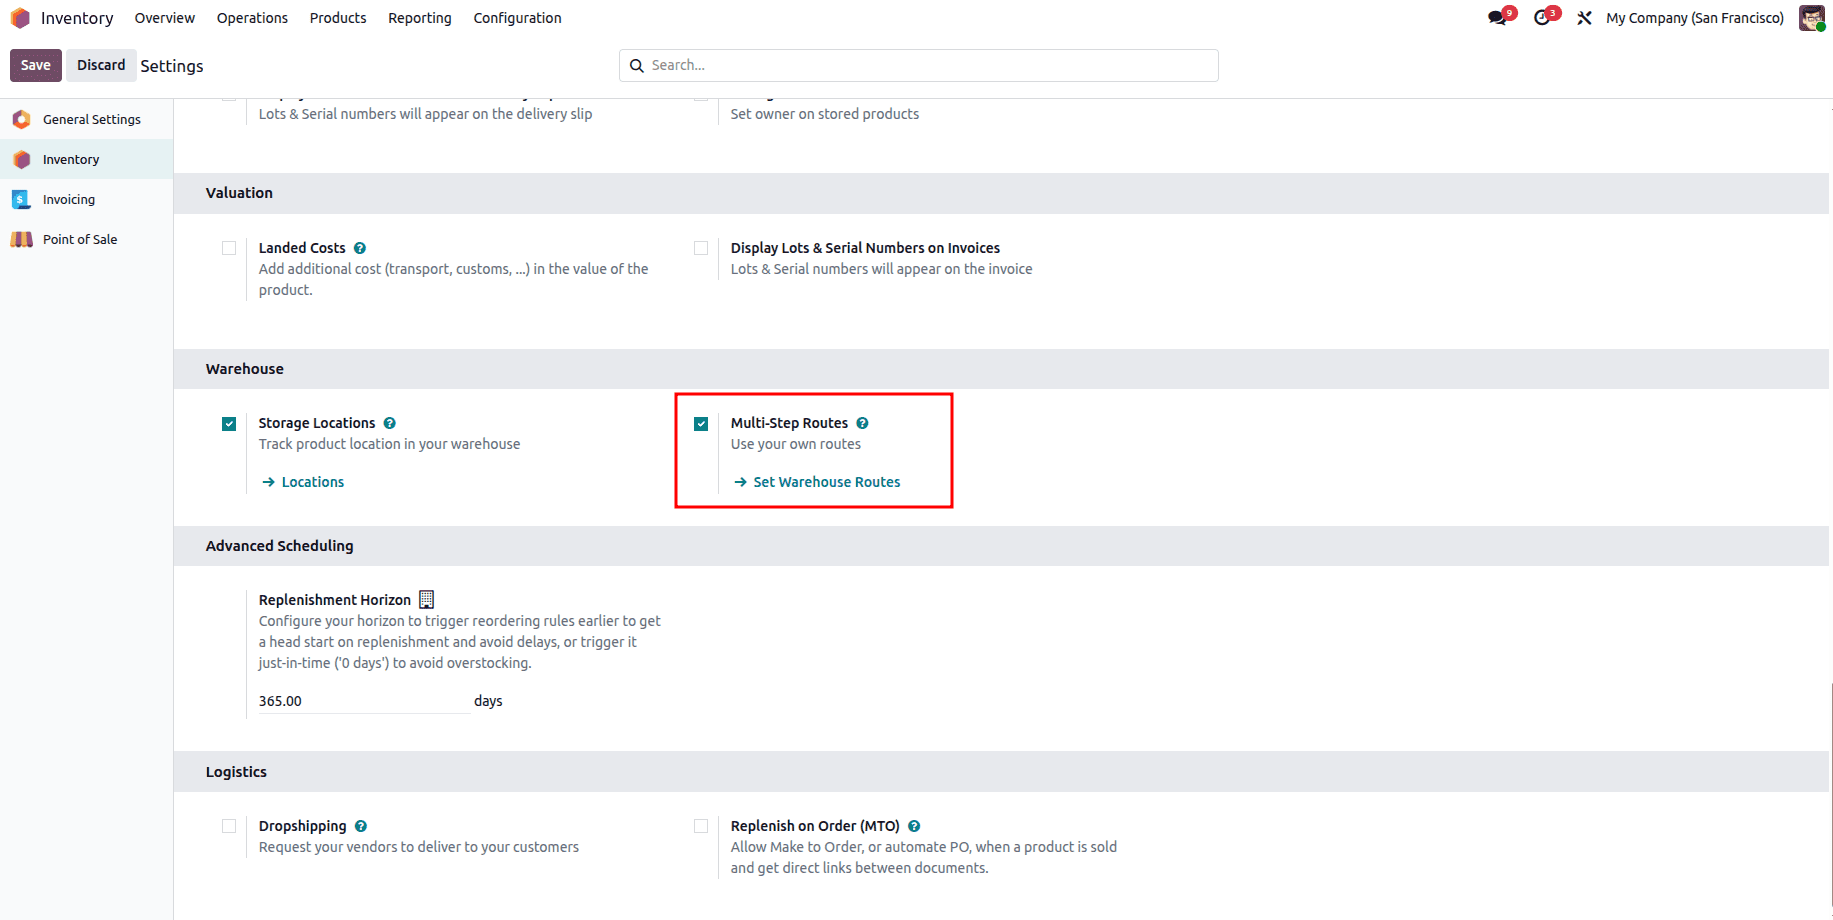
Once you enable the Multi-Step Routes, we can see that the Storage Locations are auto-enabled. This is because we need to have the locations to use on routes; then only the real use of the rules and routes is utilised.
Rules
To view or create a rule, click on the Rules under the Warehouse Management section in the Configuration dropdown of the Inventory module, which will take you to the Rules page.
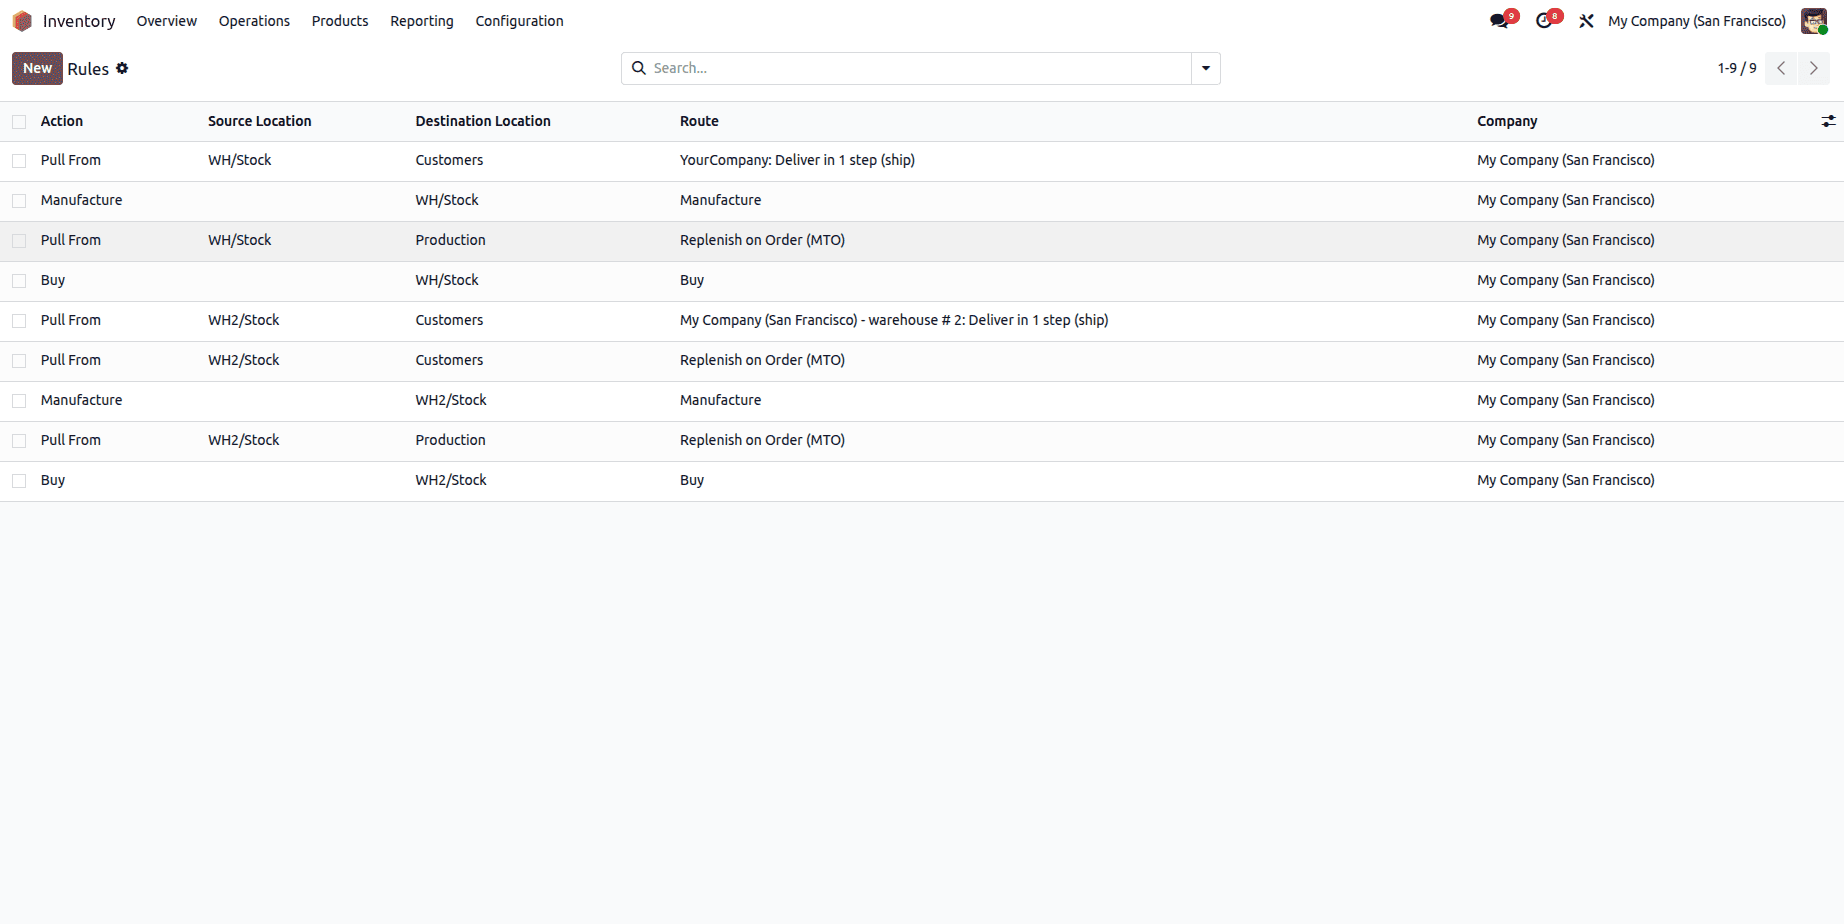
This page will show the existing rules in the list view of Odoo, and from the view itself, we can have a basic understanding of the Rules. Click on the New button to create new rules.
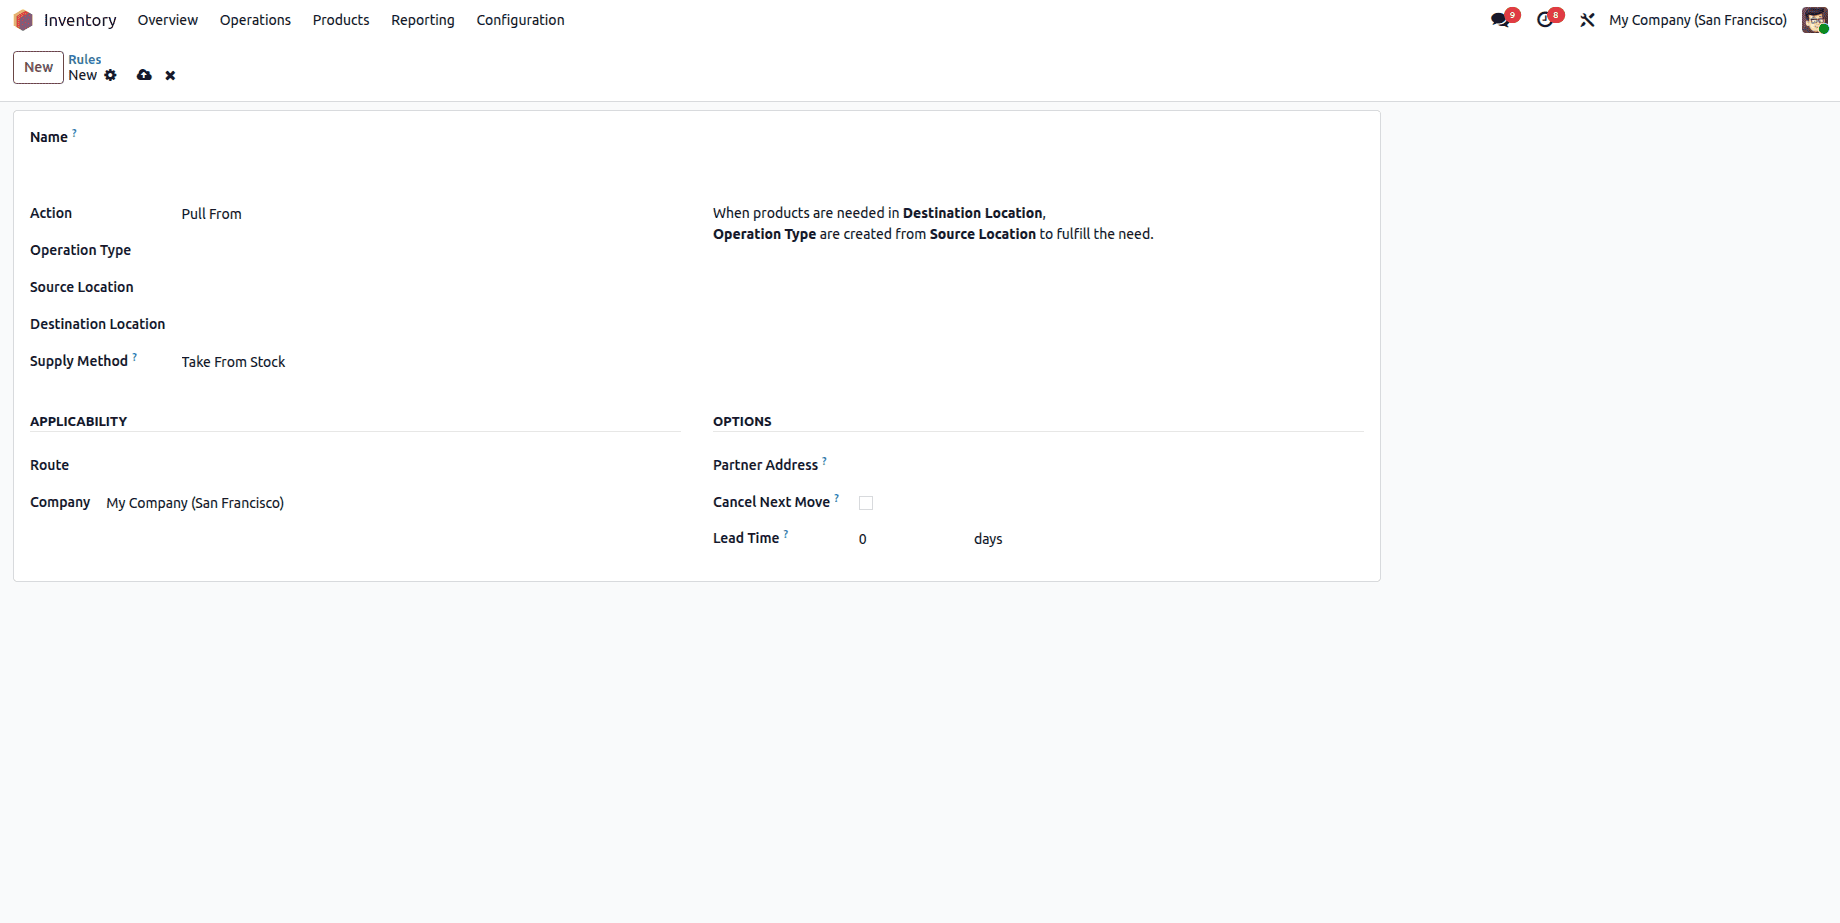
Give a suitable name for the rule and select the action. When we click on the action, a dropdown will appear and choose the appropriate action.
Actions Listed:
- Pull From: We can use this action if our reason for any transfer originates from the destination. This action will pull the stocks from the source location to the destination location when there is a need in the destination location.
- Push To: This action is used when products arrive at a location and need to be transferred to another location. It works based on the source location. For example, after products are received from a vendor, this action can be used to automatically move them to specific storage locations based on predefined conditions.
- Pull & Push: It is a combination of push and pull actions. Stocks can be pulled when demanded and pushed automatically when they reach an intermediate location. It is mostly used in multi-warehouse operations.
- Manufacture: Used in products that need to be manufactured. When we need the product, it will create a manufacturing order for the product
- Buy: Odoo will create purchase orders for the products when needed. Used for products that are purchased from the suppliers
Odoo will display the use of each action on the right side of the form once you select the action.
Select the Operation Type for which operations we need to apply the rule. Select the Source and Destination Locations. For Push Actions, we have an additional field named Automatic Move, where we can select the action that needs manual interaction or Automatic.
Supply Method is very important in the rule, because this decides how to obtain the required products when the rules are triggered.
- Take From Stock: When the rule is triggered, it will check if the product is available in the source location and fulfill the need if the stock is available; if not, wait for restocking of the source.
- Trigger Another Rule: This method won’t check stock in the source location; it will directly trigger another rule, normally used in a multi-warehouse.
- Take From Stock, if unavailable, Trigger Another Rule: This method is a combination of both. It will check the stock in the source location and take from there if it is available; else, it will trigger another rule, maybe manufacture, buy, or pull from.
Choose the company and route under the Applicability tab, which determines to which company the rule is applied and on which route, respectively.
Under the Options tab, we have the Partner Address, Cancel Next Move, and Lead time. The partner address is used to specify the delivery address. If the cancel next move is enabled, it will cancel the move right after it when a move is cancelled due to any conditions. And if we provide lead time, it will calculate the expected date for creating the transfer. All these are optional fields
Routes:
Routes determine how the products are moved through the locations. It is a collection of rules that help to determine how a product needs to be purchased, manufactured, stored, sold, and transferred in odoo
We can access the routes from the Inventory module under the Warehouse Management section of the Configuration menu. Click on the Routes menu over there, and it will take us to the routes page, where we can find the predefined Odoo routes
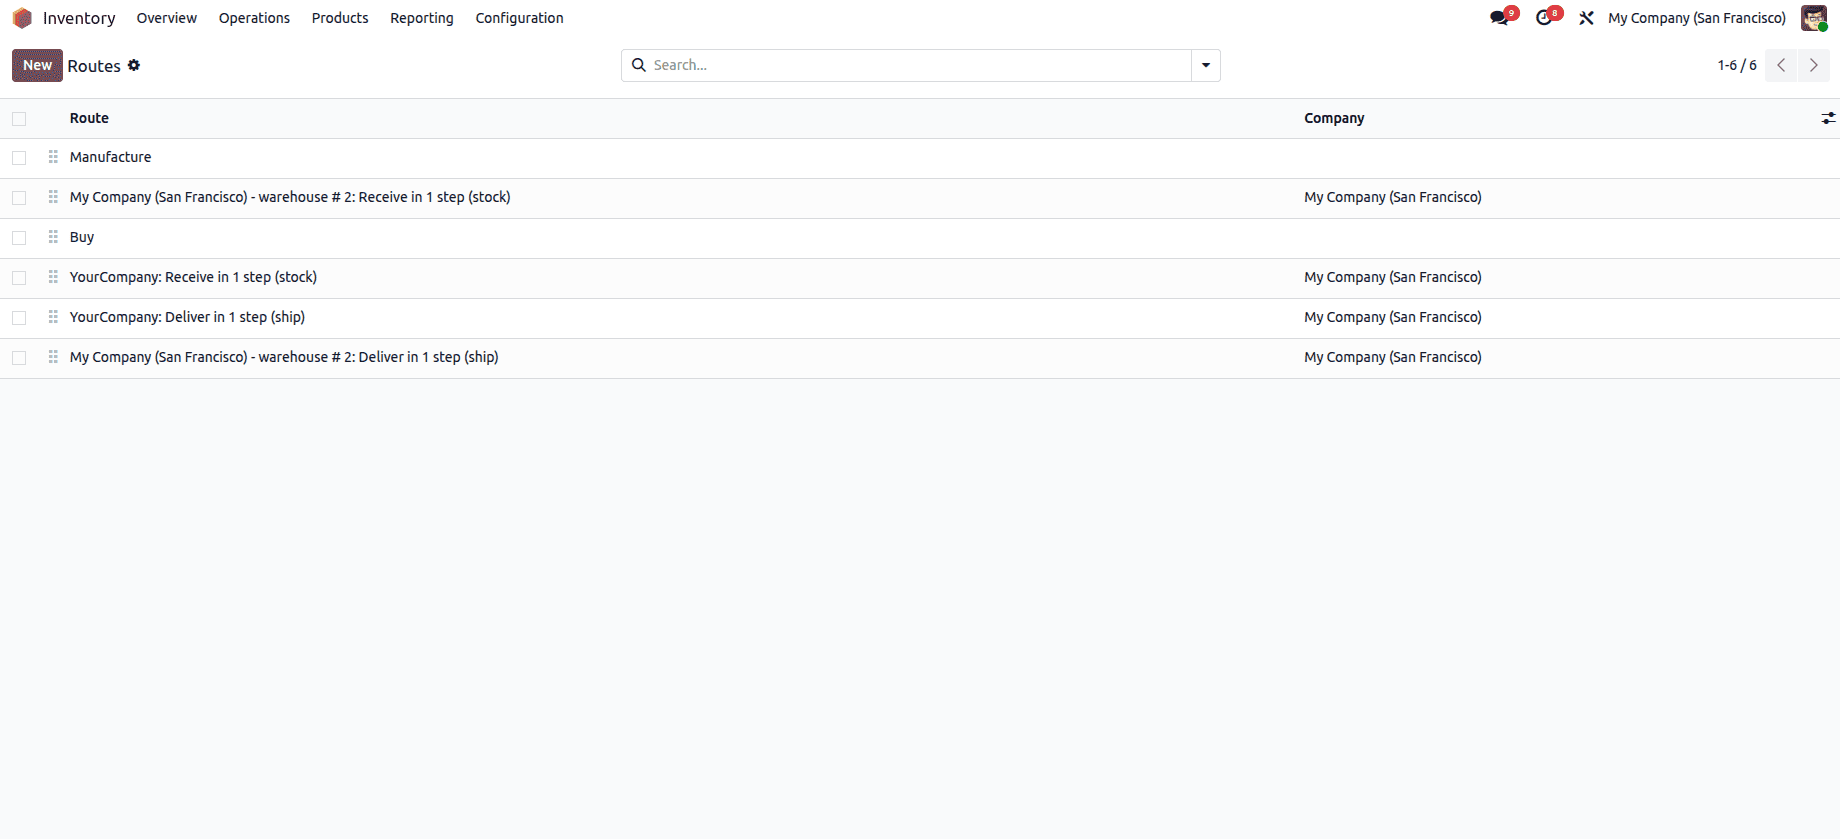
Click on the New Button to create new routes
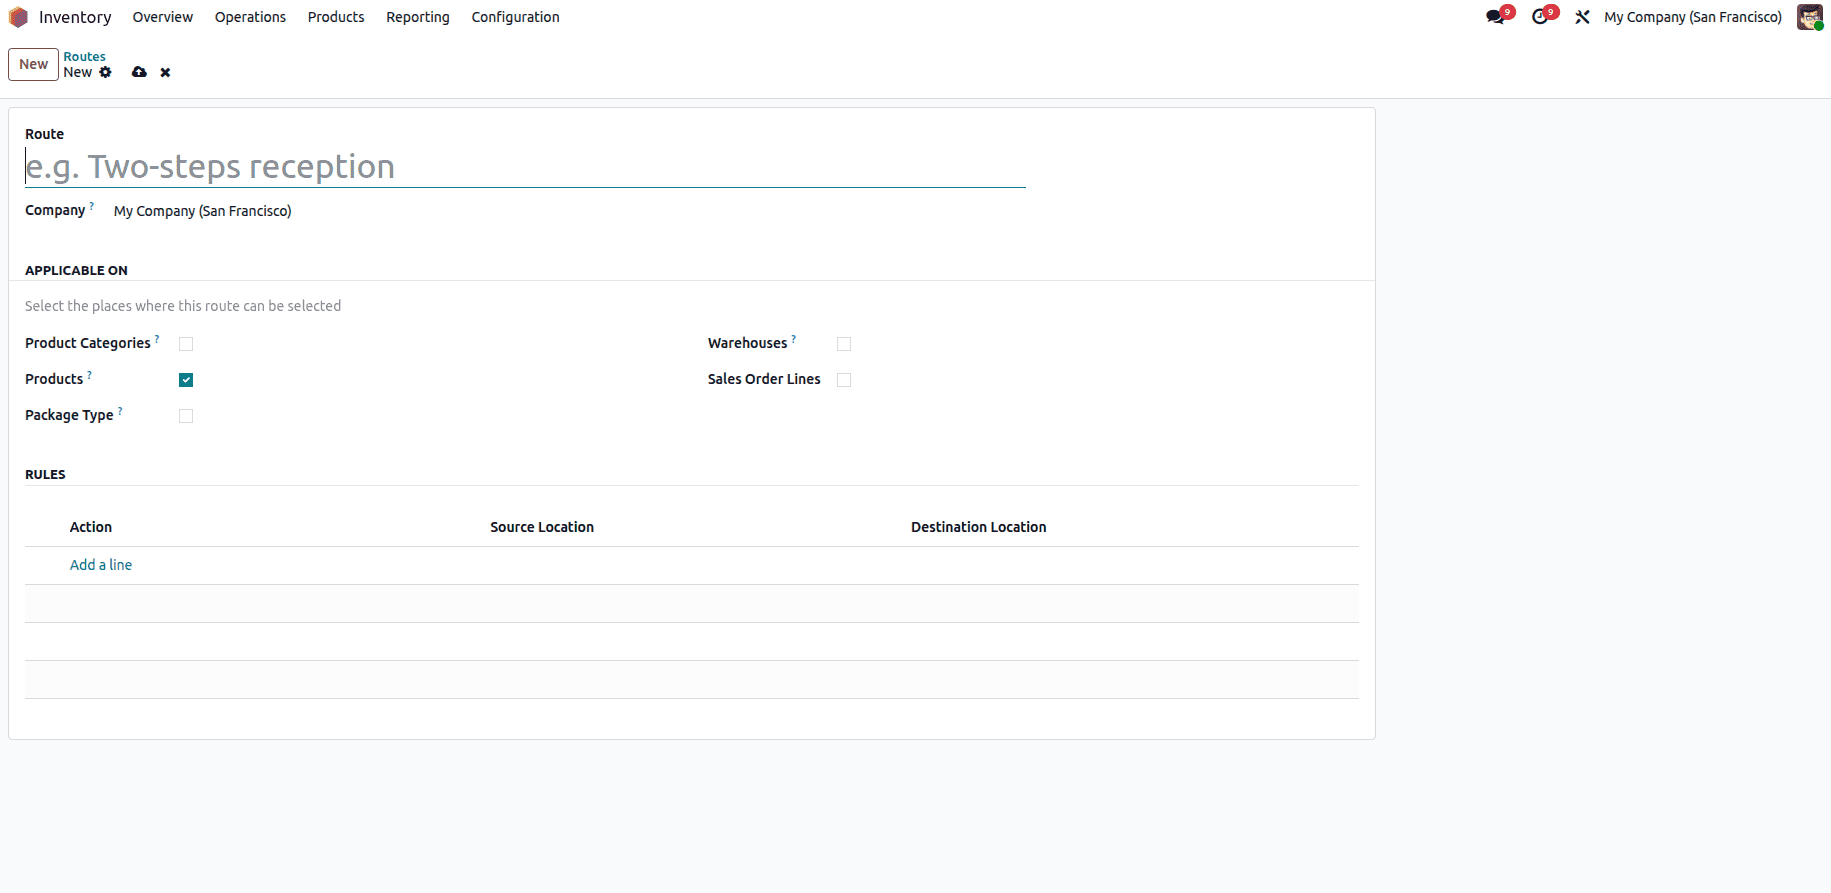
Give a name for the route, choose a company if you want to apply this route for any specific company, or leave it empty so that it can be accessed by all companies.
Under the Applicable On tab, we have multiple options. By enabling the options, we can select the route at the respective places. For example, if you enable the product, we can use the route in products; enabled in the product category can be used in the category, likewise in others. We can enable all if we need.
Afterwards, we have an option to add rules to the routes. Once we click on the add line it will open the form to create the rules that we discussed on the first, and we can add the respective rules to the route.
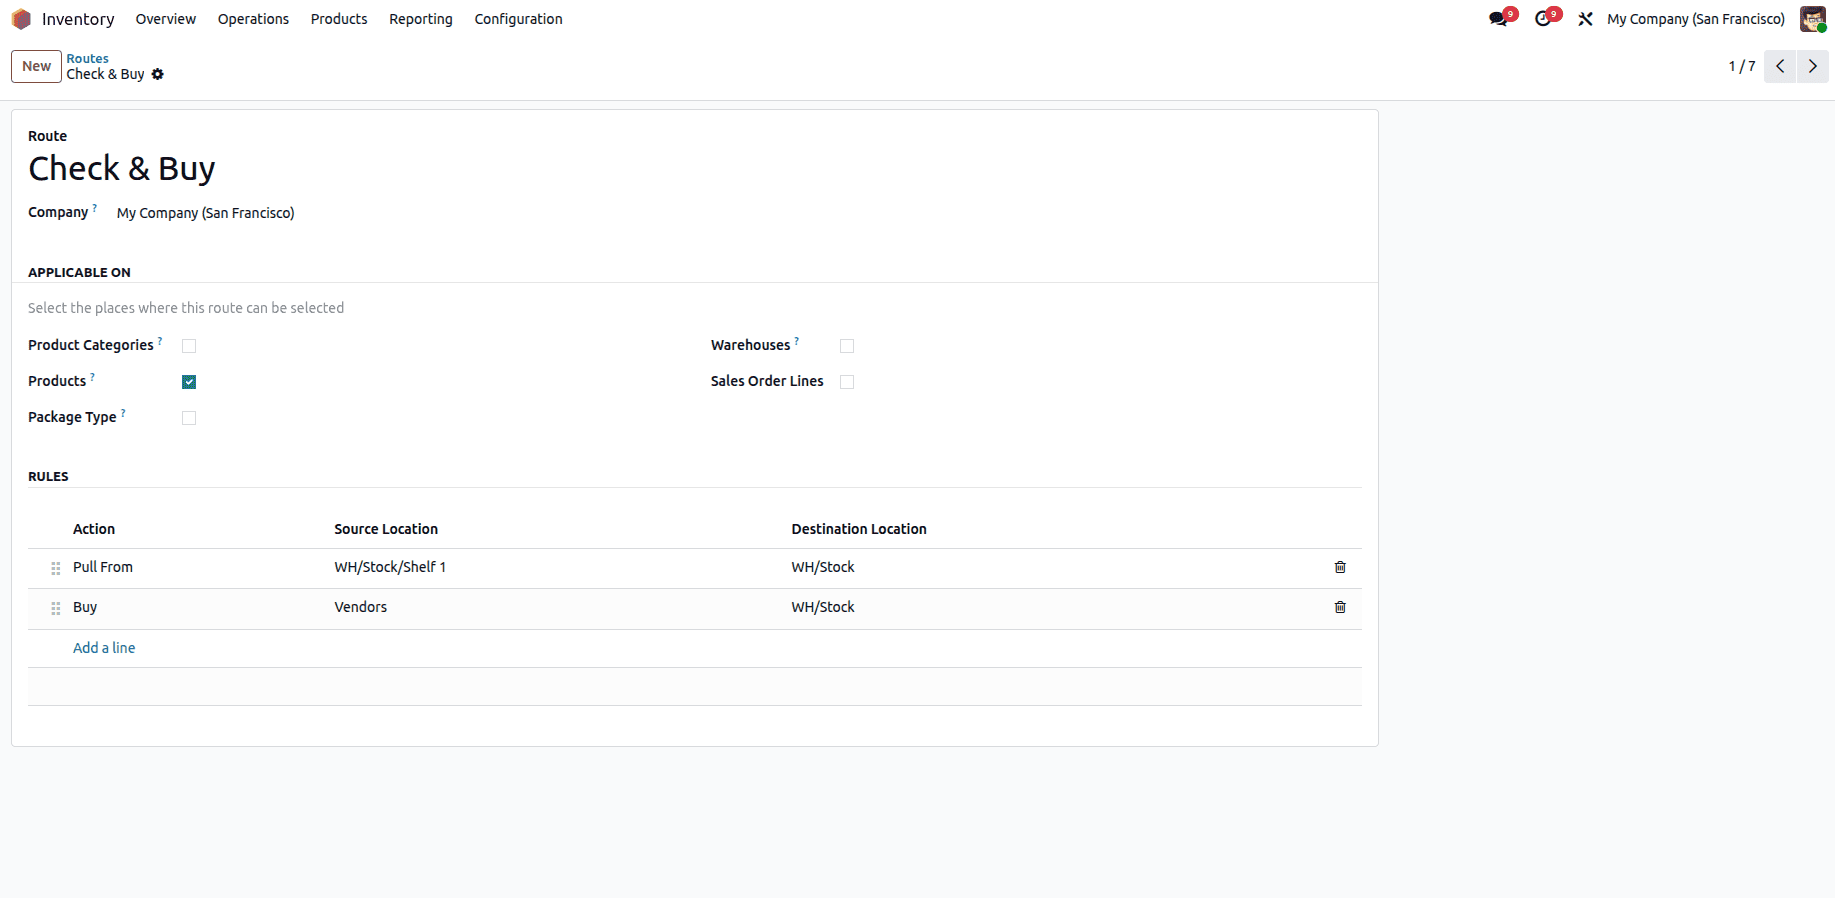
Created a route with the first rule to check the internal location for products. If there is no product, it will trigger the second rule, which is to buy from vendors. Now lets apply this rule for products.
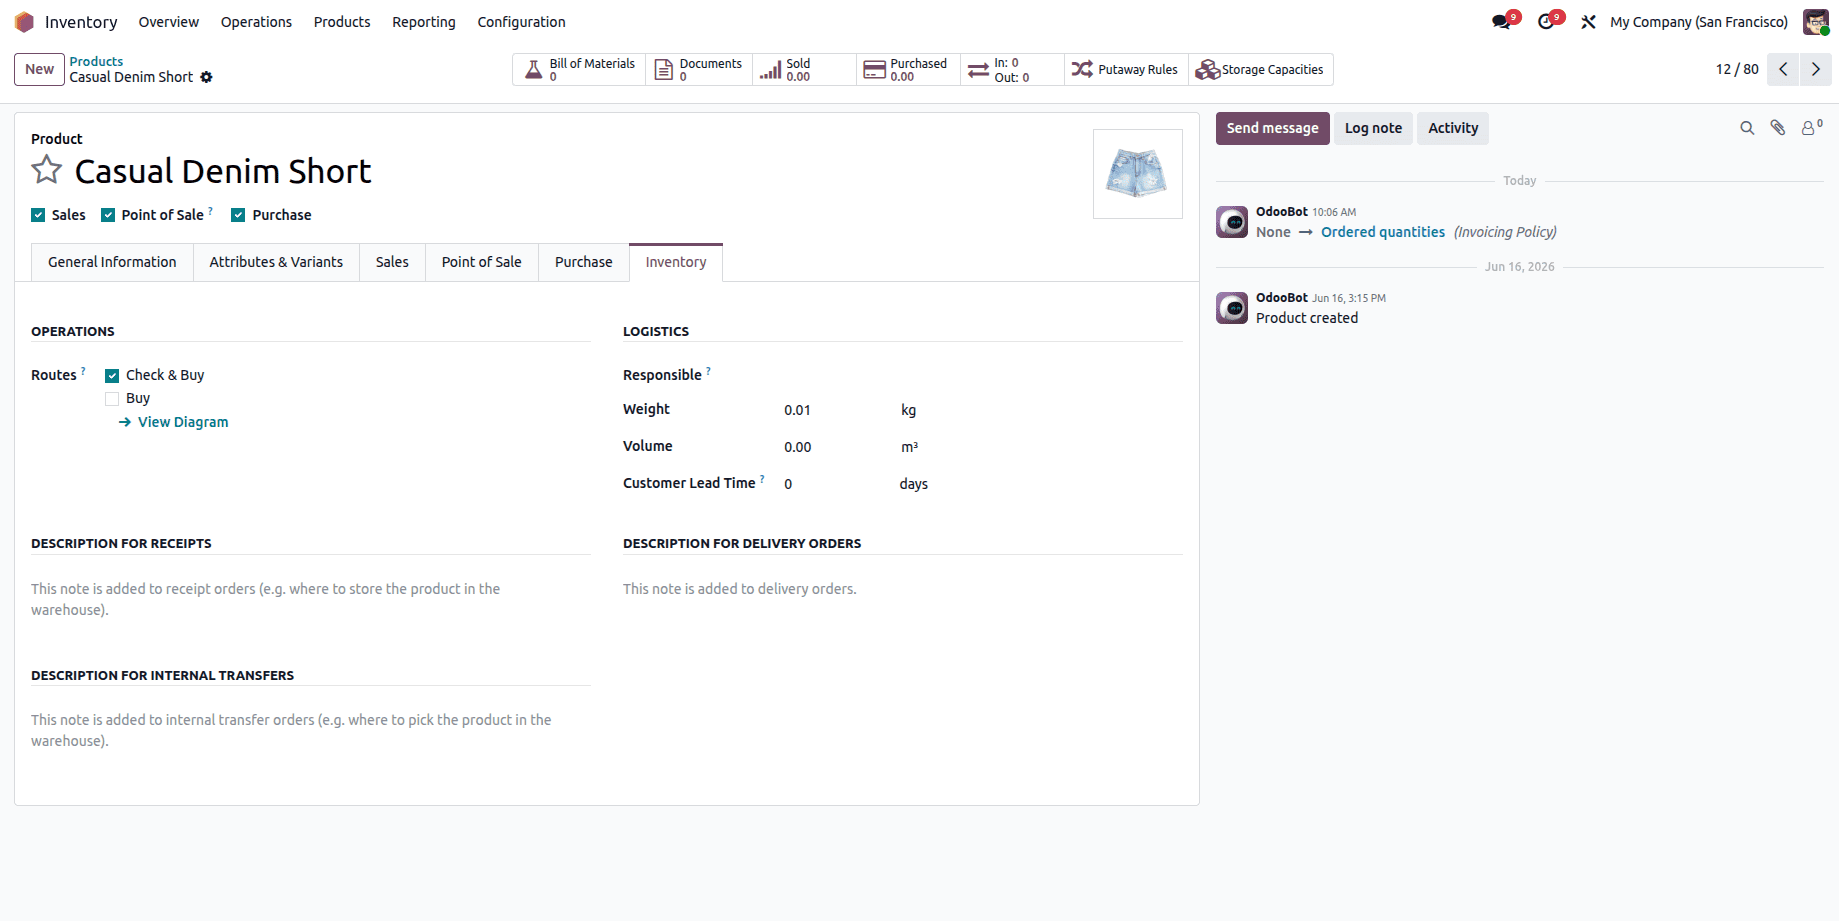
Open the products which we need to update the route and open the inventory tab under there we can see the routes which are available for products and enable the route which we just created.
Like this, we can create routes and rules and we can apply on the desired locations which are available in the Applicable On in the routes form, which will help to purchase, manufacture, buy, sell, and transfer the products in the odoo inventory.
To read more about How to Manage Rules & Routes in Odoo 18 Inventory, refer to our blog How to Manage Rules & Routes in Odoo 18 Inventory.