For companies of all sizes and sectors, efficient expense management is essential. However, the conventional approaches to managing spending can be time-consuming and error-prone, frequently leading to inefficiencies and disparities in finances. The Odoo 19 Expense Module, which provides a thorough and automated solution to streamline spending tracking and control, is extremely helpful in this situation.
We'll examine the Odoo 19 Expense Module's operation and how it might improve your business's expense management procedures in more detail in this article. Odoo 19 streamlines and eliminates errors in every step of the process, from recording expenses and submitting them for approval to producing informative reports.
Businesses may lessen the chance of errors and do away with human tracking by implementing this automated method. The Odoo 19 Expense Module's user-friendly interface and robust capabilities increase operational efficiency, transparency, and financial correctness. For any company looking to maximise expense management and guarantee accurate, timely reimbursements, it is an essential tool.
The Odoo 19 Expense Module streamlines organisational expense management in the following ways:
Users must first make sure the Expense Module is installed from the Apps area before they can start using it in Odoo 19. They may simply access it after installation by going to the main dashboard and selecting the "Expenses" icon. Employees can now effectively manage and report their expenses through the module interface.
The dashboard of the expense module is as shown below. Which shows an onboarding panel, contains expense values of To Submit, Waiting Approval and Waiting Reimbursement. There are 2 buttons: one is Upload, and the second one is New.
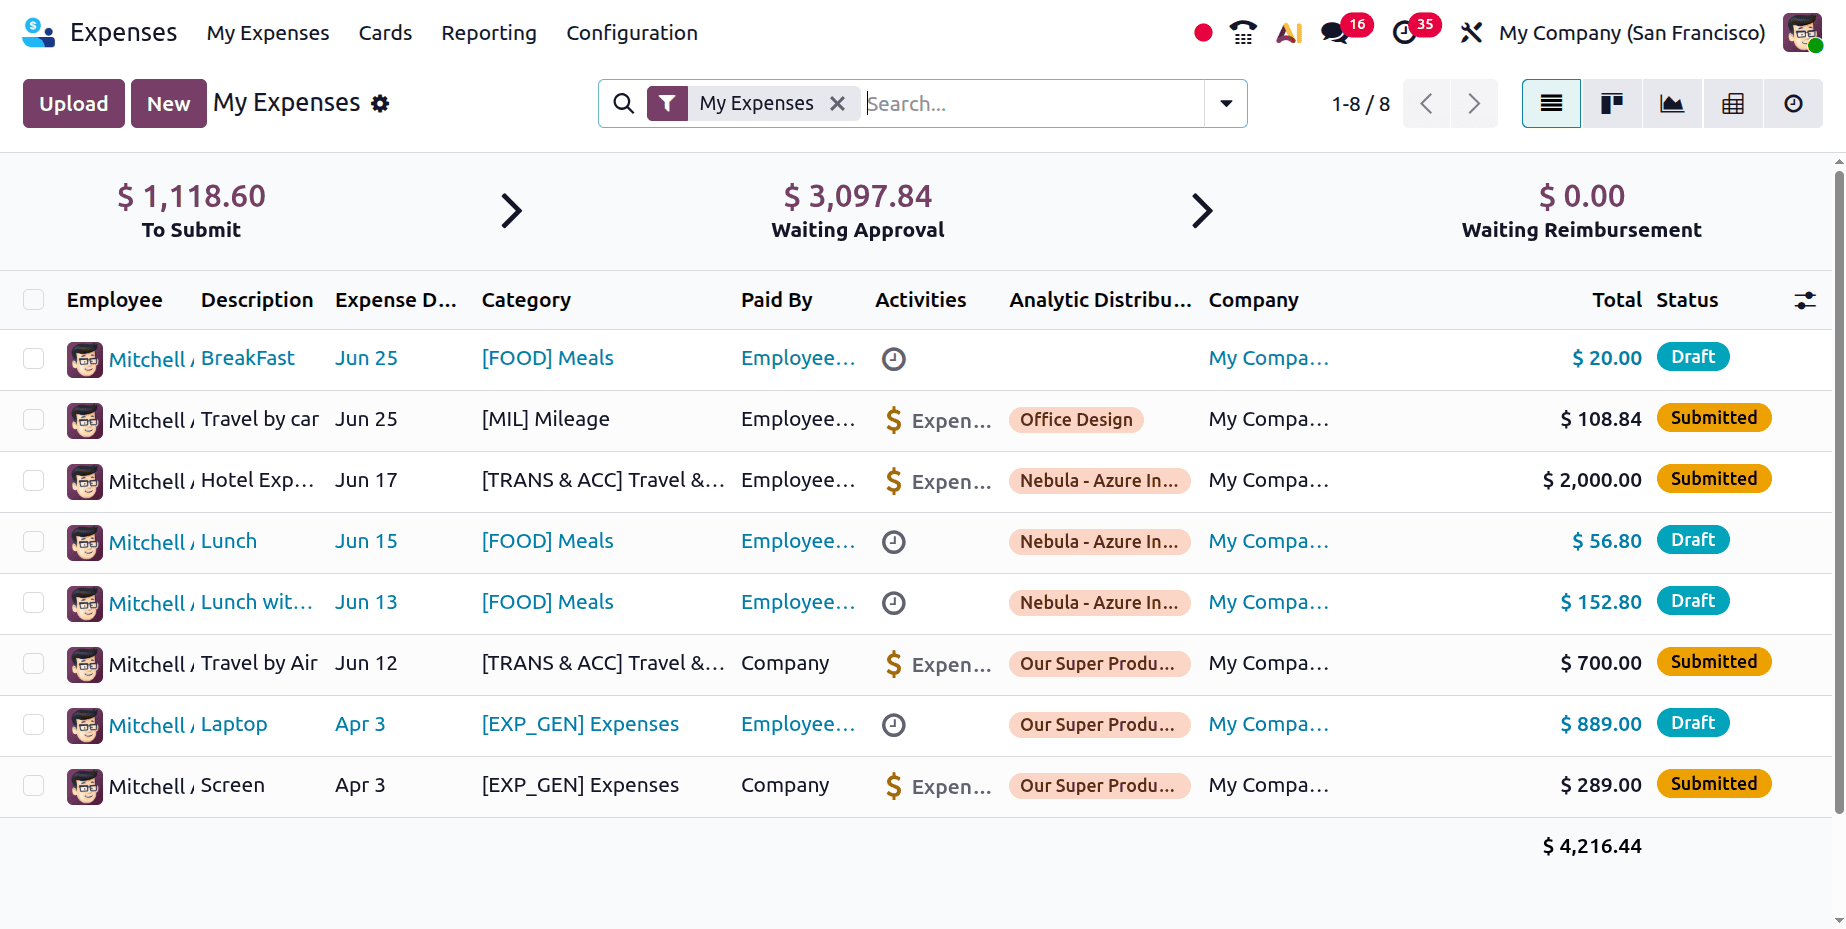
The list shows all the created expenses with details like Employee, Description, Expense date, category, paid by, activities, analytic distribution, company, total and status. Clicking the Upload icon will allow you to upload an expense report from your system.
Overview of the Expense Dashboard
After entering Odoo 19's Expense module, users are presented with an extensive dashboard that provides a clear summary of all charges that have been entered. The expense date, description, employee name, payment method (Paid By), associated activities, business, total amount, and status are all included in the dashboard's filtered list of expenses.
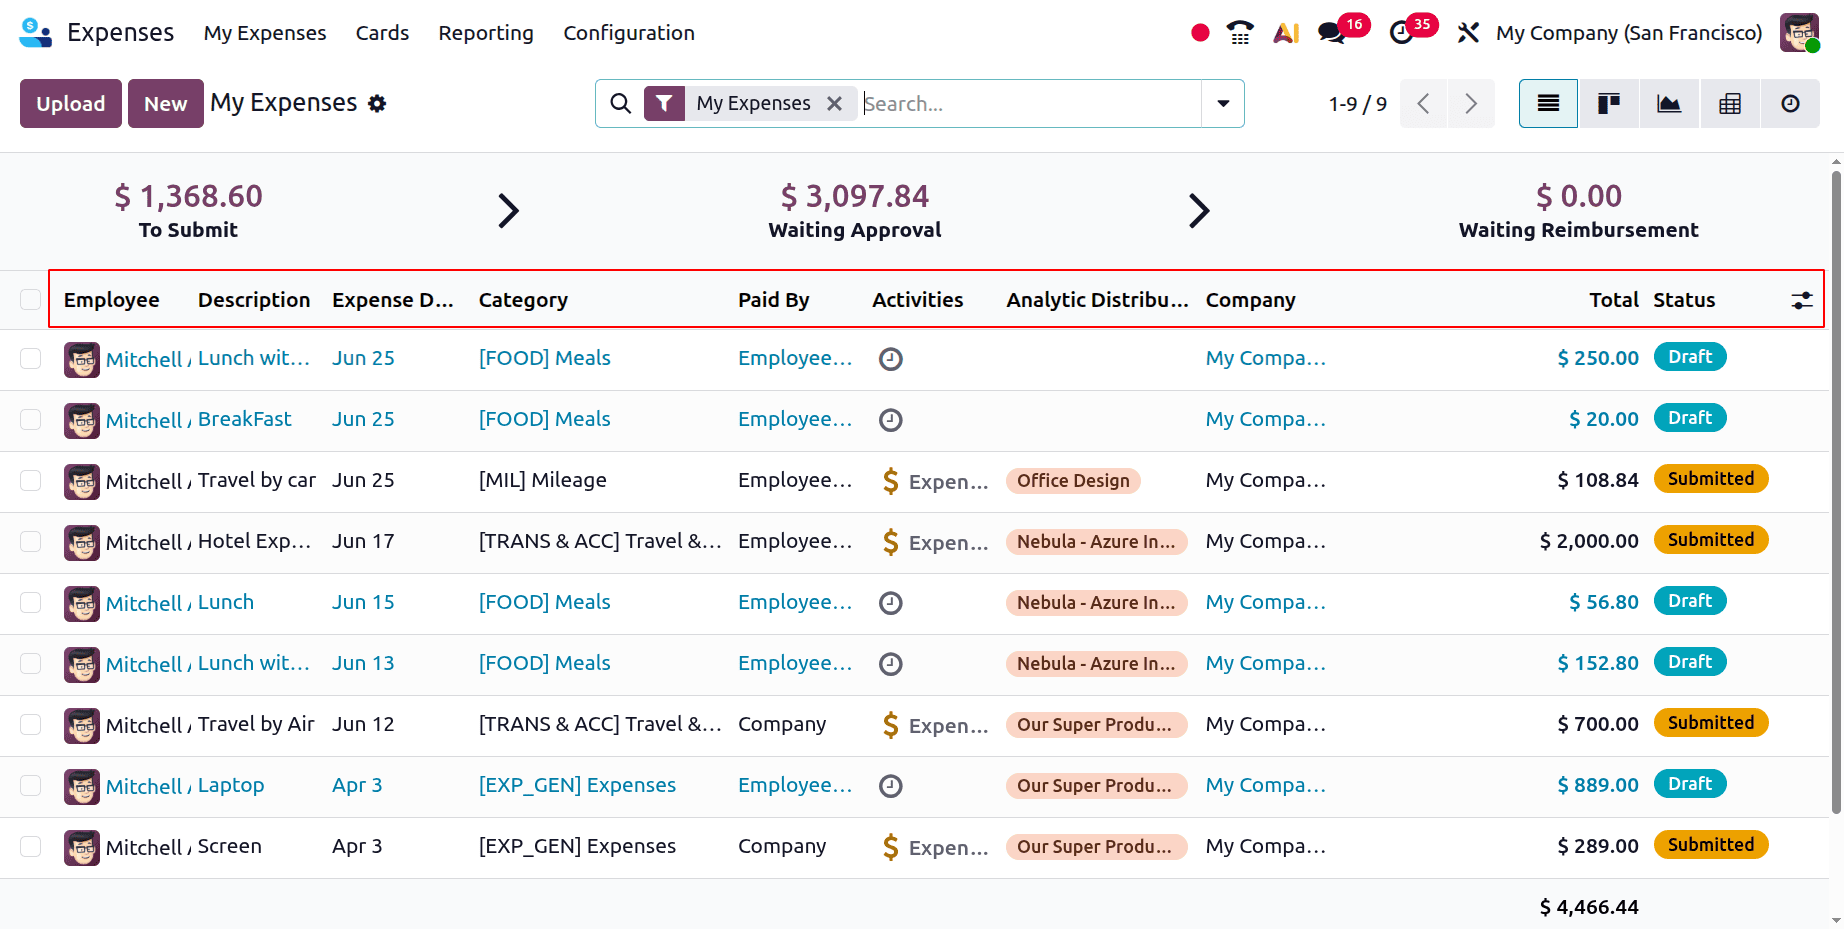
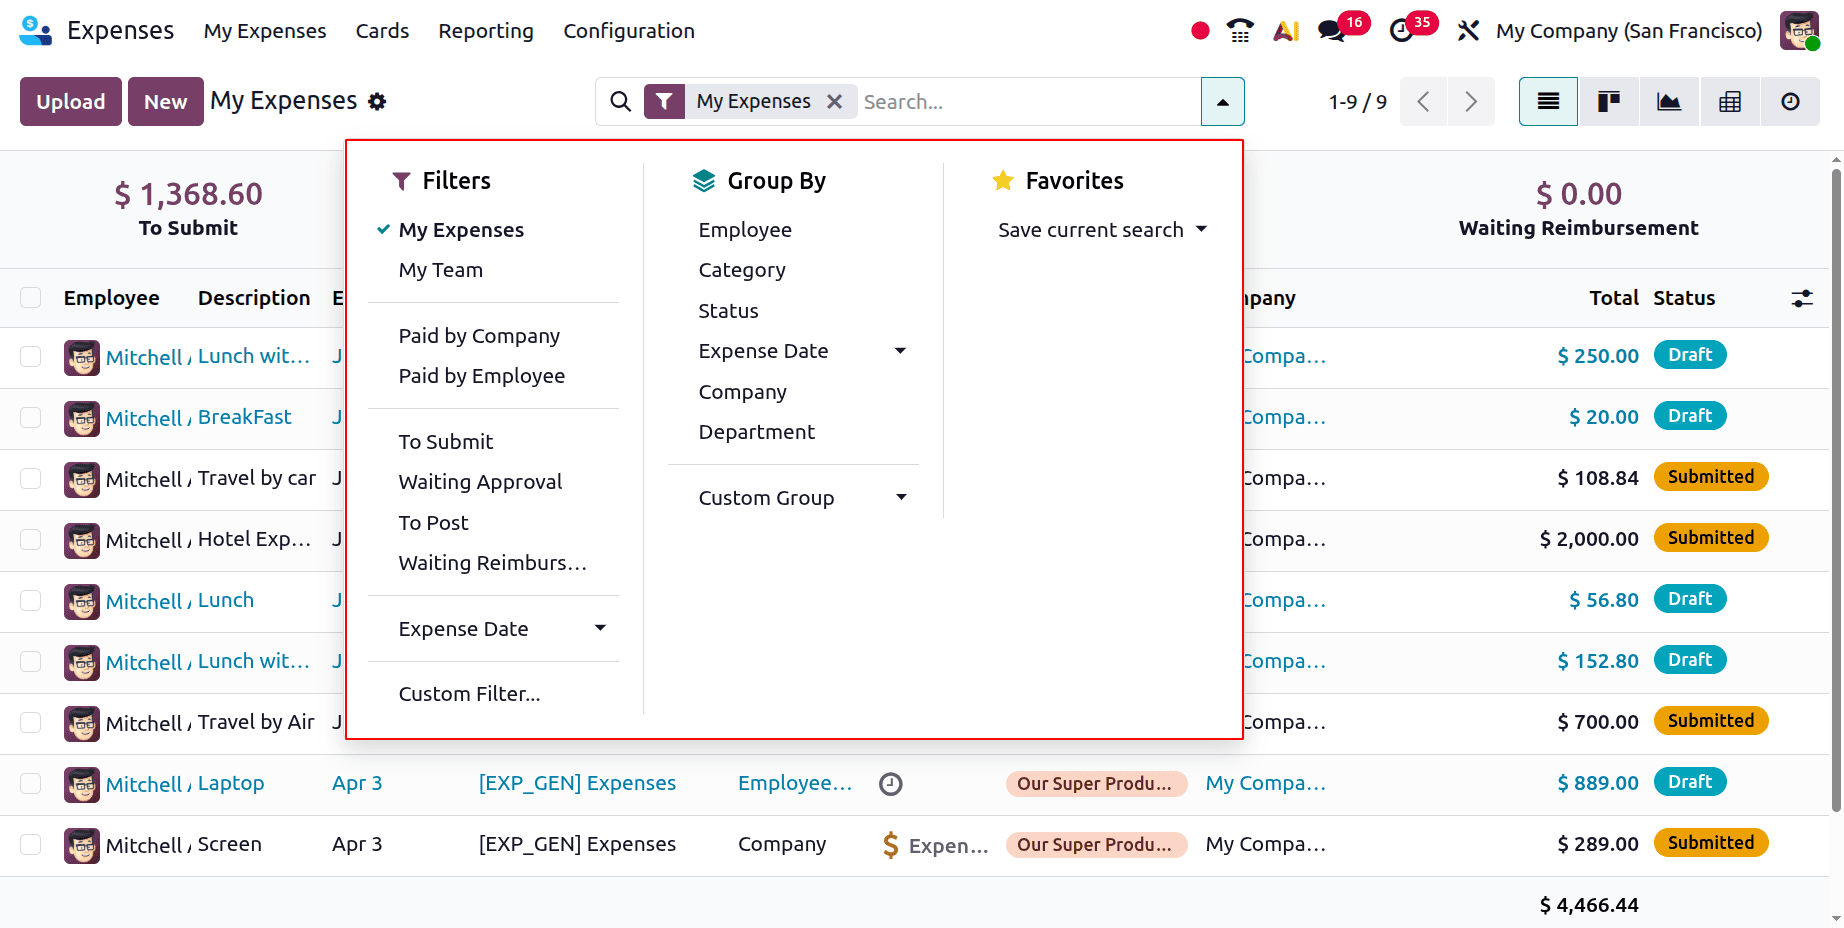
Users can tailor their expense view according to particular criteria by applying different filters and using the "Group By" option.
This centralised perspective guarantees improved tracking and accountability throughout the company and enables users to quickly check the status of their expenses.
Users may easily access their spending records, which are divided into three primary statuses, at the top of the Expenses dashboard:
To Submit > Waiting Approval > Waiting Reimbursement
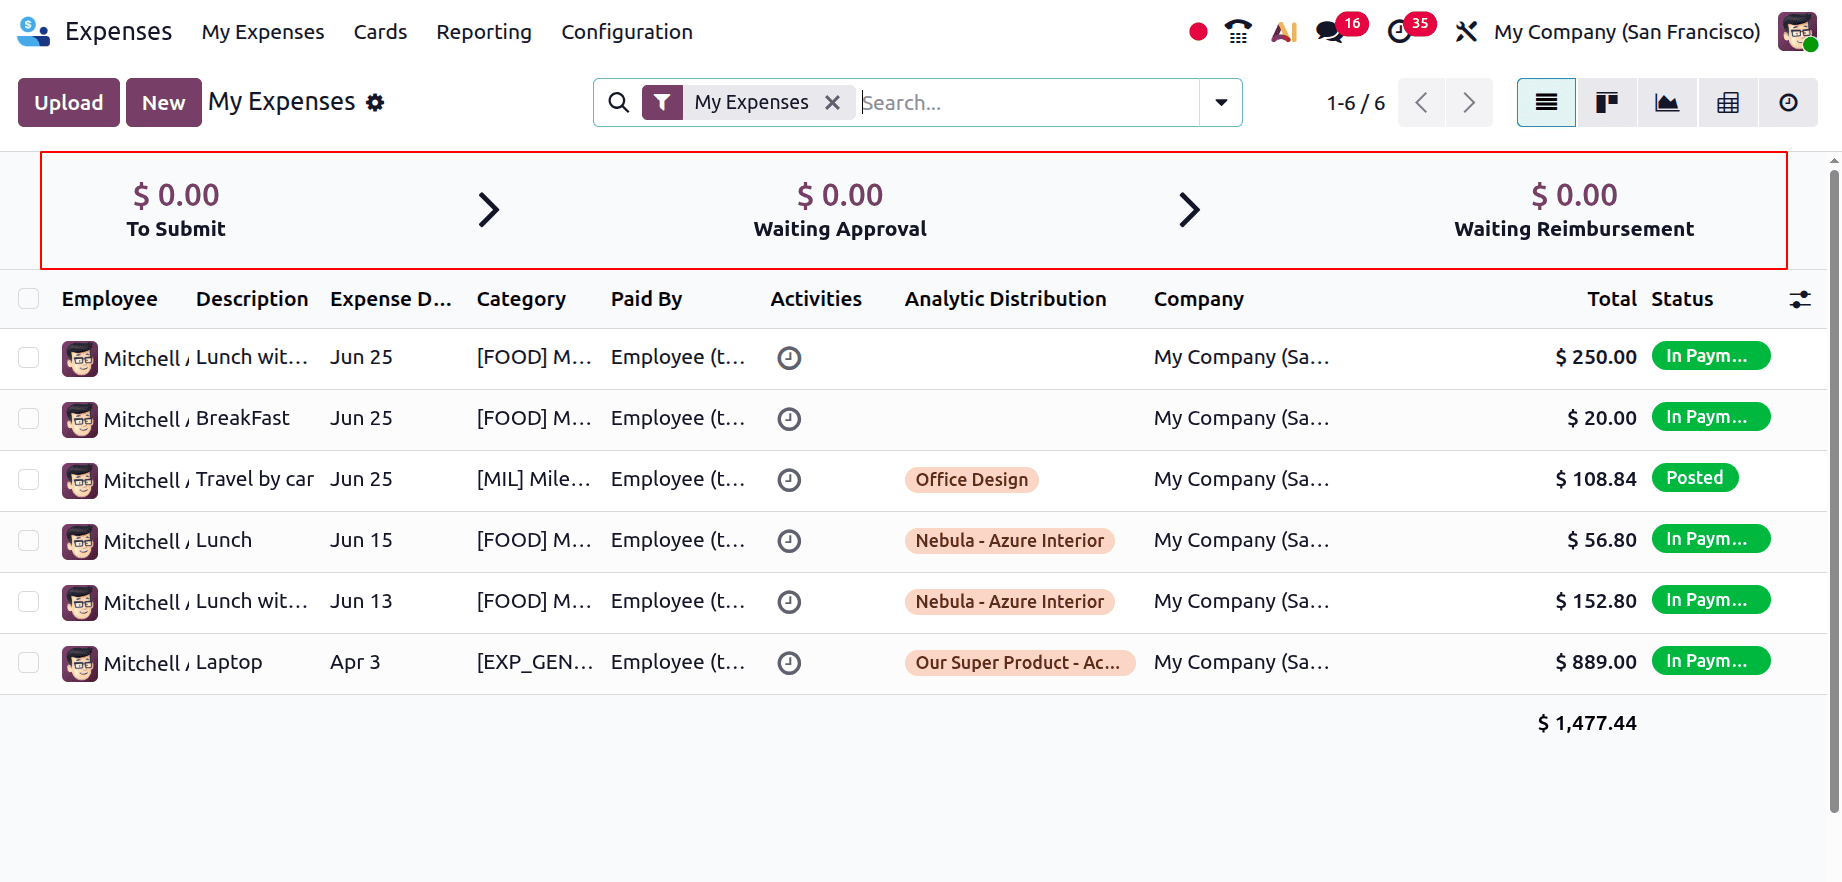
Let's create a new expense to check those stages. By choosing the New icon in the My Expenses pane, you may also create a new expense.
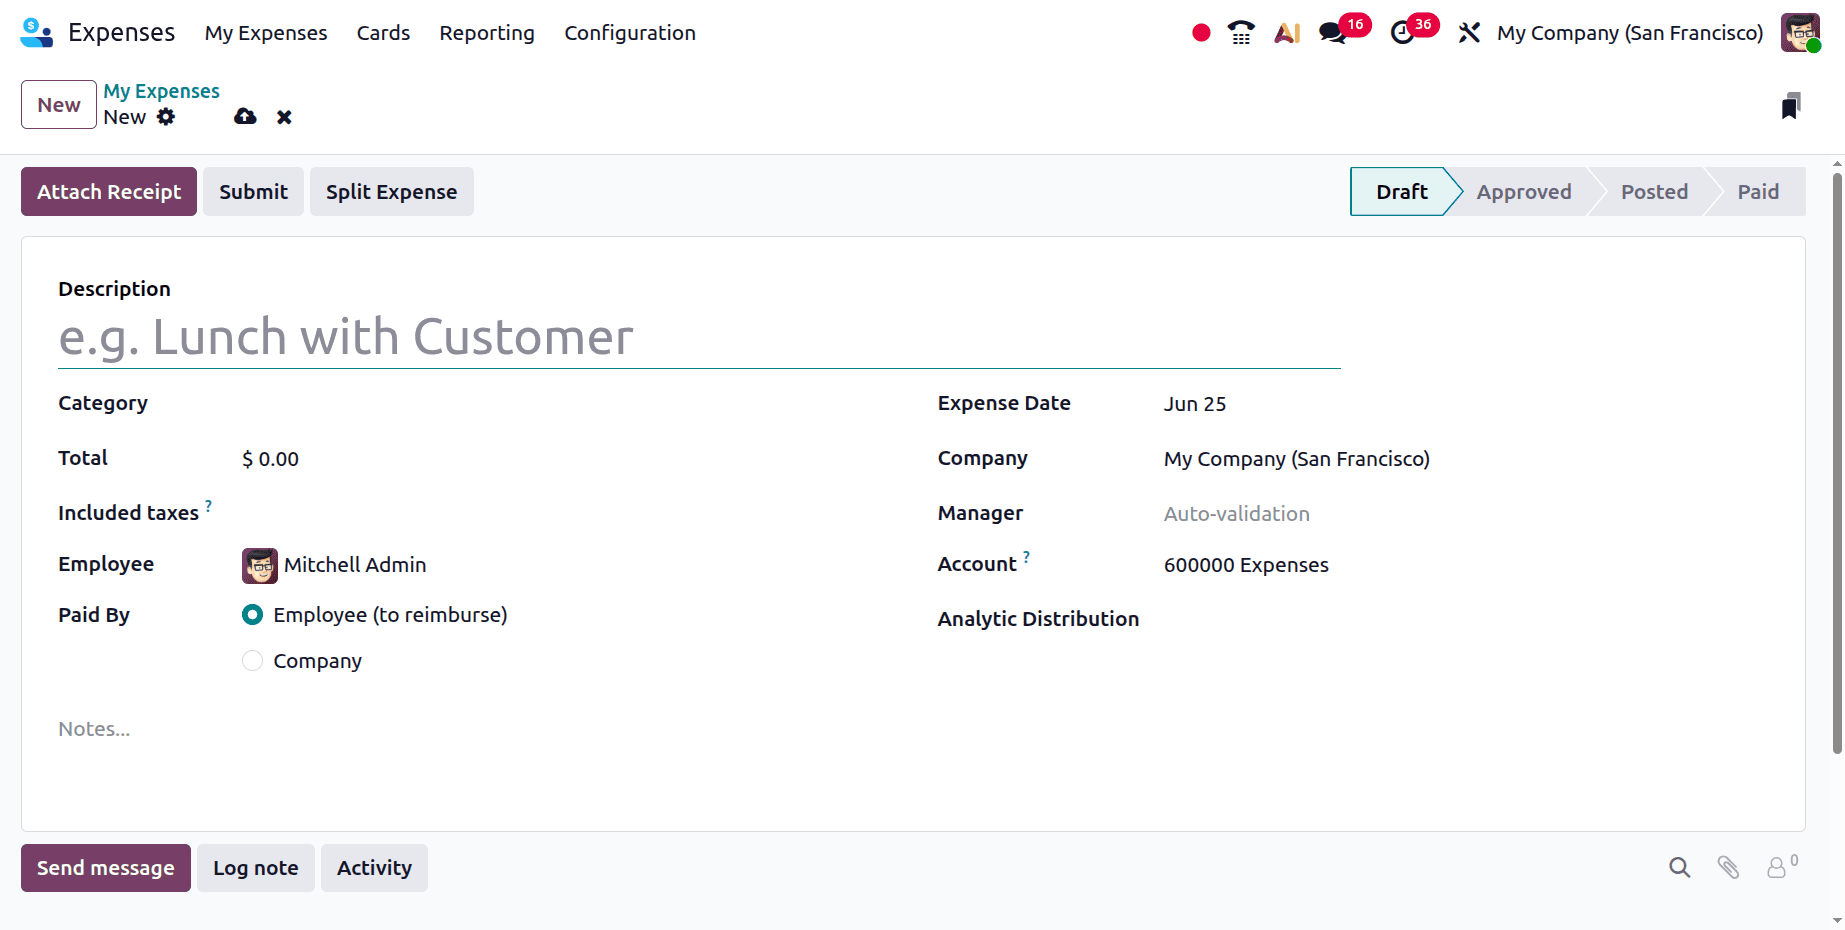
After providing specifics about your expenditures in the Description section of the new window, choose the relevant Category.
A variety of expense categories are available to users, including:
Costs associated with phone, internet, and other communication services are referred to as communication.
- Meals: food and drink costs associated with business.
- Gifts: things bought as presents for partners, customers, or staff.
- Mileage is the amount paid for using a personal vehicle for work.
- Travel and Accommodation: charges associated with housing, transportation, and other travel-related expenses.
Any other business-related expenses not included in the aforementioned categories are referred to as general expenses.
Fill in the Total column with the entire cost. You can choose the name of the employee linked to the expense in the Employee box.
In the Paid By area, you can also indicate who is responsible for covering the cost. Either the employee or the company is an option. The employer will thereafter repay the worker for the costs incurred if they pay.
The Expense Date, which shows the date the item was billed, can also be added. The Account field can be used to choose the anticipated expense account. Additionally, you can choose the name of the company.
The expense status can be classified as To Report, To Submit, Submitted, Approved, Refused, or Done.
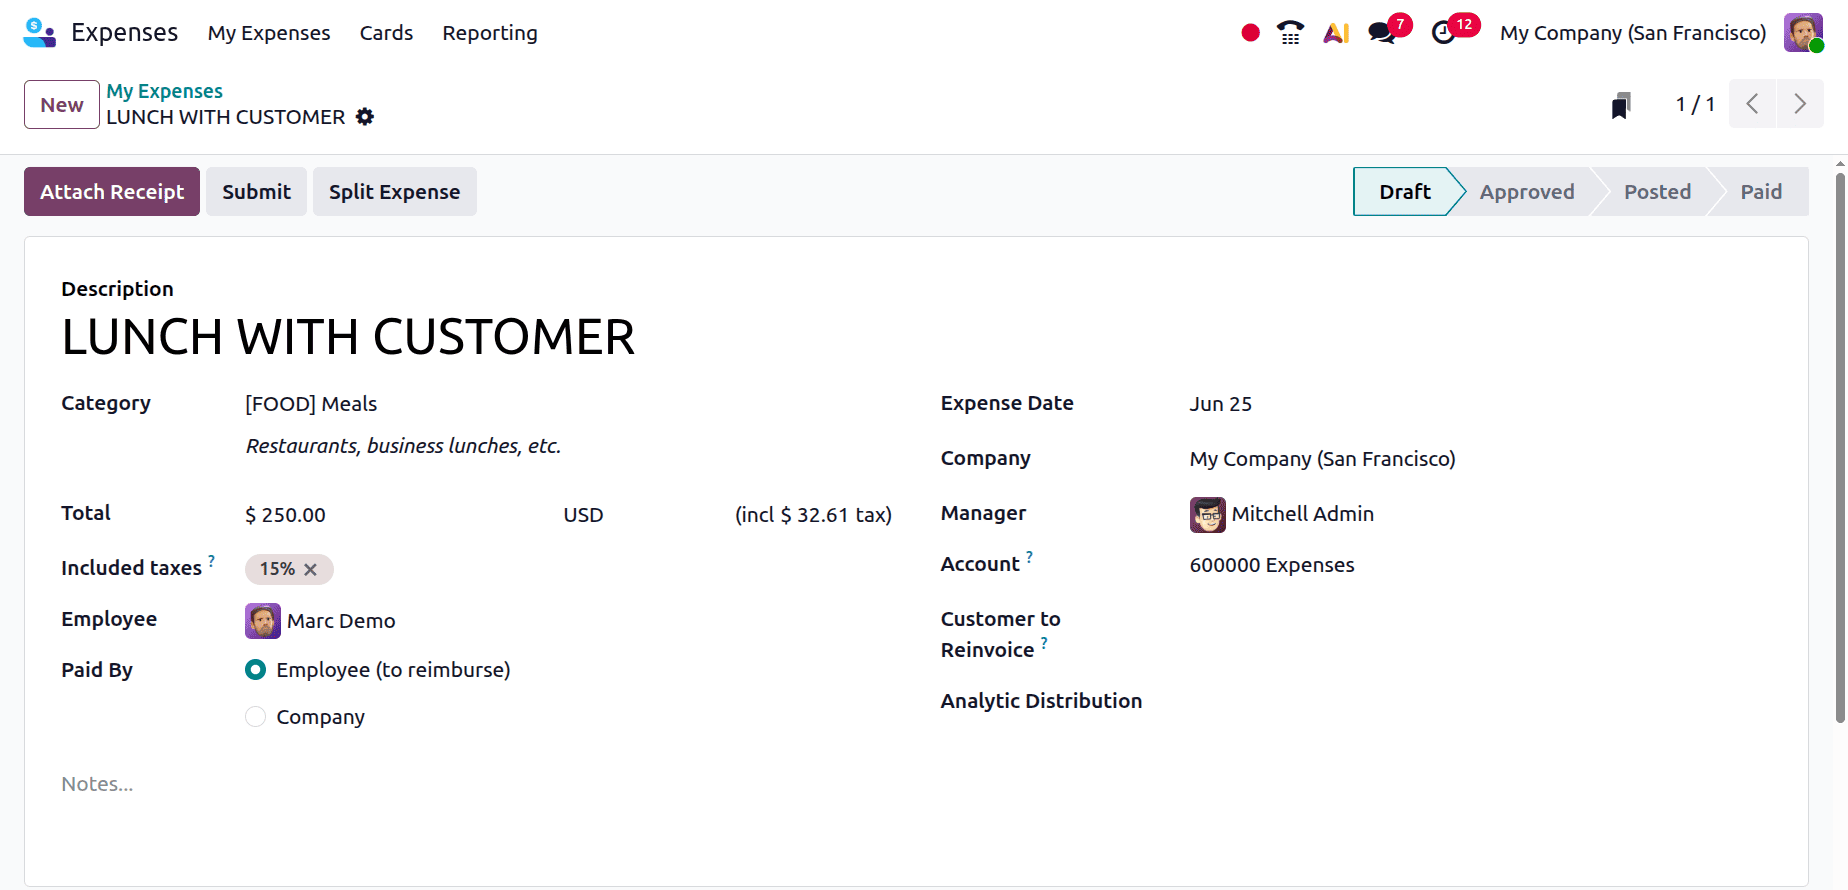
Here, an expense is created by the employee Marc Demo, the category is chosen as Meals with a total cost of $250. The expense is Paid by Employee and the details like Expense Date, Company, manager, account are added here. There are three buttons named Attach Receipt, Submit, Split Expense.
Employees can upload supporting documentation for their expense claim, such as bills, invoices, or receipts, using the "Attach Receipt" button on the expense form.
It is currently in draft form and has not yet been submitted. It will now be accessible under the "To Submit" status. This expense will be included in the stage's header-level total. Consequently, $250 is the value.
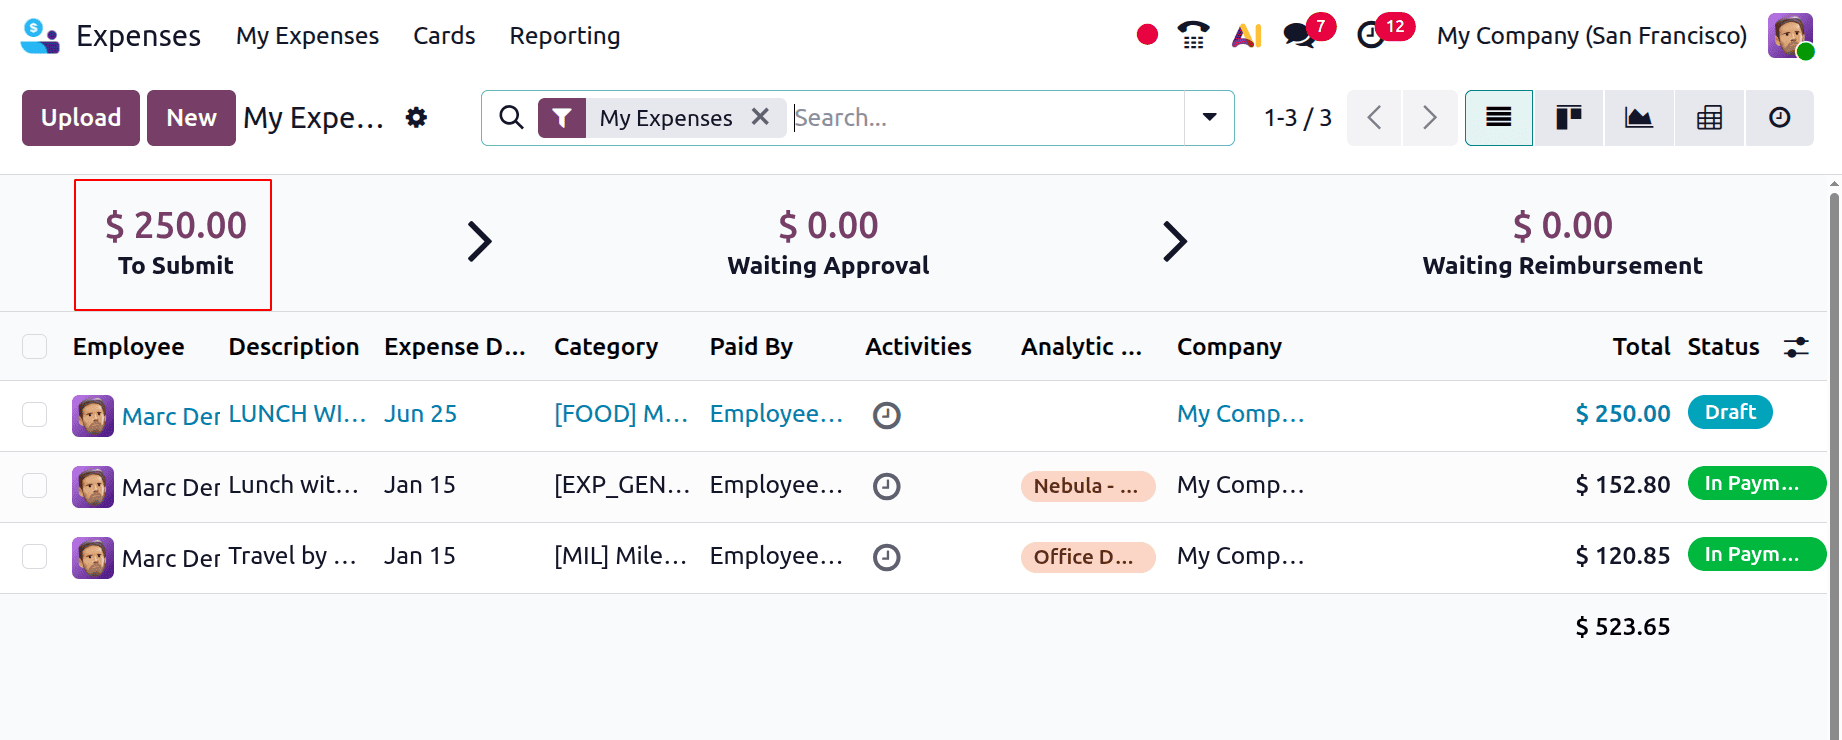
To Submit: will display all created expenses that have not yet been submitted for approval. Additionally, the header prominently displays the entire amount of these outstanding charges, allowing users to quickly assess the amount that has to be addressed.
Now let's open the expense that was filed. Next, press the "Submit" button. The report might then be accepted or rejected by the management.
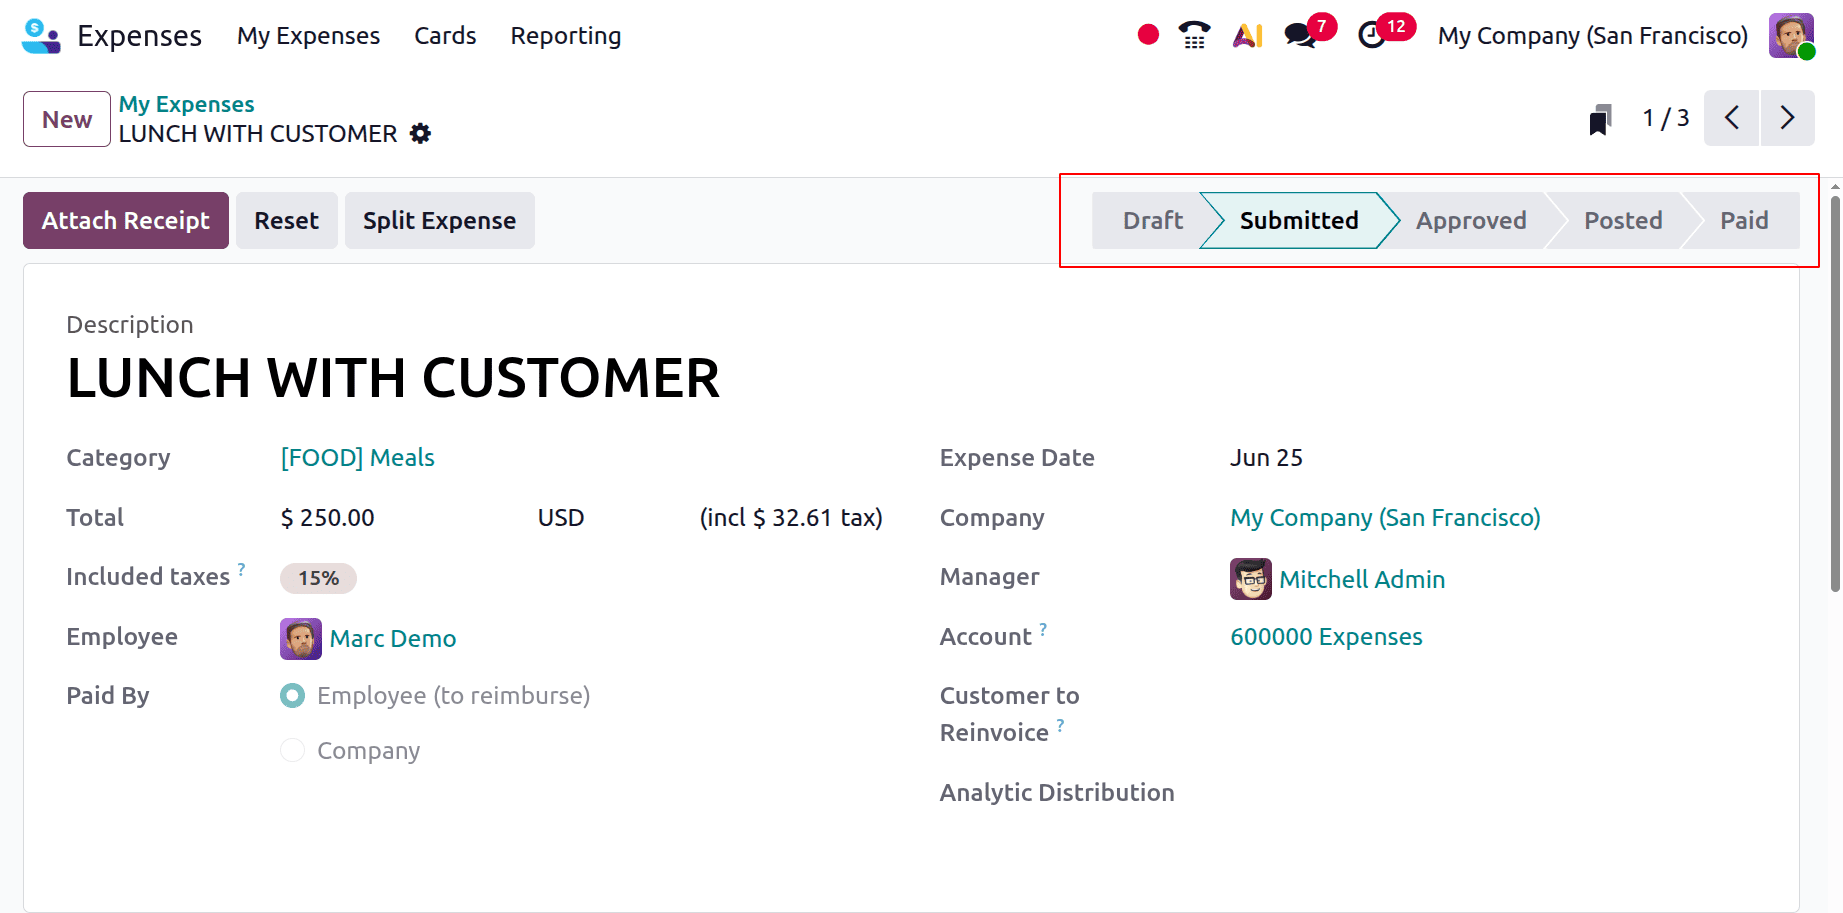
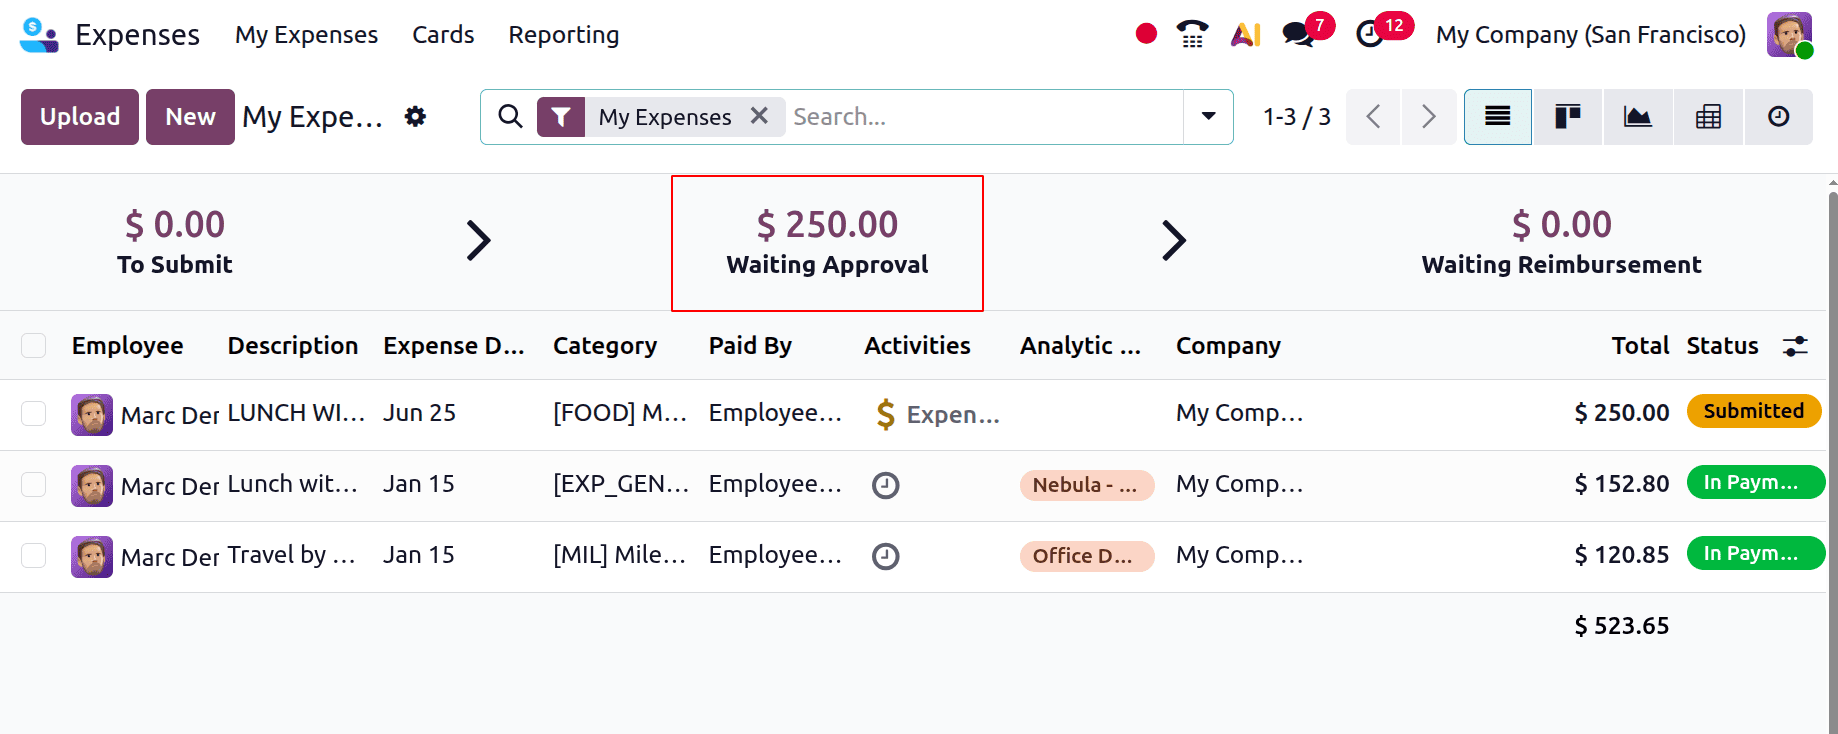
The expense report is awaiting clearance, but the stage has changed to Submitted. The matching cost is now added to the "Waiting Approval" stage and subtracted from the "To Submit" step.
Expenses that are presently undergoing approval and awaiting managerial evaluation and approval are referred to as under validation. As seen below, the value rose to $250.
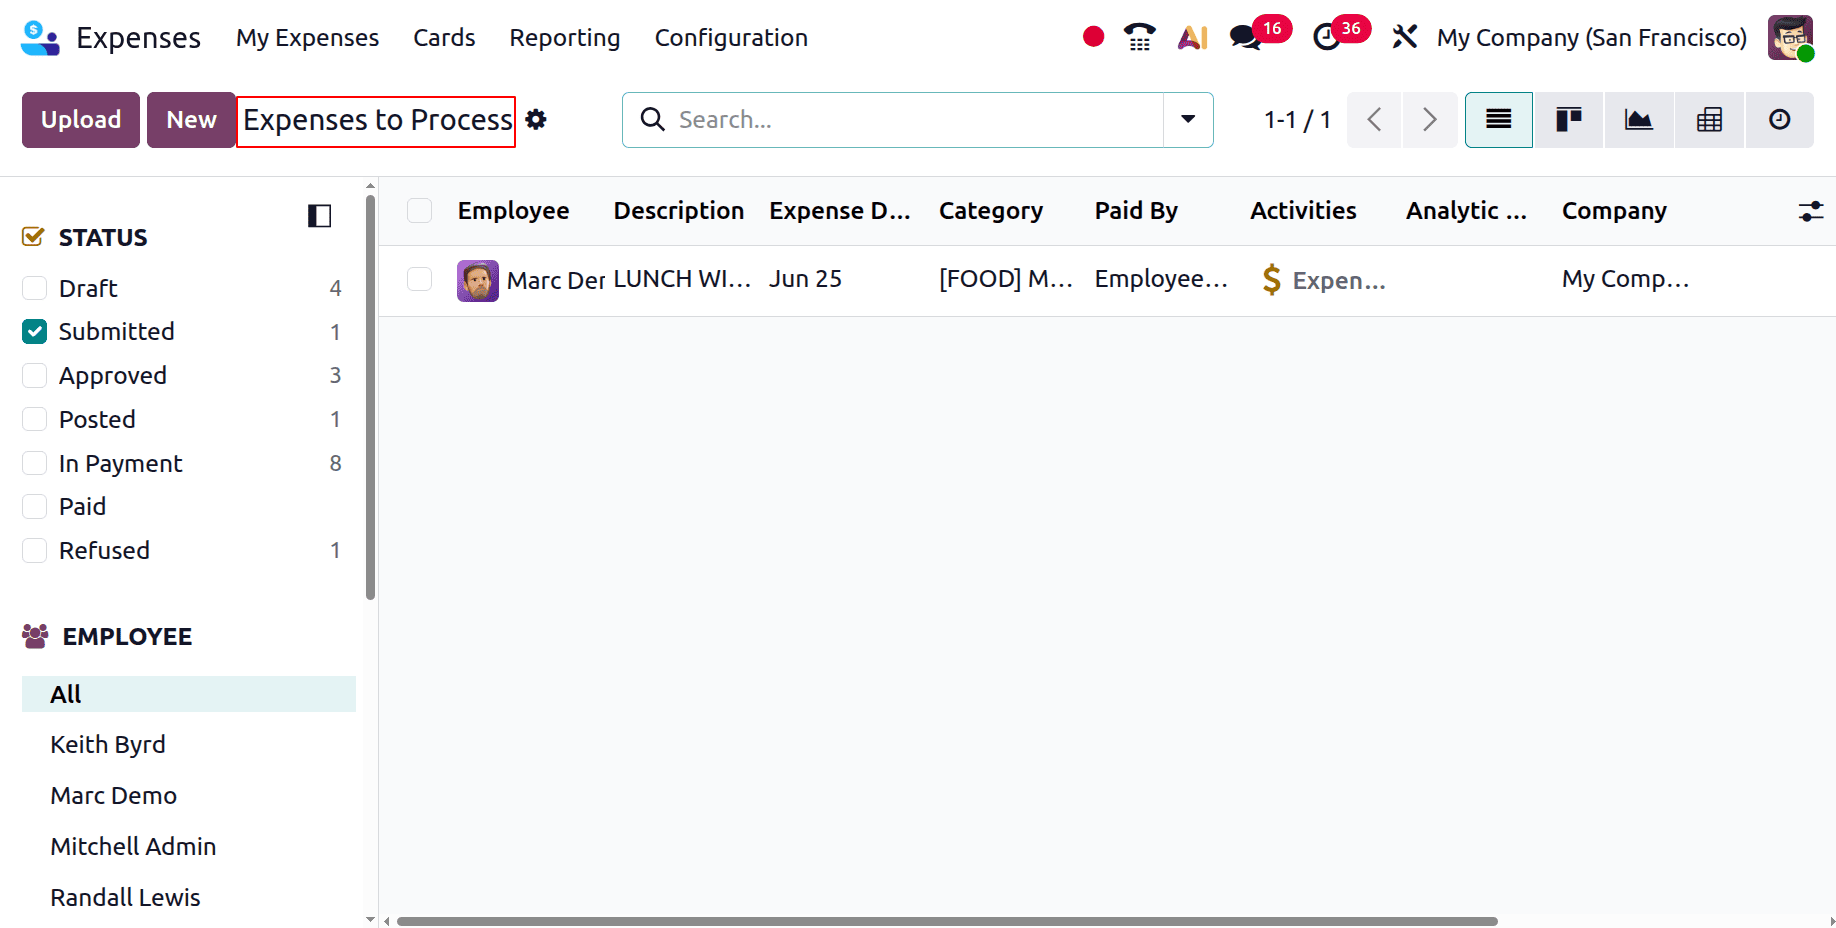
Mitchell Admin is the manager in this case. Just log in as Mitchell Admin. Choose the Expenses to Process from My Expenses menu.
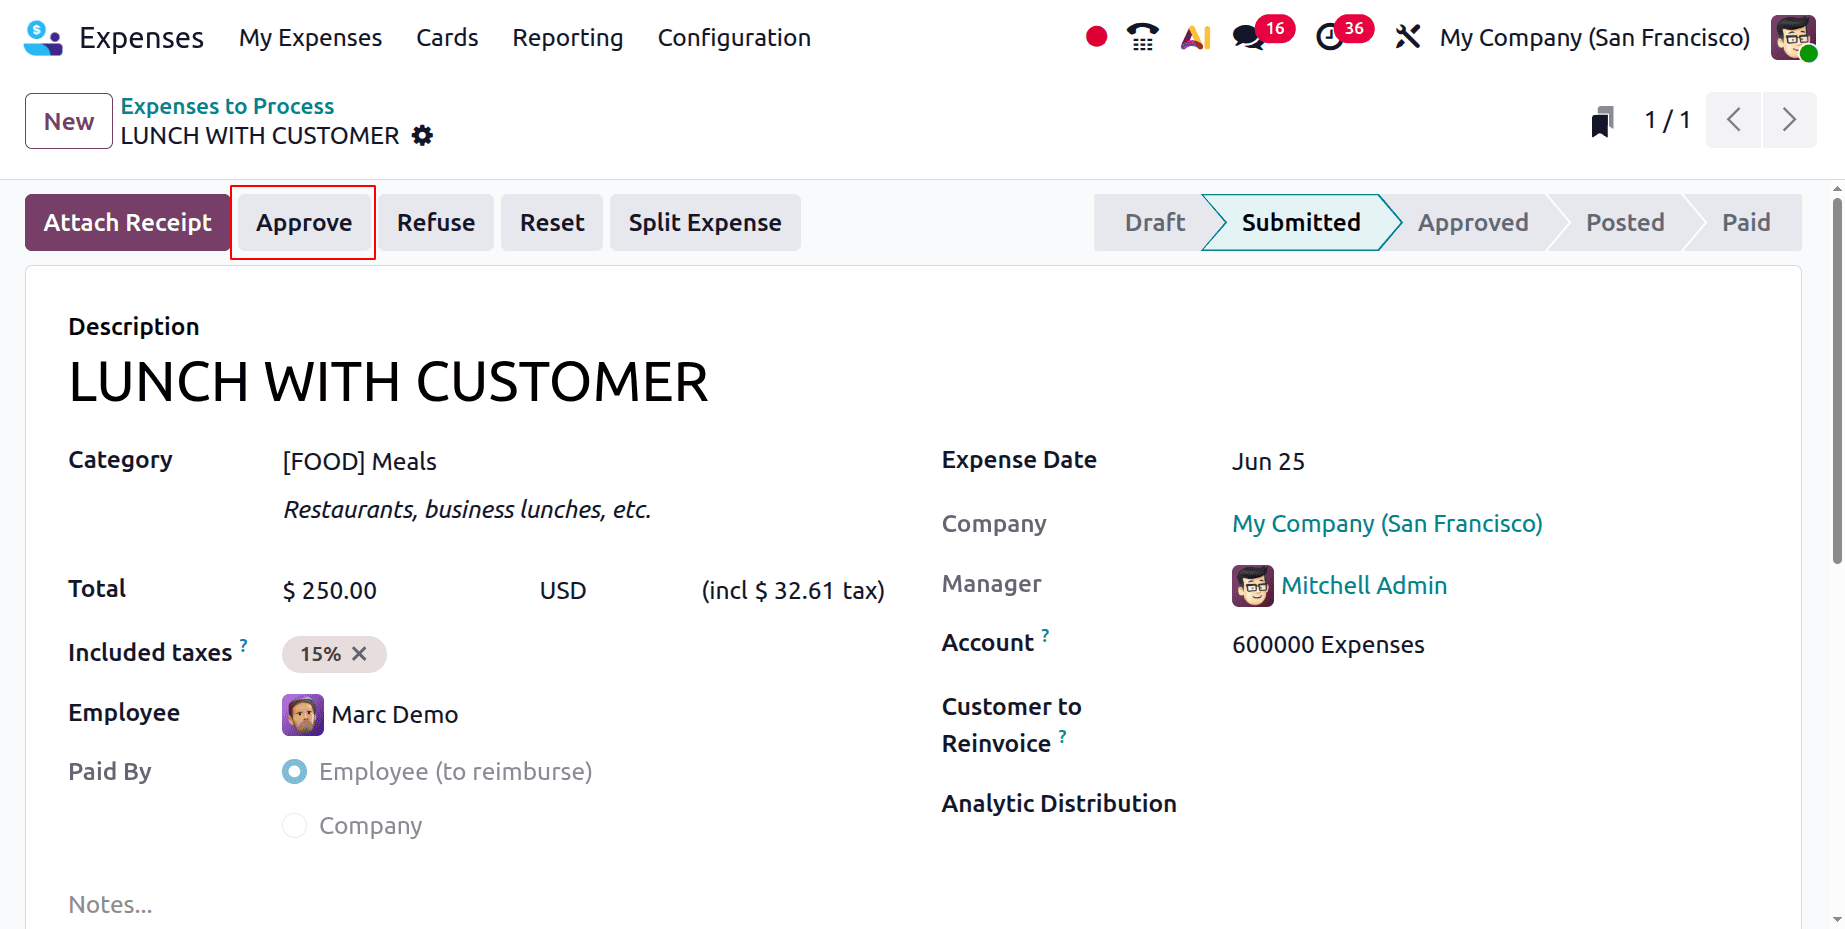
Open the expense once more now and click on the Approve button as shown below. We have the option to accept or reject the expense.
Then again, log in as the employee Marc Demo. The charge will be available under "Waiting Reimbursement" if the manager allows it.
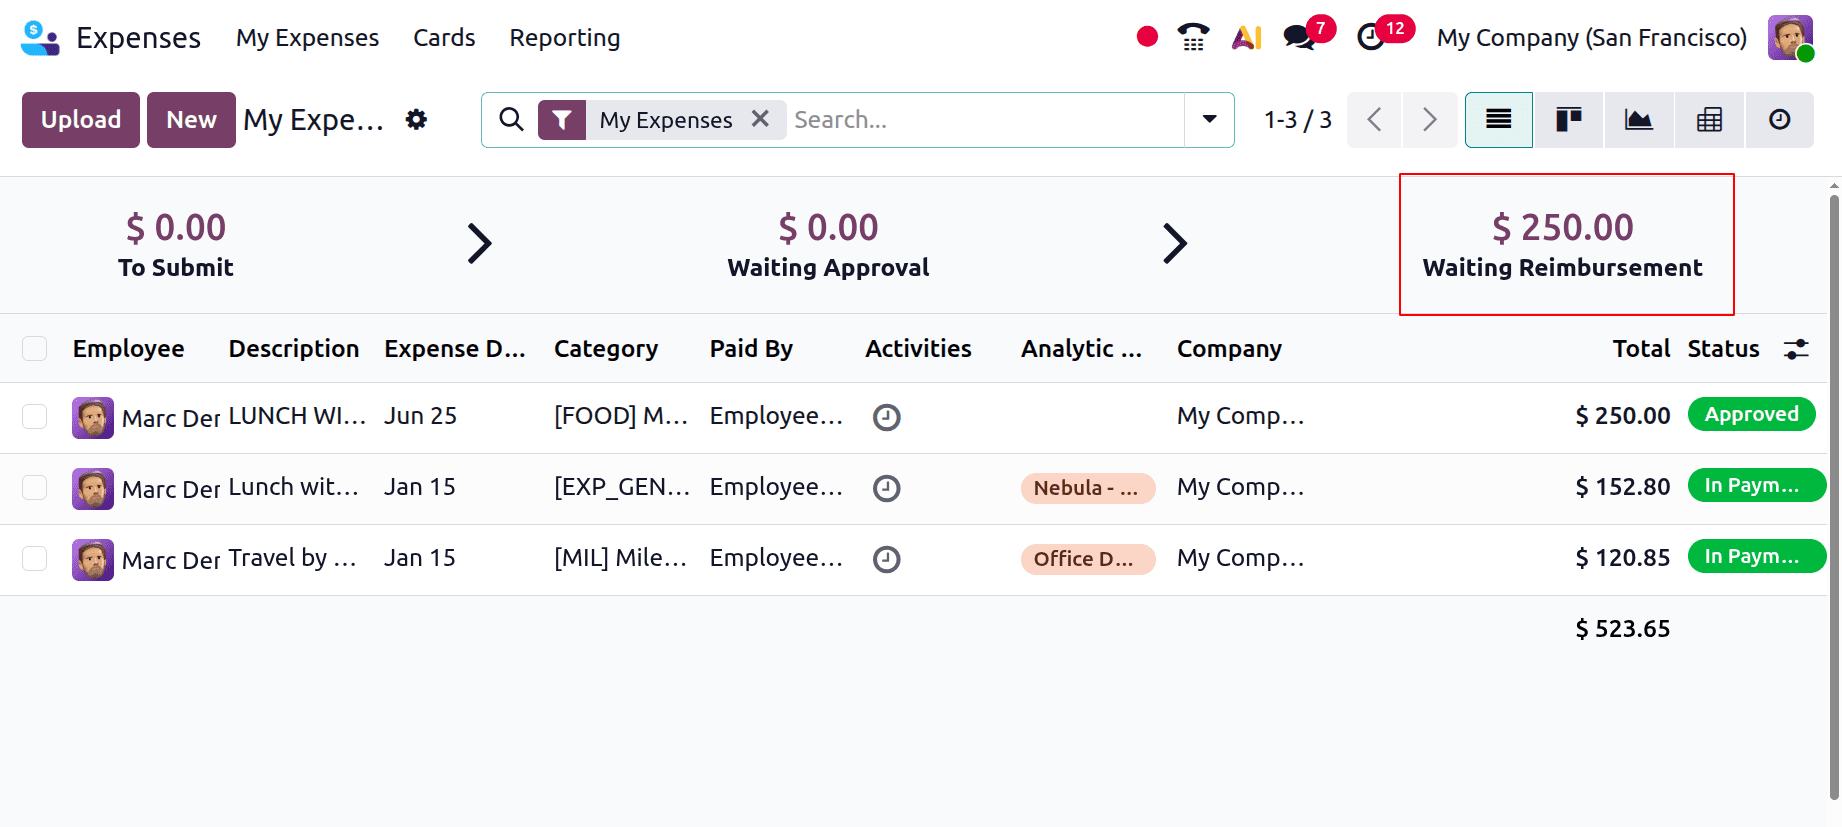
Waiting Reimbursement: Authorised costs for which the employee has not yet received reimbursement. $250 was added, as indicated below.
The button action allows the user to post the journal entry in order to refund expenses.
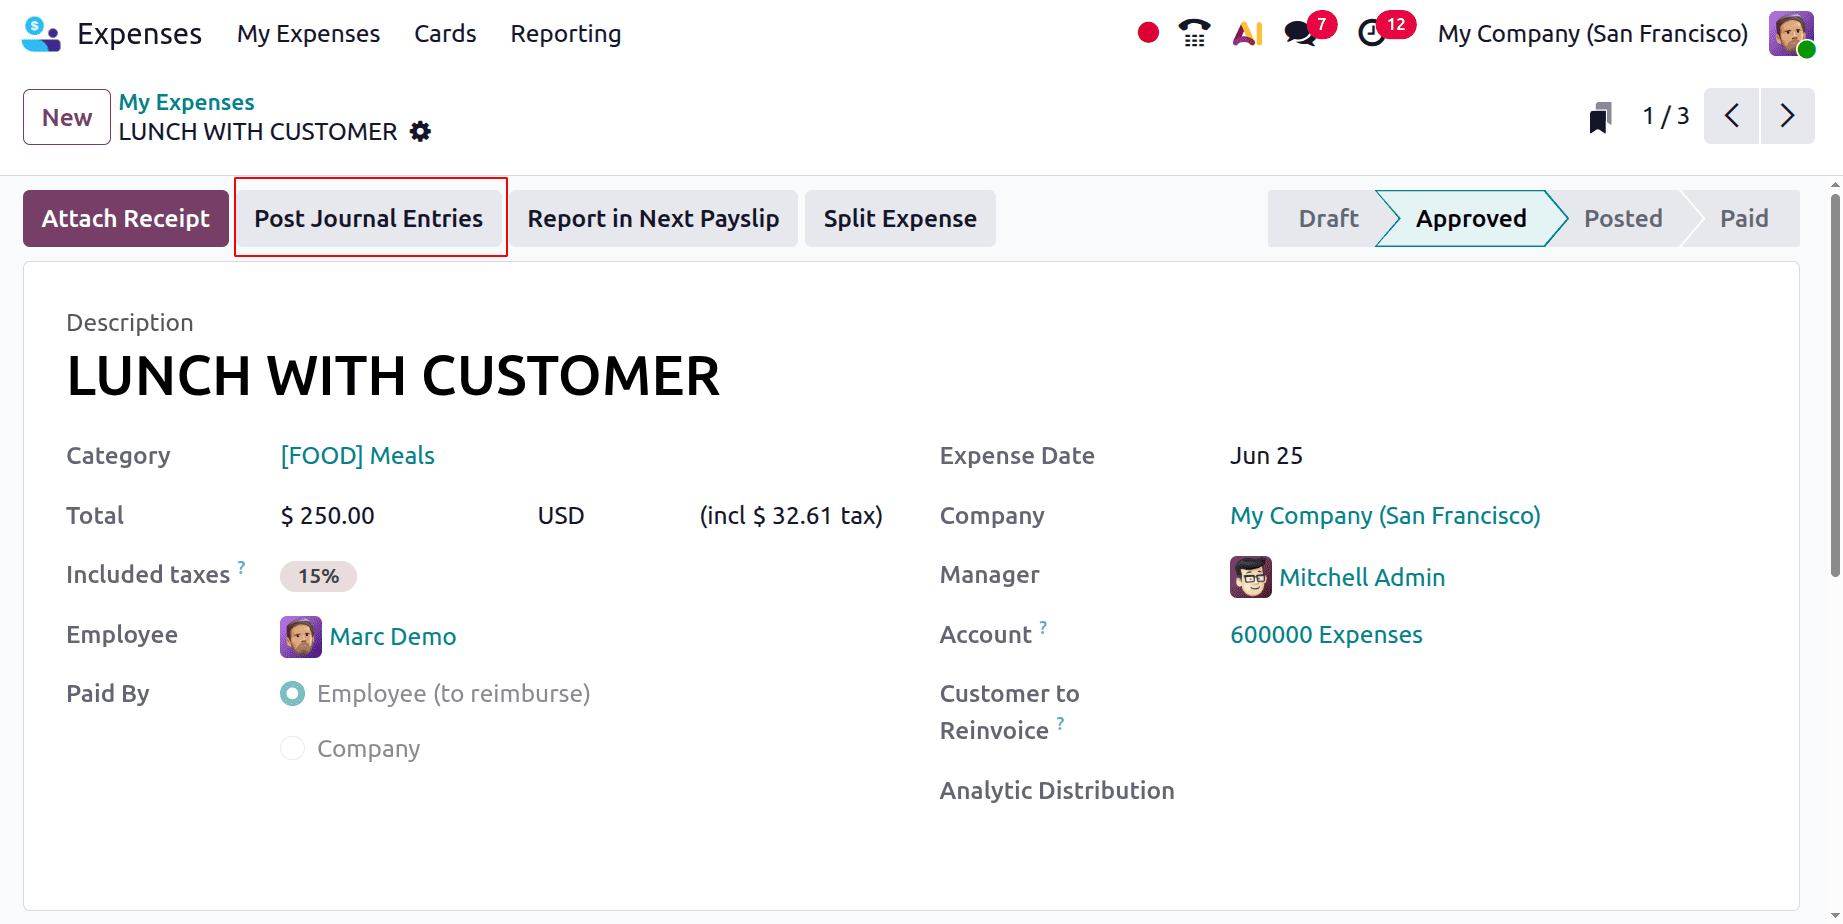
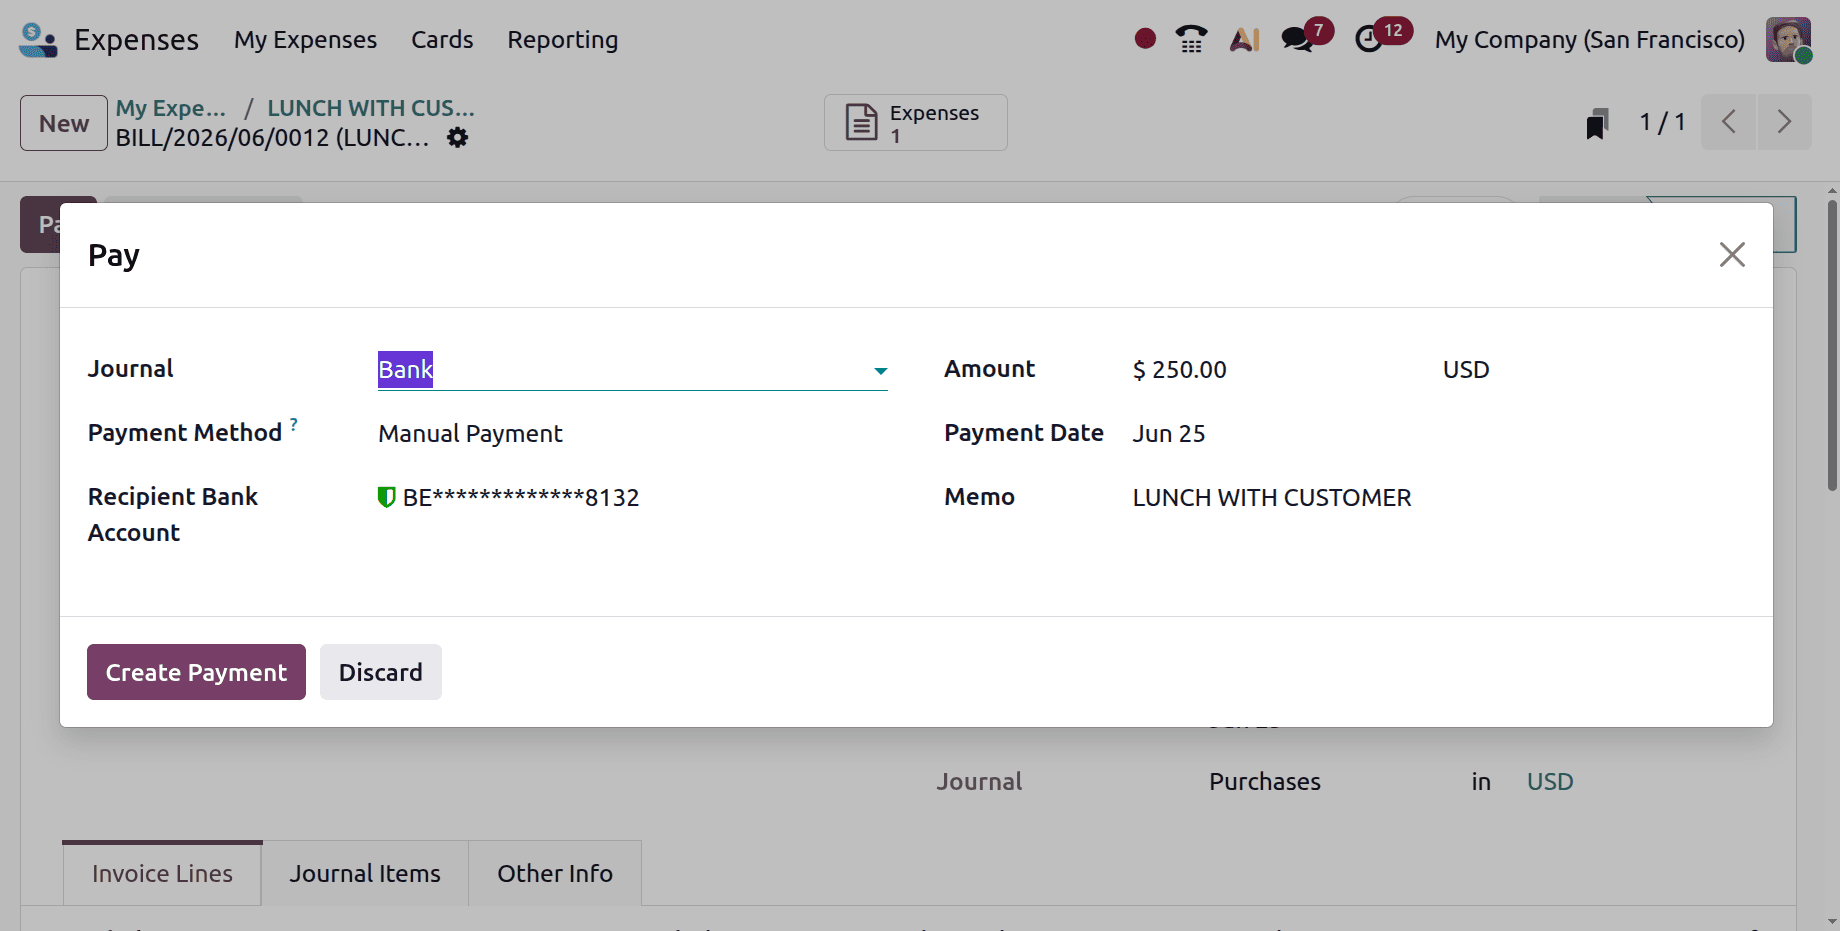
The stage will then switch to Posted.
To access the Register Payment pop-up box, click the Pay button in the upper-left corner of the journal entry. Enter the following information in this window:
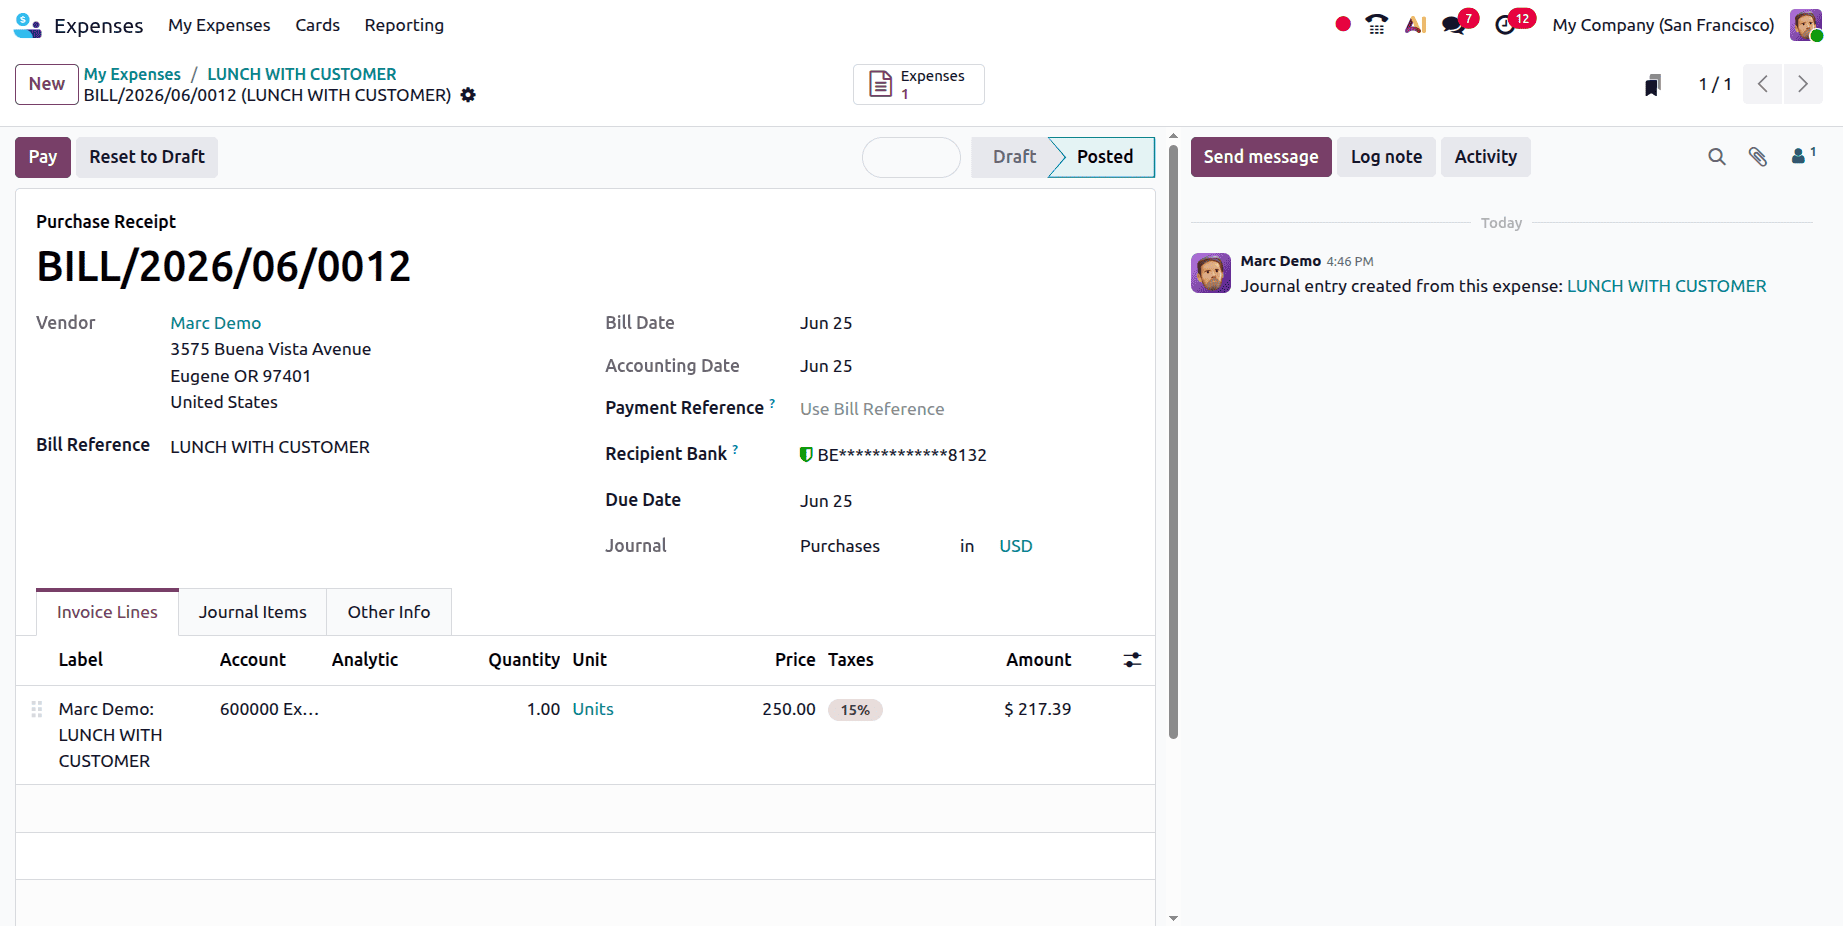
- Journal: Select the accounting journal that will be used to document the payment. Cash or Bank are the default choices.
- Payment Method: Decide on a payment method. Manual is the sole option if Cash is selected as the journal. Manual or checks are the default choices if a bank is chosen.
- Recipient Bank Account: Decide which employee's bank account will receive the payment. This field will be filled in automatically if the employee's bank account is already stored in the Private Information page of their employee record in the Employees app.
- Amount: This field is automatically filled in with the entire amount being repaid. The drop-down menu can be used to change the currency, which is situated to the right of the field.
- Payment Date: Fill up this area with the date the payments were made. This field is automatically filled in with the current date.
- Memo: This field is automatically filled up with the text entered in the Bill reference field.
By making it simple for users to monitor and take action on expenses according to their present status, this dynamic navigation simplifies the expense management process.
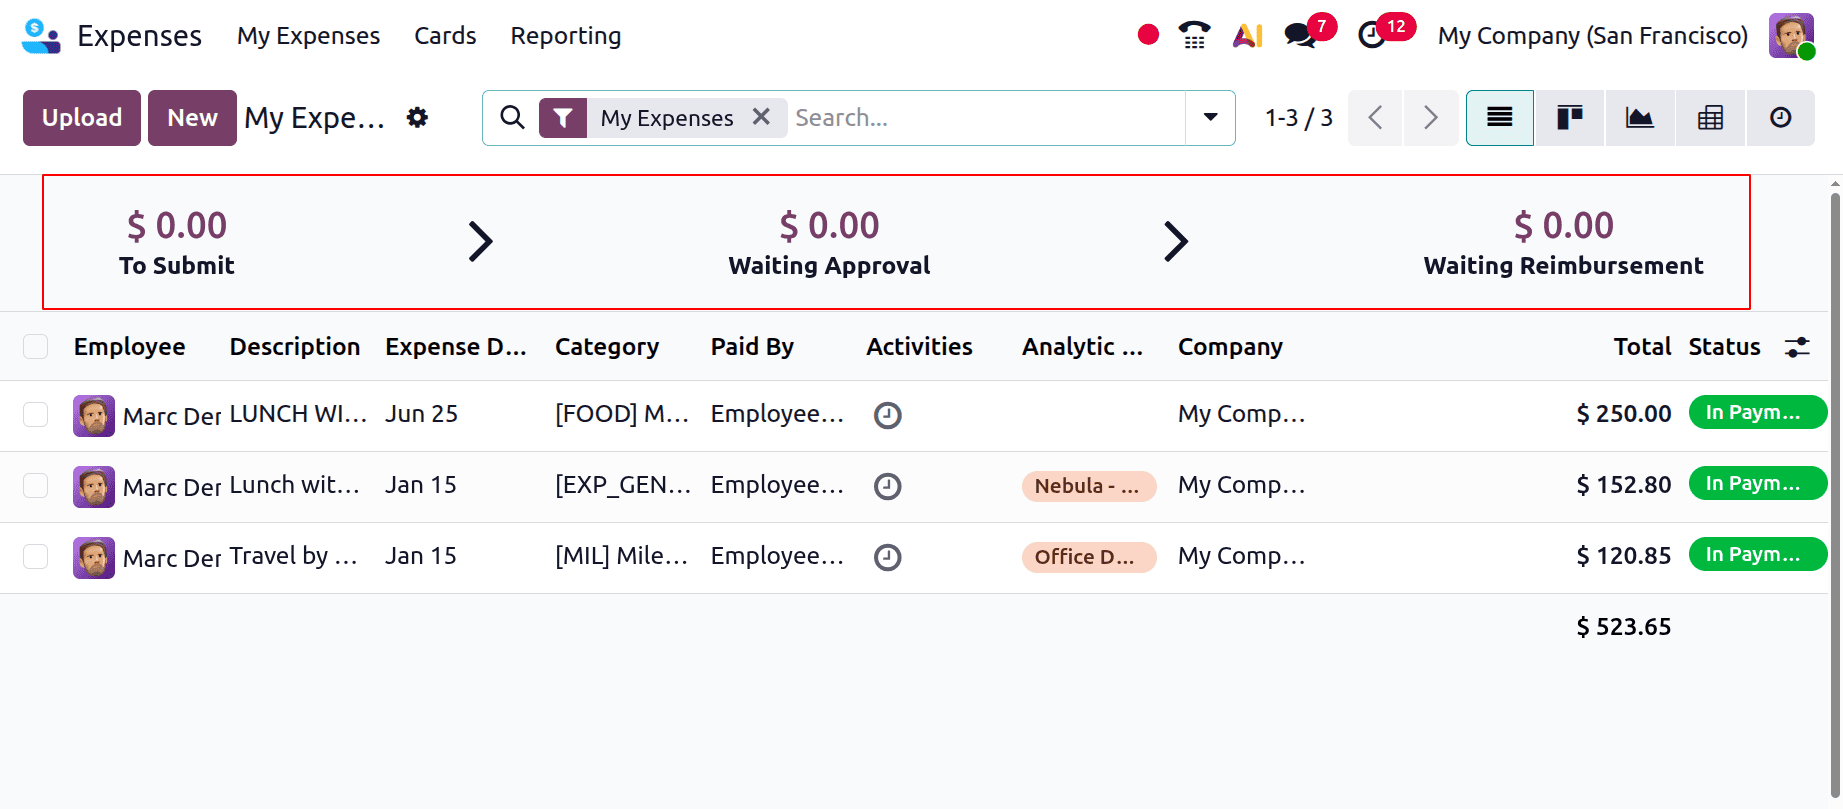
Next, look at the dashboard to see the amount that was subtracted, as seen below.
As a result, the Odoo 19 expense module provides a practical and effective way to manage business spending. With capabilities including cost creation, receipt attachment, report generation, and approval workflows, it helps businesses to improve financial transparency, expedite spending monitoring, and confidently make well-informed decisions.
To read more about An Overview of the Expense Module in Odoo 18, refer to our blog An Overview of the Expense Module in Odoo 18.