Businesses such as coaching centers, consulting firms, salons, and clinics rely on a seamless scheduling process to efficiently manage client appointments in today's fast-paced world. Odoo 19 allows businesses to effectively manage bookings and appointments, either with free appointments or the option to collect payment in advance. These decisions typically result in more efficient operations, fewer cancellations, and more polished client interactions. Odoo 19 offers a wide range of possibilities for automation, customer communication, and scheduling. Odoo 19 provides a powerful Appointment module for managing online bookings with ease. This blog explains the complete setup process, including appointment type configuration and optional paid booking integration. By the end, you'll be able to create an efficient, user-friendly scheduling system tailored to your business needs.
Make Appointments Without the Upfront Payment Option:
Scheduling appointments without requesting Up-front Payment is appropriate for companies that provide free consulting or internal meetings. Customers can book available time slots directly from your website without having to pay. Customers can easily schedule an appointment by selecting a service, choosing a convenient date and time, and receiving a confirmation email upon booking.
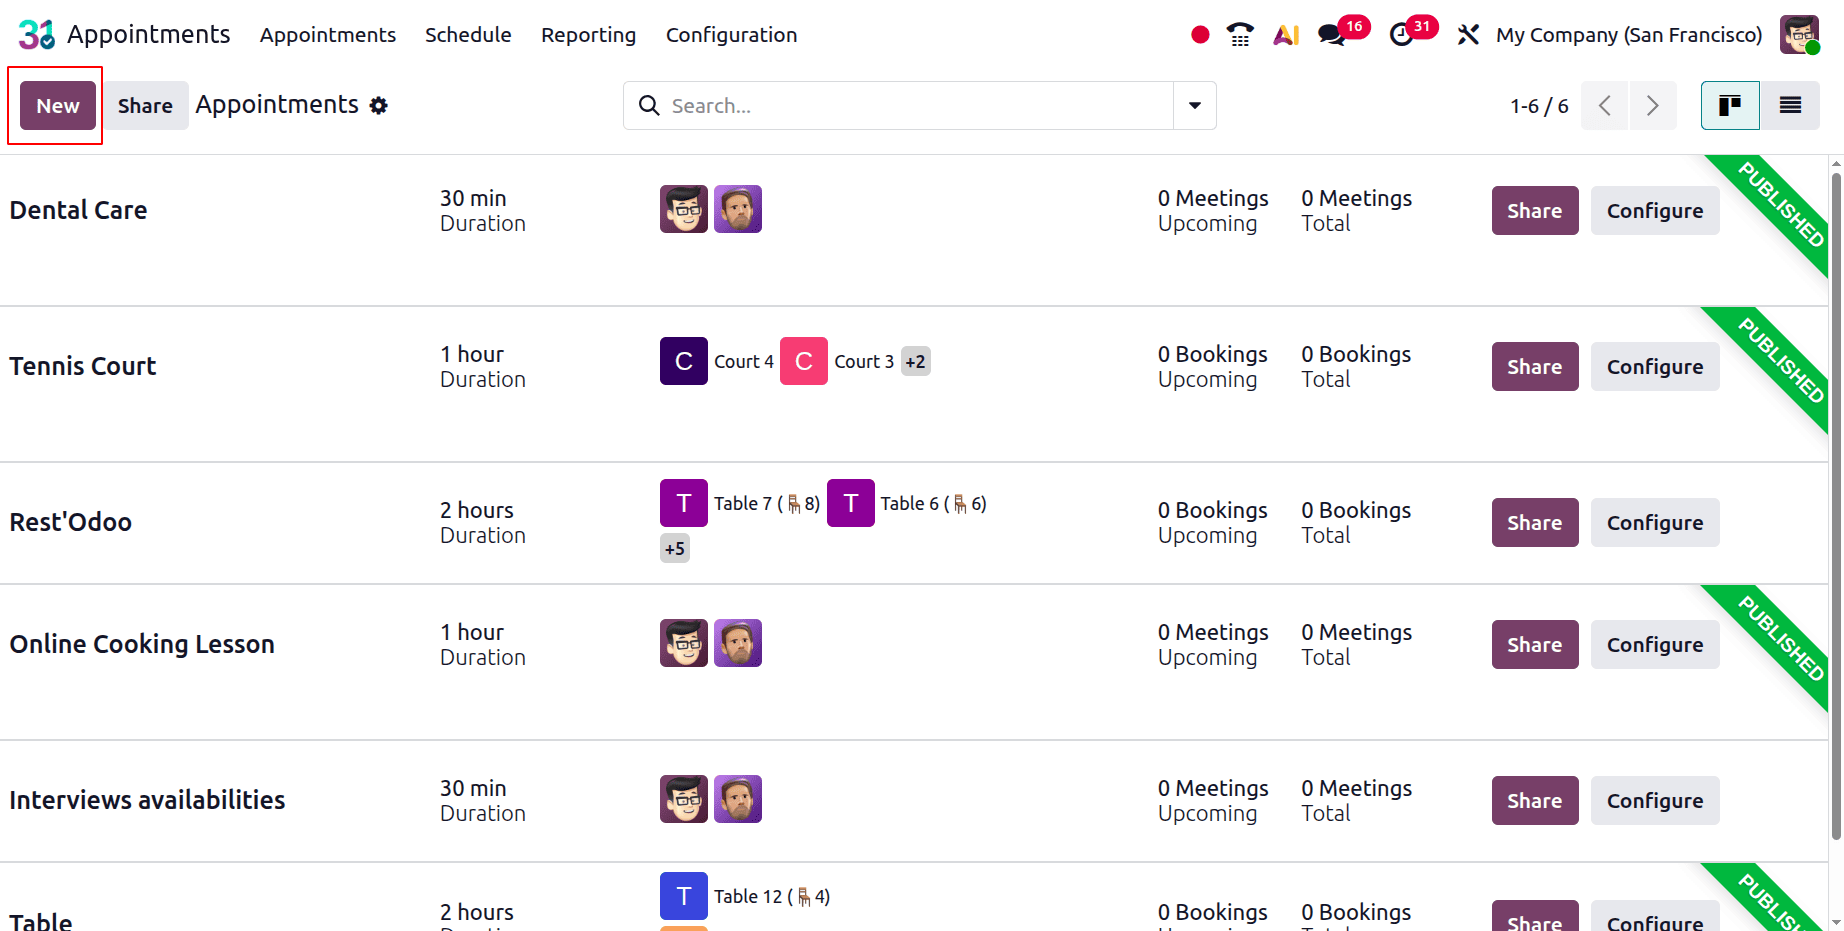
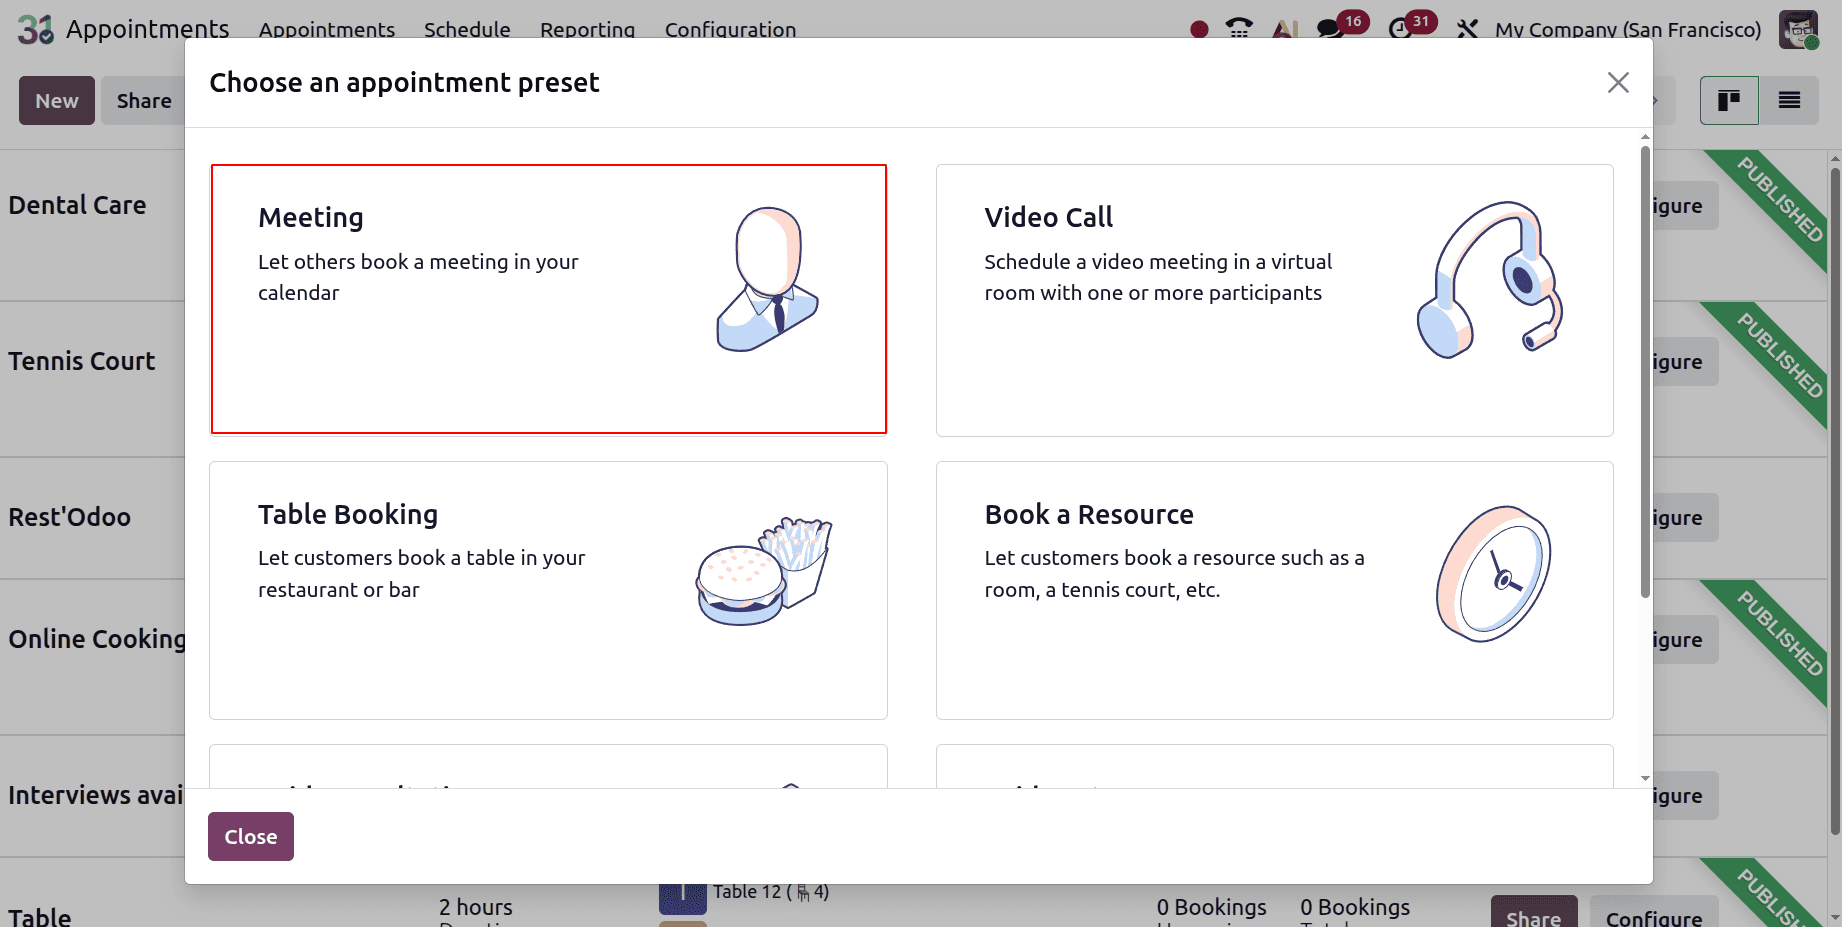
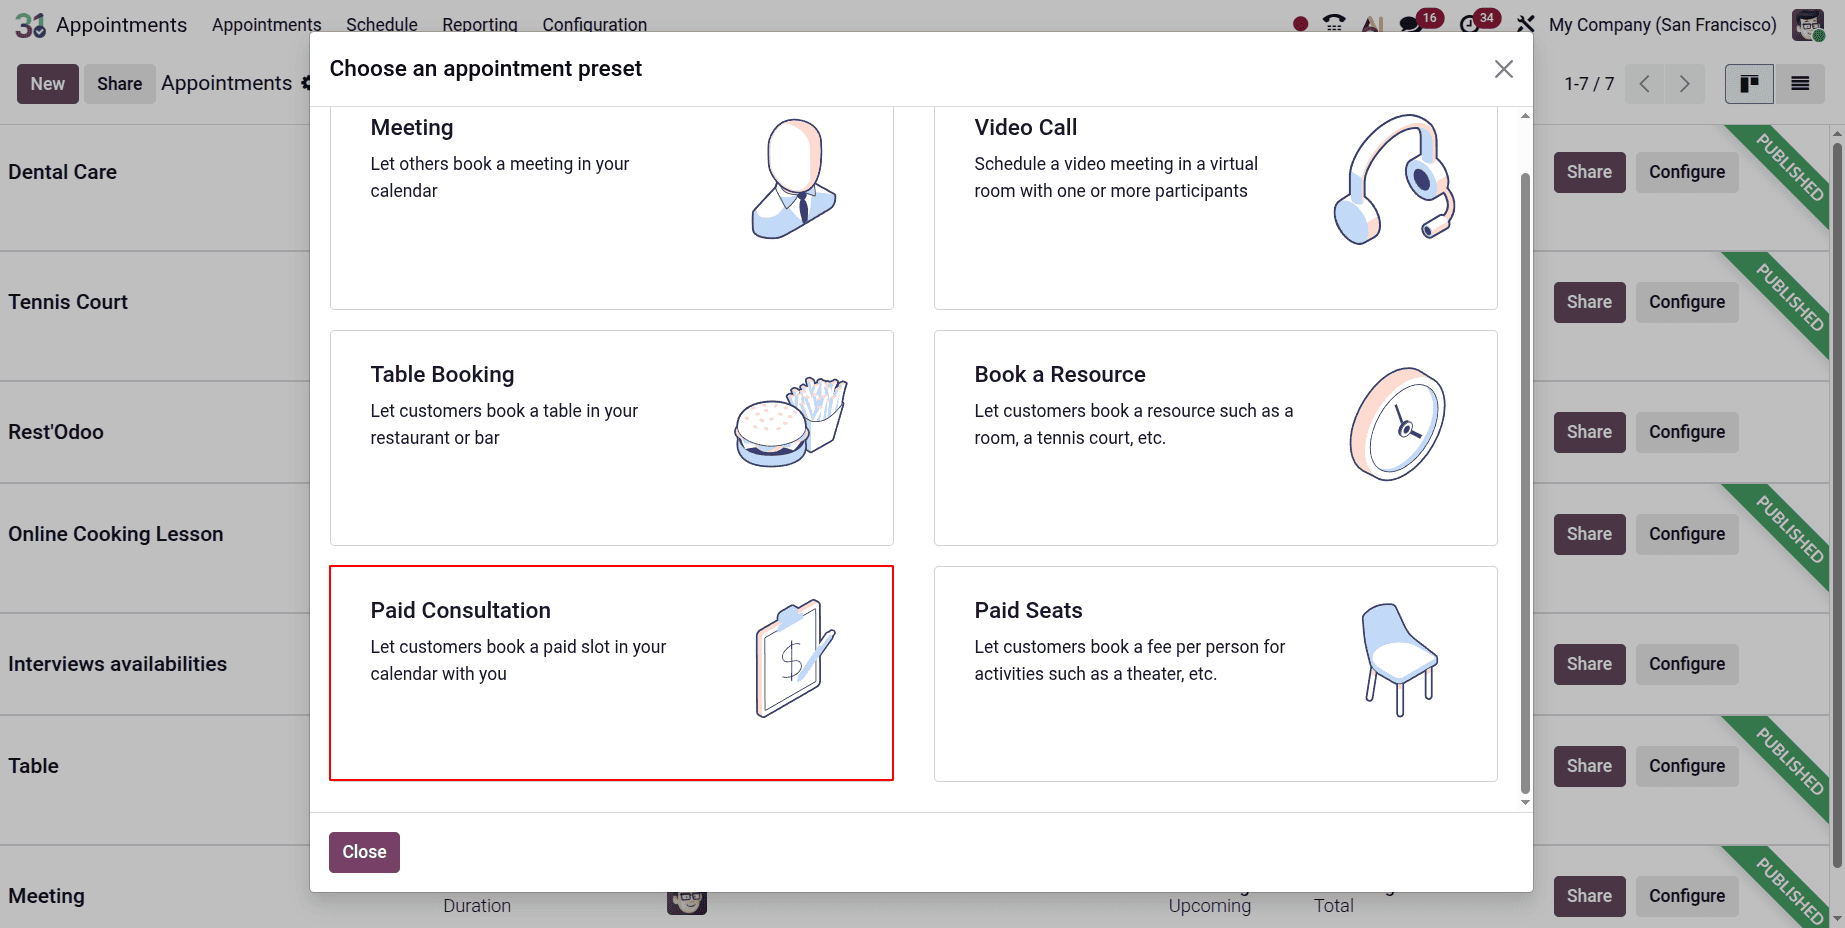
Click the New button in the Appointments module to schedule an appointment without paying in advance. The pop-up screen shows some appointment presets, from which the users can choose the necessary one.
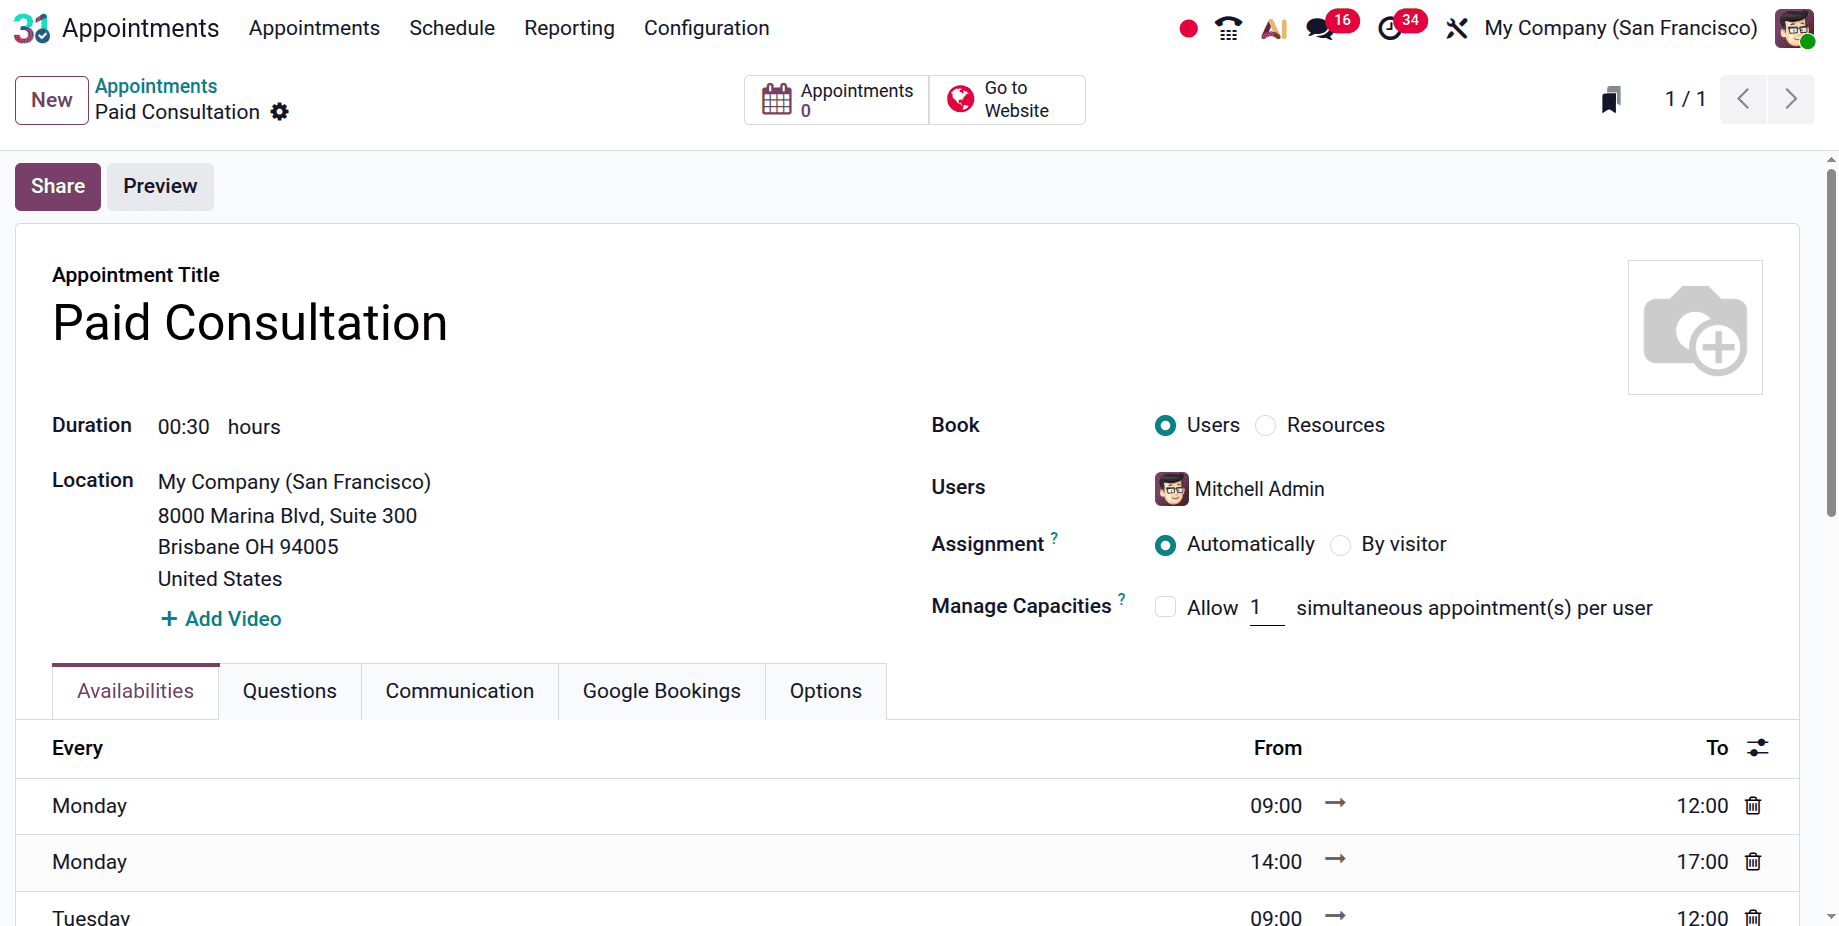
The appointment title will update automatically as shown below. Next, include the pre-booking duration. In addition to setting the Location and the video link. Next, as indicated below, enter Availability on as Users, or Resource. Then, select the Assignment Method as either Automatically or By Visitor. Inside the Manage Capacities fields, the users can mention the maximum number of people the user/ resource can handle.
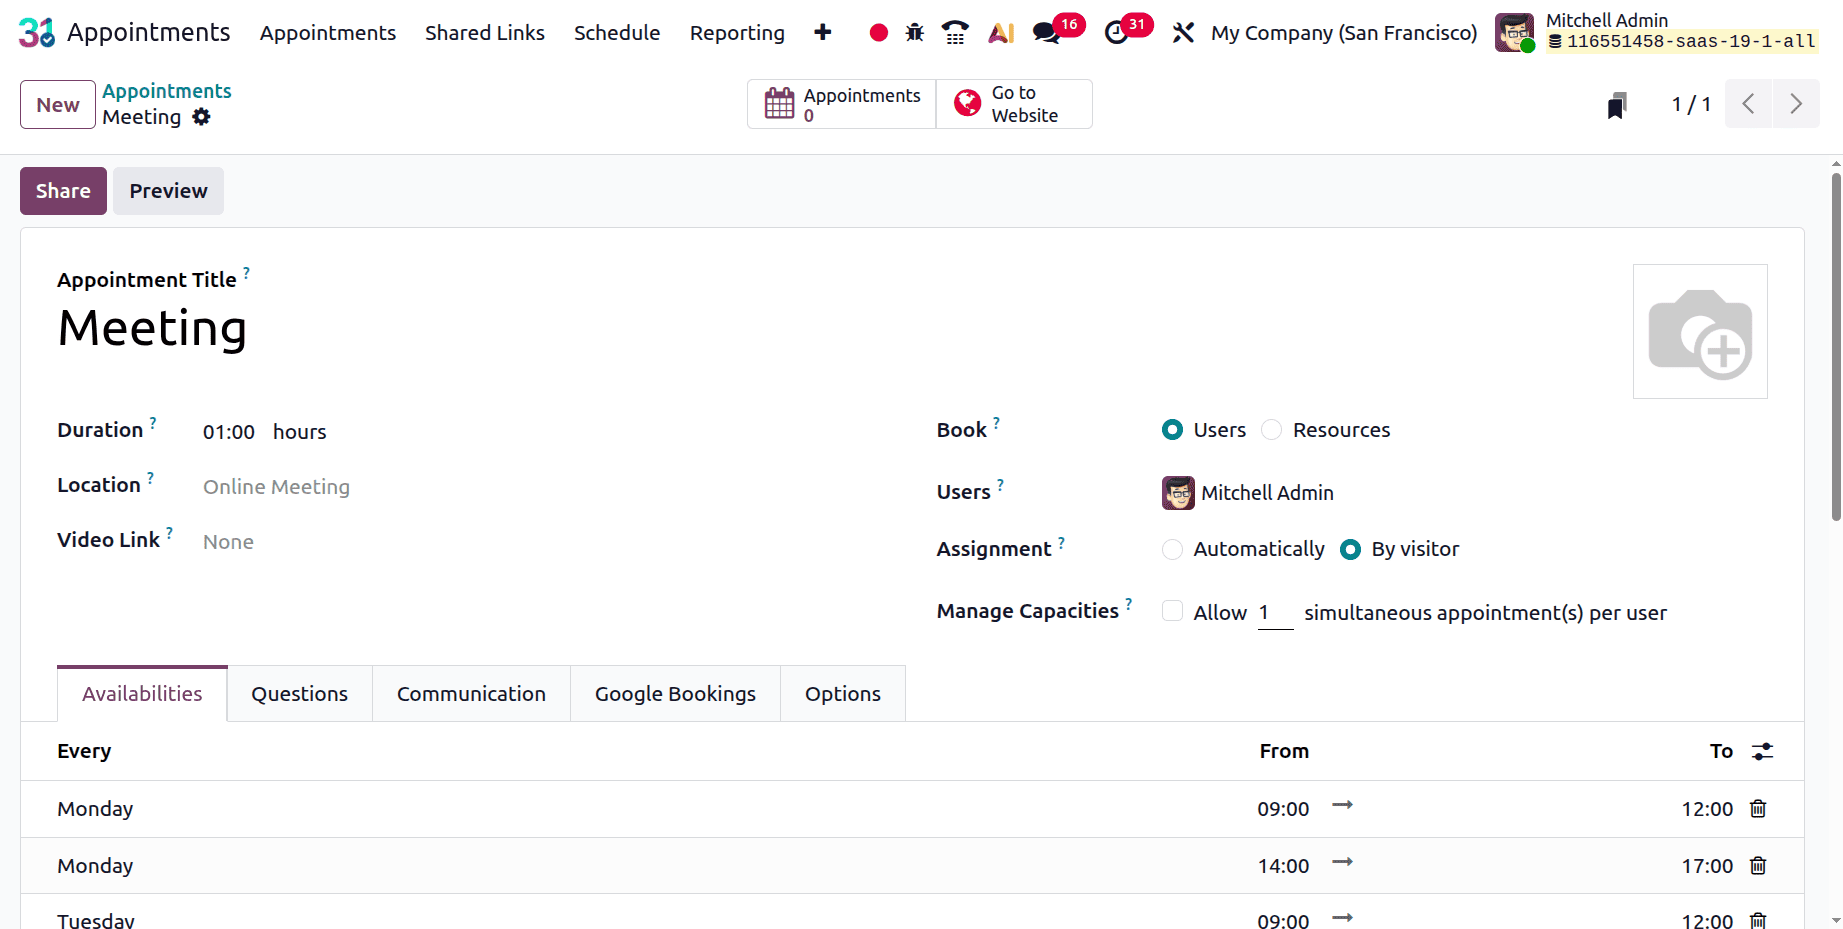
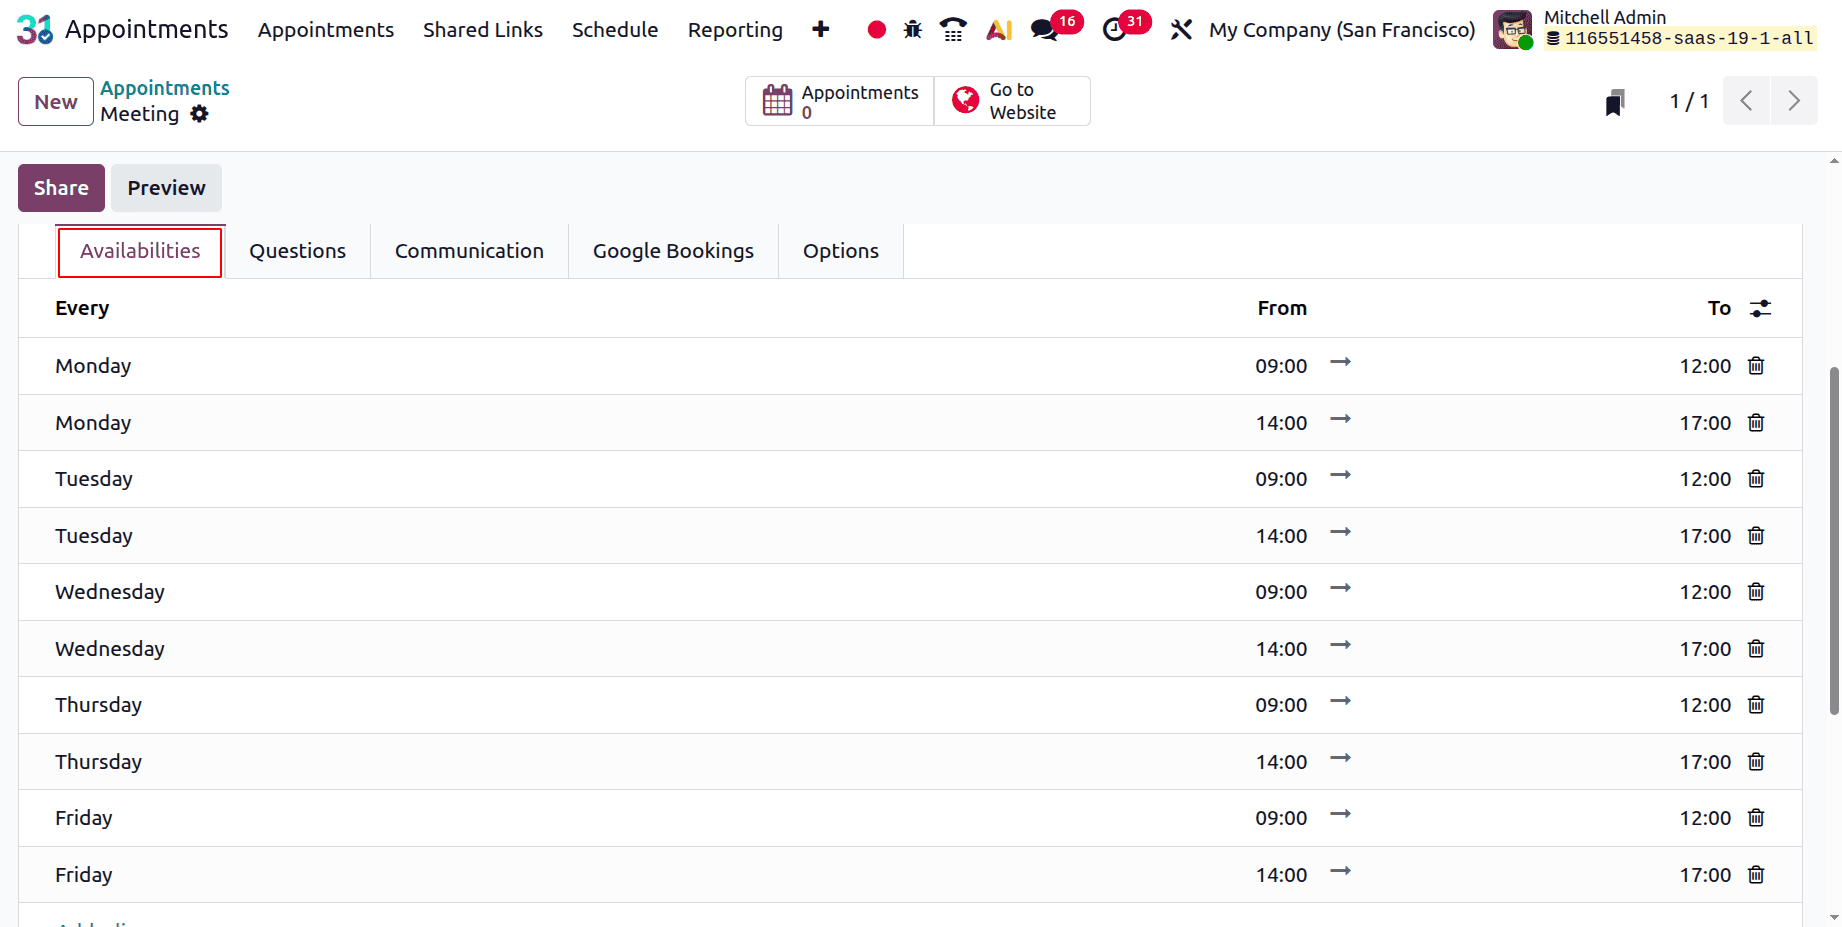
The Schedule page also allows you to specify the day and time of the appointment.
Verify that the Up-front Payment is turned off in the Options tab.
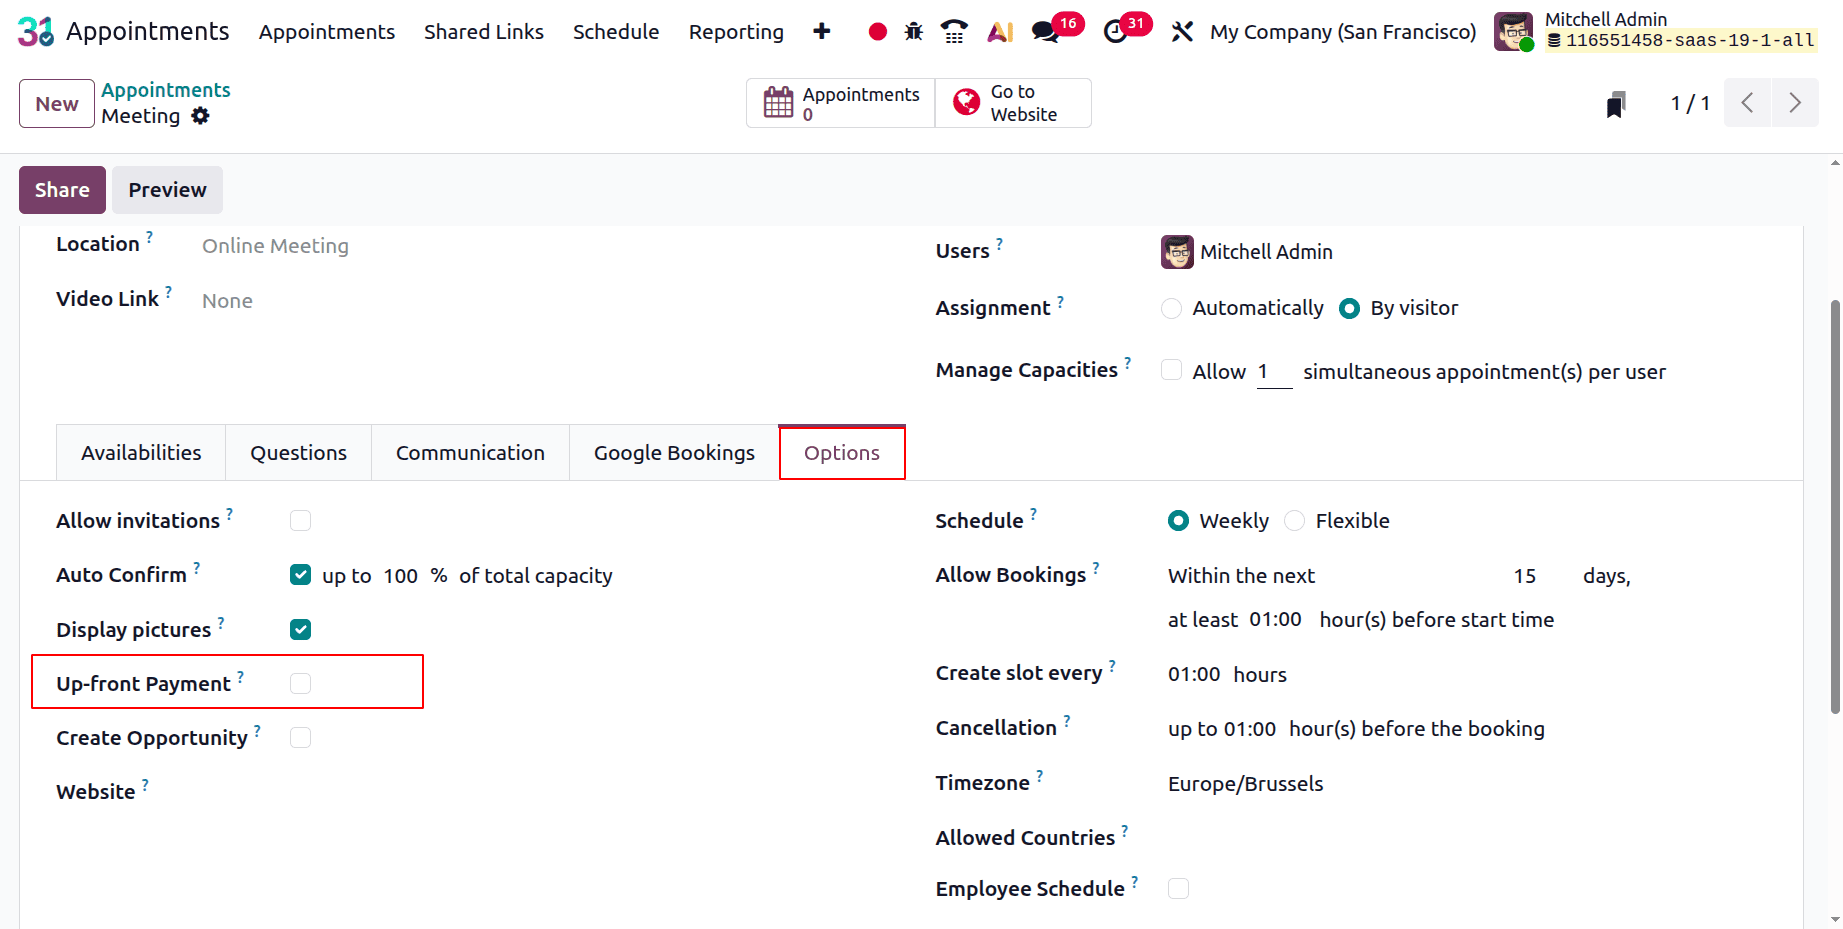
The Questions and Messages option allows you to enter enquiries, cancellations, or confirmation messages regarding your bookings.
The date and time can then be chosen by clicking on Go to Website and enabling Publish. The appointment details are displayed on the right side of the screen.
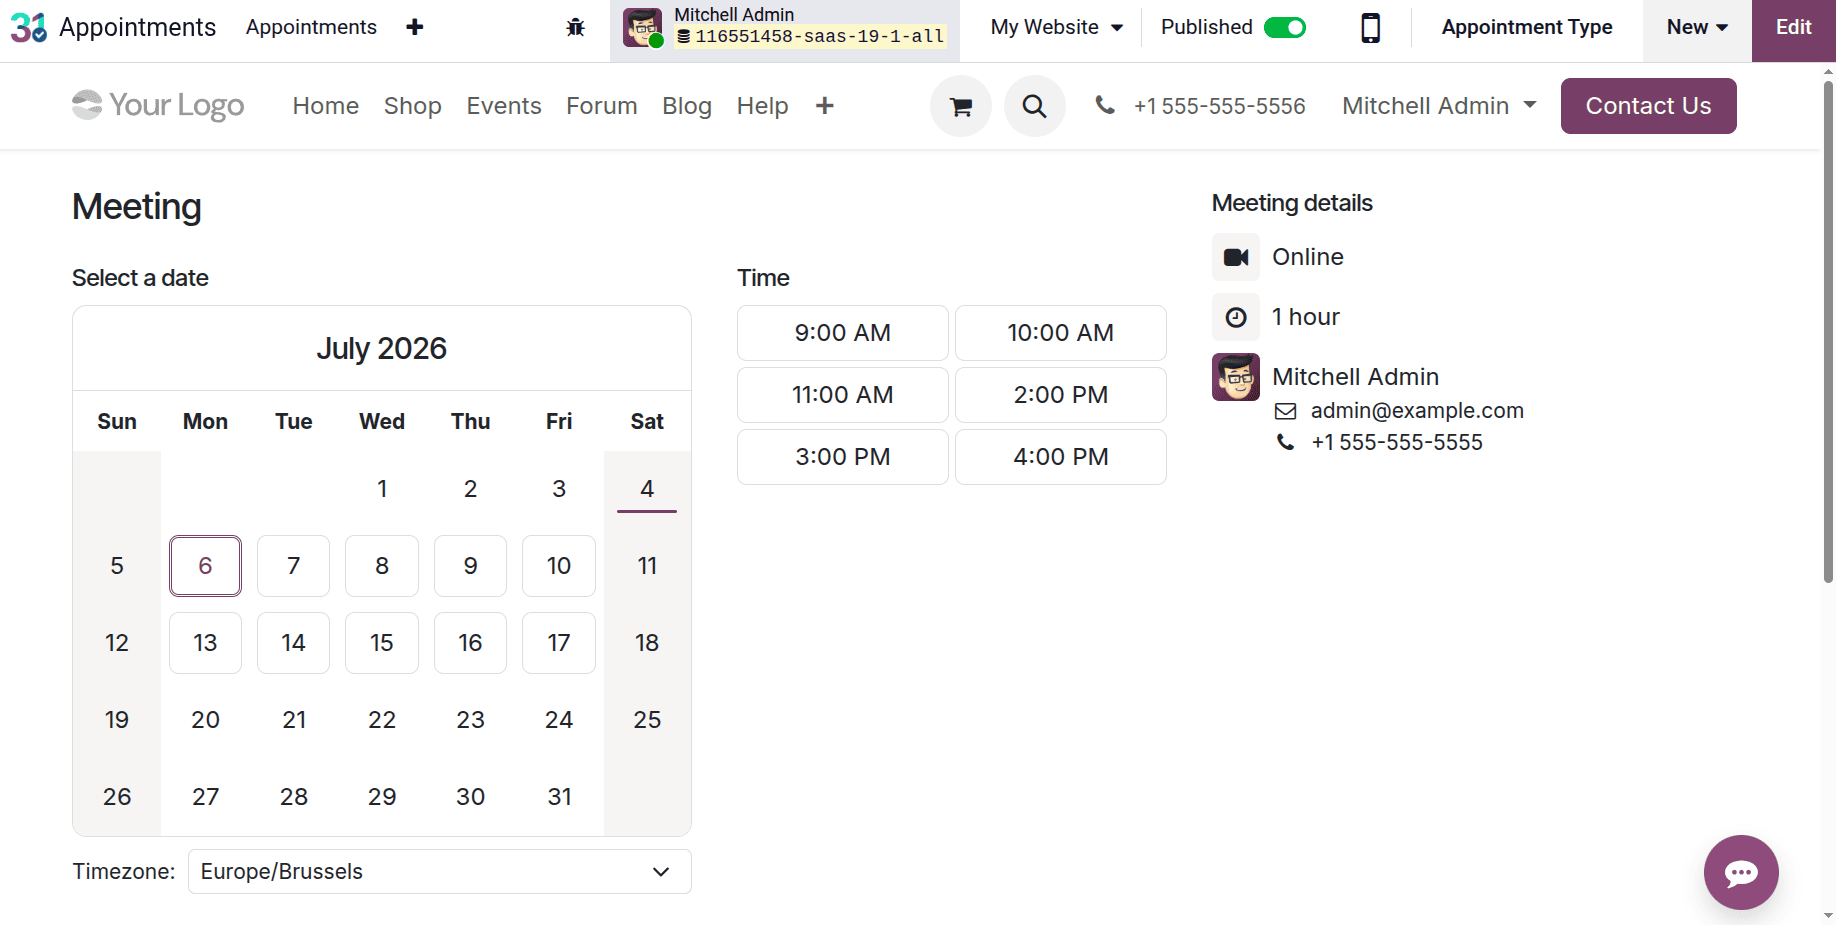
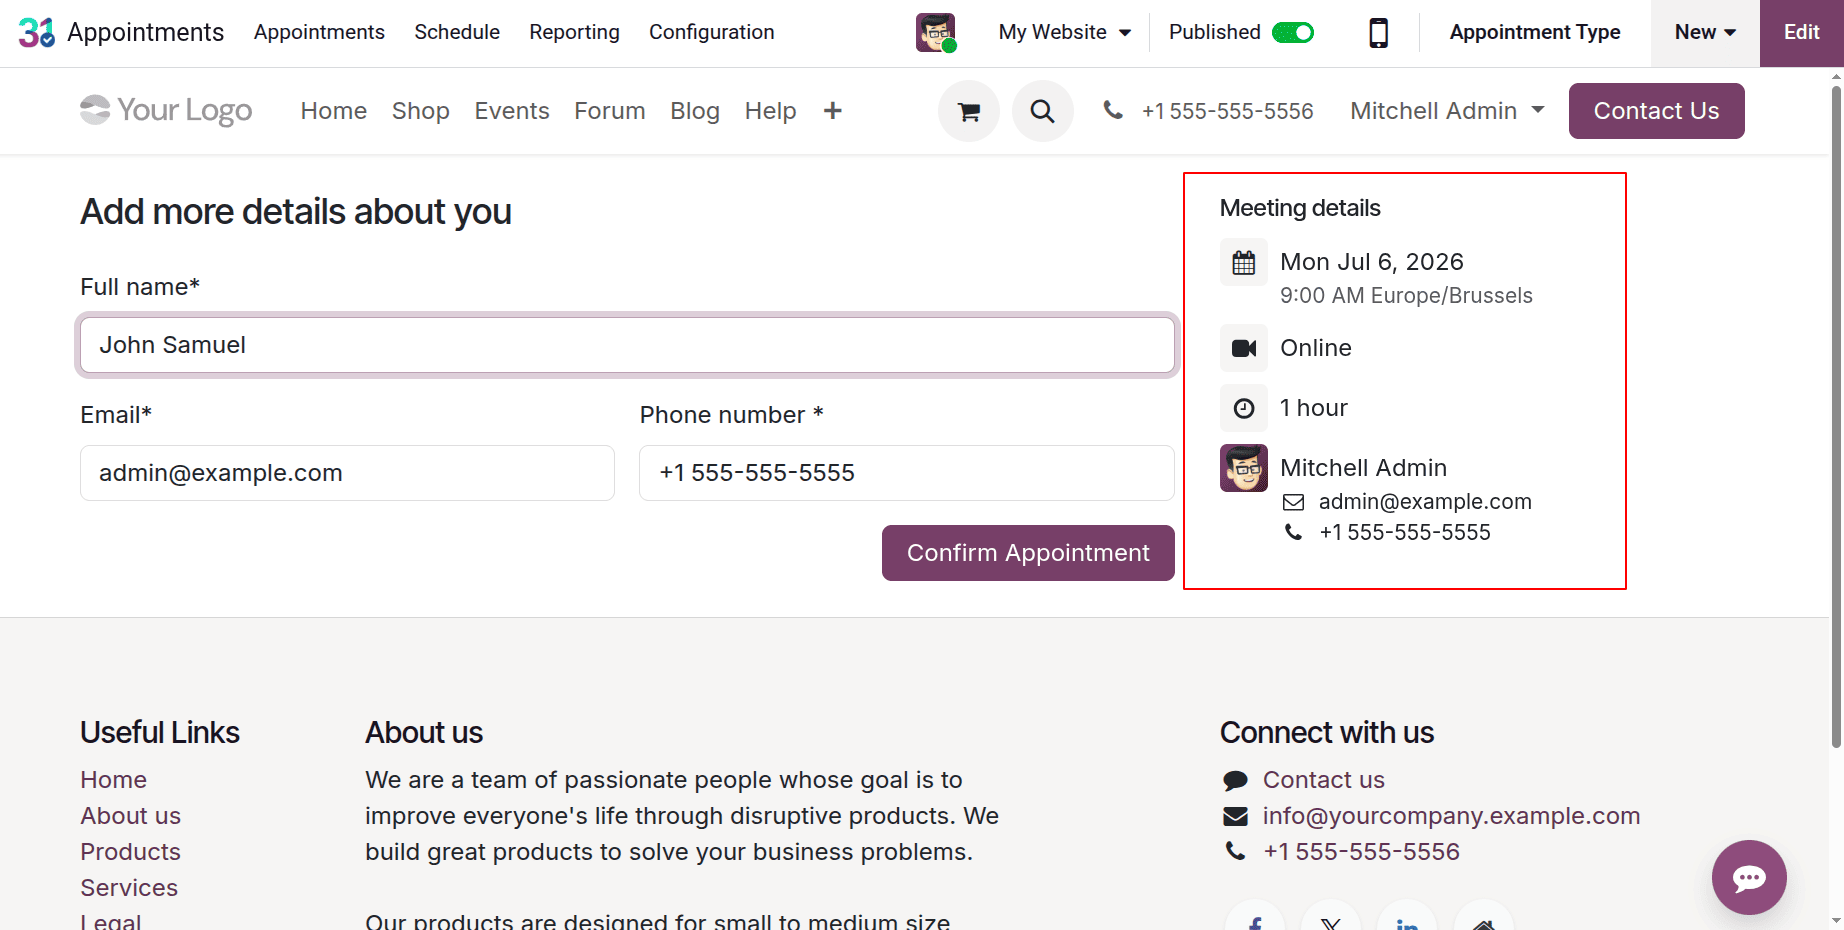
The right side of the screen displays the selected appointment date and time. You can then confirm the appointment as indicated below:
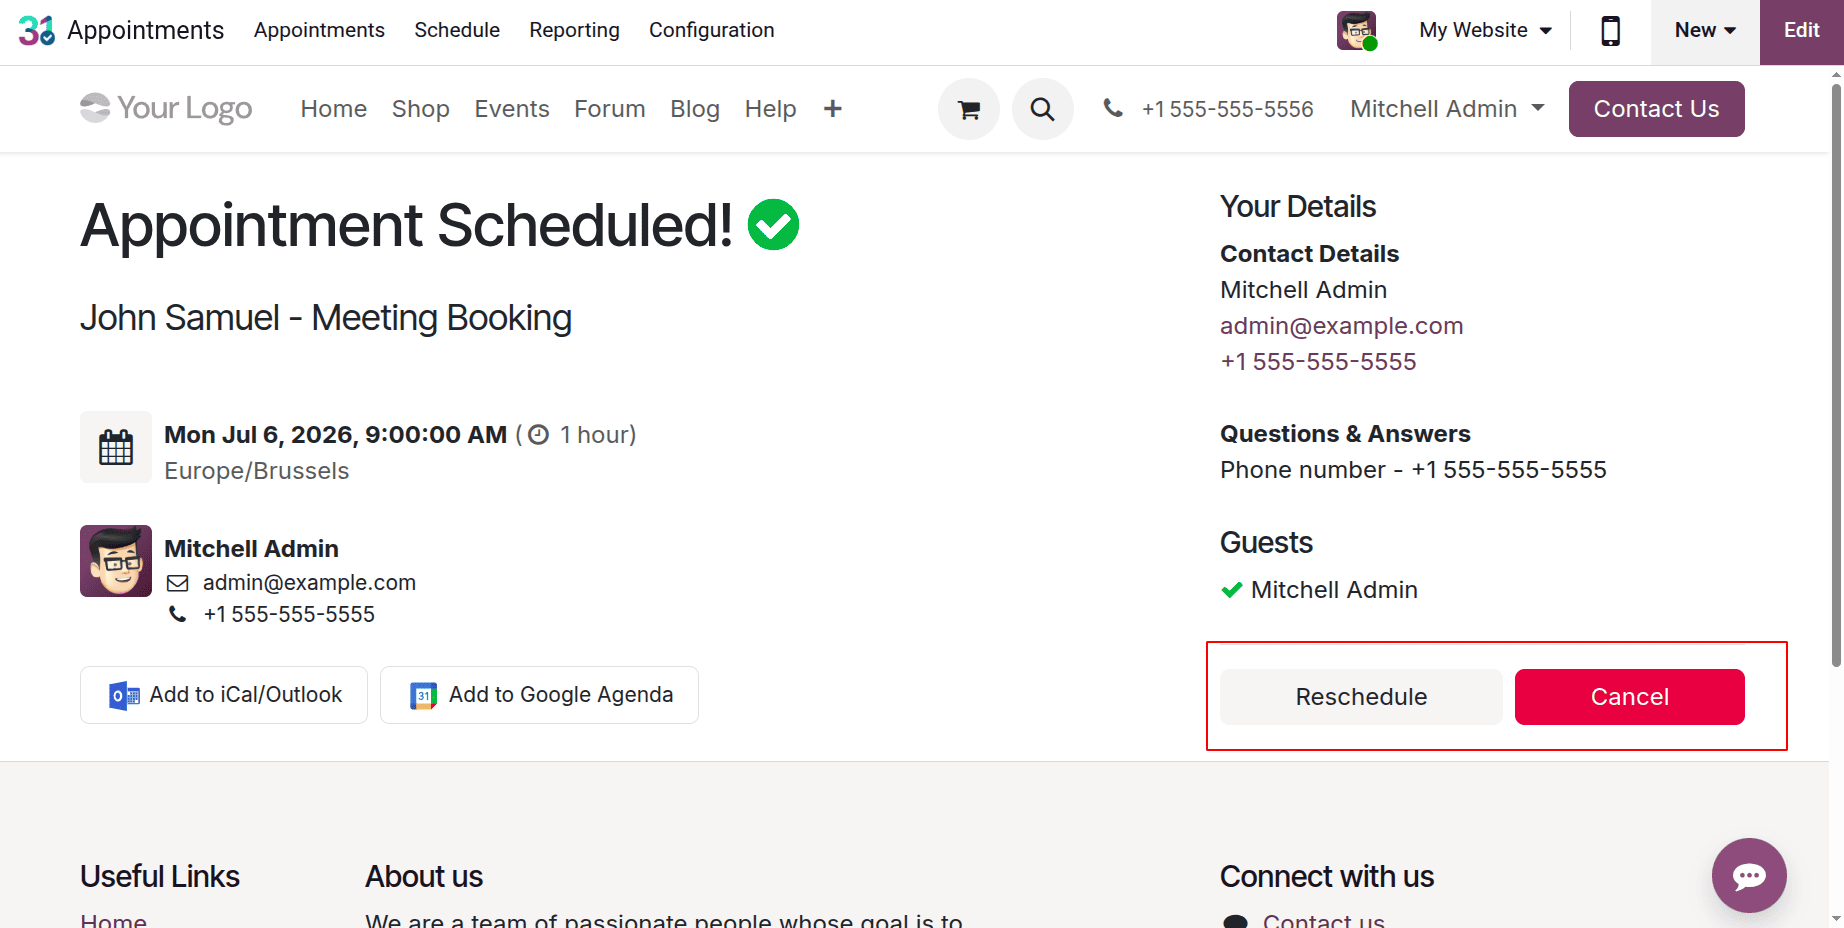
Here, the appointment is successfully scheduled, and the users can view the details. It's also possible to reschedule the appointment or cancel it.
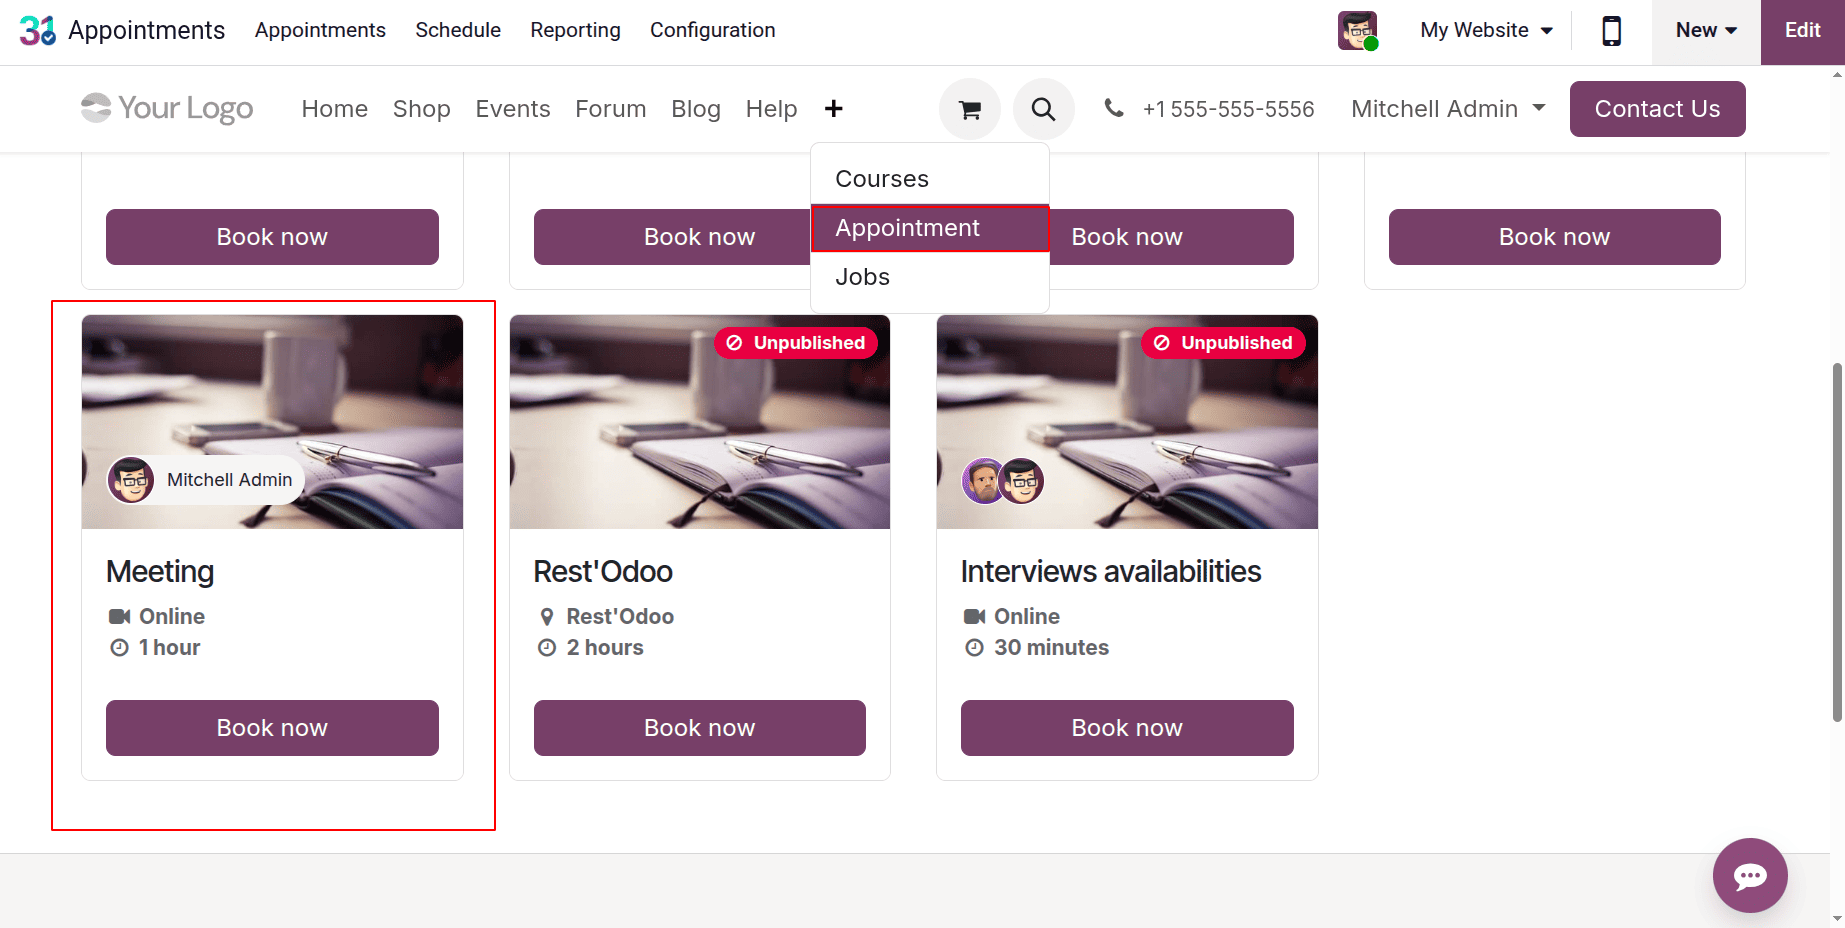
Once the appointment settings are configured in the Website module, click the Appointment option to proceed. Next, choose the relevant appointment from the list as indicated below:
Make Appointments Using the Upfront Payment Option:
Set up upfront payment for appointments to better manage your schedule, lower cancellation rates, and ensure substantial customer engagement. This setup is ideal for professionals who offer coaching sessions, consultations, personal care services, or other paid appointments.
Let's create another appointment type, click on the New button again. Here, this time choose the Paid Consultation.
As shown below, all the configuration is the same as mentioned in the above case. Follow the above instructions to establish a new appointment type.
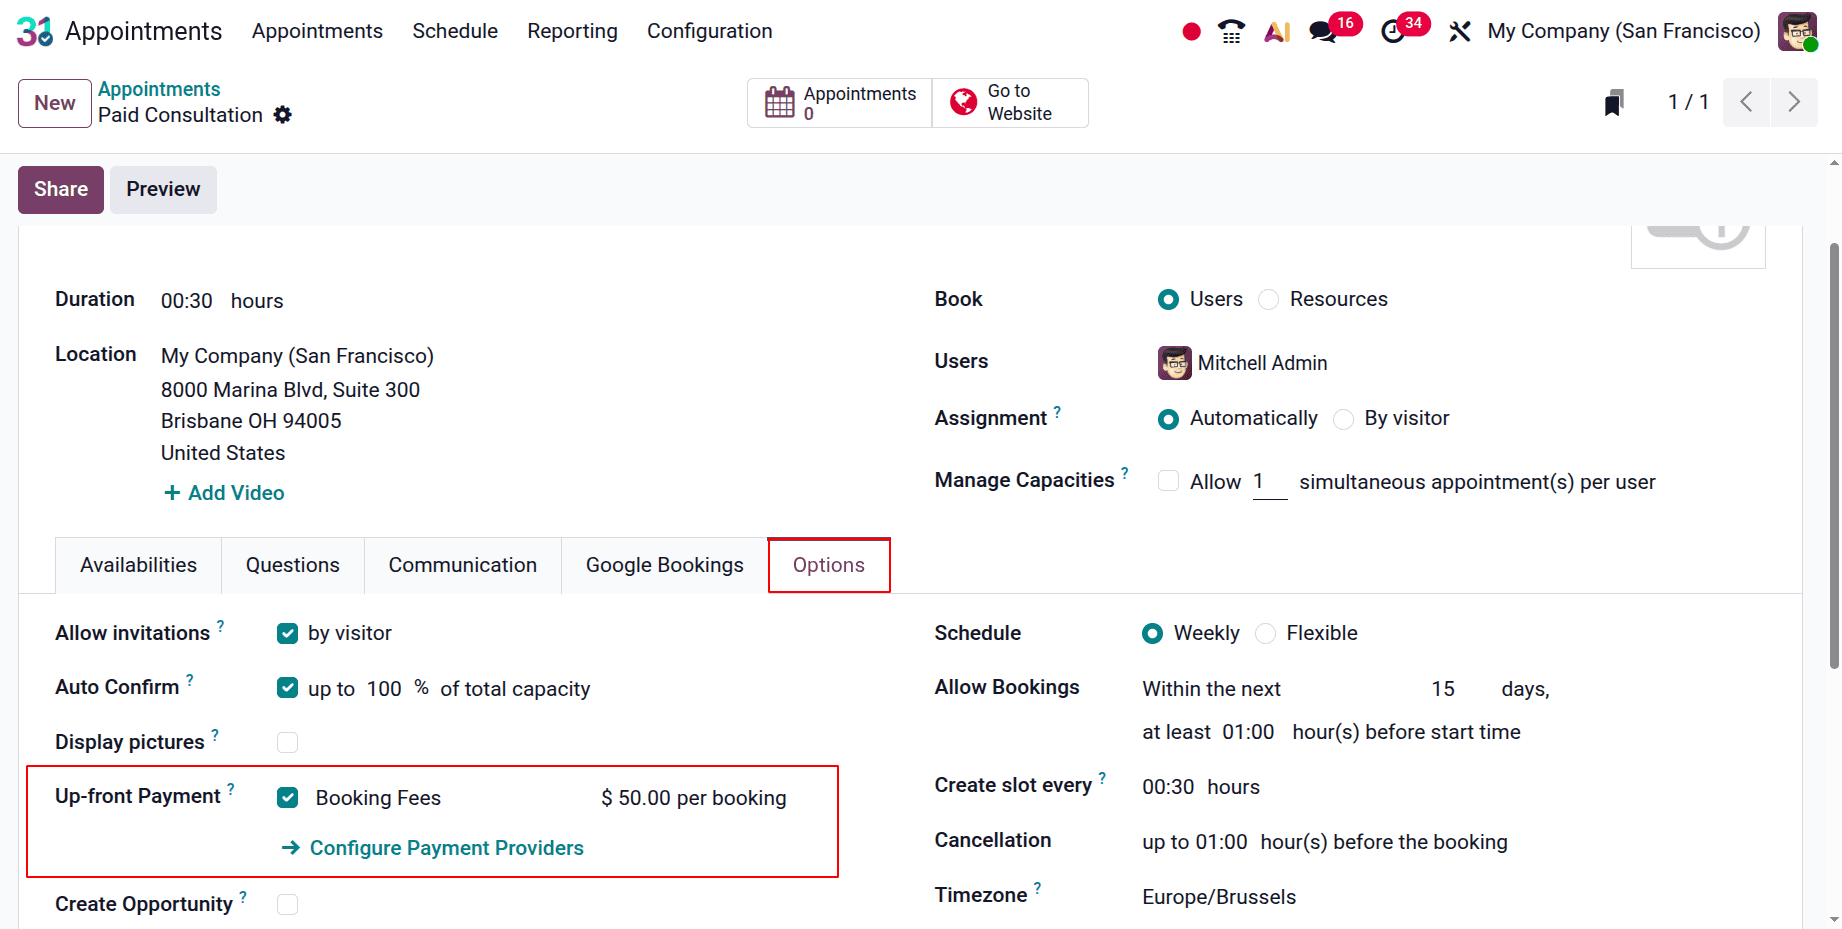
Then check the Options tab. As indicated below, automatically activate the Up-front Payment function in the Options tab. The specific appointment fees are displayed there.
After selecting Go to Website, allow Published as indicated below. The appointment details are displayed on the right side of the screen, where you may choose the date and time and view the booking fees.
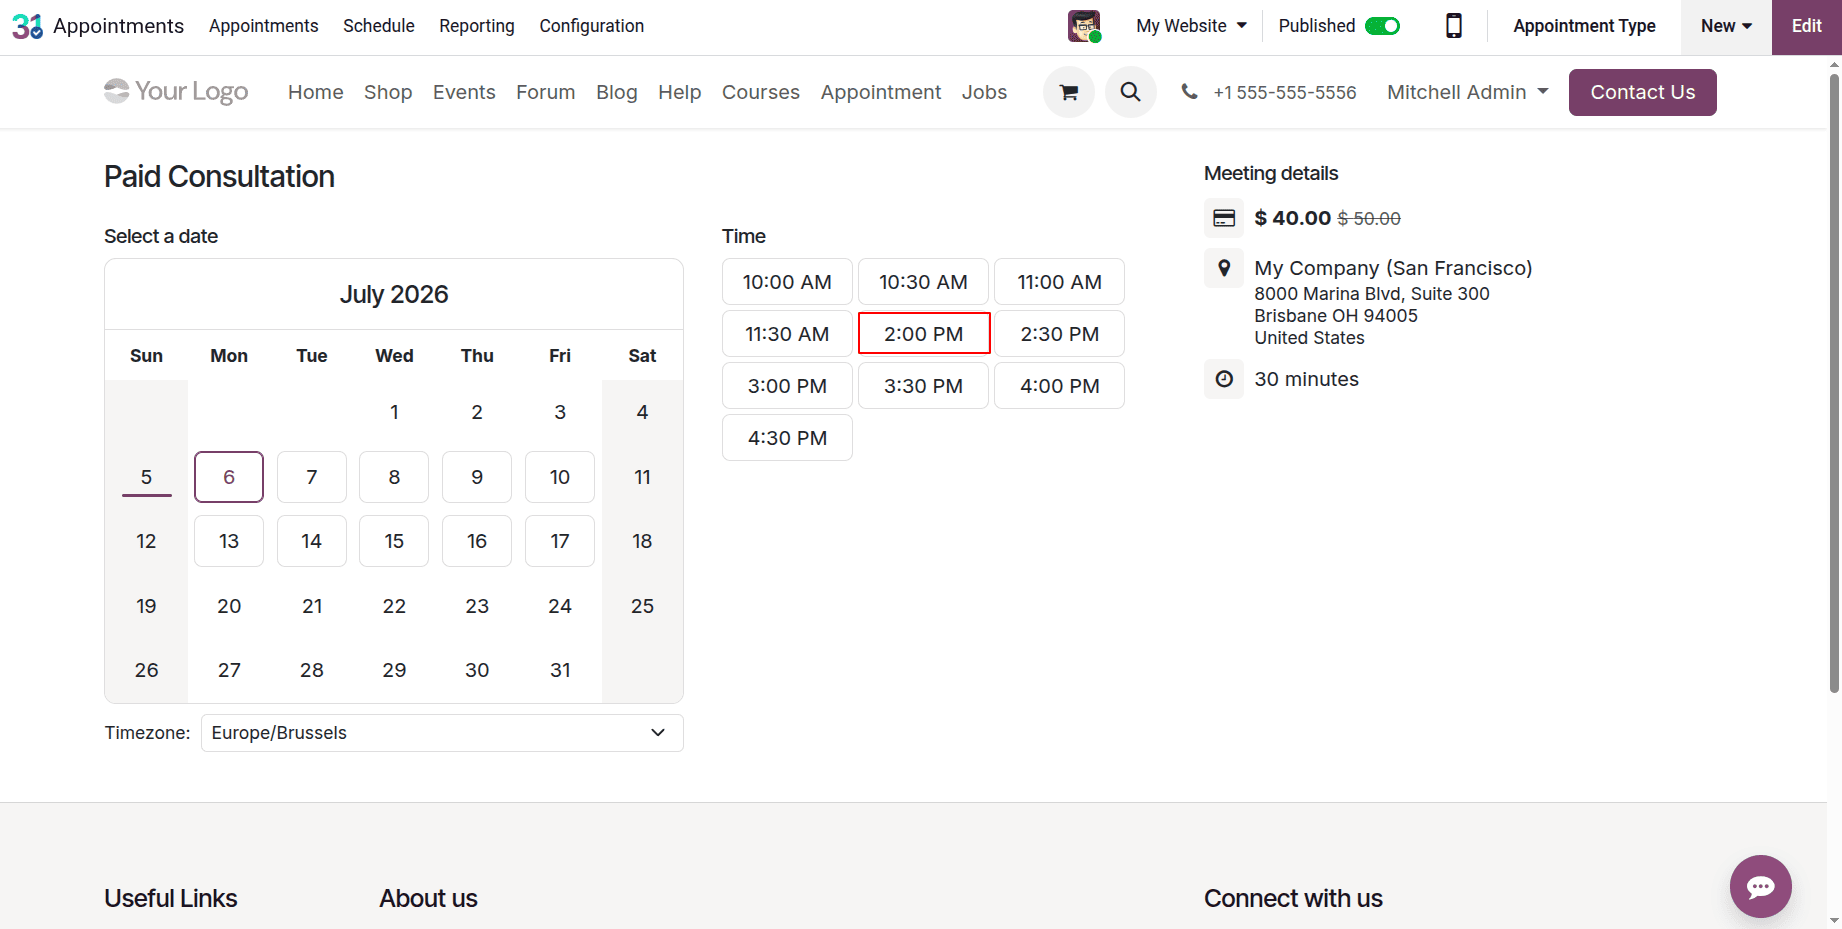
The screen displays every detail of the appointment. Next, as indicated below, click the Proceed to Payment button:
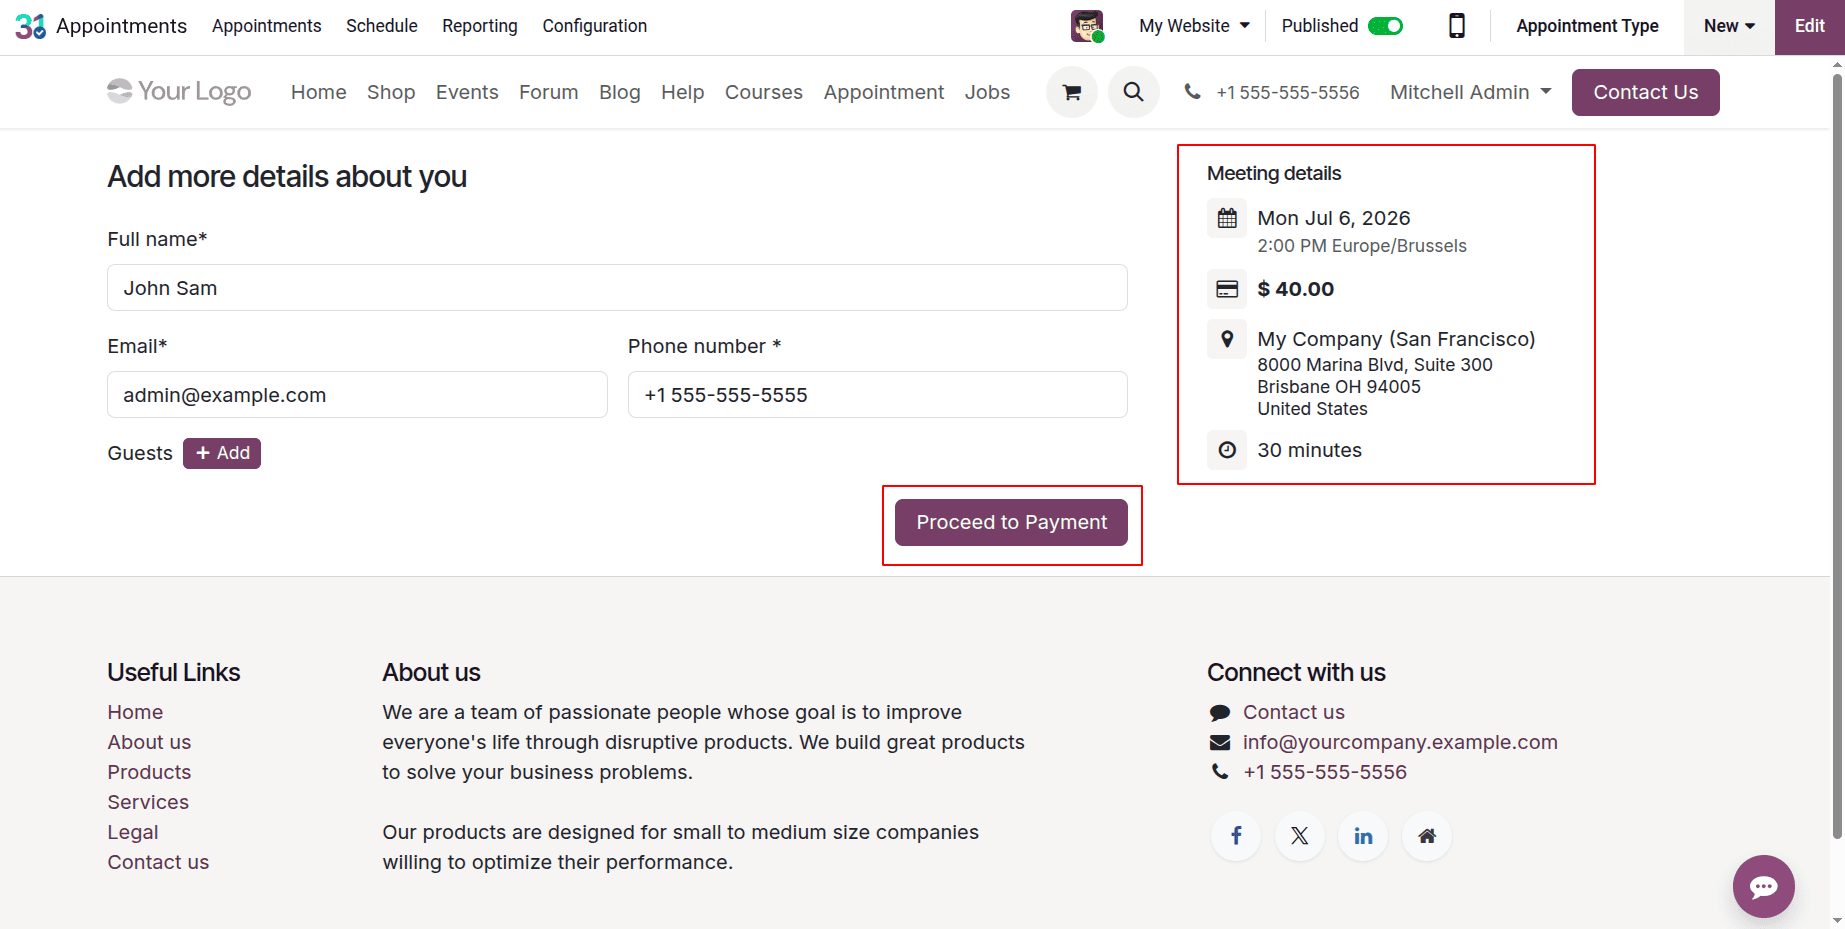
Details of the Order overview were displayed on the screen. To complete the payment, click Pay with Demo.
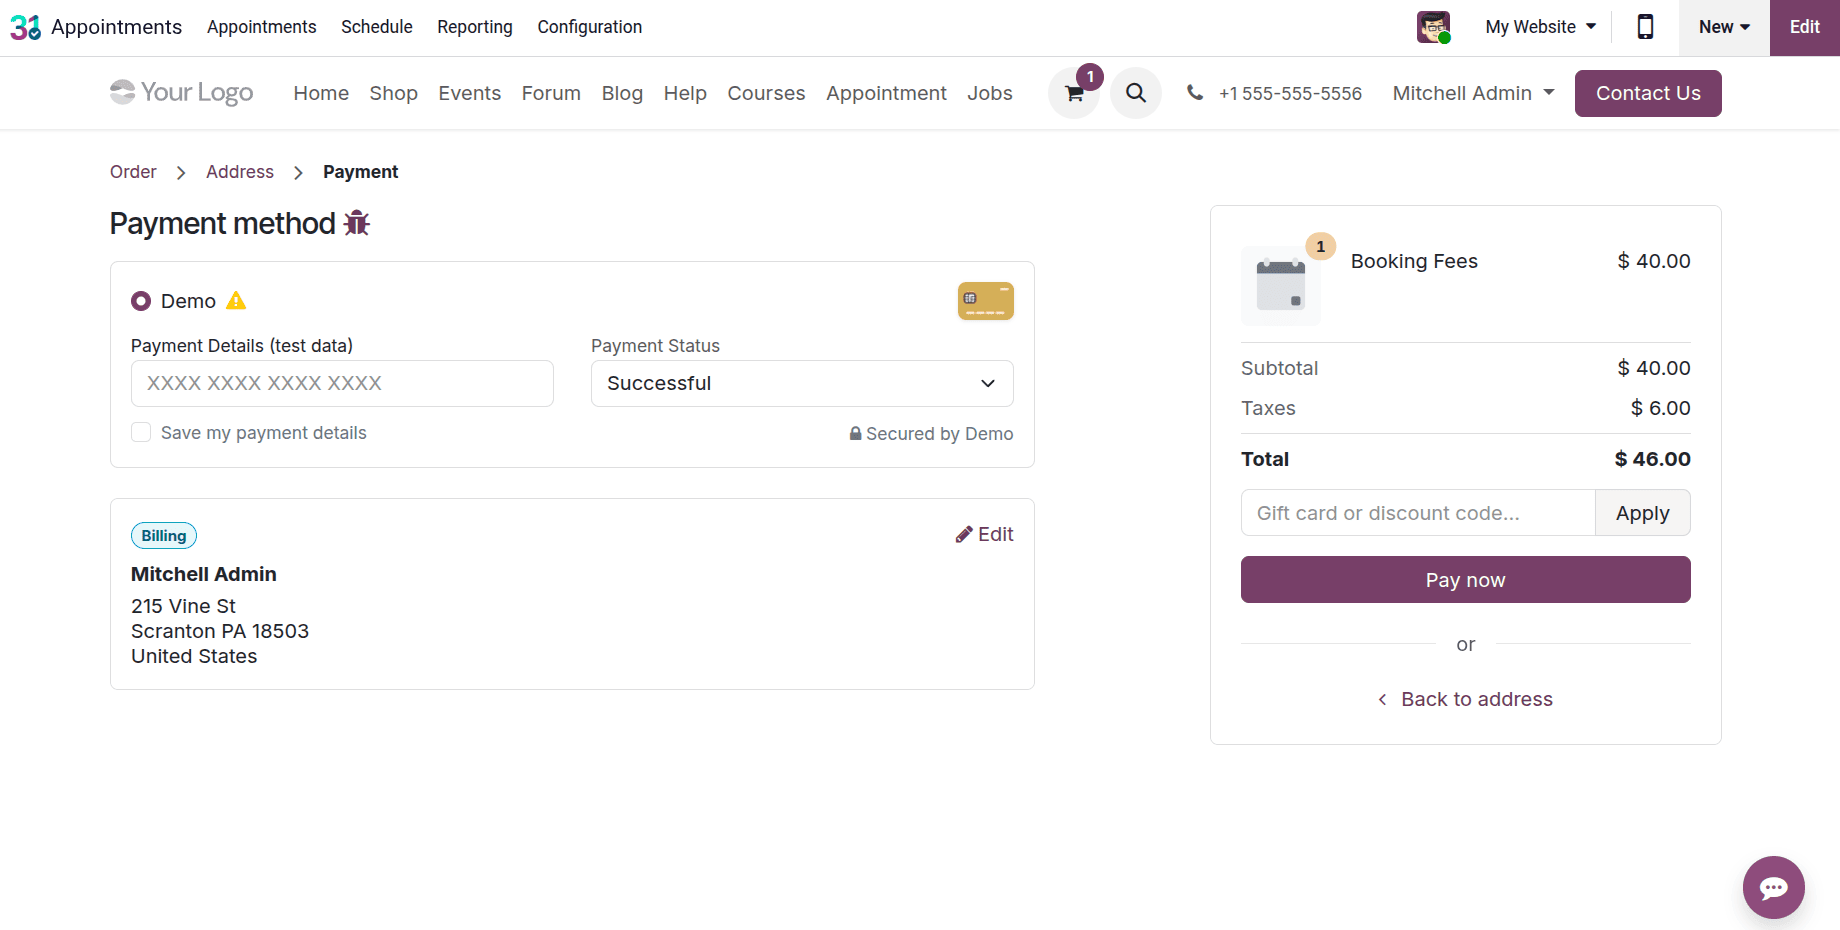
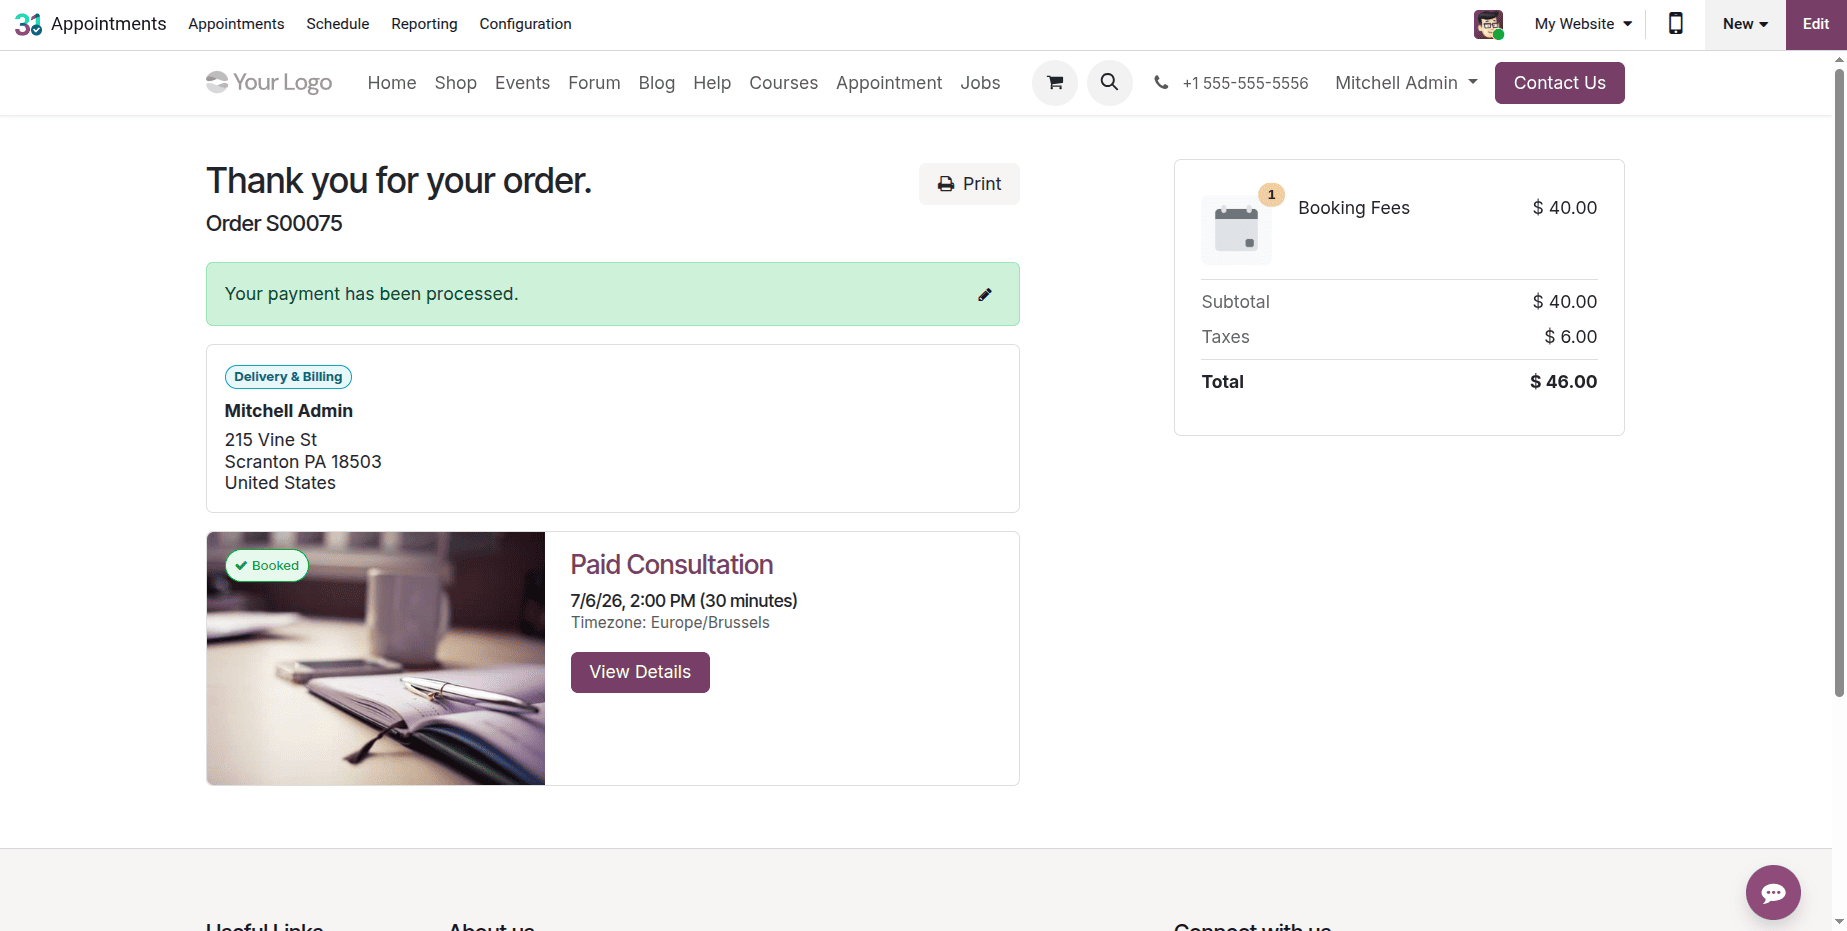
Now, the appointment is scheduled. And the payment details are also visible there, as shown below. The screen displays the appointment's details and confirmation, as seen below:
In conclusion, Odoo 19 offers a robust and flexible appointment booking solution, regardless of whether an advance payment is necessary. Whether your business needs instant appointment booking or payment-based reservations, Odoo 19 Appointment offers a complete solution for managing schedules effectively. It automates the booking process, improves customer satisfaction, and provides the tools needed to run a professional appointment-based business.
To read more about How to Manage and Schedule Appointments in Odoo 18 With or Without Up-Front Payments, refer to our blog How to Manage and Schedule Appointments in Odoo 18 With or Without Up-Front Payments.