Email communication plays a vital role in day-to-day business operations, whether it’s sending quotations, invoices, or notifications to customers. However, sending an email alone is not enough—you also need visibility into what happens after it is sent. Knowing whether an email was successfully delivered, failed, or remained in the queue is important for maintaining reliable communication.
Email tracking has been implemented in Odoo 19 and can be easily handled by the user or developer of the software. Many ways of tracking emails are possible through Odoo, such as from the chatter view to backend models. In this blog post, we discuss in-depth email tracking and its application in Odoo.
Understanding Email Tracking in Odoo
Odoo uses the mail.thread and mail.mail models to manage email communication. When an email is sent:
- A message is created in the chatter
- Email status is stored internally
- Notifications are tracked per recipient
This allows you to monitor the full lifecycle of an email directly from the system.
Where to Check Email Status
1. Chatter (Most Common Method)
Every document (like Sales Orders, Invoices, etc.) has a chatter section.
From the chatter, you can easily identify whether the email was sent successfully and view additional details related to the communication. This includes the message content, recipient information, and delivery status (if properly configured).
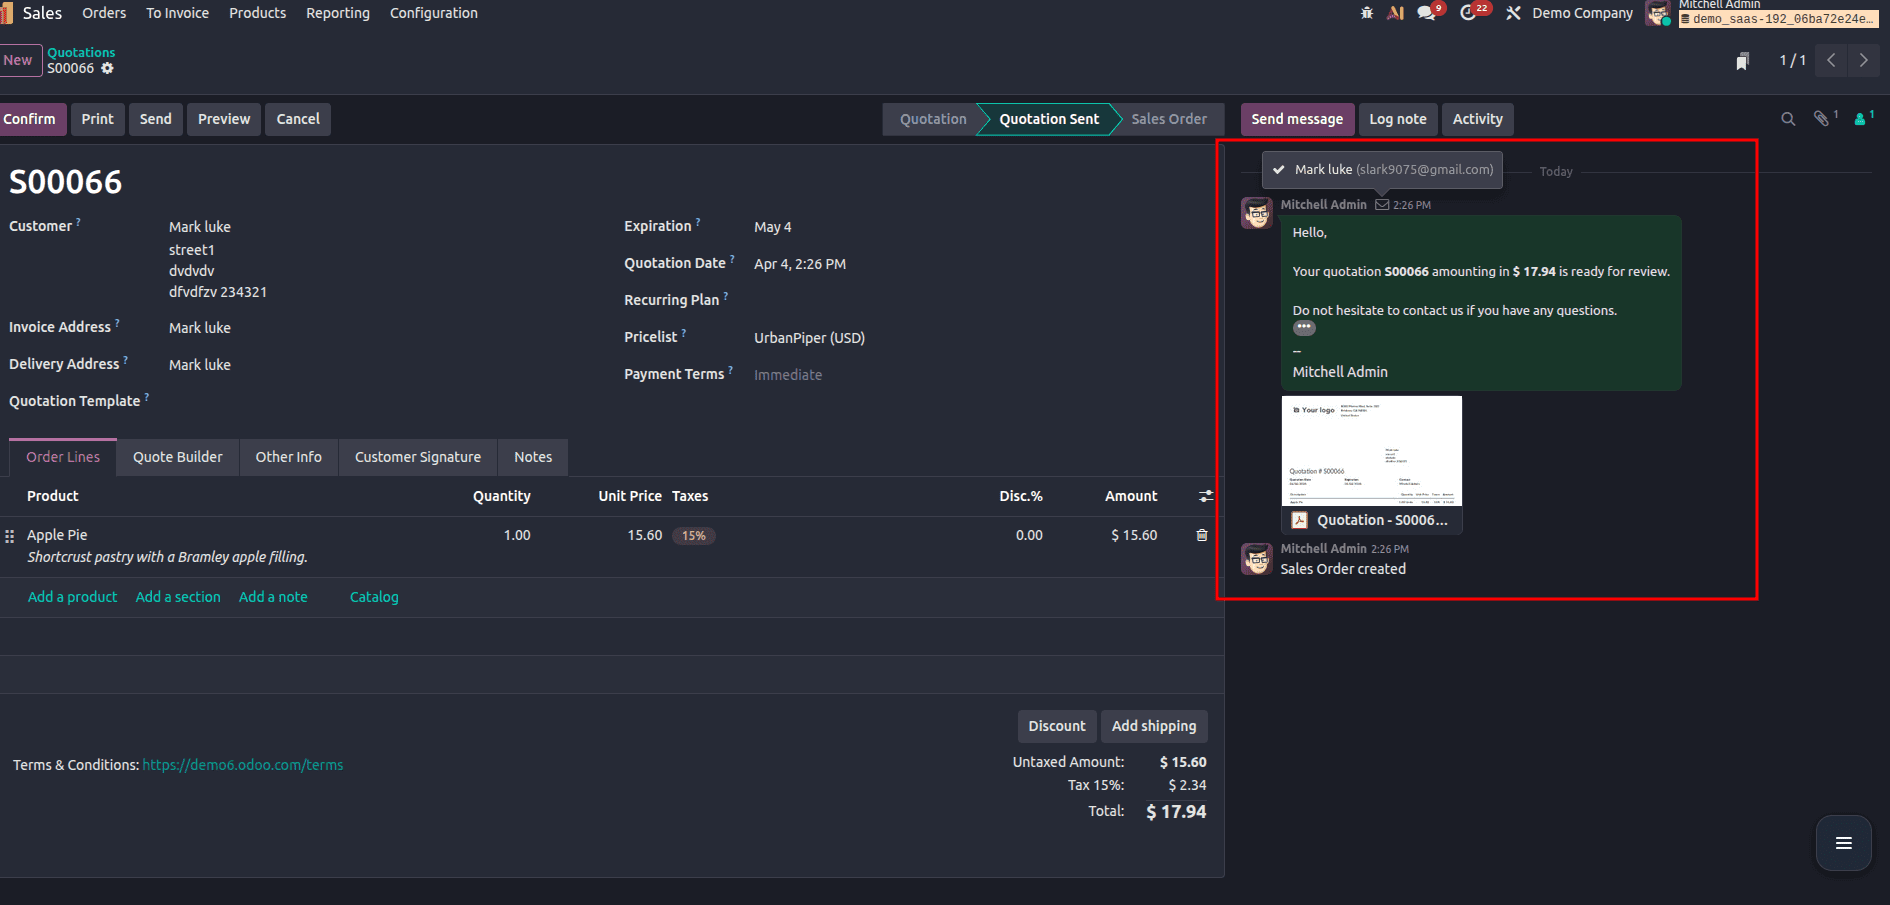
As shown in the image above, once an email is sent, a message appears in the chatter highlighting the action. This makes it very convenient for users to track communication history directly within the record itself.
Overall, the chatter provides a simple and user-friendly way to monitor email activity, making it the most commonly used method for tracking email status in Odoo.
This is the easiest way to track emails for a specific record.
2. Email Queue (Technical View)
For a more detailed and technical way to track emails in Odoo, you can use the Email Queue. This view gives you complete control and visibility over all outgoing emails processed by the system.
To access it, enable developer mode and navigate to Settings > Technical > Emails > Emails. Here, you can view essential details such as the email subject, recipients, and the current status of each email.
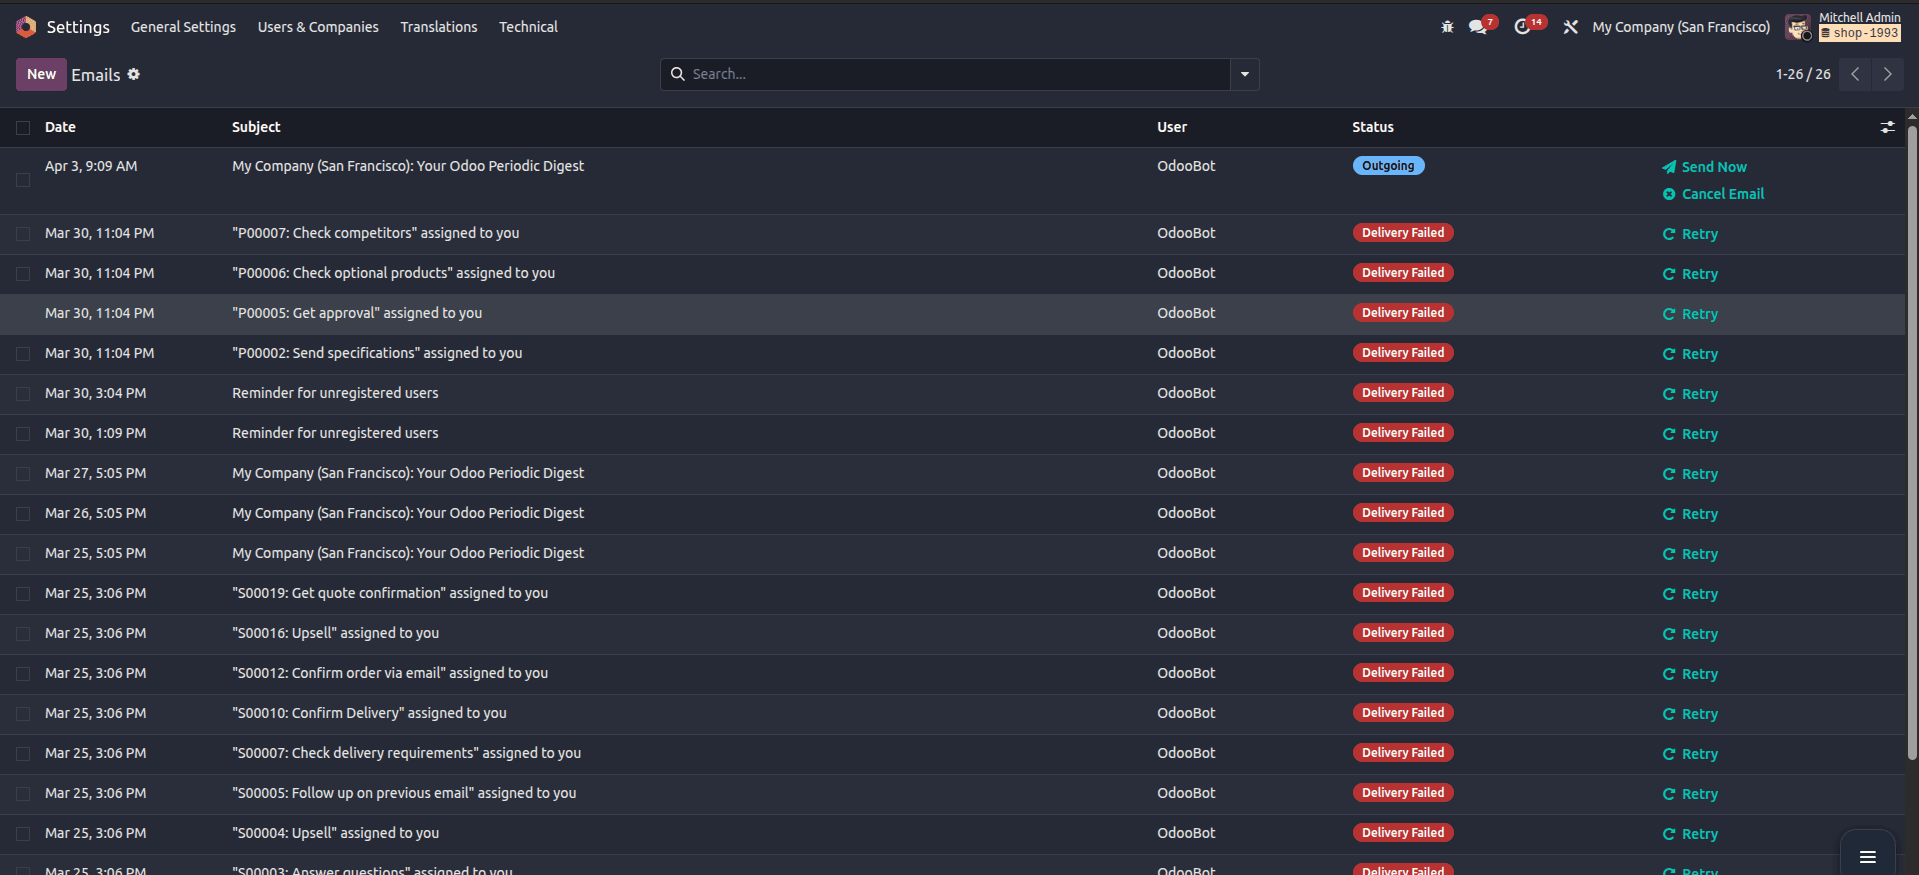
Odoo provides multiple status indicators to help you understand the email lifecycle:
- Outgoing – Email is queued and needs to be delivered.
- Sent – Email was successfully delivered
- Received – Email was received (under certain configurations).
- Delivery Failed (Exception) – Email delivery failed due to errors
- Cancelled – The email was manually cancelled
As shown in the image above, failed emails are distinguished with labels such as “Delivery Failed,” offering options such as “Retry” to resubmit emails once the problem has been fixed.
This view is especially useful for debugging email problems, monitoring delivery status, and ensuring that important communications are successfully sent.
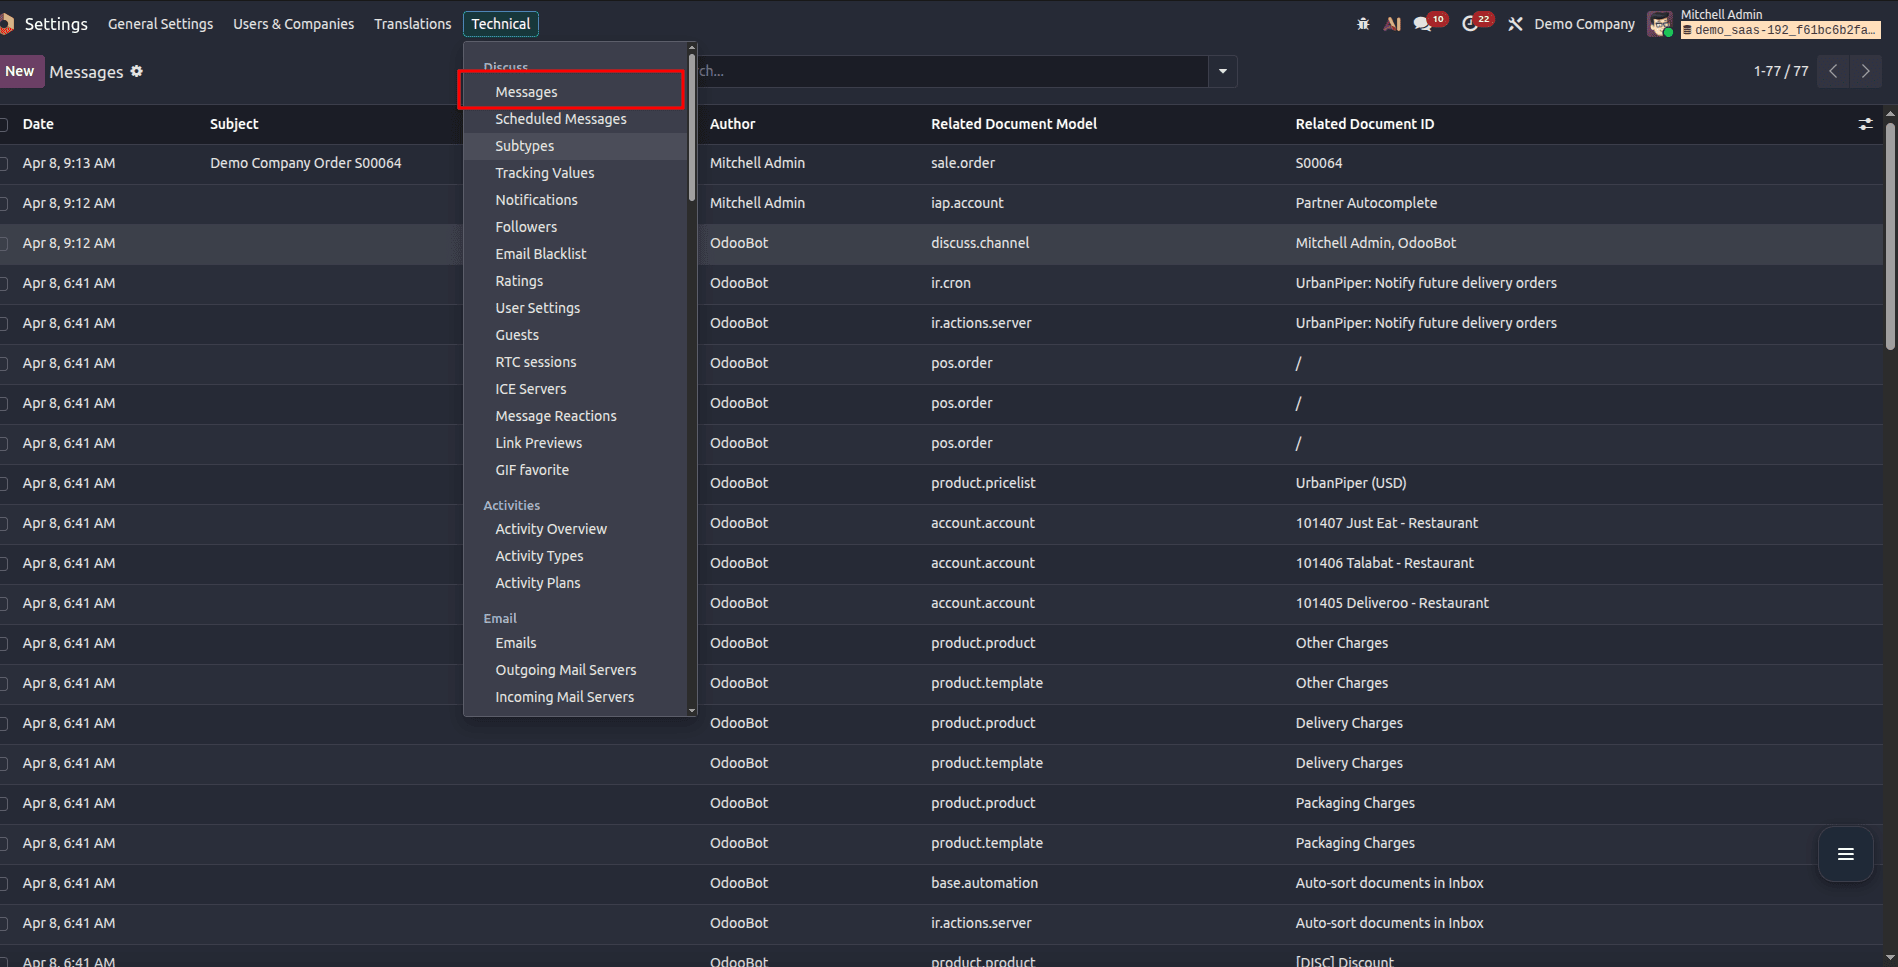
3. Messages Menu
Another efficient way of monitoring the state of emails in Odoo 19 is via the Messages menu that appears under the Technical menu.
For this:
- Activate Developer Mode
- Go to Settings > Technical > Messages > Messages
In this menu, you will be able to see an advanced email tracking form, which will help you keep track of all emails being sent. You will notice a list of all messages, where you will be able to locate the recently sent emails and open them for further analysis.
Once you choose one of them, the following data will be displayed:
- Email subject and content (body)
- Sender and recipient details
- Related document (like Sales Order, Invoice, etc.)
In addition, the Recipients tab provides more granular information about each recipient. This includes whether the email was successfully sent, read, or failed (Exception).
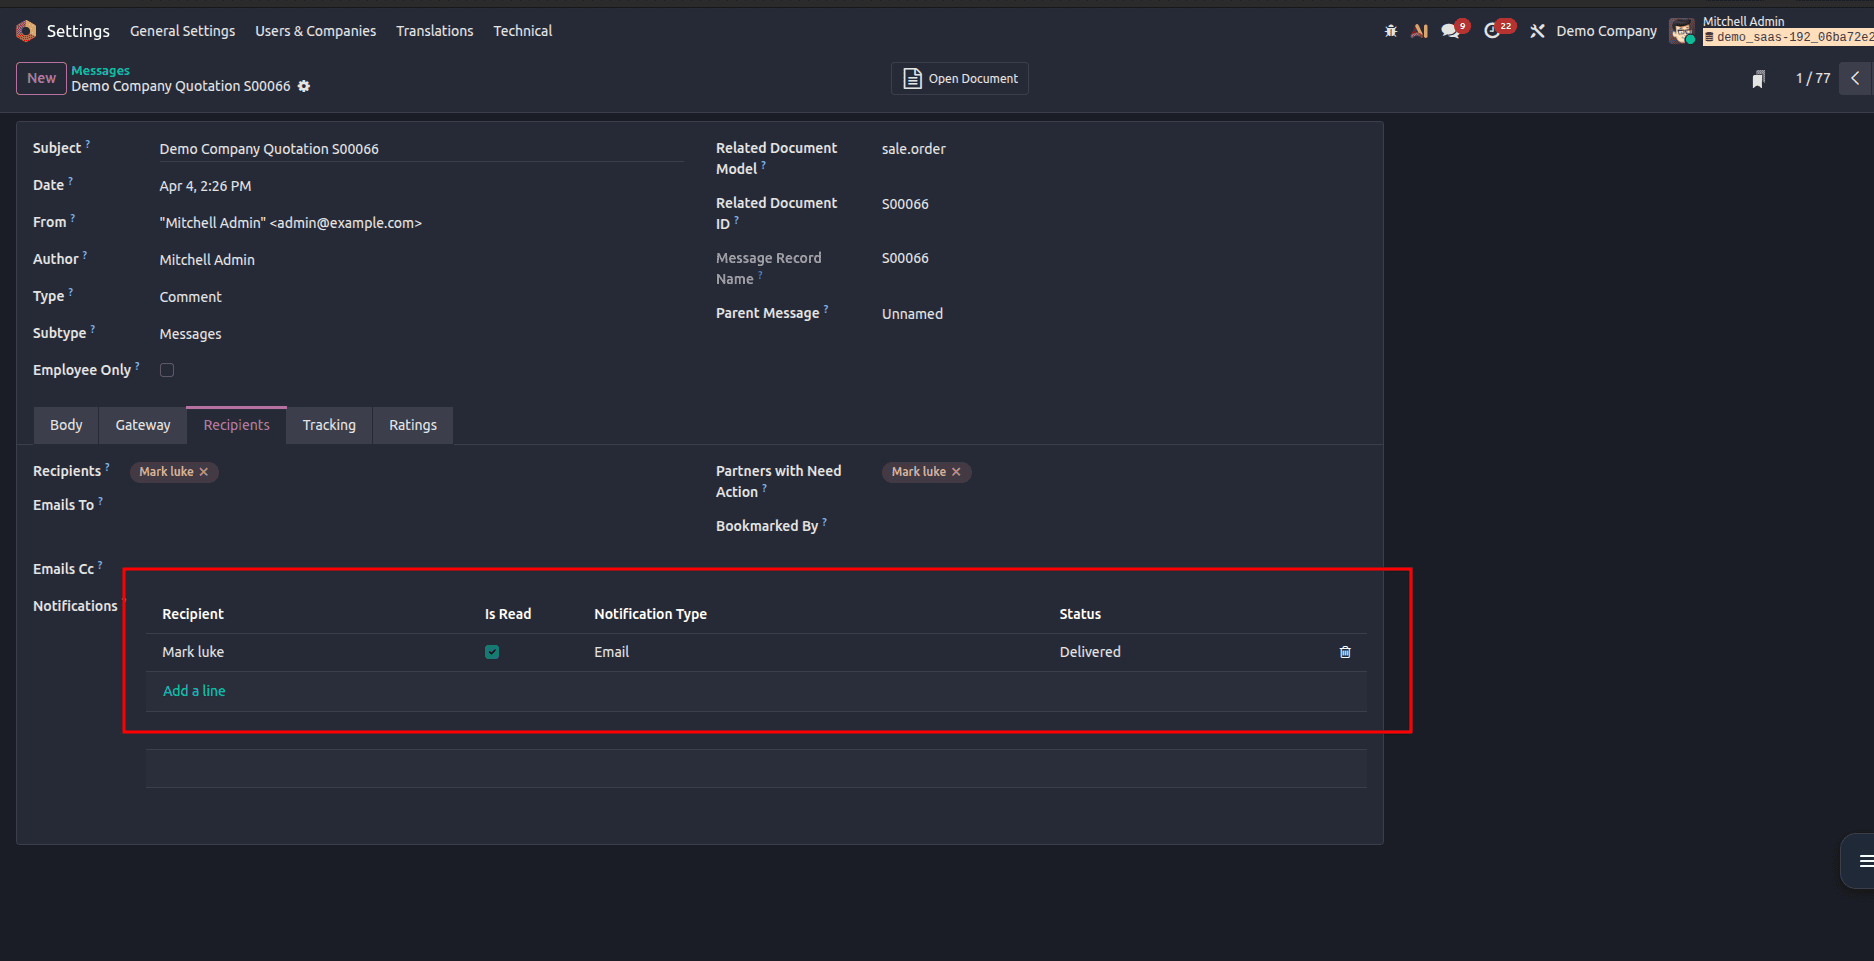
This method is useful when you want to get more insight into the email communication process. For example, it allows you to track email status at the recipient level, as well as learn the body and content of the emails that were sent.
The monitoring of email statuses is necessary for reliable communication in Odoo 19. Whether you are a functional or technical user, there are several options for tracking email status in Odoo. They include such views as Chatter, Email Queue, and Messages.
Each option serves its purpose, and the selection depends on what kind of information you need. With chatter, it will be easier to track the status of an email quickly, with Email Queue, you will be able to debug and send emails again. The Messages option lets you get all the data about recipients and email delivery.
To read more about Overview of Scheduled Emails in Odoo 19, refer to our blog Overview of Scheduled Emails in Odoo 19.