Managing field service operations goes beyond simply assigning tasks to technicians — it also requires accurate and transparent billing for the time and materials used on-site. In many businesses, field service teams handle installations, repairs, or maintenance that involve both labor and spare parts. Traditionally, keeping track of these costs and converting them into customer invoices can be a manual and error-prone process.
With Odoo 18 Field Service, this challenge is solved seamlessly. The system allows companies to record time spent, materials consumed, and expenses directly within the task, and then automatically generate professional invoices. This ensures that every job is billed correctly, revenue is captured without delays, and customers receive a clear breakdown of charges.
By linking field service tasks with sales, inventory, and accounting, Odoo 18 provides a fully integrated workflow — from scheduling the task, to execution on-site, to issuing the final invoice. This approach not only enhances accuracy but also reduces administrative effort considerably.
Step 1: Configuring Sales Orders
The first step in establishing time and material billing in Odoo 18 is to create service-based sales orders for your clients. Before starting a new assignment in the Field Service module, you can create a new Sales Order from the Sales module. While setting up this order, you can include key details such as customer information, invoicing and delivery addresses, quotation template, order date, price list, and payment terms.
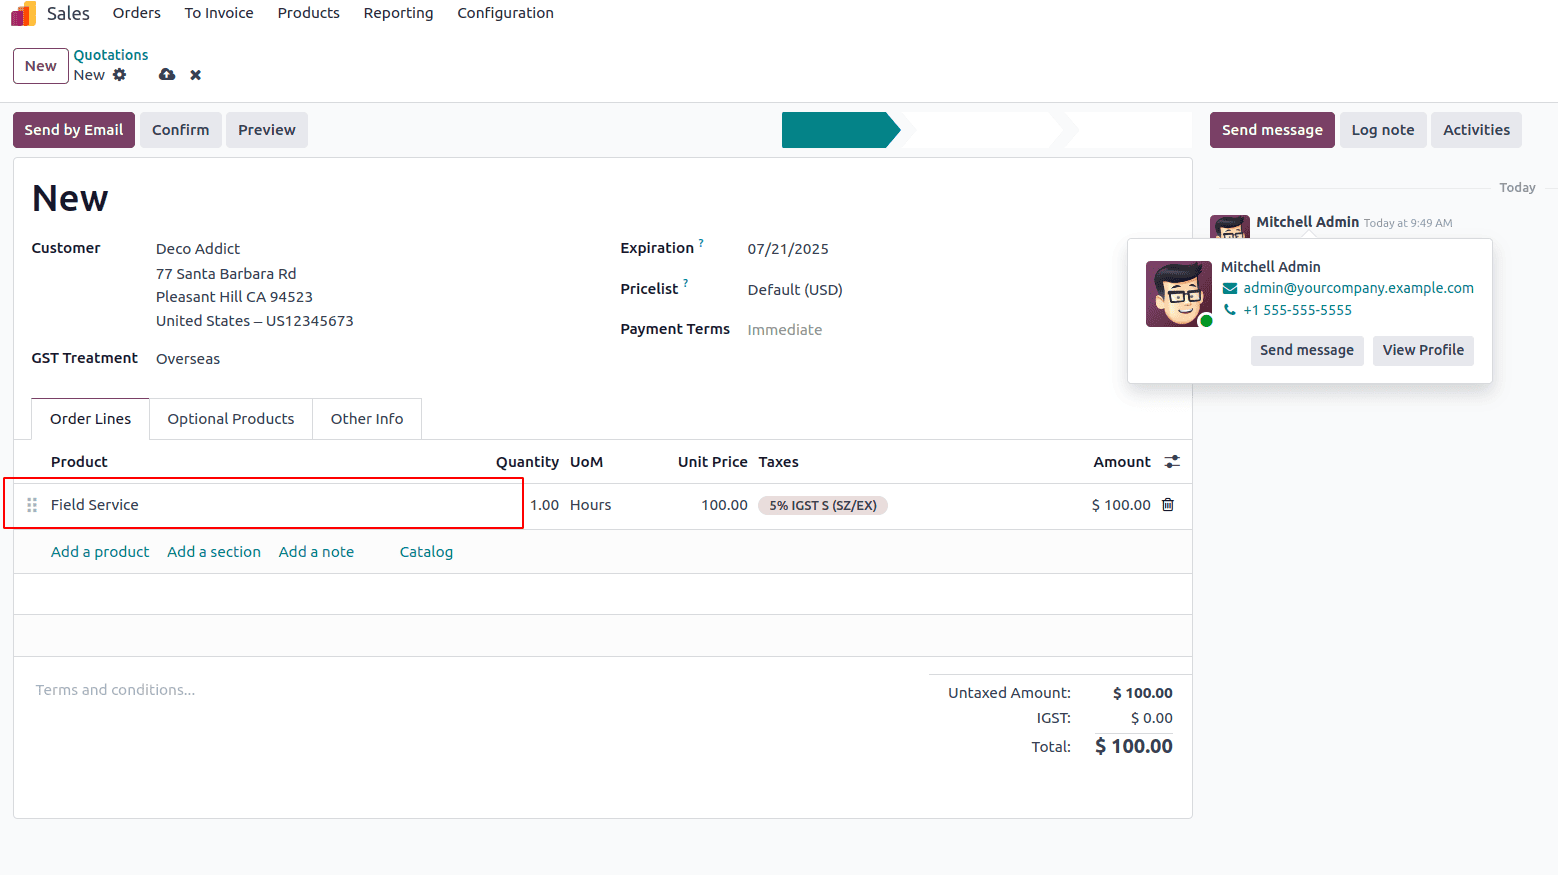
Within the Sales Order Line, you can customize service products by establishing a new one using the Create option or editing an existing one by selecting the Internal Link next to the product name.

When configuring a product, you can set its Product Type to Service. In Odoo 18, service products can be invoiced using four policy options: Timesheets, Milestones, Delivered Quantity, or Fixed Price/Prepaid.”You can choose the appropriate policy from the list based on your billing method. Additionally, you can link the product to a specific project by selecting Field Service as the project and assigning a Worksheet Template if required. After updating the product details, fill in the remaining fields in the Sales Order and then click Confirm.
This confirmed sales order can then be linked when creating tasks within the Field Service module for the associated service.
Step 2: Generating Field Service Tasks
Once a Sales Order is confirmed, you can generate field service tasks and assign them to technicians for execution. These tasks can include various Odoo 18 features, such as task creation in the Field Service module with details like descriptions, schedules, and sub-tasks..
Be sure to specify the following: Project, Worksheet Template (aligned with the Sales Order), Assignees, Customer, Planned Date, and Tags.
After selecting the Customer, an additional field will appear, allowing you to link the relevant Sales Order Item, as shown in the screenshot.
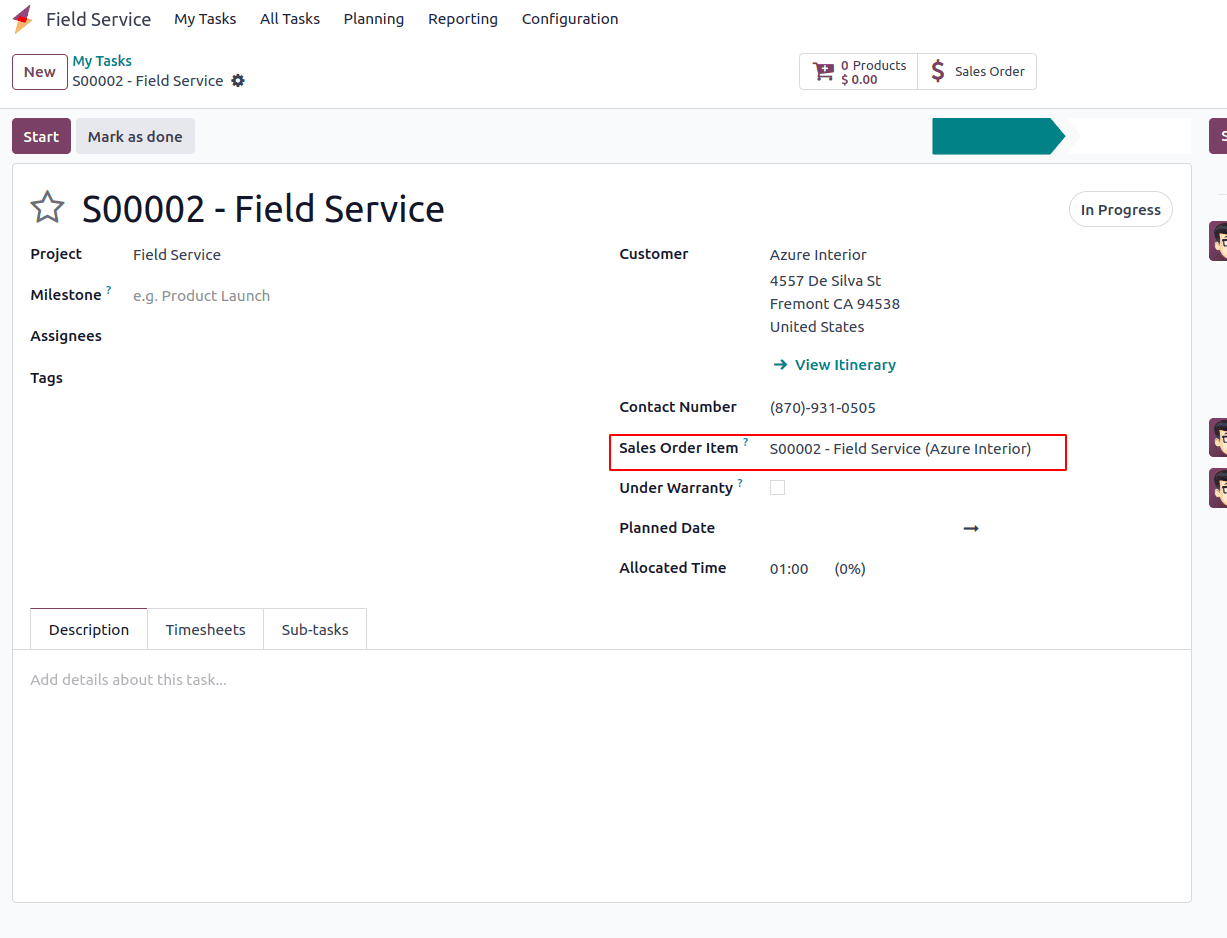
In this field, you can link the confirmed Sales Order that corresponds to the specific field service task, which was previously created in the Sales module.
Step 3: Recording Time and Materials
Make sure to fill in the following details: Project, Worksheet Template (matching the configuration from the Sales Order), Assignees, Customer, Planned Date, and Tags.
Upon selecting a Customer, an additional field becomes available, enabling you to link the appropriate Sales Order Item, as demonstrated in the accompanying screenshot. They have the ability to track working hours, start and stop task timers, and record consumed materials, ensuring precise monitoring of billable time and material costs.
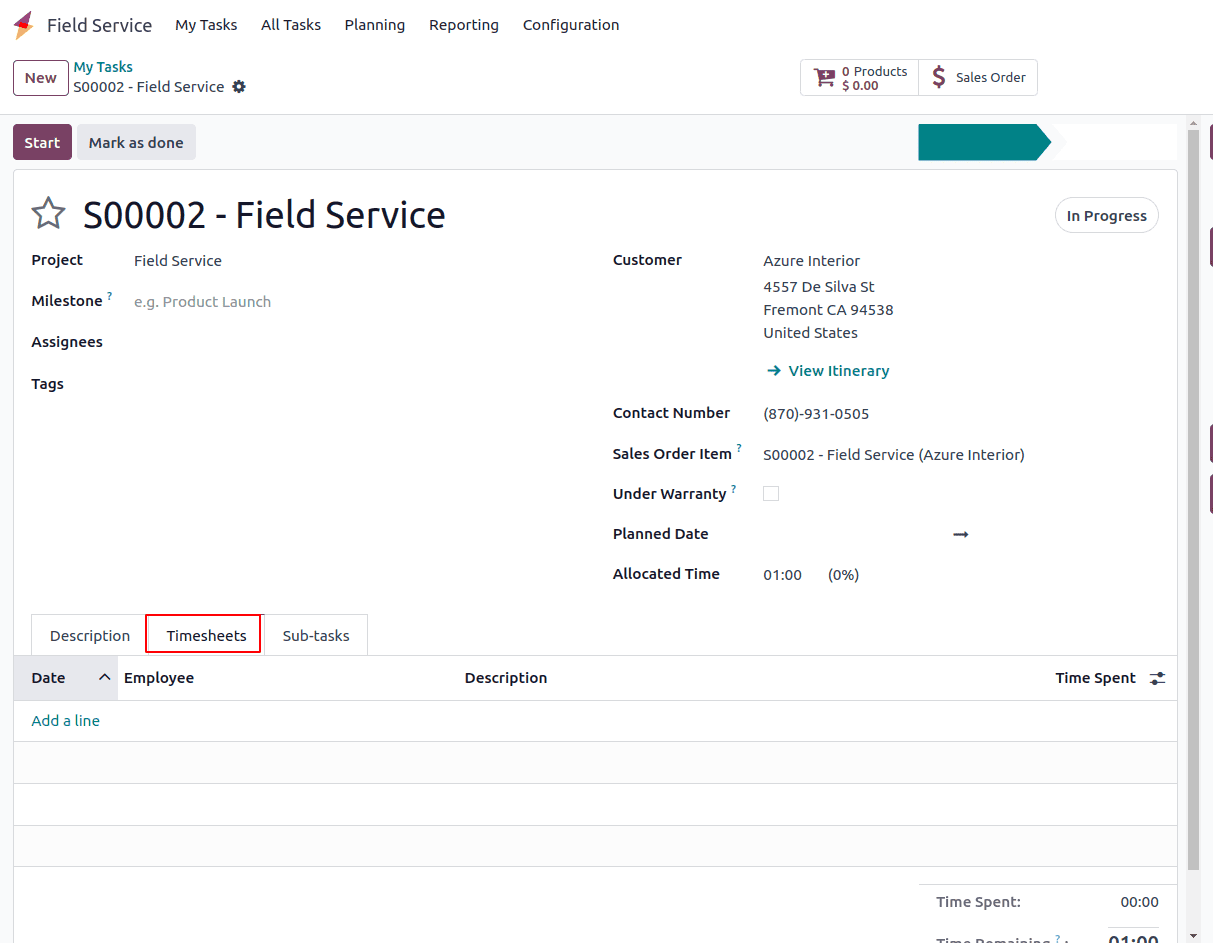
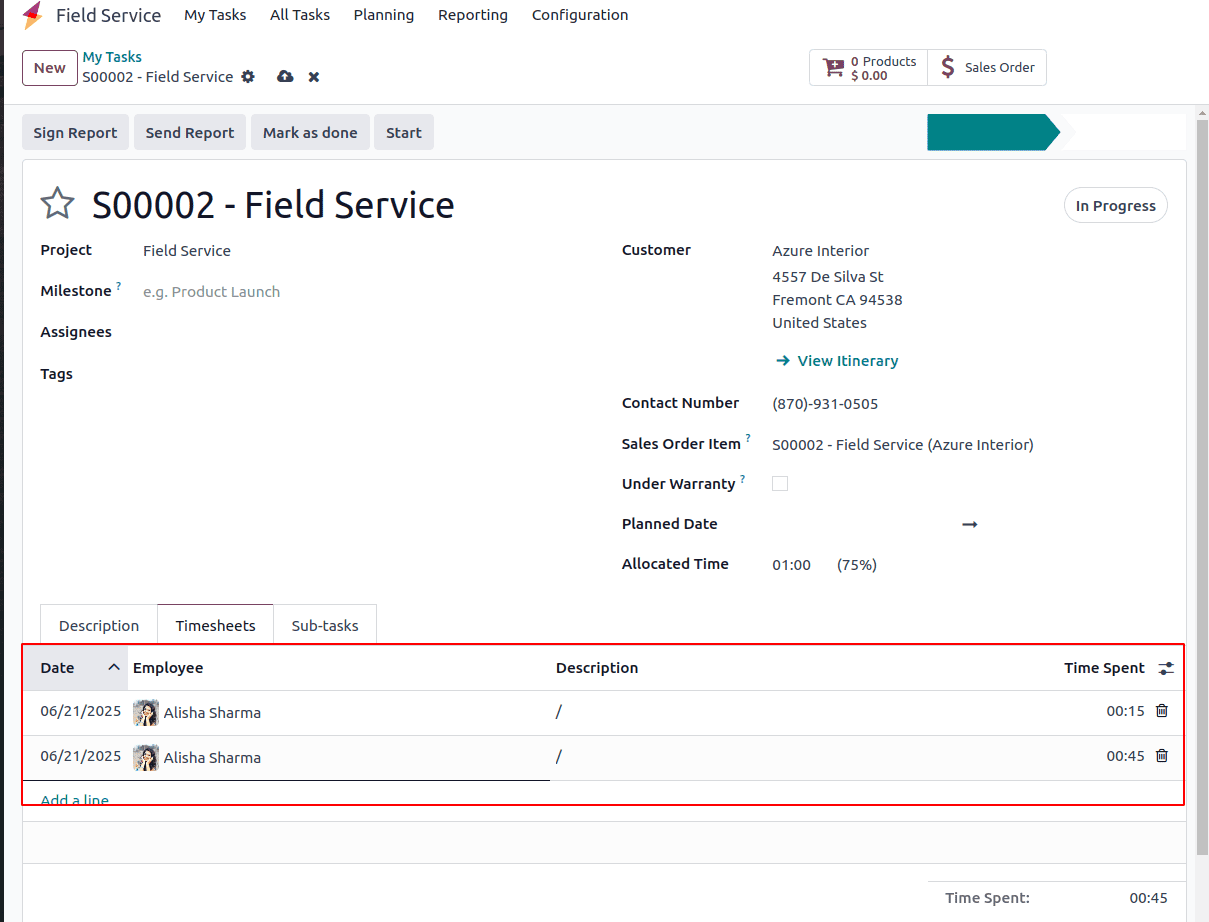
The Timesheets tab captures the time spent by each assigned employee on the task. These entries are essential for generating invoices when the invoicing policy is set to Based on Timesheets. You can either manually log time entries using the Add a Line button or start tracking time automatically.
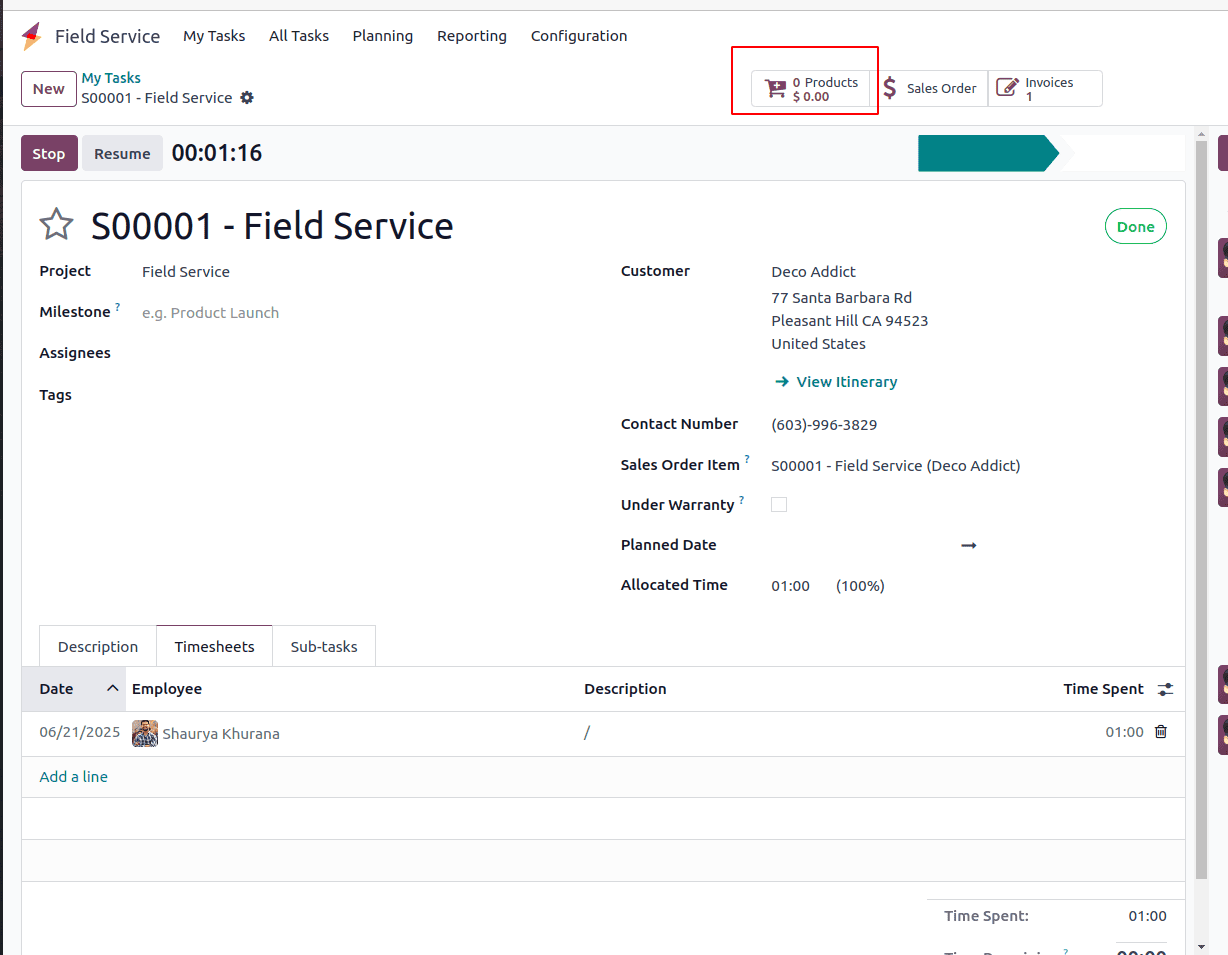
Once the task is saved, a Start button becomes available on the screen. Clicking this button begins automatic time tracking, allowing Odoo to record the duration worked on the task in real-time.
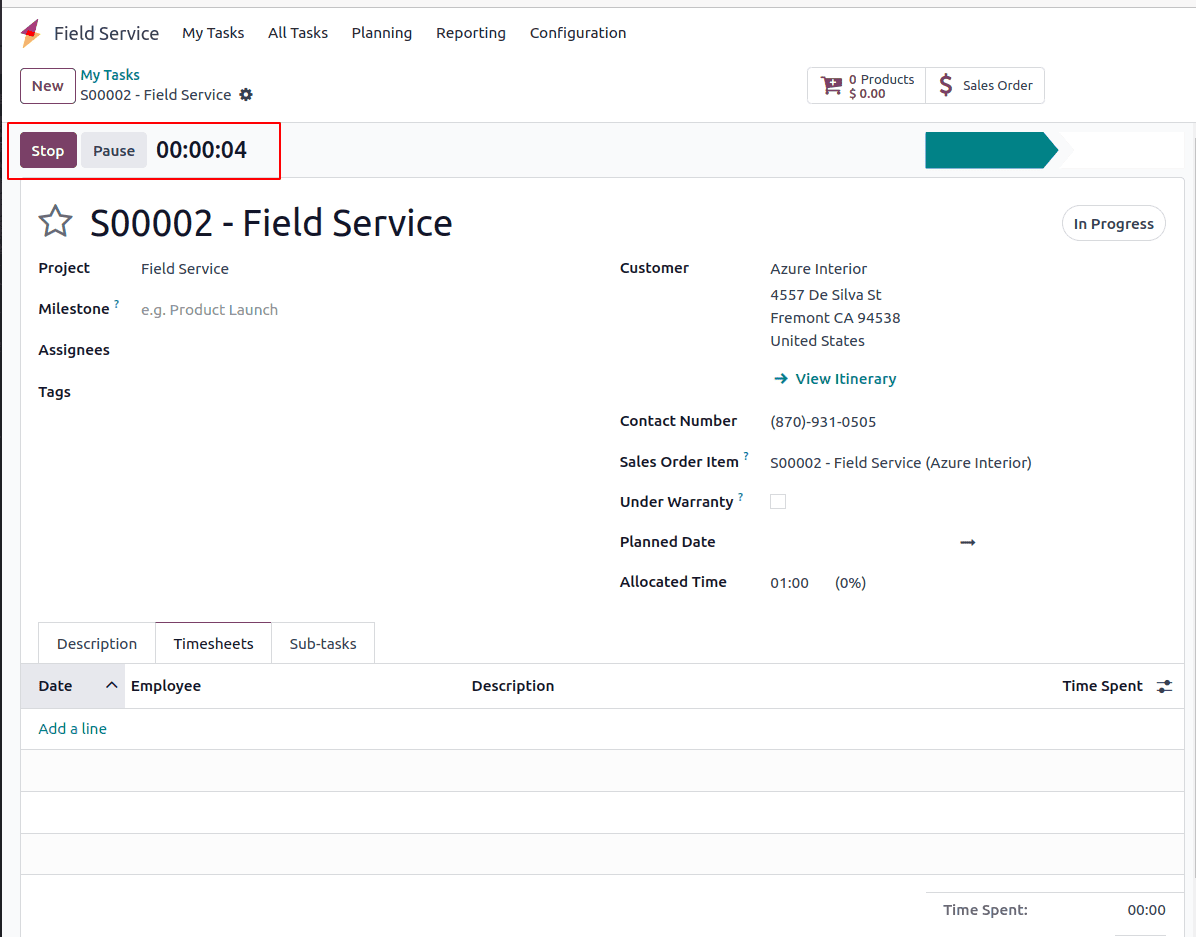
To stop time tracking, click the Stop button. The recorded duration will then be automatically added under the Timesheets tab, as shown in the example below.
You can also log the materials used for the task by clicking the Products smart button available within the task window. This feature allows you to log materials used in detail, ensuring precise tracking and better resource management.
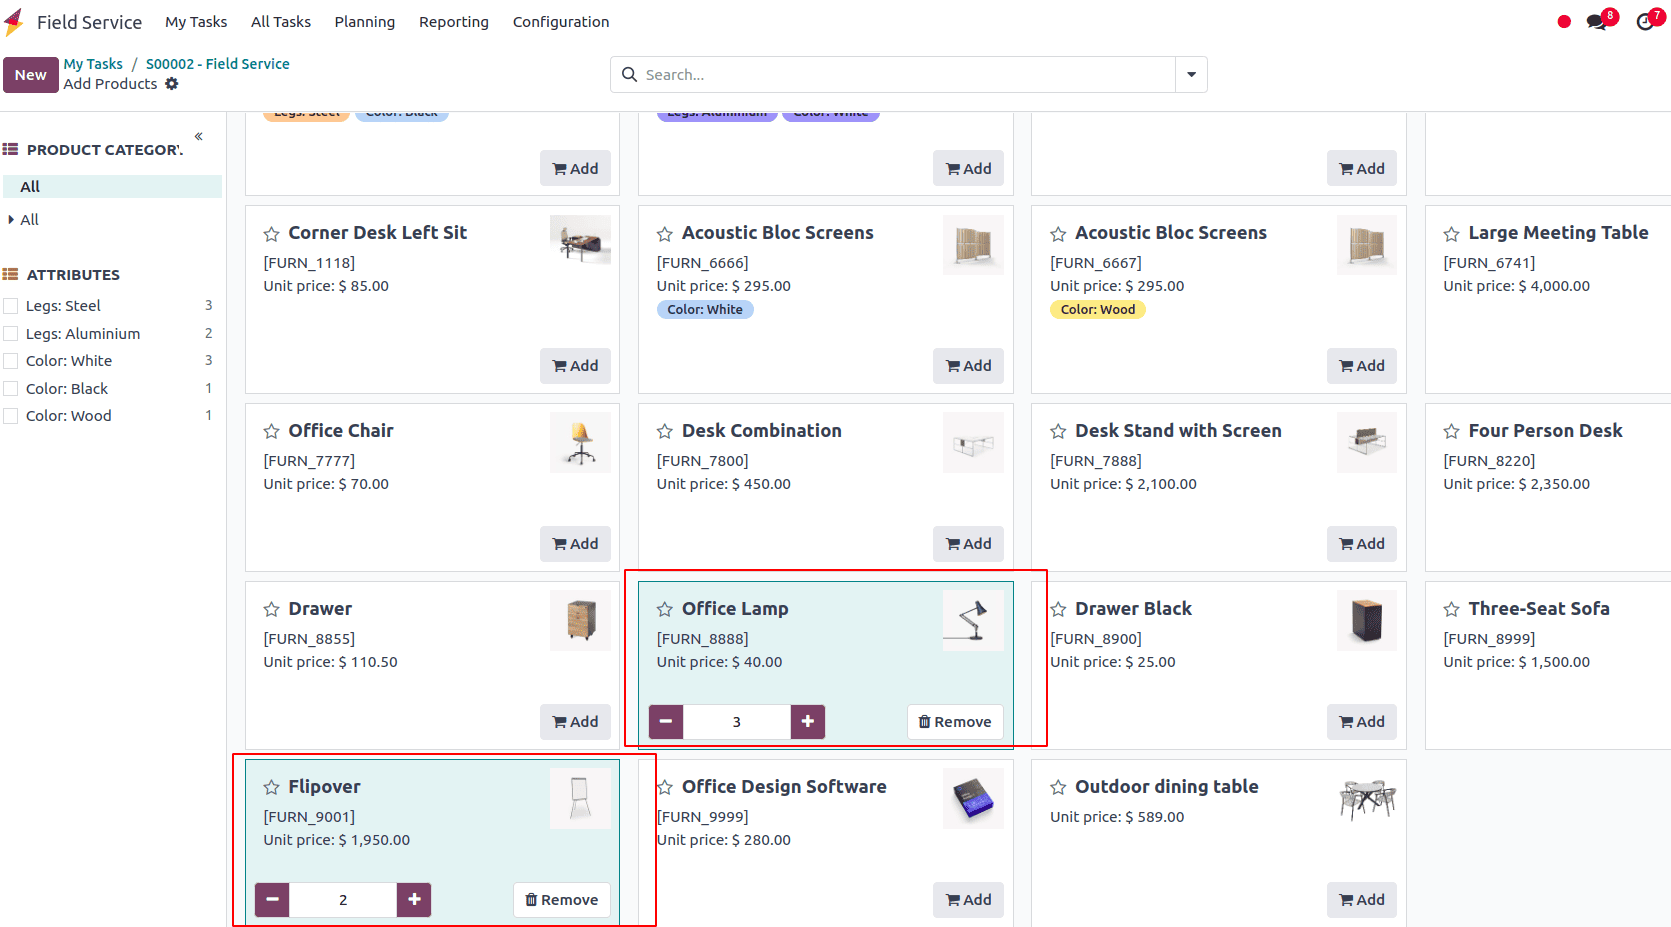
When you click on the Products option, you’ll see a comprehensive list of all products configured in the Field Service module. From this interface, you can conveniently choose the required products and specify the quantities needed to complete a task. This simplifies material tracking and management, ensuring precise inventory control and efficient resource allocation.
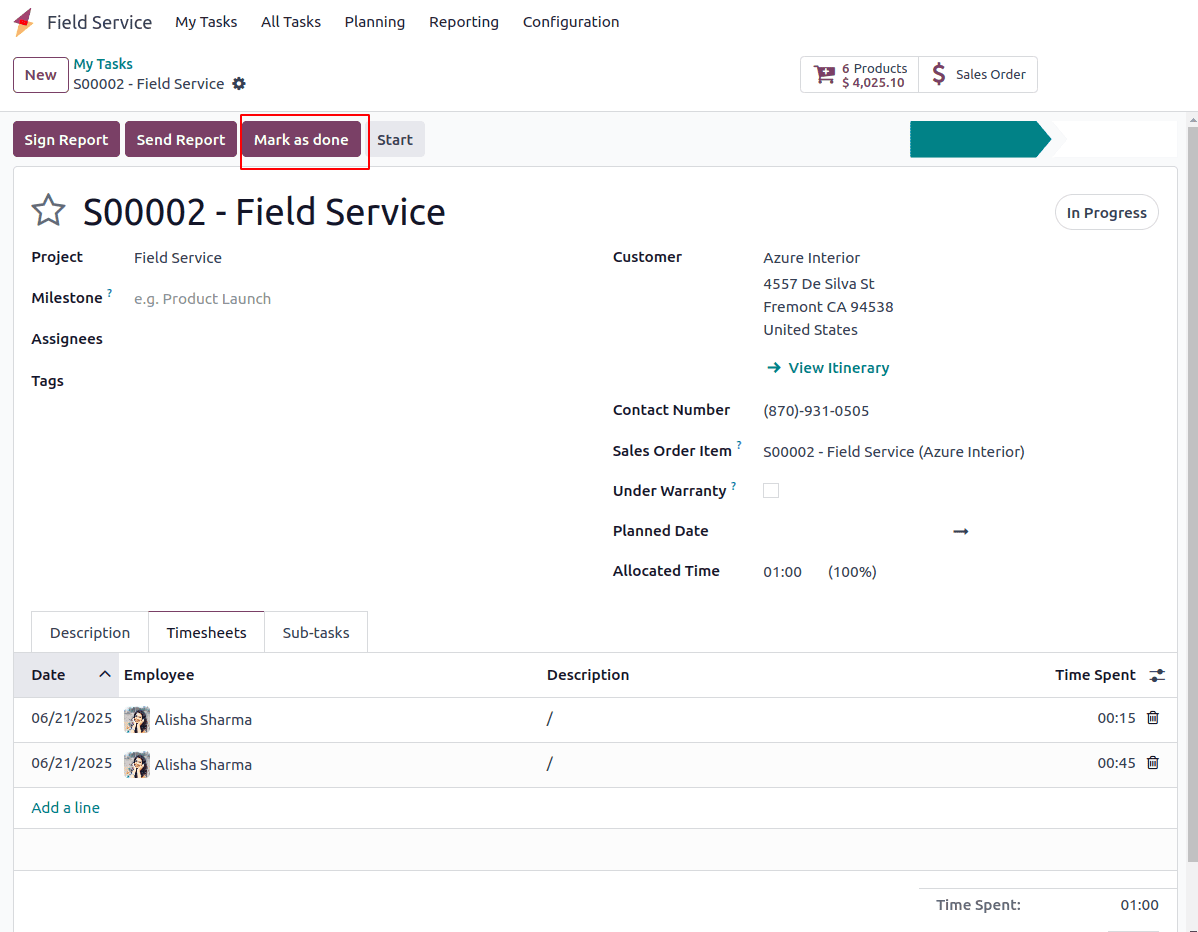
After completing the task, mark it as Done. This action verifies that all related activities and objectives have been accomplished, officially signaling the task’s closure.
Step 4: Invoice Generation
Once field service tasks are finished, administrators can generate invoices that reflect the recorded time and materials used. Odoo 18 streamlines this process by automatically extracting data from the completed tasks to create accurate and detailed invoices. These invoices can be customized to include key details such as task descriptions, labor charges, material costs, and applicable taxes.
Once a task is completed, three options become available: Create Invoice, Sign Report, and Send Report, as shown below.
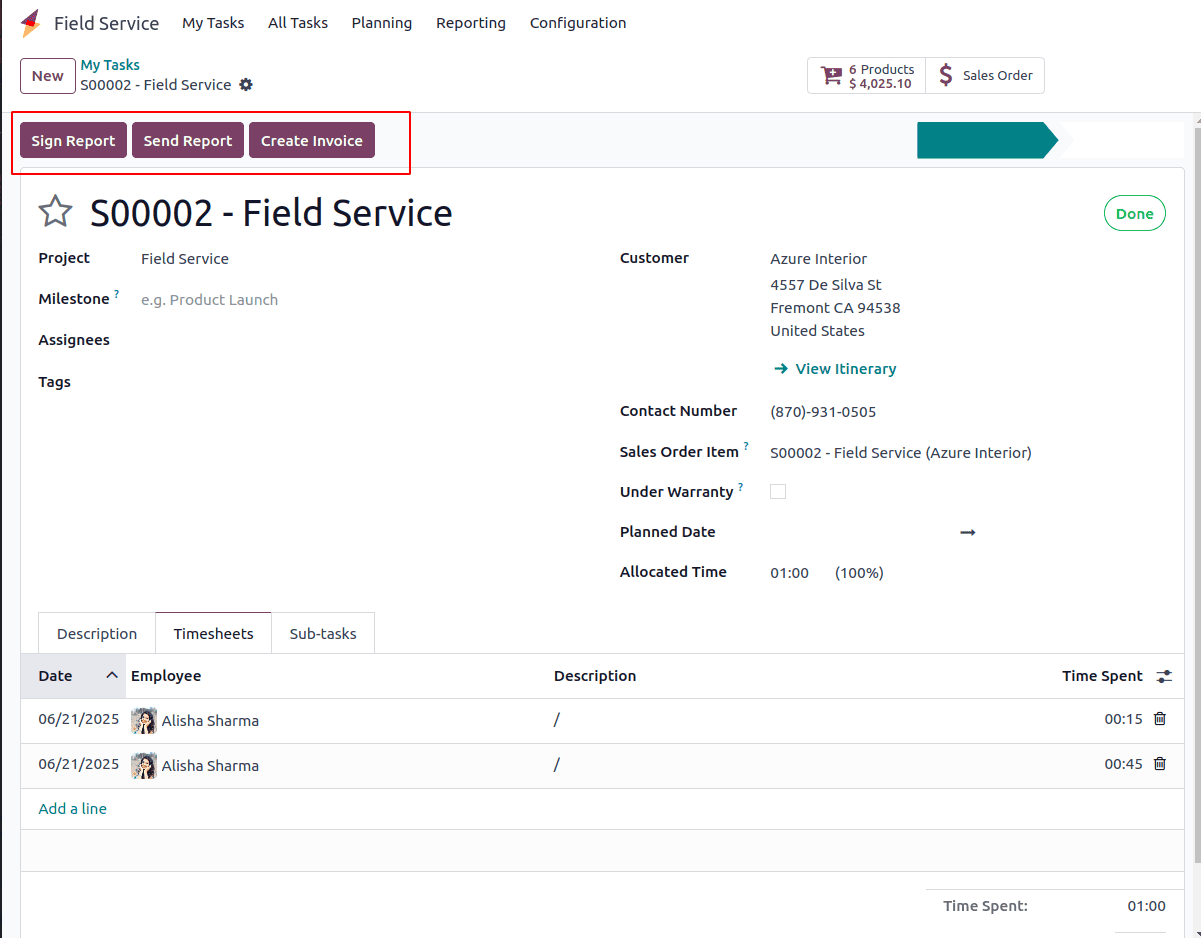
Customers can also sign the report electronically using the Sign button, making the approval process faster and ensuring proper documentation of task completion.

As shown in the screenshot below, the task report provides a detailed summary including essential information such as the technician and customer details, a breakdown of time and materials, and timesheet entries of the assigned employees.
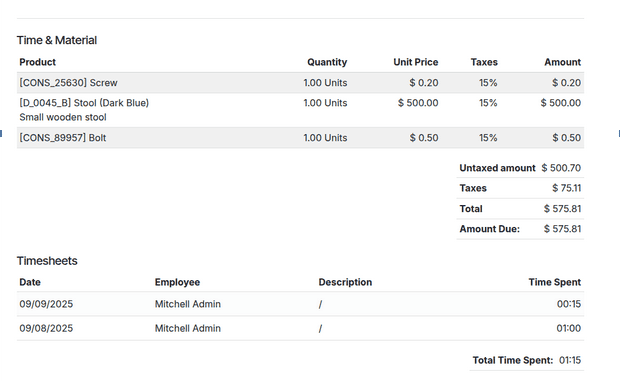
This comprehensive report offers clear visibility into the service performed, promoting transparency and accountability for both parties.
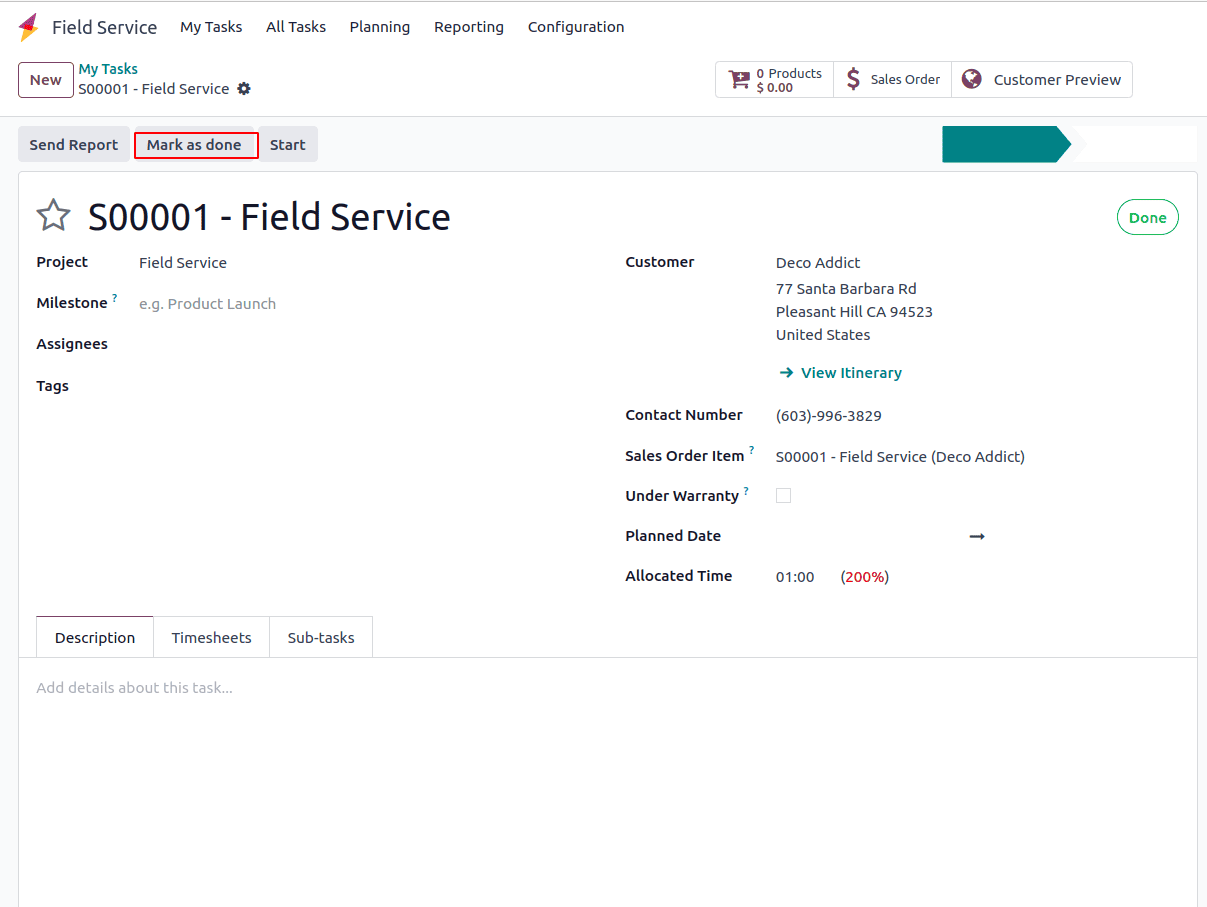
The task is finished, simply mark it as Done. This action confirms that all required activities and objectives have been fulfilled, officially indicating the successful completion of the task.
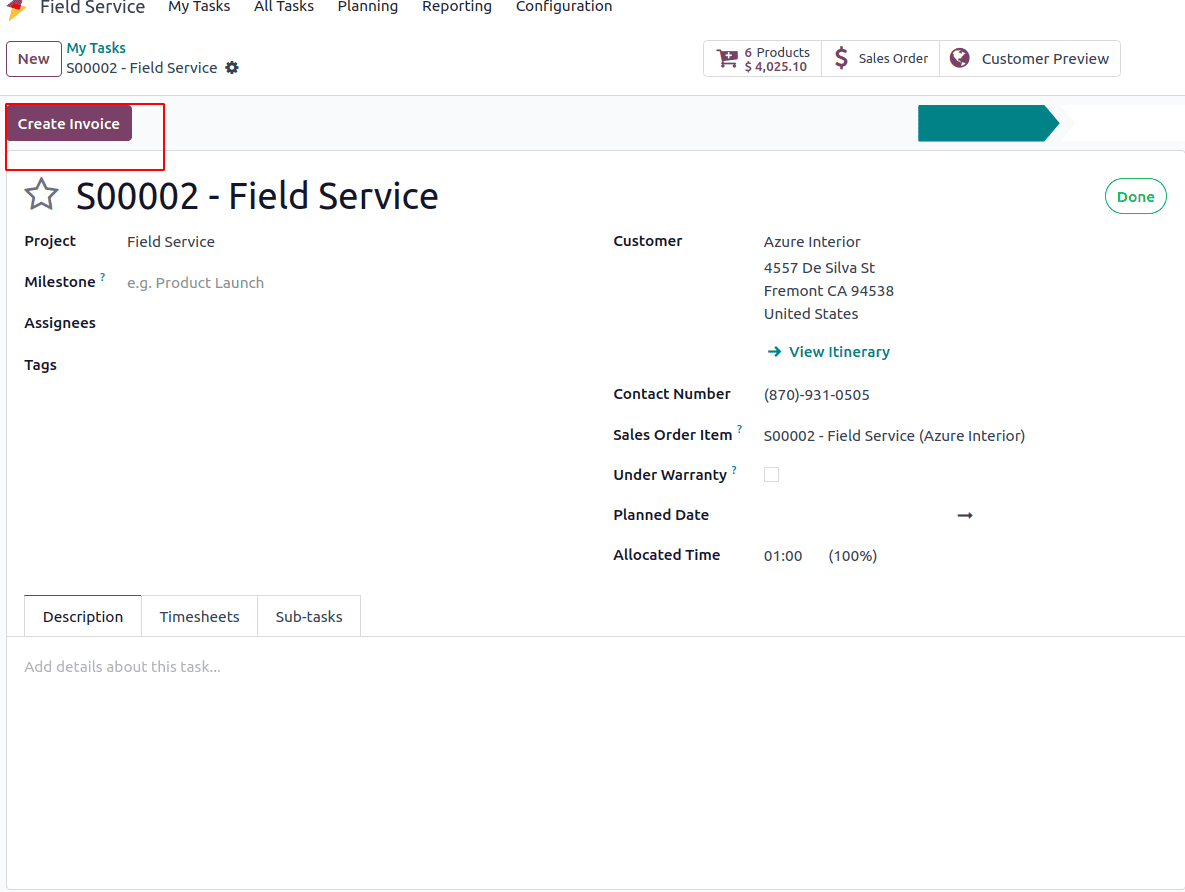
The final option on the screen is Create Invoice, which generates an invoice for the current task. By clicking this button, a draft invoice is created, as illustrated in the screenshot below.
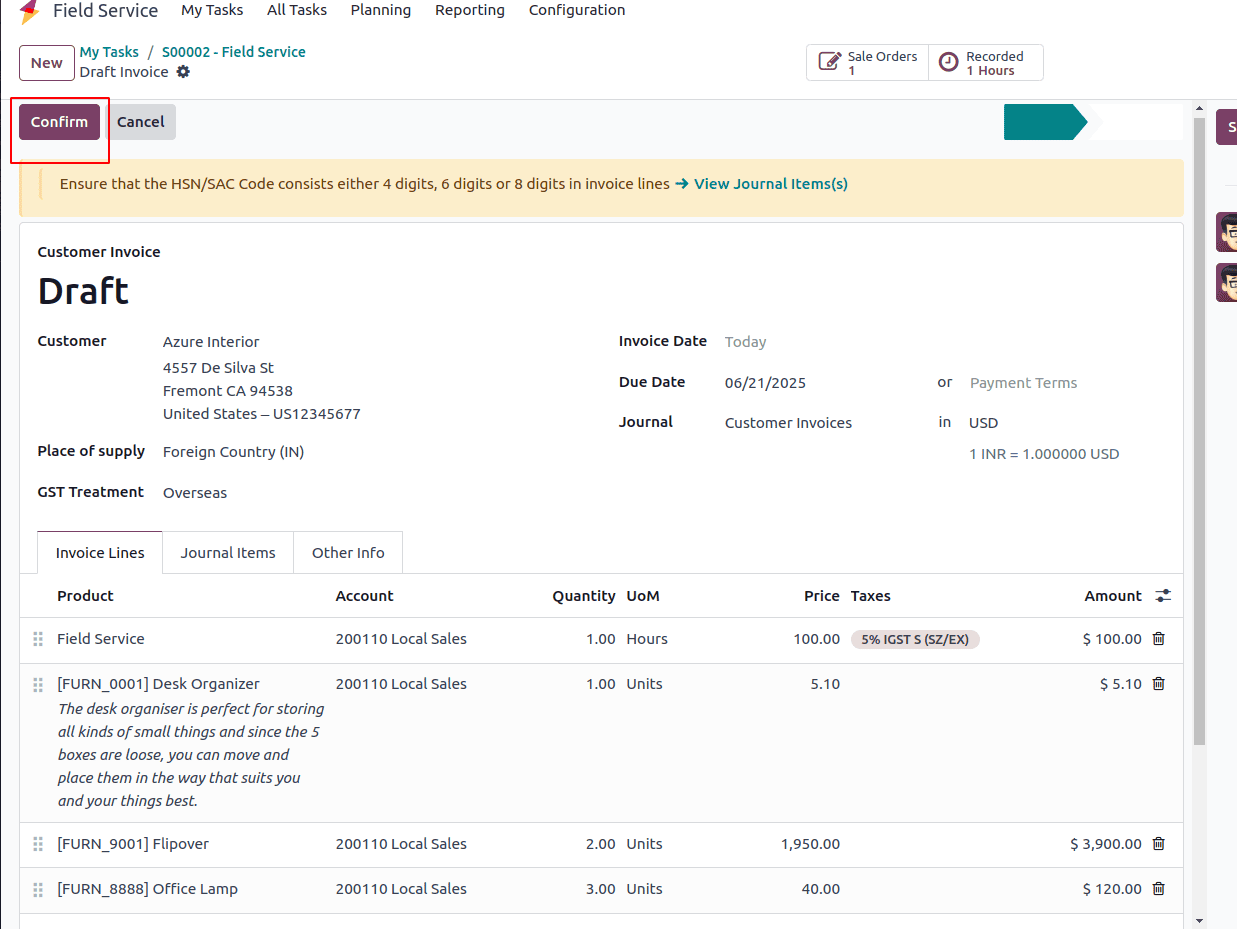
In the Customer Invoice, the Invoice Line section will display a detailed breakdown of the materials used for the task, along with the related sales order line based on timesheet entries. After reviewing the draft invoice, you can click the Confirm button to validate and finalize the invoice.
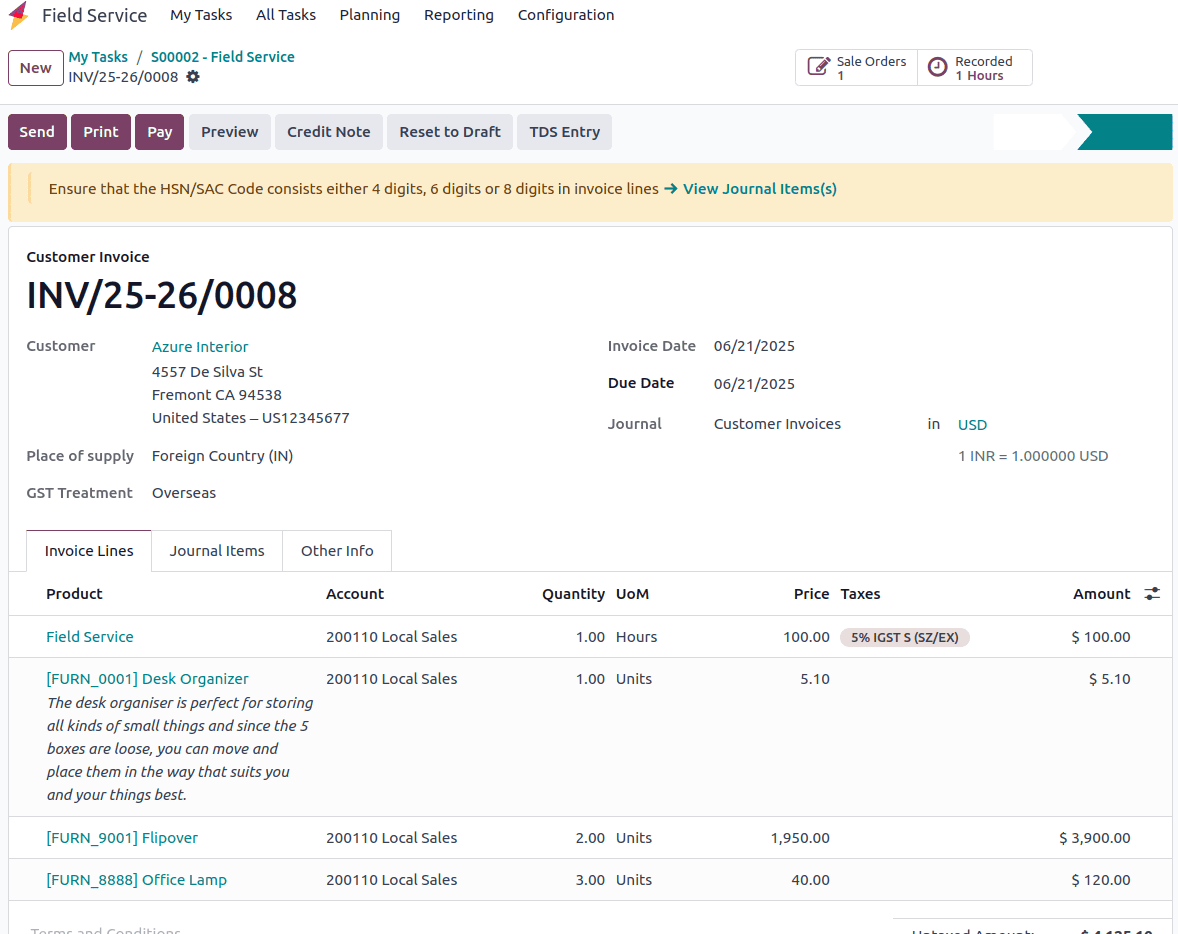
The screenshot shown depicts a confirmed customer invoice indicating the time and materials used for a specific task.
Step 5: Reviewing and Sending Invoices
It's crucial to check invoices for accuracy and completeness before sending them to clients. Administrators can examine the invoice and make any necessary changes using the tools provided by Odoo 18.
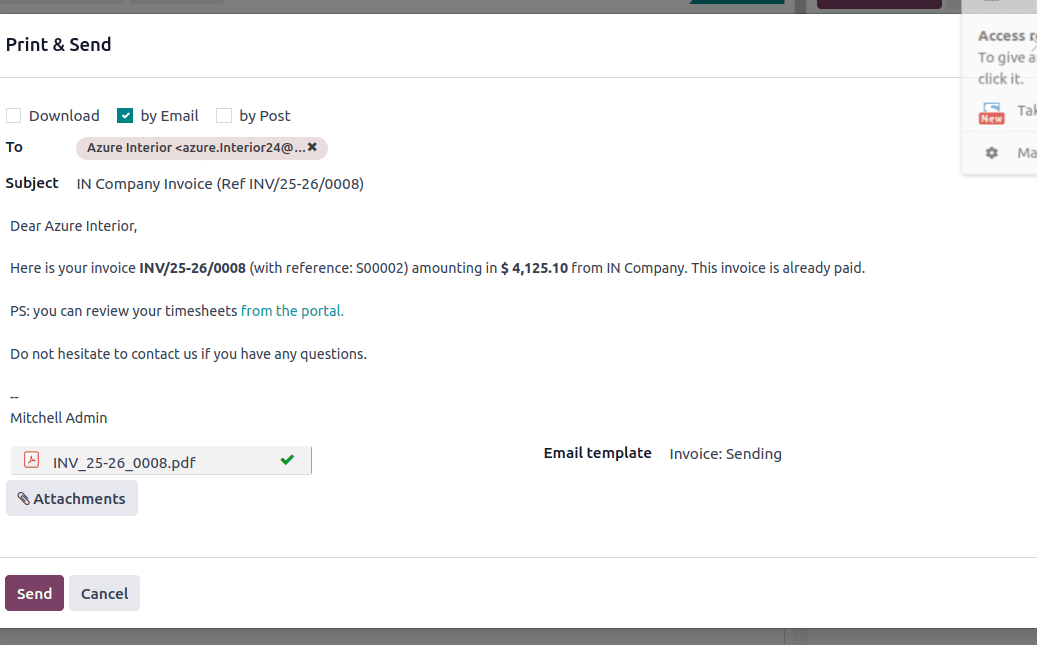
Once completed, invoices can be printed for in-person delivery or emailed to clients online.
Step 6: Payment Monitoring
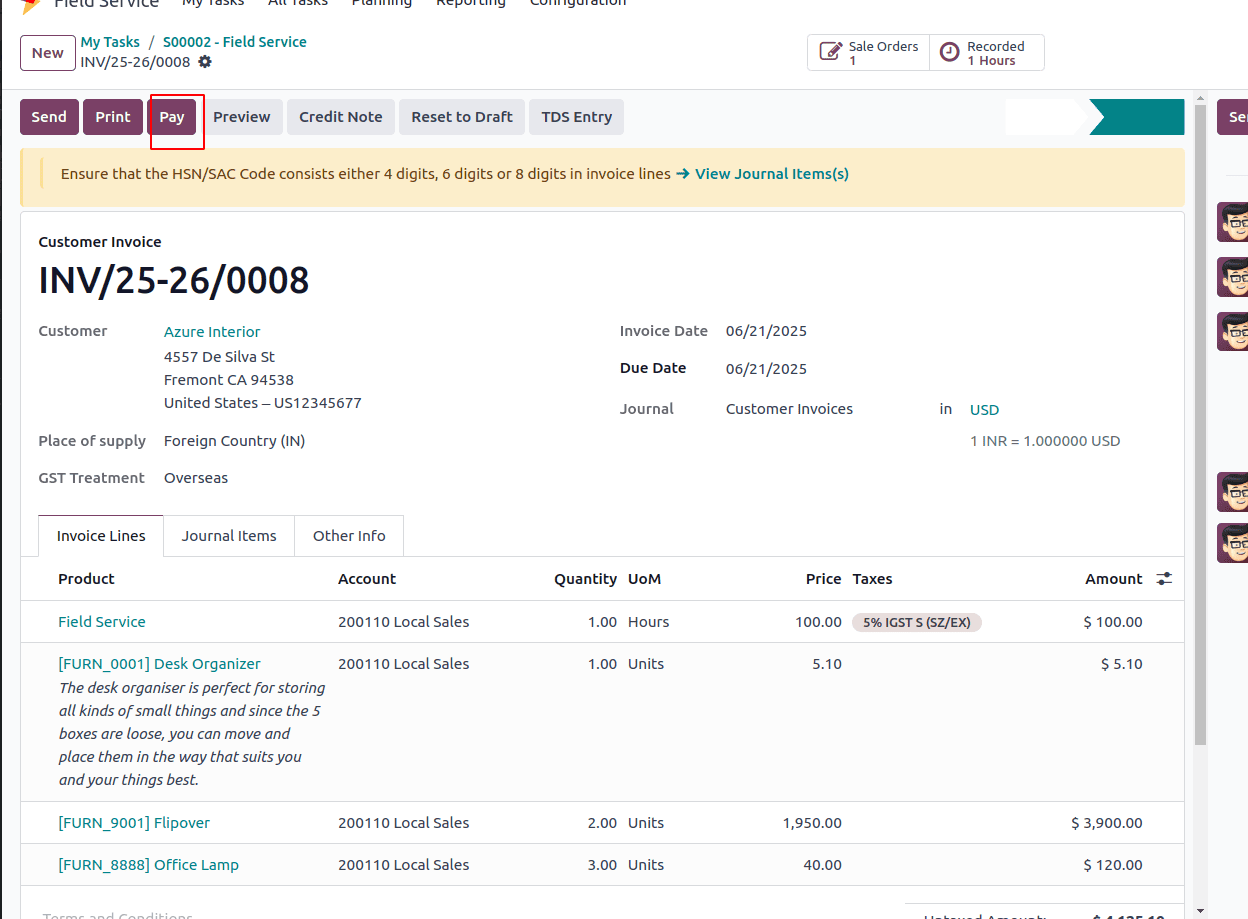
After sending invoices, businesses can use Odoo 18 to monitor payments and handle accounts receivable effectively. To record a payment, simply click the Register Payment button, enabling you to log the transaction and update the invoice status accordingly.
Administrators can conveniently track invoice statuses, monitor payment due dates, and send reminders to customers when necessary. Odoo 18’s integrated accounting features offer real-time visibility into financial transactions, enabling accurate reporting and seamless reconciliation.
In Odoo 18, time-and-material invoicing for field service operations allows businesses to bill clients with improved efficiency and enhanced accuracy. By utilizing Odoo 18’s robust features for field service management, task tracking, and automated invoicing, companies can enhance operational efficiency and improve customer satisfaction. Whether you're a small or large organization, Odoo 18 gives you the tools you need to optimize field service workflows and increase revenue.
To read more about Overview of Field Service Reporting In Odoo 18, refer to our blog Overview of Field Service Reporting In Odoo 18.