The Point of Sale (PoS) module in Odoo 18 is designed to handle front-end sales operations for businesses like retail shops, supermarkets, and restaurants. It allows users to process customer orders, accept payments, manage sessions, and keep track of daily transactions, all in a fast and organized way.
In Odoo 18, the PoS backend provides clear menus to view and analyze these operations after the sales are completed. In this blog, we’ll walk through how to analyze PoS data using three key menus under the Orders section, Orders, Sessions, and Payments.
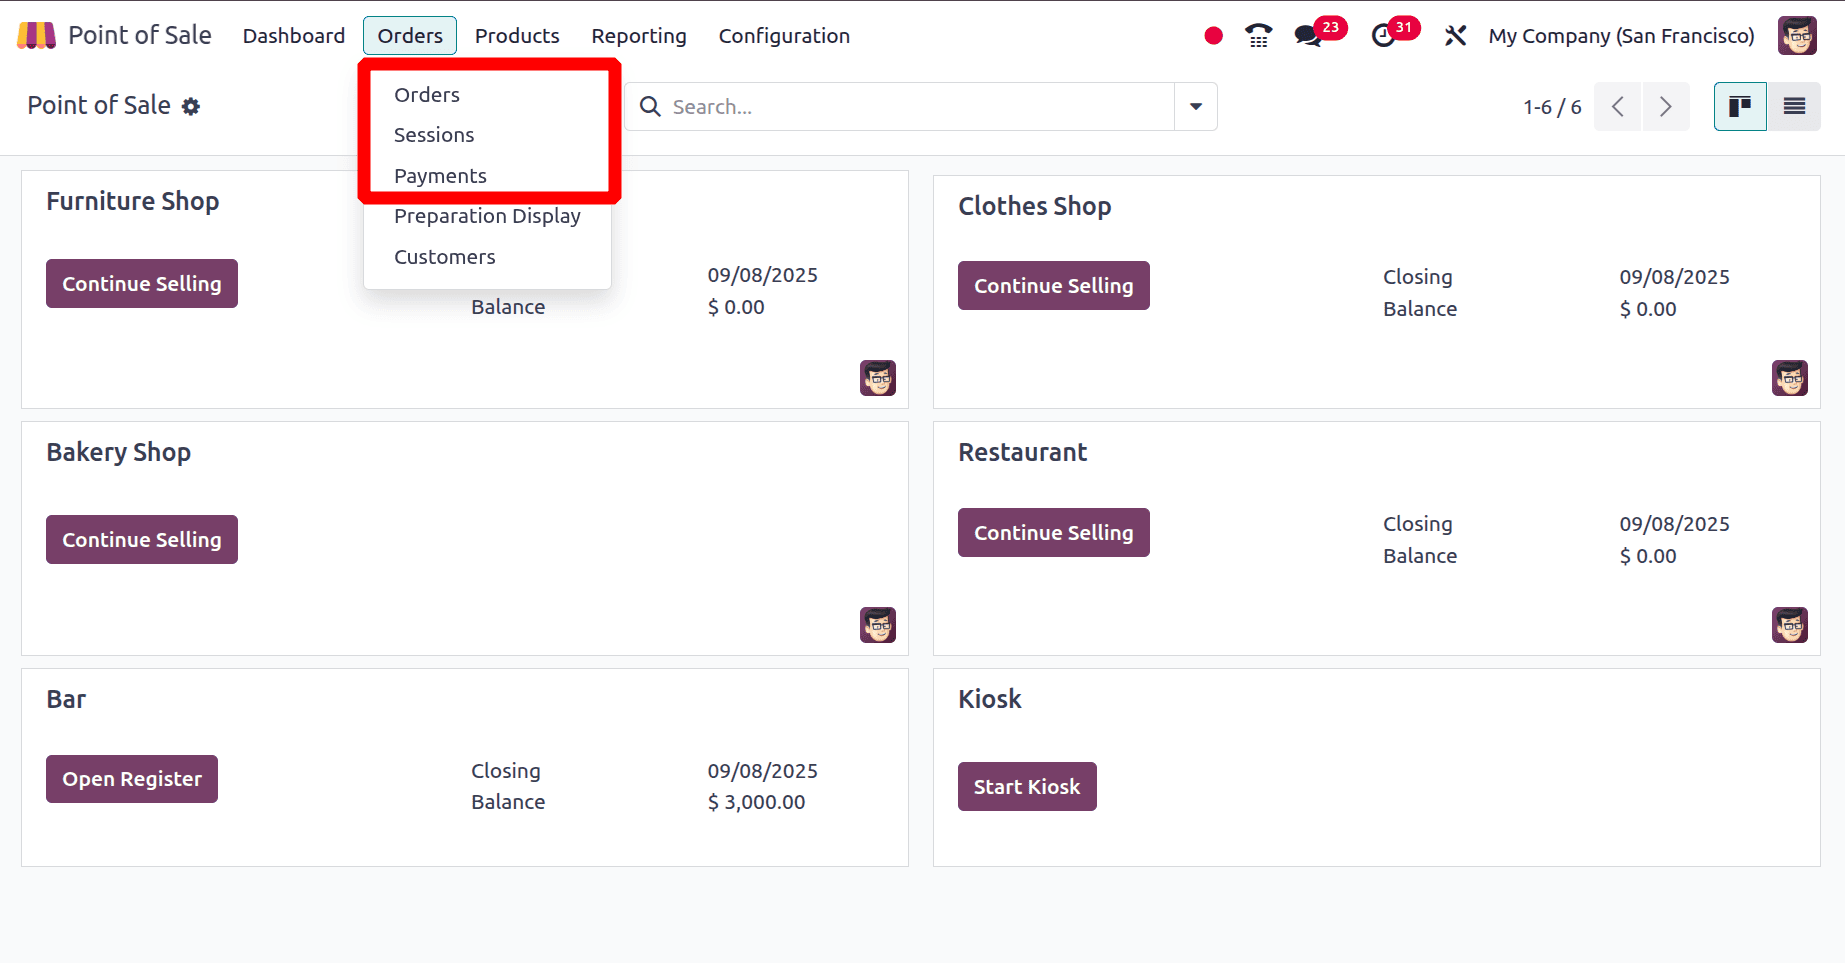
Orders
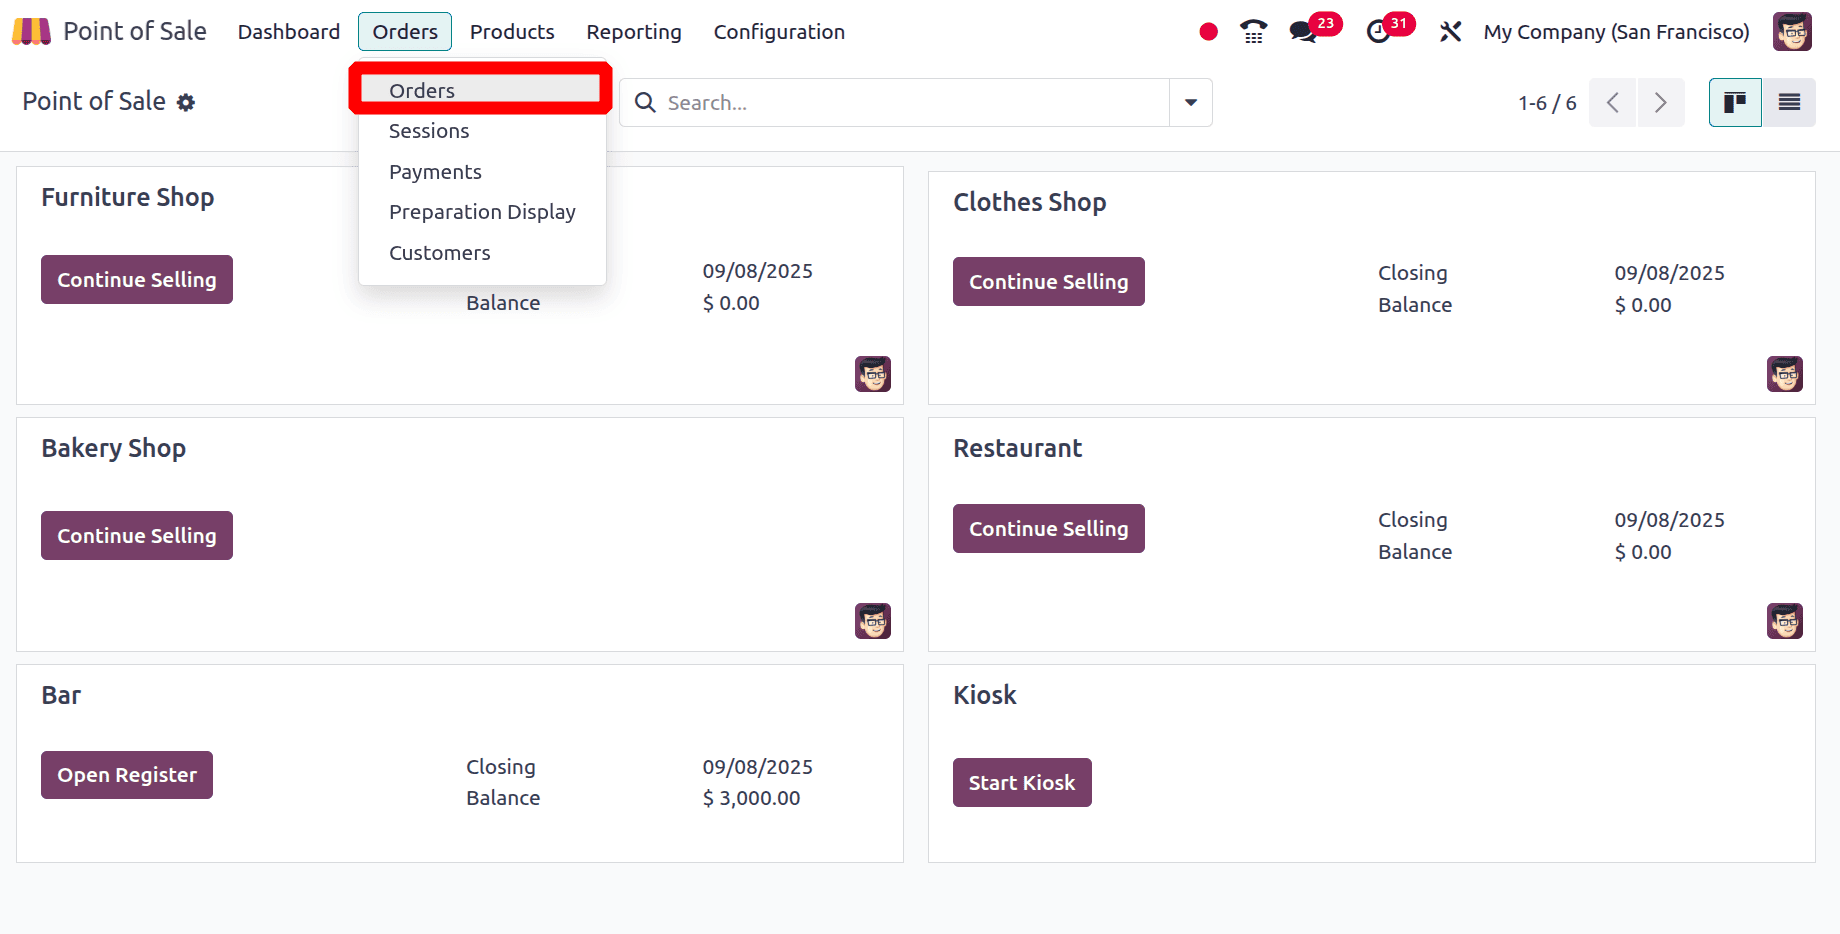
In Odoo 18, the Orders menu within the Point of Sale module gives you access to all the sales transactions processed through PoS. This section is especially useful for reviewing past sales, tracking individual order details, and understanding overall sales activity.
To access it, you can open the Point of Sale module from the main dashboard and navigate to Orders menu, then click on Orders sub menu.
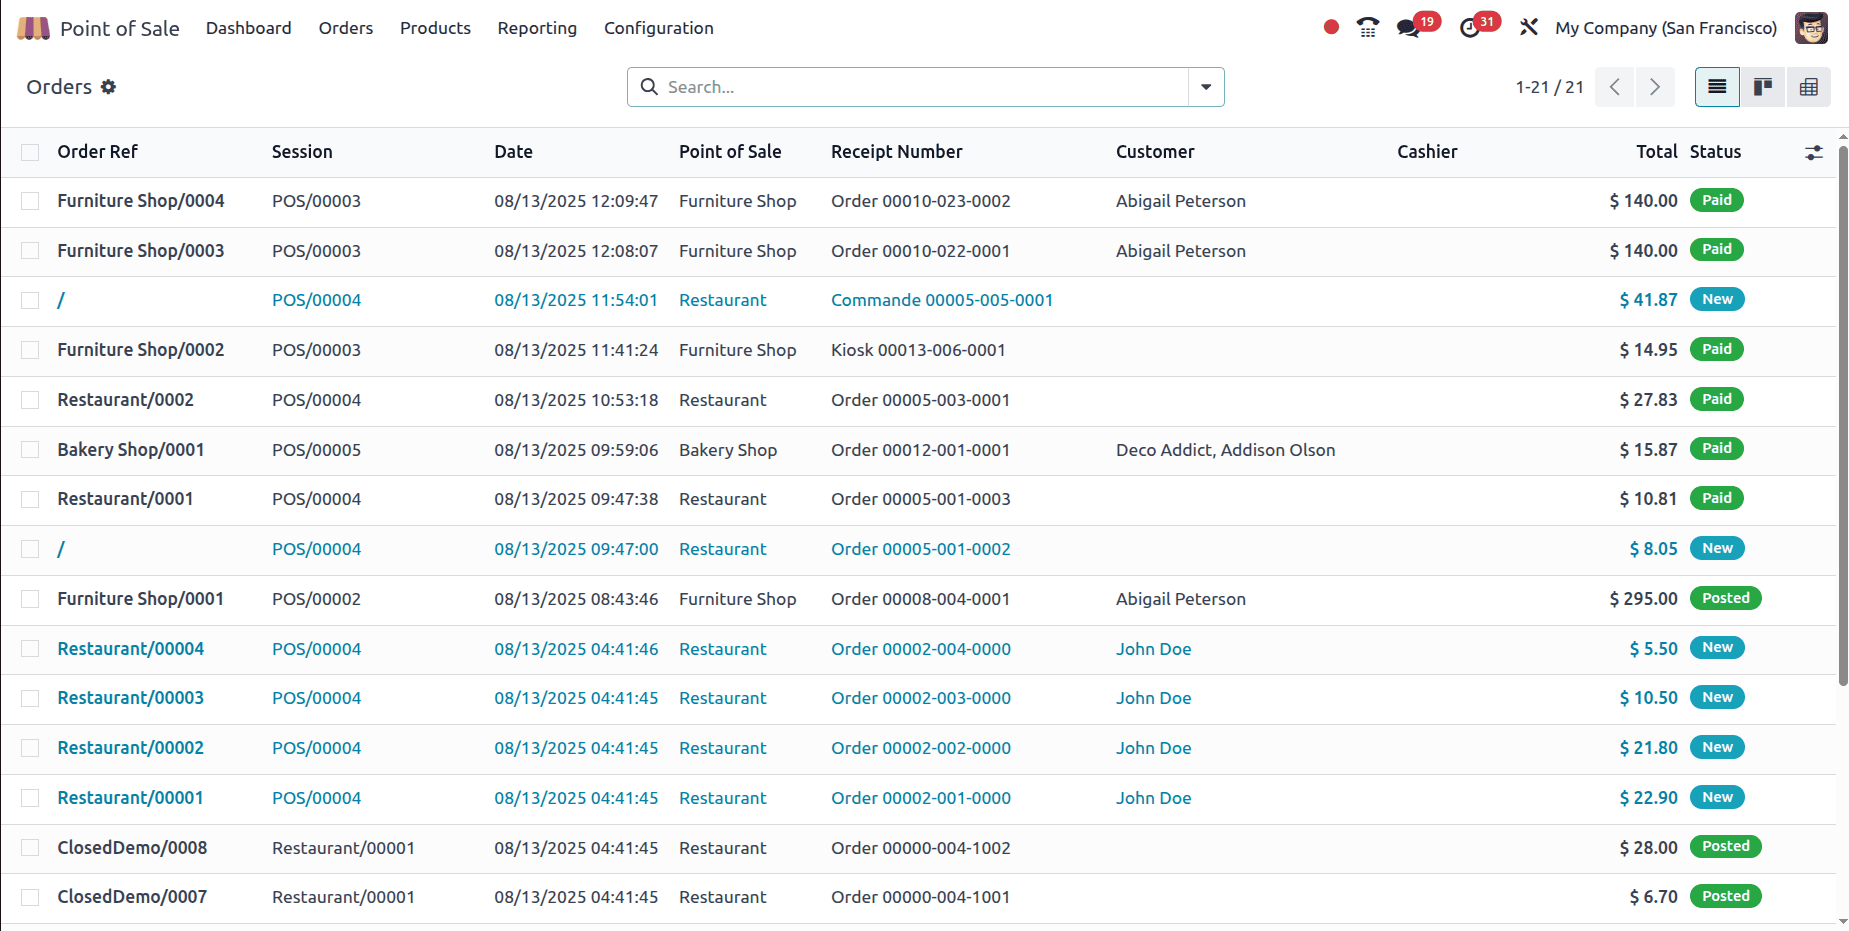
This brings up a list of all PoS orders, showing key information such as the order reference, the session it belongs to, the customer name, order date, total amount, receipt number, type of post, cashier, and the current status.
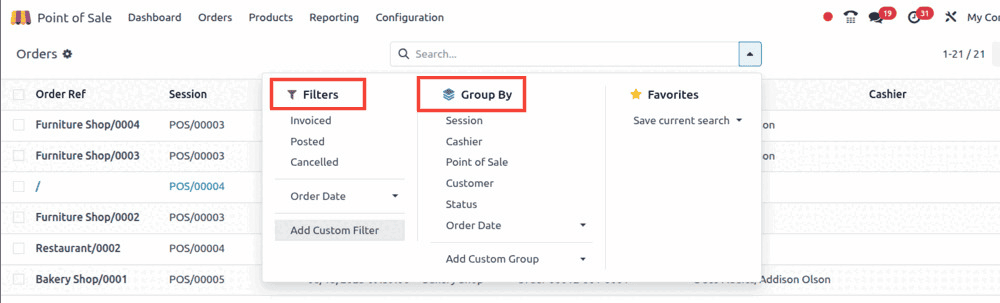
To make analysis easier, users can filter orders by date Invoiced, Posted, and Cancelled, or Order date , we are also able to apply filters by adding custom filter, or group them by session, customer, Cashier, Point of Sale, Status, Order Date and payment method.
Clicking on an order opens its detailed form view, where you can see the order reference, date, session, employee, and customer details.

The Order Ref shows the unique identifier automatically assigned to the order, making it easy to track in reports or during audits. The Date field records the exact date and time the order was placed, providing precise chronological tracking. The Session field links the order to the specific PoS session in which it was processed, which is useful when reconciling sales at the end of a shift.
The Employee field identifies the cashier or staff member who handled the transaction, while the Customer field records the buyer’s details for personalized service and sales history tracking. If a fiscal position is applied, the Fiscal Position field indicates the tax configuration used for that order. For businesses like restaurants, the Table field shows the table number and floor location where the order was served, and the Guests field records the number of diners for operational insights.
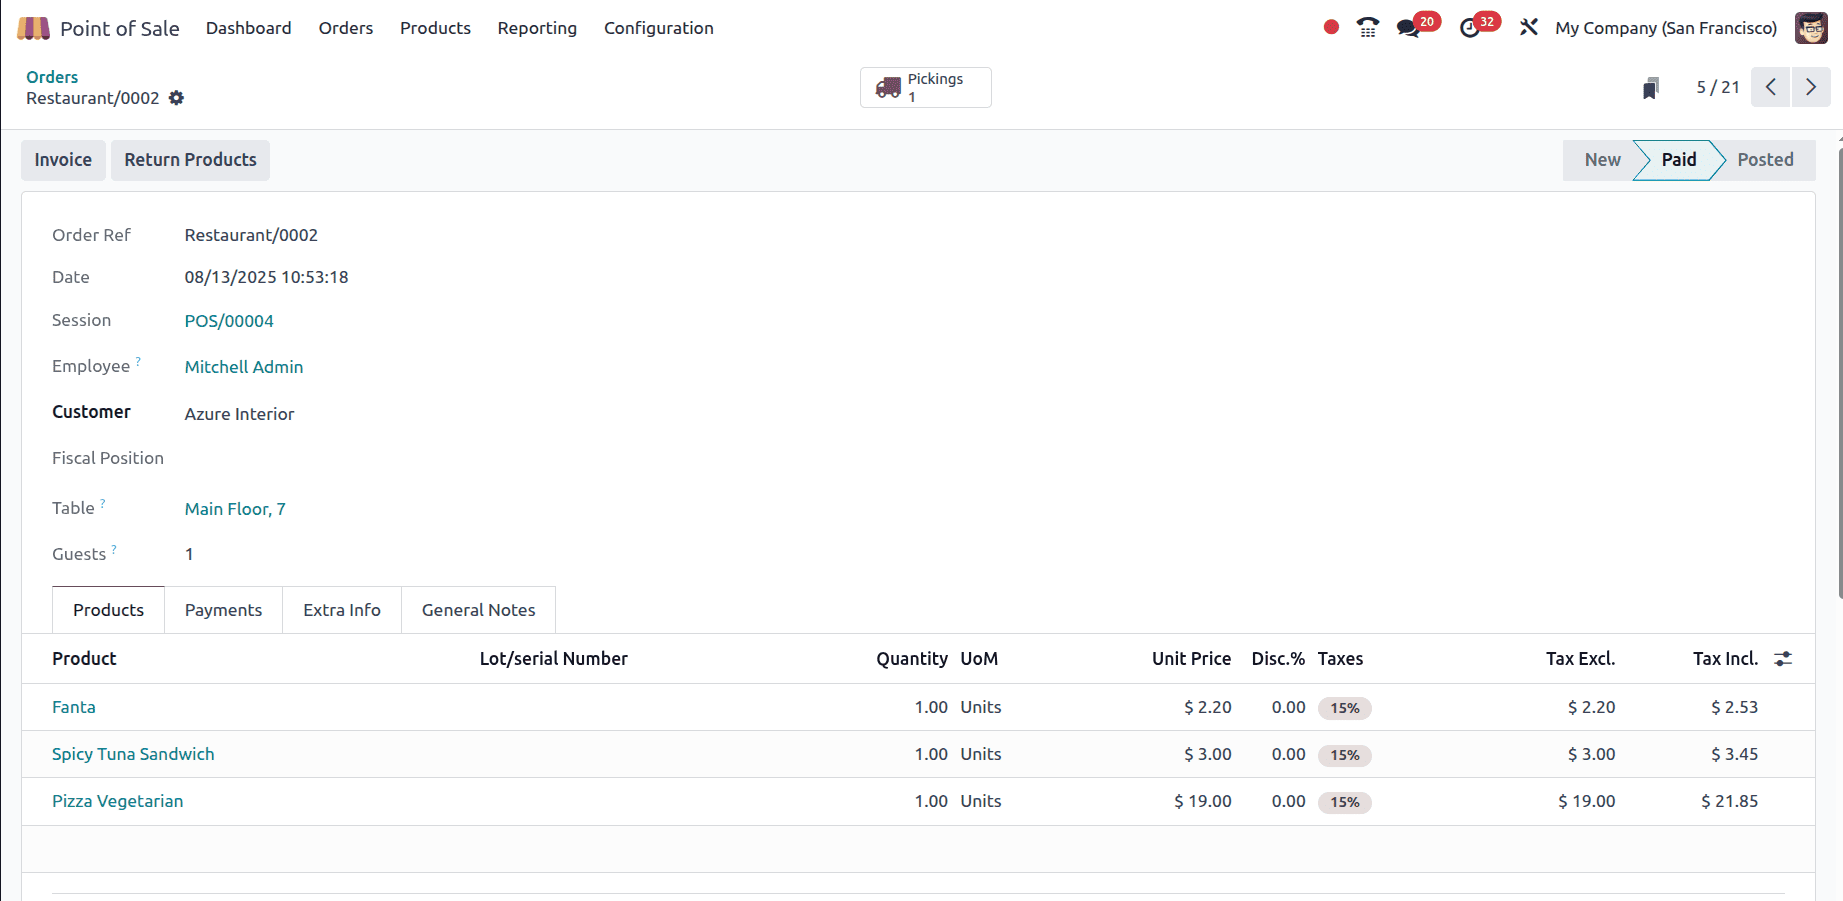
The Products tab lists all items sold in the order, showing the product name, quantity, unit of measure, and unit price. It also displays any discounts applied, the tax rate, and the price both excluding and including taxes. For traceable products, the lot or serial number is shown. At the bottom, you can see the total taxes, order total, and the final amount paid after rounding. This tab provides a clear view of exactly what was sold and how the totals were calculated.
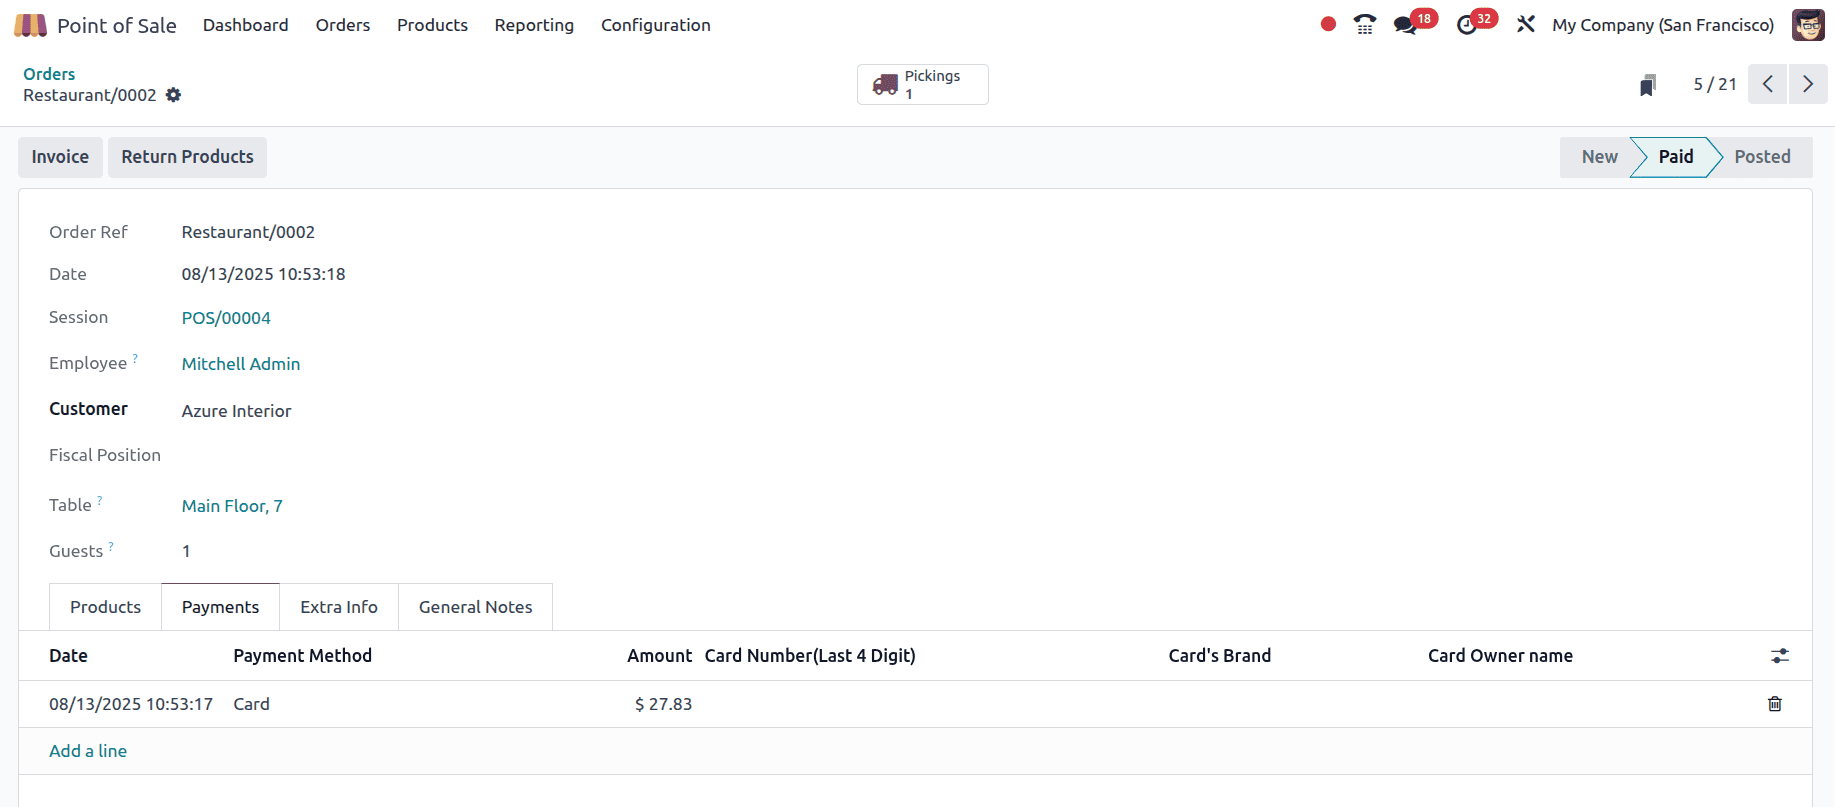
The Payments tab records how the order was settled, showing the payment date, amount received, and the payment method used, such as cash, card, or customer account. It also links the payment to the corresponding order reference and identifies the cashier who processed it.
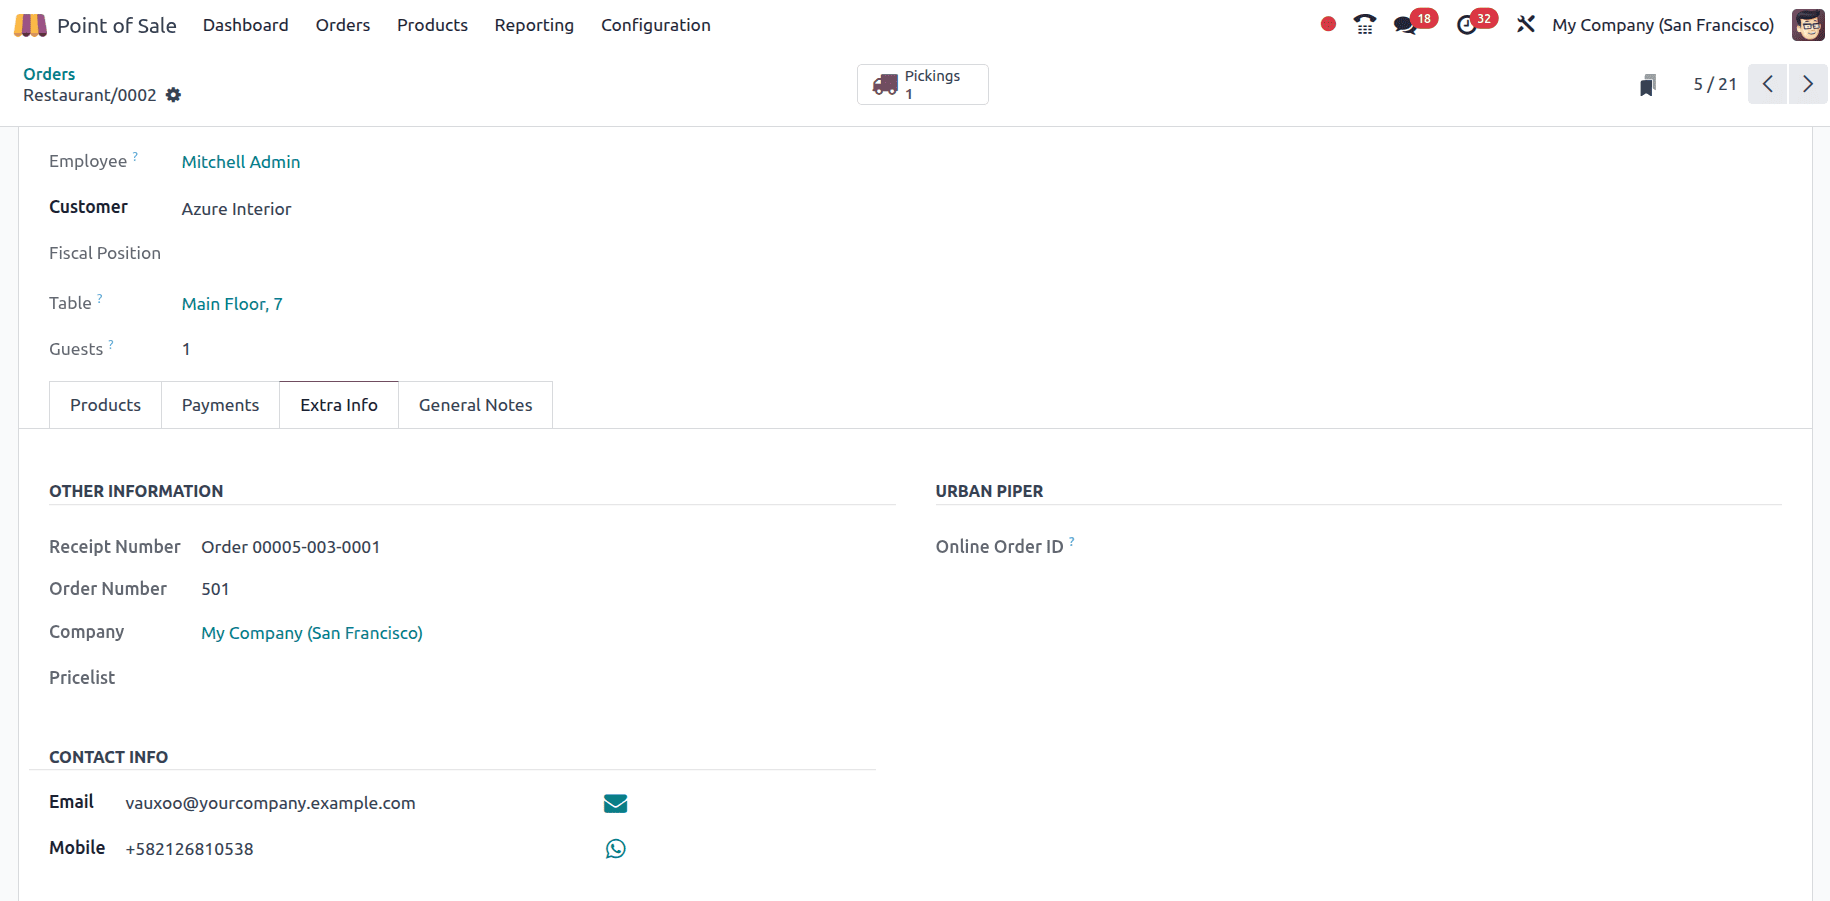
The Extra Info tab stores additional order details for tracking and backend use. It includes the Receipt Number for matching printed tickets, the Order Number as the internal sequence, the Company that processed the sale, and the Pricelist applied.
The Contact Info section records the customer’s email and mobile number for follow-ups. If linked to platforms like Urban Piper, an Online Order ID appears here, connecting the PoS order to its original online transaction.
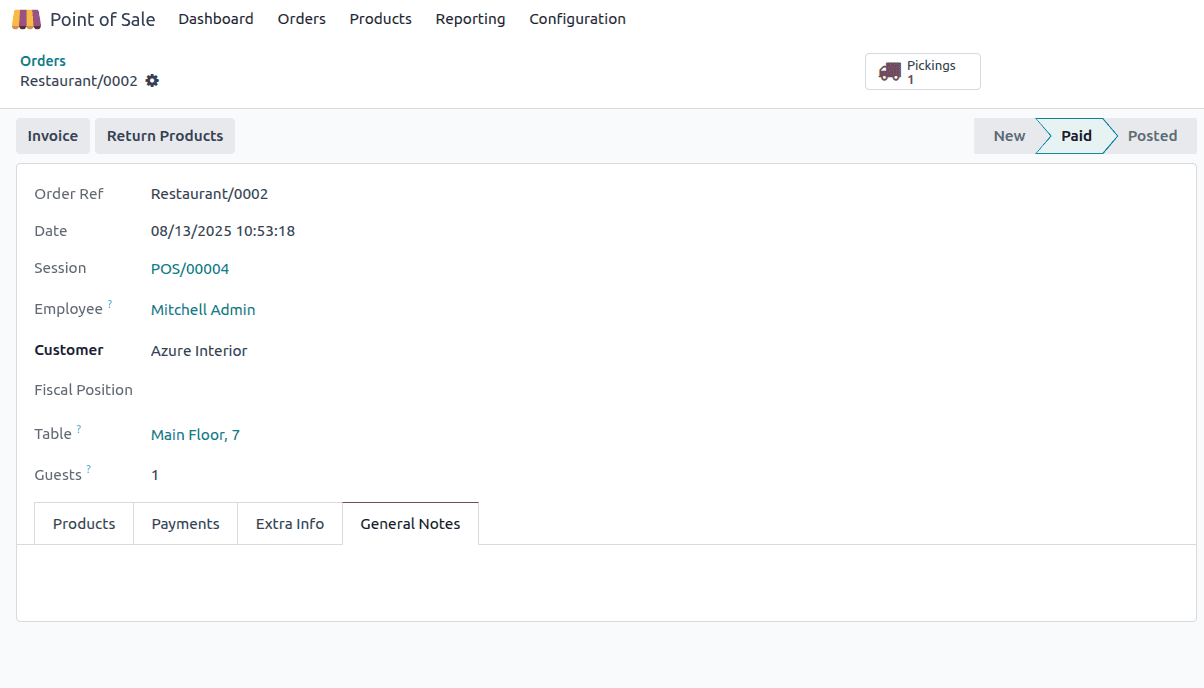
The General Notes tab serves as a space to record any remarks or special instructions related to the PoS order. Staff can note customer requests, unusual situations, or internal comments that may be relevant for future reference.
In the PoS Order form, the Pickings smart button links directly to the delivery order generated for the sale, streamlining inventory tracking and order fulfillment.
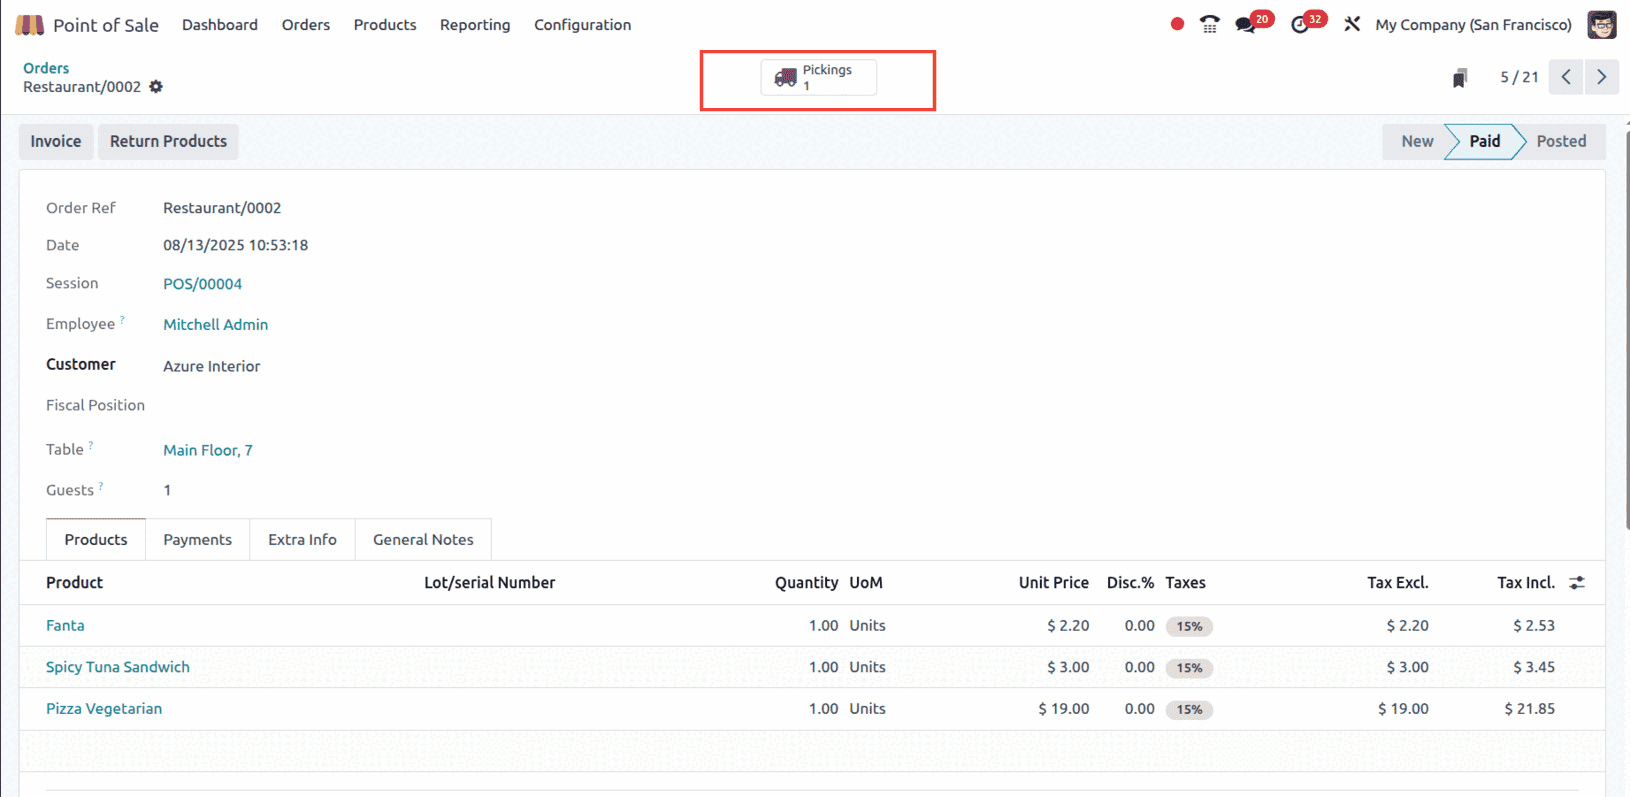
When clicked, it opens the corresponding delivery order in the Inventory module, showing details of the products that need to be moved or delivered.
Sessions
As we’ve already explored the Orders menu, the next part of analysis takes us to Sessions. Before we dive into the menu itself, let’s understand what a PoS session actually is.
In Odoo, a session refers to a specific period during which the Point of Sale is active, typically representing a cashier’s shift or a working day. Each session begins when the cashier starts the PoS and ends when they close it. Odoo records everything that happens during this time: the orders placed, payments received, and balances counted.
All available sessions in the Point of Sale module can be accessed by going to the Orders menu and selecting Sessions. You’ll now see a list view of both ongoing and closed sessions, each showing the session ID, opening and closing Date, starting and ending balance, responsible user, status, and theoretical closing balance made.
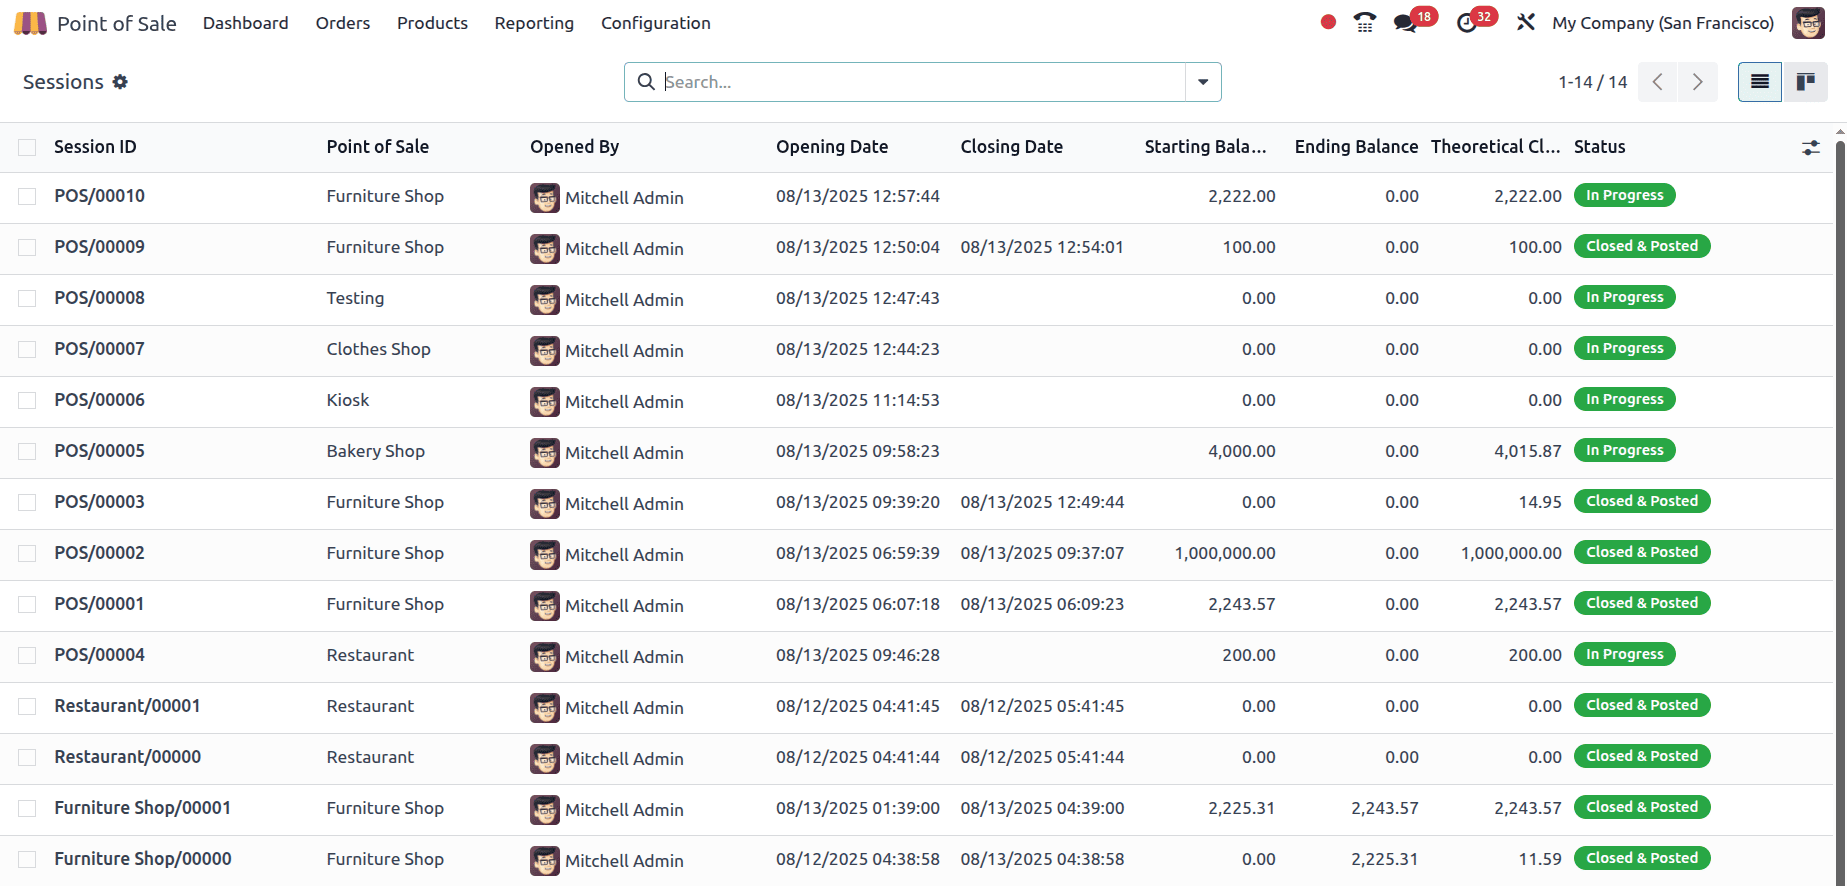
This list gives a quick overview of all PoS activity, making it easier to monitor shifts and ensure proper session management.
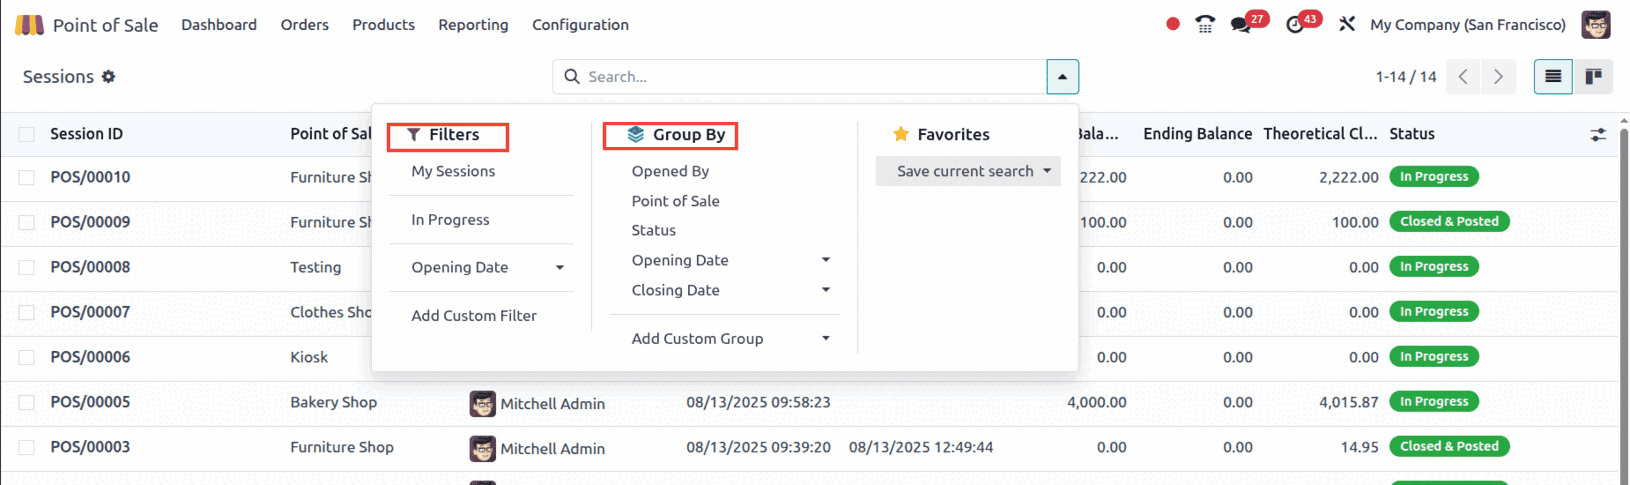
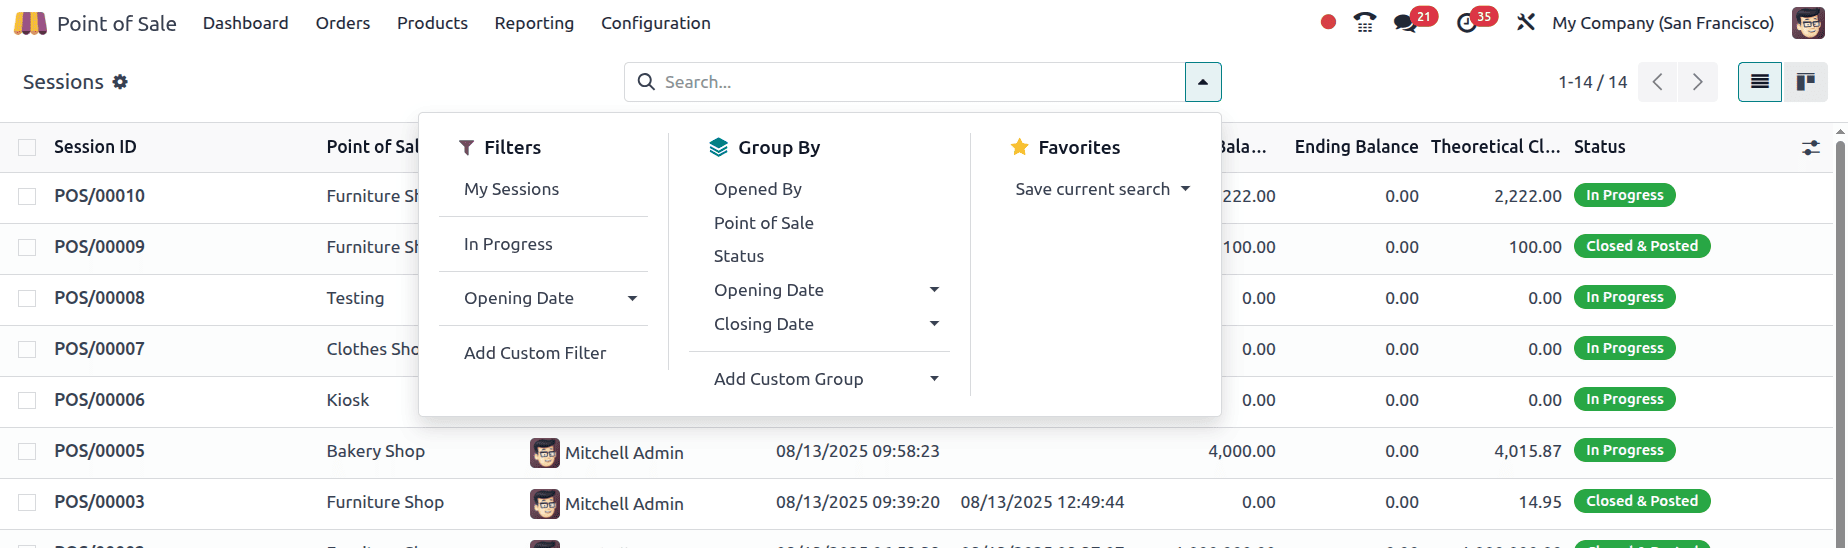
Similar to the Orders, we have the Filters and Group by for sessions also. By navigating to the search bar you can see the filters of my sessions, in progress, and we can add our own custom filters or we can group them by Opened by, status, point of sale and custom group by options.
To review a specific session in detail, click on it.
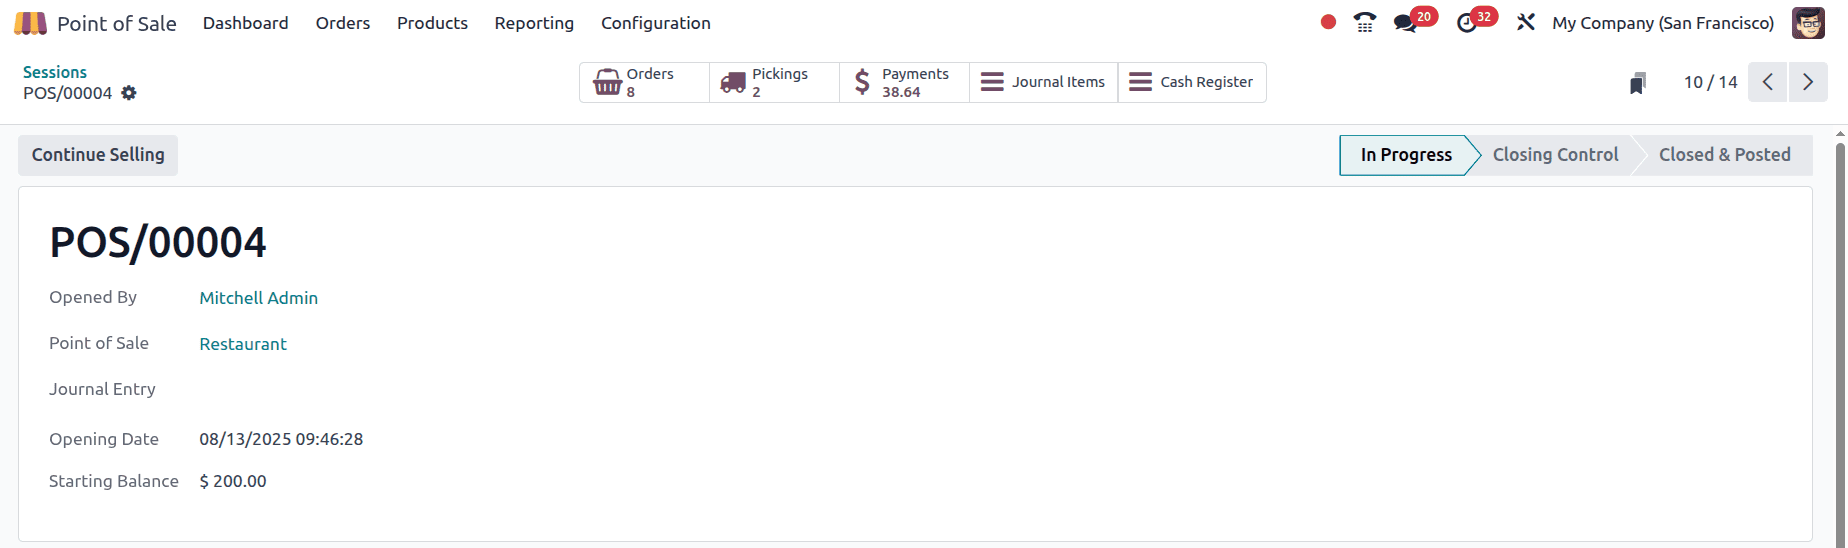
The form displays essential session information such as the user who opened it, the specific Point of Sale configuration used, and the journal entry linked to the session closure. It also records the opening and closing dates, the starting balance of cash, and the final balance after sales and payments. A status bar in the top right corner indicates the session stage—whether it is in progress, undergoing closing control, or fully closed and posted. This layout ensures that managers and cashiers can monitor, control, and review each POS session with clarity and ease.
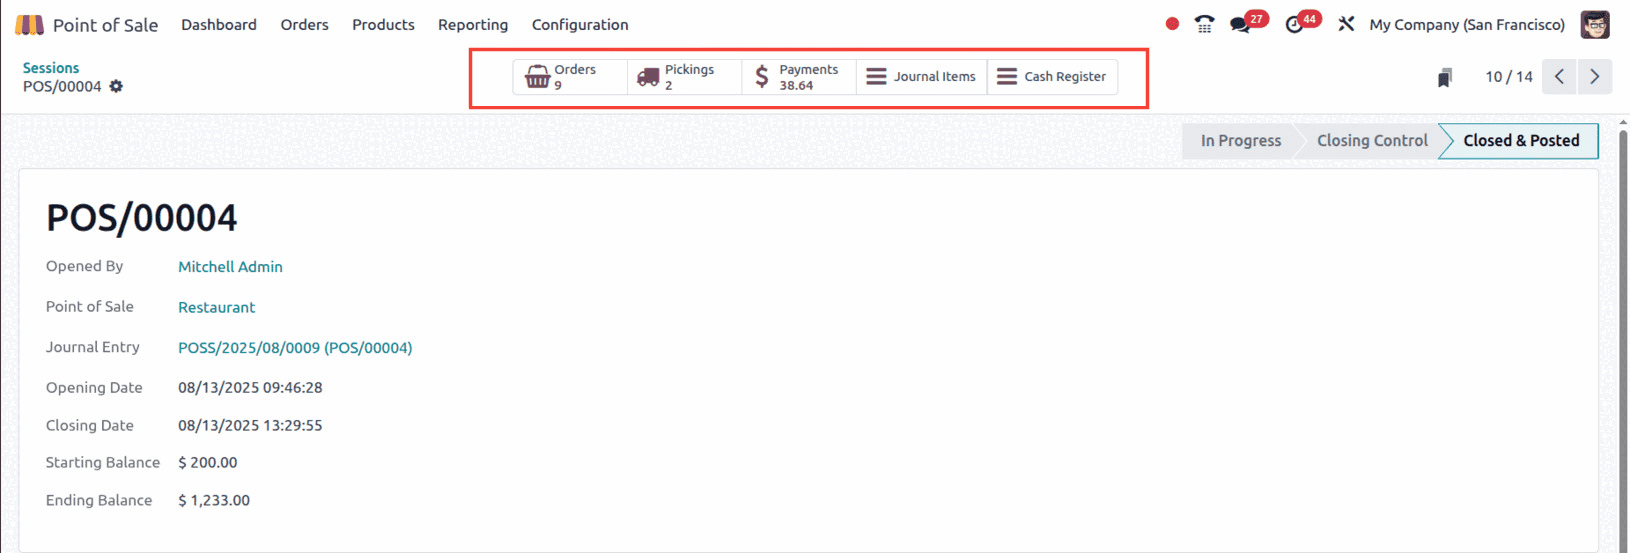
At the top, it features Smart Buttons, which provide quick access to related records, allowing users to navigate efficiently without leaving the page. For example, the Orders button displays all POS orders processed during the session, while Pickings links to the corresponding delivery orders generated for stock movements. The Payments button shows all payment transactions recorded in the session, and Journal Items opens the related accounting entries. Additionally, the Cash Register button gives details of cash inflows and outflows for the session.
This detailed view is useful for verifying session closures, checking for mismatches in cash, and ensuring accountability for each cashier’s activity.
Payments
After exploring Orders and Sessions, the final section in our analysis is the Payments menu. This menu gives you a clear overview of how payments were made for each PoS order, whether through cash, card, customer account, or any other configured payment method in your system.
You can access it by going to the Orders menu and clicking on Payments. This opens a list view that shows each payment transaction linked to a PoS order. The list includes important fields like the amount, payment method, order reference, and the date.
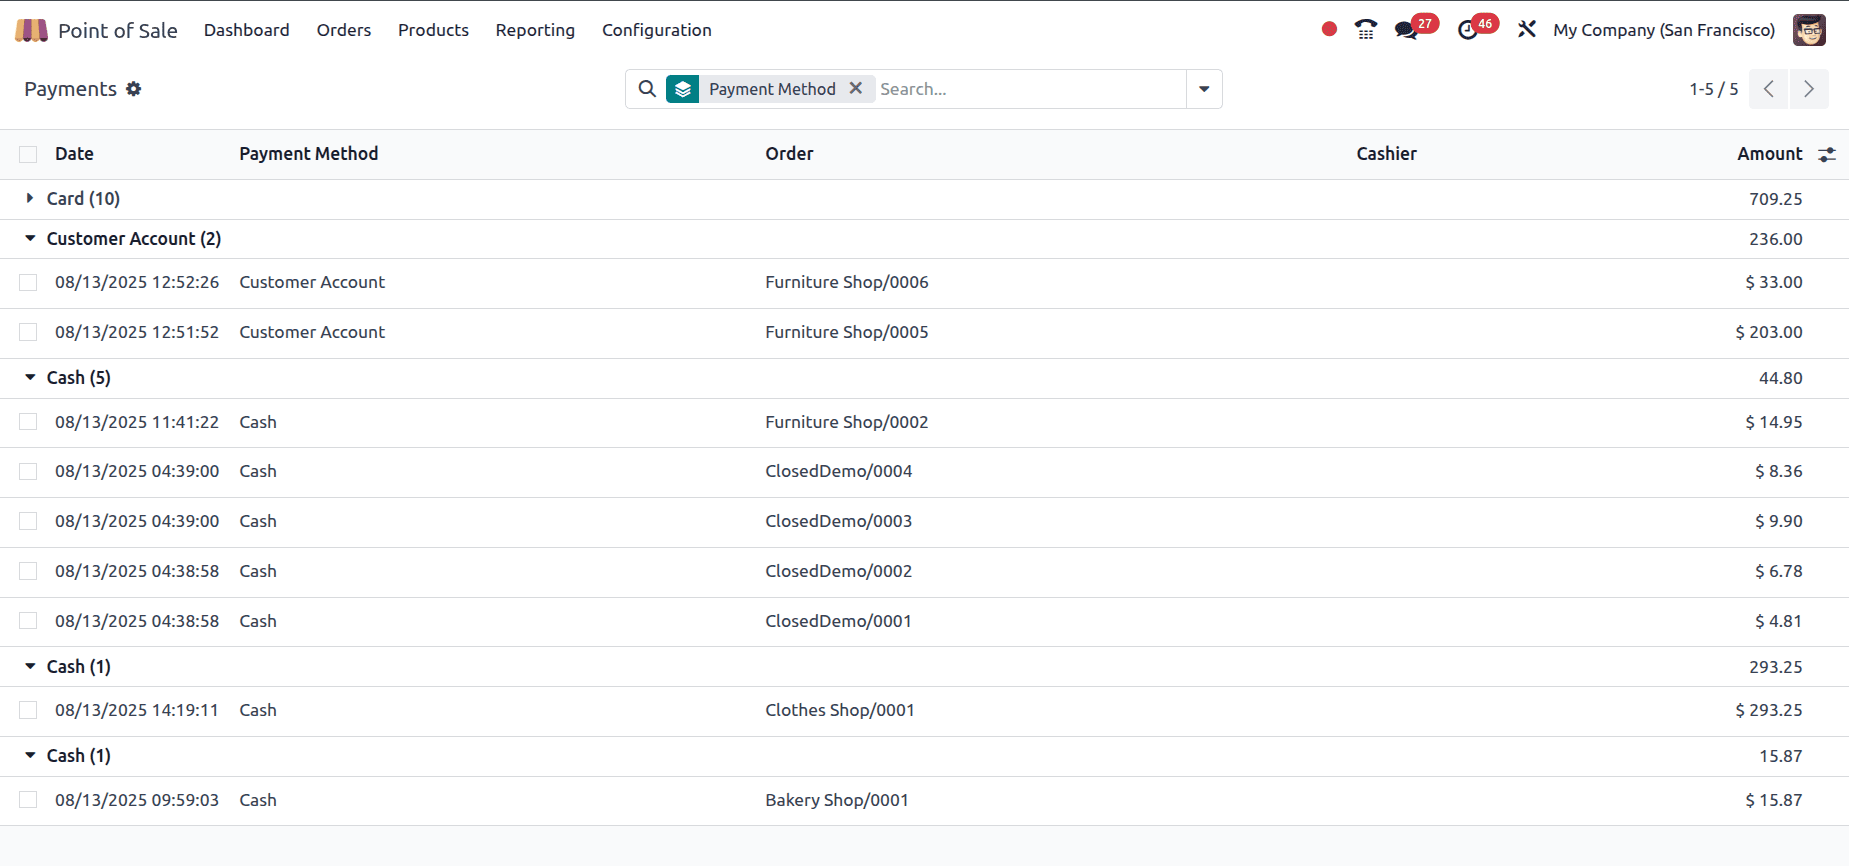
This screen displays essential details such as the payment date, method, related order, cashier, and amount.
You can see that by default, the payments are grouped by payment methods.
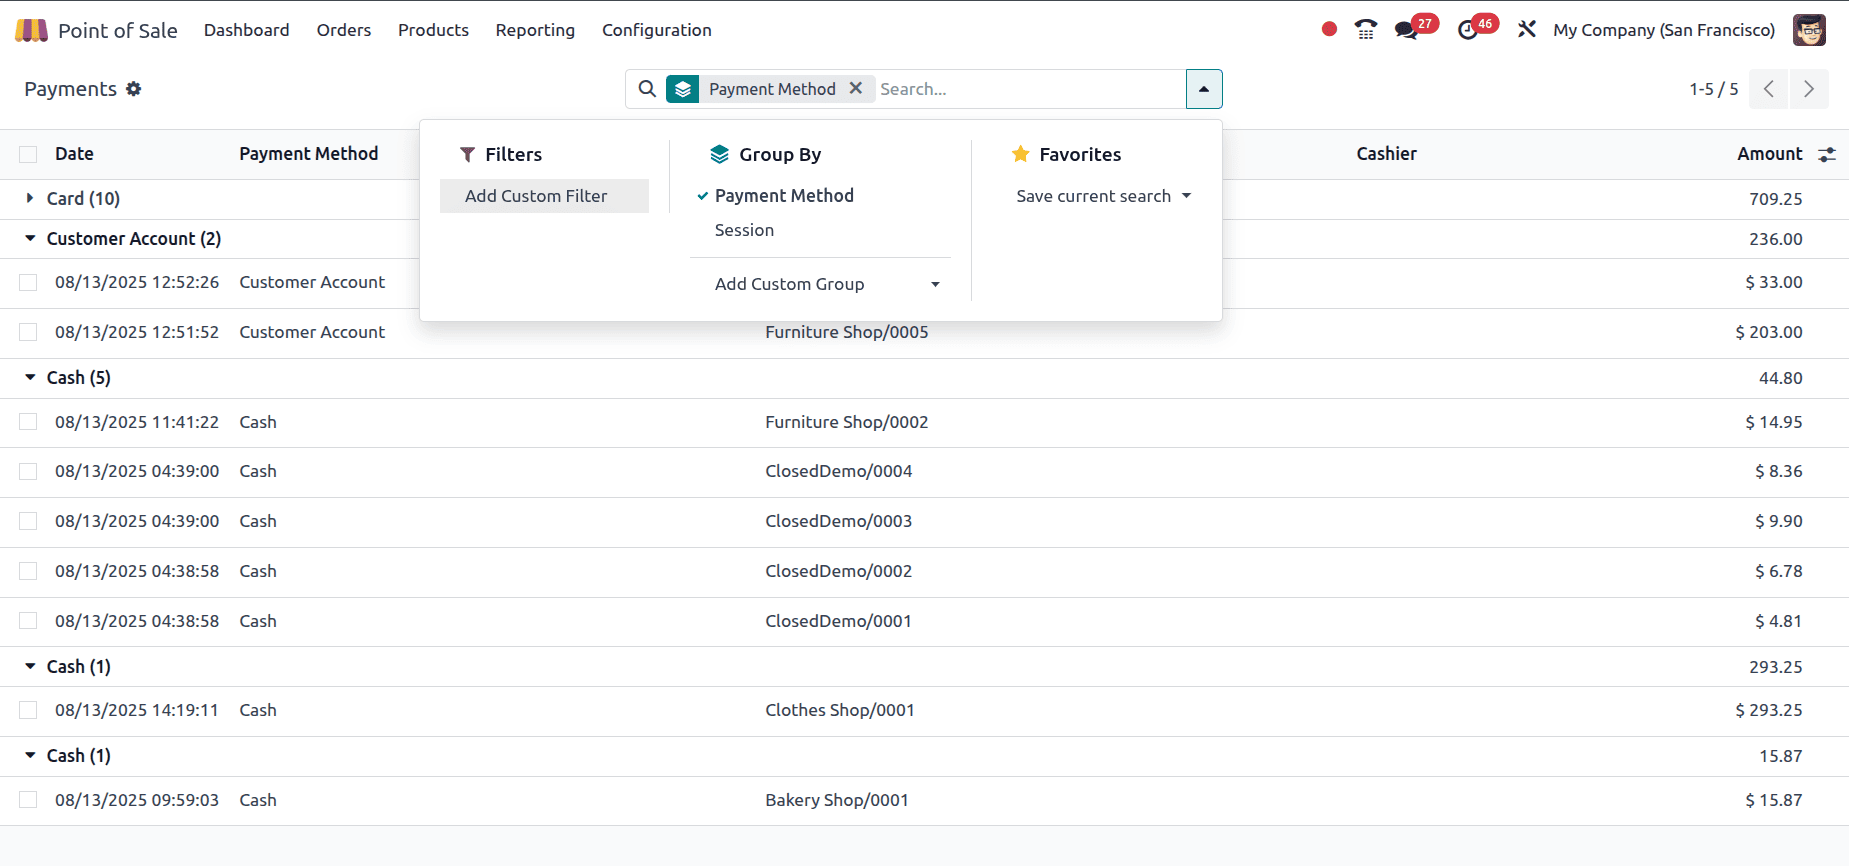
Payments can be grouped for better organization—for example, by Payment Method or Session—helping managers quickly analyze sales trends. The Filters option allows for applying custom conditions to refine results, while Favorites lets you save frequently used searches for faster access.
If you click on a specific payment entry, you'll be taken to its detailed form view, where you can see additional context like the session, amount, payment method, and linked order.
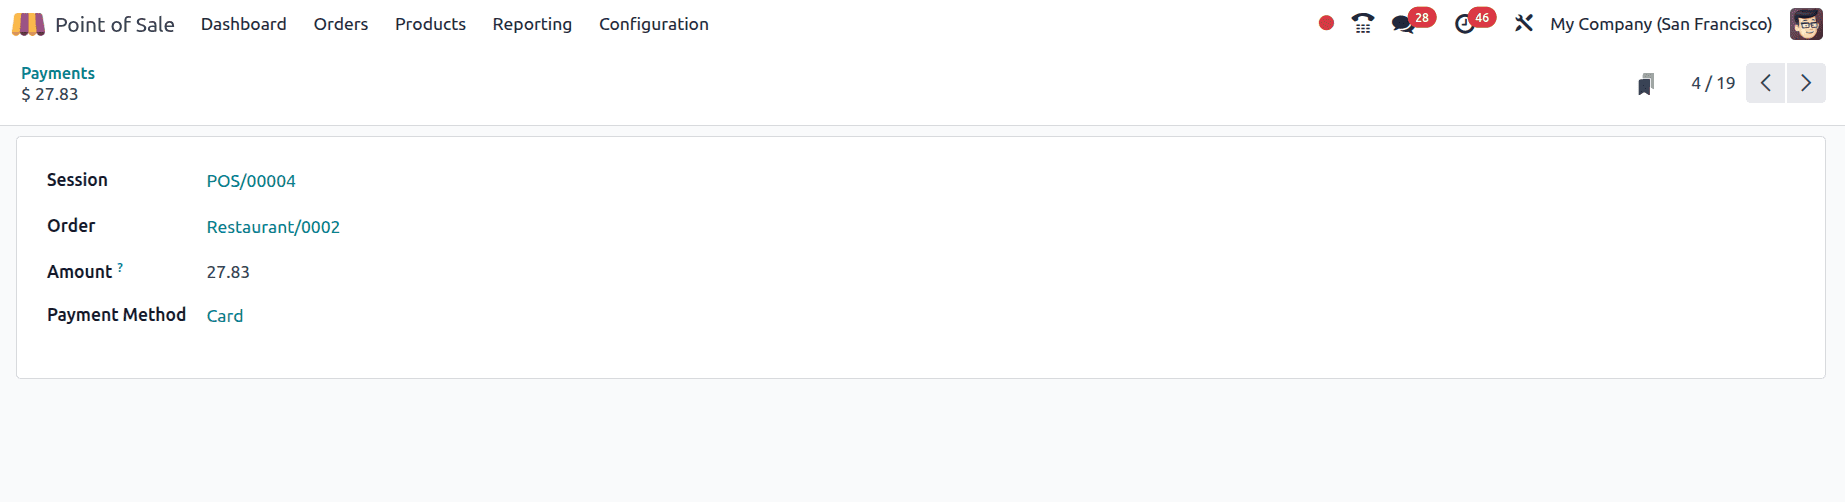
In the Payment form view of Odoo’s Point of Sale, you can see complete details of a specific transaction in a neatly organized layout. It highlights the Session in which the payment was processed, the corresponding Order, the Amount paid, and the Payment Method used. This clear breakdown makes it easy for cashiers, accountants, or managers to trace any payment back to its source. By providing direct links to both the session and order, Odoo ensures quick navigation and accurate financial tracking within the POS workflow.
The Payments section completes the analysis loop, giving you full visibility of how that payment is recorded.
The Point of Sale module in Odoo 18 provides a structured and user-friendly way to manage and analyze sales activity from the backend. By using the Orders, Sessions, and Payments menus under the Orders section, users can efficiently track transactions, monitor cashier performance, and review how payments are received and recorded. Whether you're managing a retail store, Bar or a Restaurant, these tools make it easier to stay organized, ensure transparency, and keep your sales operations running smoothly.
To read more about An Overview of Sales Analysis of Odoo 18 Point of Sales with Sales Team, refer to our blog An Overview of Sales Analysis of Odoo 18 Point of Sales with Sales Team.