Taking time off is a normal part of work life, but managing leave requests manually through emails, spreadsheets, or paper forms can quickly become a headache for both employees and managers. Odoo 19 solves this with a dedicated Time Off module that makes applying for leave, tracking balances, and approving requests simple and transparent for everyone involved. Everything is in one place, the process is clear, and both employees and managers always know exactly where things stand.
This blog walks through the employee dashboard, how an employee can apply for leave, and how a manager can approve it all within the Odoo 19 Time Off module.
The Employee Dashboard
When an employee opens the Time Off module in Odoo 19, the first thing they see is the Dashboard. This is their personal overview of everything related to their leave available balances, upcoming time off, and any requests that are still waiting for approval.
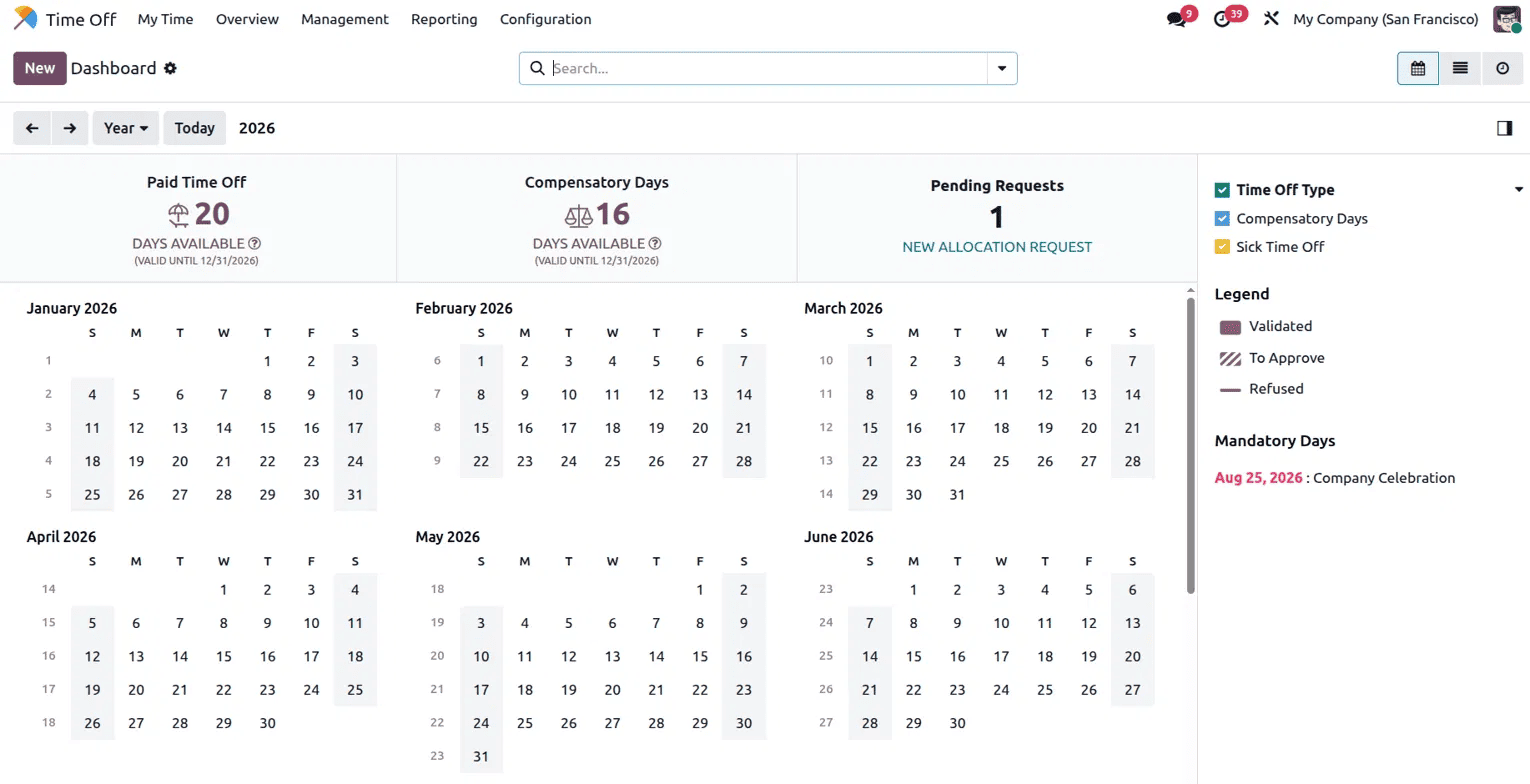
At the top of the dashboard, leave balances are displayed clearly in separate panels. In this example, the employee has 20 Days Available under Paid Time Off, valid until 31st December 2026, and 16 Days Available under Compensatory Days, also valid until the end of the year. These panels give the employee an instant picture of how much leave they have left to use before the balances expire.
Next to the leave balance panels, there is a Pending Requests counter showing the number of requests that are still waiting for action. In this case, there is 1 pending request. Below it, there is a New Allocation Request link that employees can use if they need to request additional leave days beyond their current balance.
The main body of the dashboard shows a full year calendar for 2026, laid out month by month. This makes it easy to see weekends, working days, and any approved or pending leave at a glance. On the right side of the dashboard, there is a panel with two sections. The first is a Time Off Type filter with checkboxes for Compensatory Days and Sick Time Off, which lets the employee filter what is shown on the calendar. The second is a Legend explaining the colour coding: dark purple for Validated leaves, a striped pattern for leaves that are To Approve, and a lighter shade for Refused leaves. Below the legend, there is a Mandatory Days section which shows company-wide non-working days. In this example, Aug 25 2026 is listed as Company Celebration, meaning the entire company has that day off.
My Time Off
Under the My Time menu, employees can access My Time Off, which shows a list of all their leave requests. This is where an employee can see the full history of their requests along with their current status.
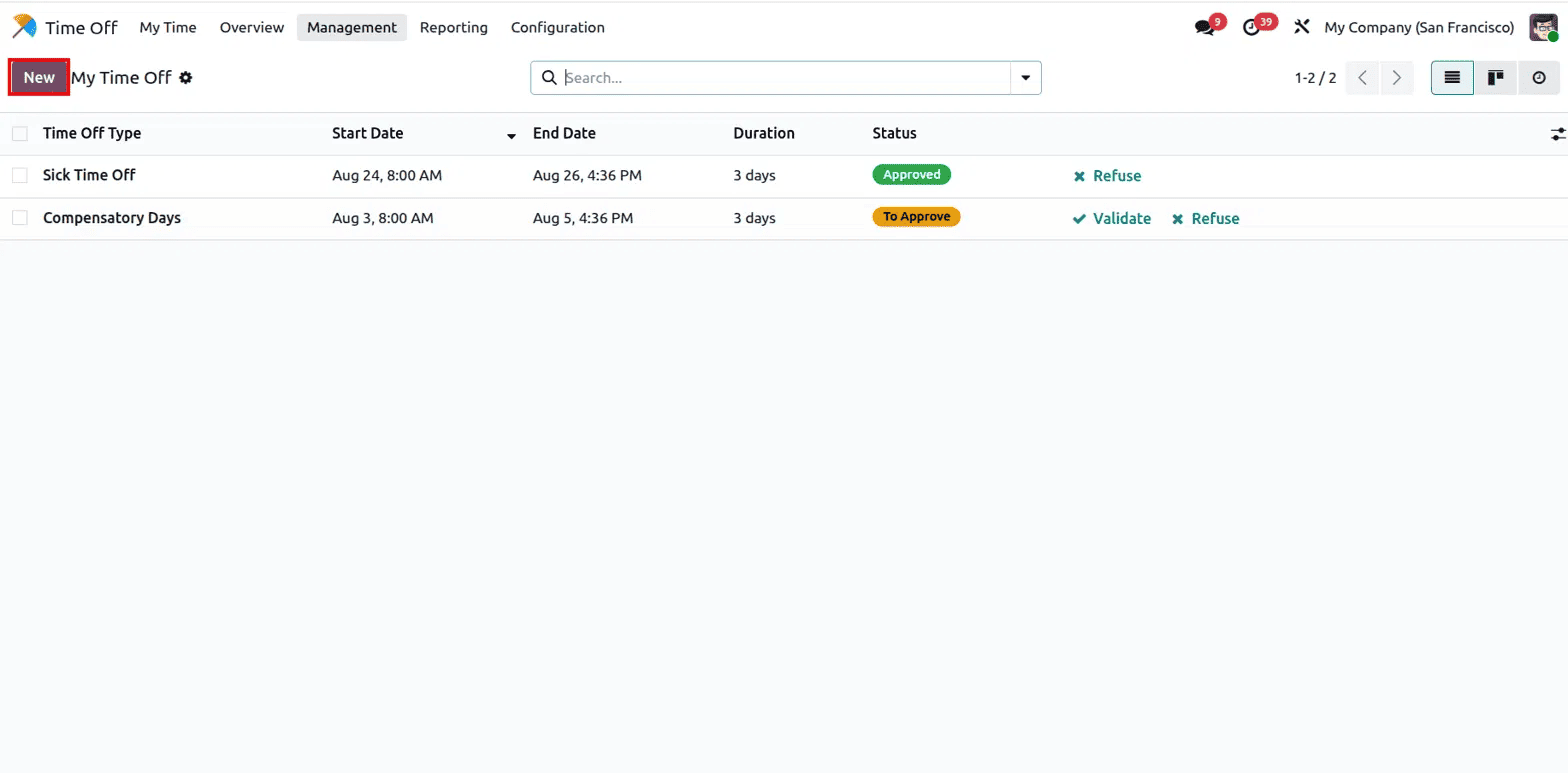
The list view shows columns for Time Off Type, Start Date, End Date, Duration, and Status. In this example, there are two requests. The first is a Sick Time Off request from Aug 24 to Aug 26 for 3 days, which has a green Approved status badge, meaning it has already been approved. The second is a Compensatory Days request from Aug 3 to Aug 5 for 3 days, which has an orange To Approve badge, meaning it is still waiting for the manager's decision. For requests that are still pending, Validate and Refuse action buttons appear directly in the list, allowing managers to take action without opening the record individually. A New button at the top left allows the employee to submit a new leave request at any time.
Applying for a Leave
To apply for a new leave, the employee clicks the New button from either the Dashboard or the My Time Off page. A leave request form opens where the employee fills in the required details.
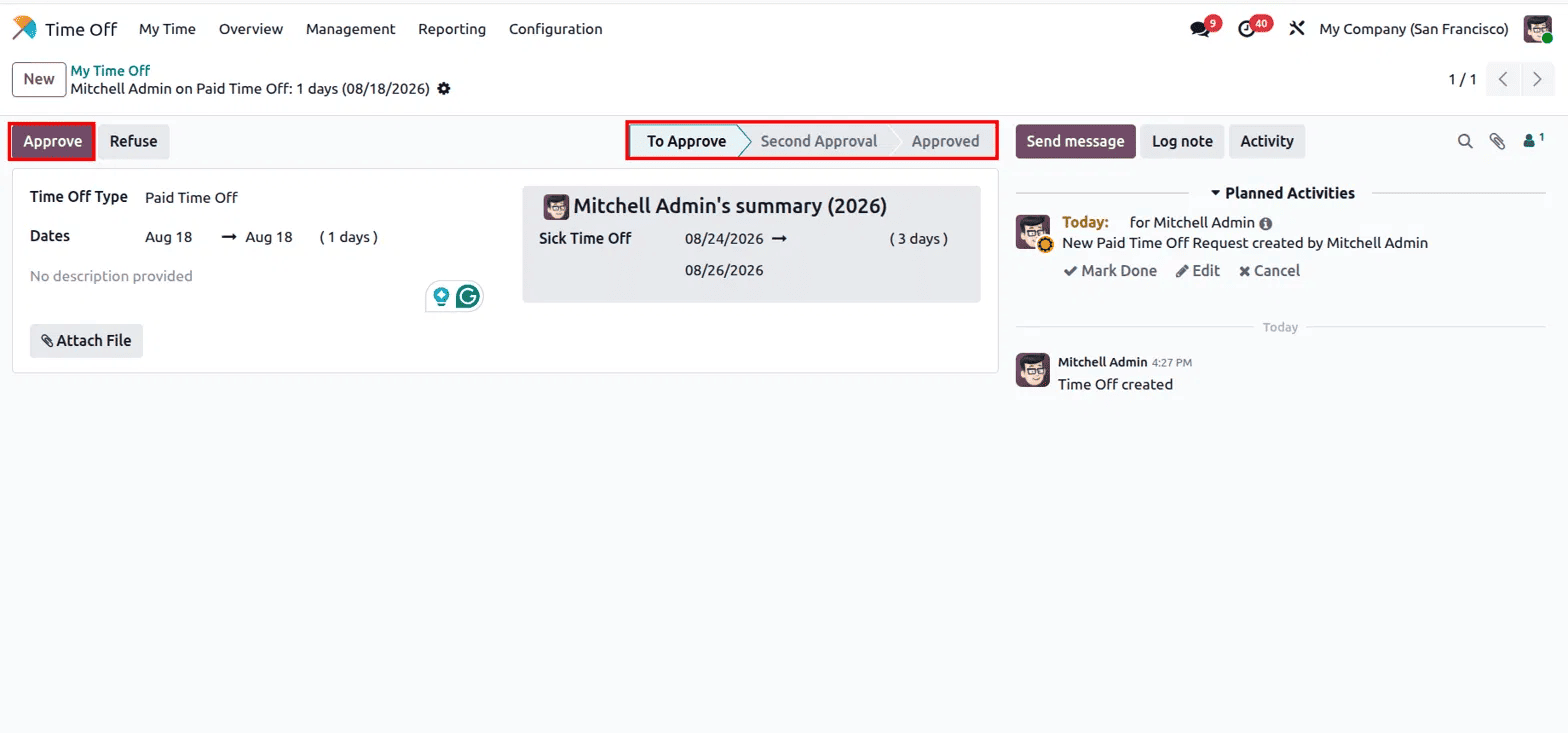
The Time Off Type field is where the employee selects the type of leave they are applying for, such as Paid Time Off, Sick Time Off, or Compensatory Days. The Dates field shows the start and end date of the leave along with the total number of days calculated automatically. If the leave requires any supporting document, the employee can use the Attach File button to upload it directly to the request.
On the right side of the form, there is an employee summary panel showing Mitchell Admin's summary for 2026. This gives both the employee and the manager a quick view of existing approved leaves for the year, so the context is always visible when reviewing a new request. In this case, the summary shows a Sick Time Off request from 08/24/2026 to 08/26/2026 for 3 days.
The status bar at the top of the form shows the three stages of the approval process: To Approve, Second Approval, and Approved. When a leave is first submitted, it starts at the To Approve stage. The chatter on the right side of the form also shows a Planned Activities section, which automatically logs the new request and notifies the relevant manager that a new Paid Time Off request has been created.
The Approve and Refuse buttons visible at the top of the form are available to the manager, allowing them to take action directly from the leave request form.
Manager Approval
When a manager opens a pending leave request, they can review all the details and then approve or refuse it. In this example, the manager clicks Approve, and the leave request moves through the status bar from To Approve straight to Approved, skipping the Second Approval stage since this particular leave type only requires one level of approval.
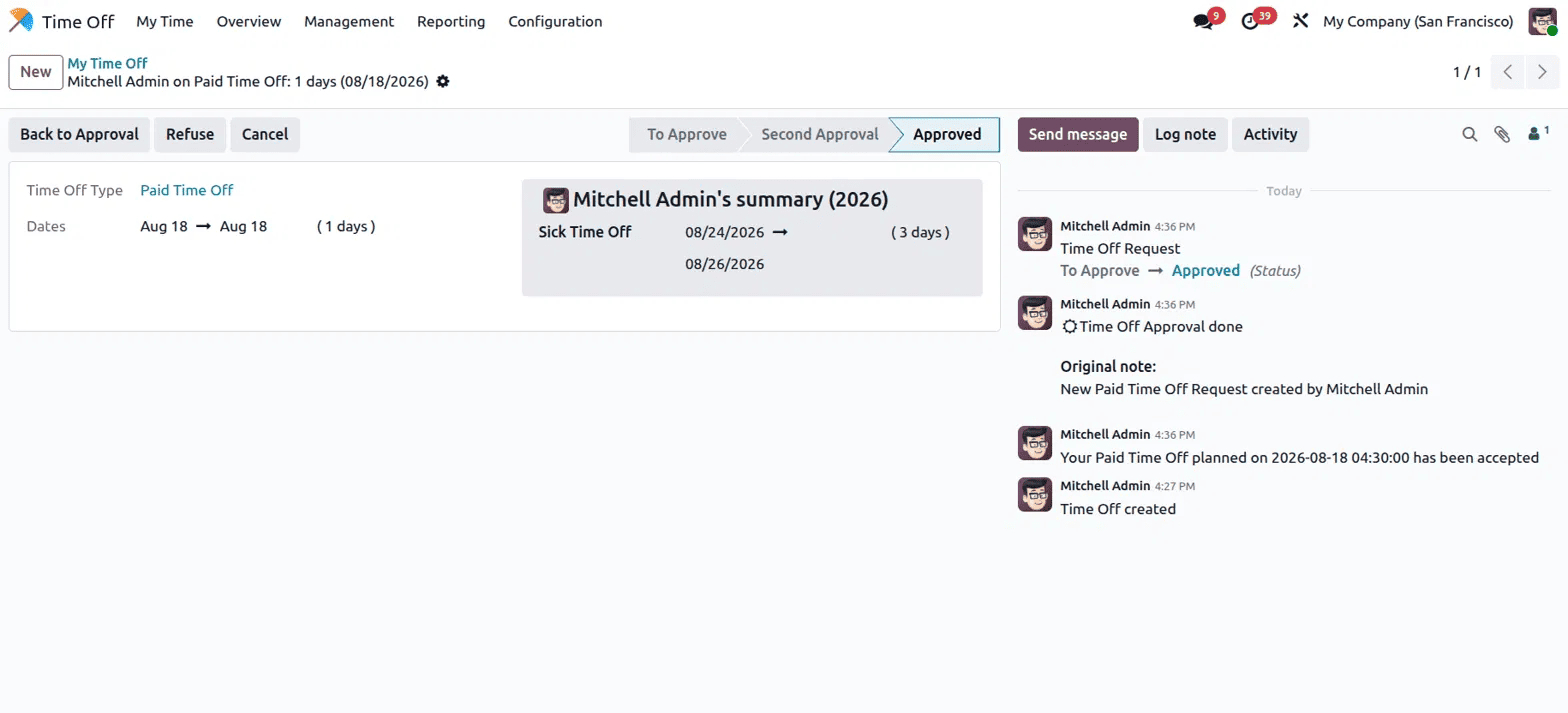
Once approved, the status bar highlights the Approved stage and the buttons at the top change to Back to Approval, Refuse, and Cancel, giving the manager the ability to reverse the decision if needed. The chatter on the right side of the form records the full activity log of what happened, showing each event in order: Time Off created, the status change from To Approve to Approved, Time Off Approval done, and a confirmation message that reads "Your Paid Time Off planned on 2026-08-18 has been accepted." This gives both the employee and the manager a complete, time-stamped record of the entire approval process.
Once the leave is approved, it is reflected on the employee's dashboard calendar and the available leave balance is updated accordingly.
The Time Off module in Odoo 19 makes the whole process of applying for and approving leave straightforward and transparent. Employees can check their balances, submit requests, and track the status of their applications all from one place. Managers can review requests, see the employee's leave history, and approve or refuse with a single click. The chatter keeps a clear record of every action taken, so there is never any confusion about what happened or when. For businesses that want to move away from messy email-based leave management, the Odoo 19 Time Off module is a clean and reliable solution.
To read more about How to Manage Leave Allocation and Accrual Plans in Odoo 18 Time Off, refer to our blog How to Manage Leave Allocation and Accrual Plans in Odoo 18 Time Off.