Scheduling meetings, managing team availability, and setting up client discussions are vital daily operations for any business. The Odoo 19 Calendar module brings all your organization’s time management into a single workspace. Fully integrated with Odoo’s CRM, Sales, and HR apps, it ensures that your team stays organized and never misses a commitment.
This blog provides an overview of how to navigate, schedule, configure, and automate your schedule using the Calendar module in Odoo 19.
The Calendar View
When the Calendar module is opened in Odoo 19, the default view is the Meetings page displayed as a weekly calendar. The current date is highlighted with a red circle so it is always easy to find where the week stands. Navigation arrows at the top left allow movement between weeks, and a Today button brings the view back to the current week instantly. There is also a dropdown to switch between Day, Week, Month, and Year views depending on how much of the schedule needs to be seen at once.
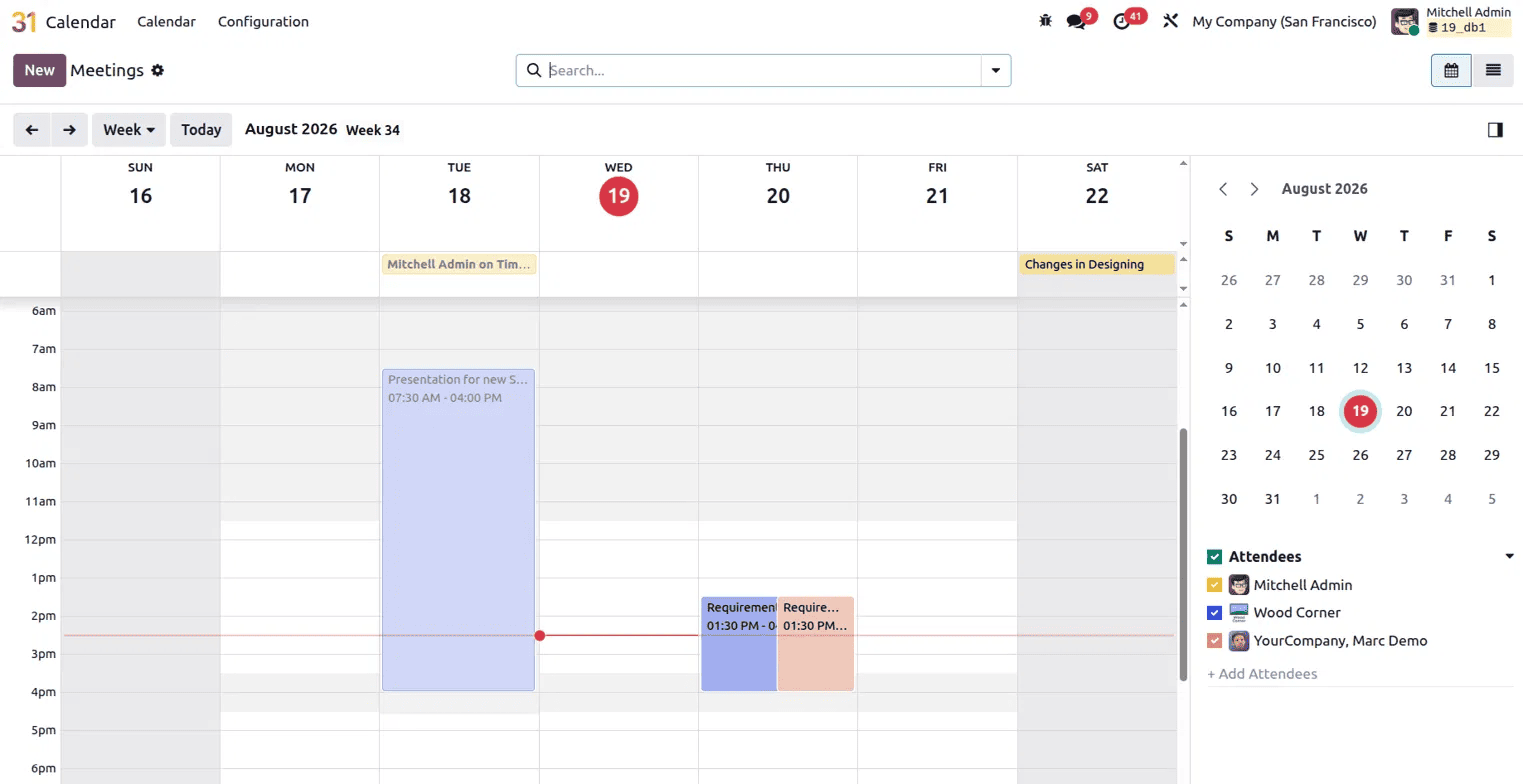
Meetings and events appear as coloured blocks on the calendar, each showing the meeting title and time. At the very top of the calendar, full-day events or time-off entries are displayed in a separate banner row, making them easy to distinguish from time-specific meetings below.
On the right side of the calendar view, there is a mini calendar for quick date navigation. Below it is an Attendees filter panel which shows a list of people whose calendars are being viewed. In this example, Mitchell Admin, Wood Corner, and YourCompany Marc Demo are listed, each with their own colour. Checking or unchecking a name filters the calendar to show or hide that person's meetings. There is also an Add Attendees option at the bottom of the panel to include more people in the view. This makes the Calendar module useful not just for personal scheduling but also for managers who need to see the availability of multiple team members at the same time.
Creating a Meeting
To create a new meeting, clicking the New button at the top left opens the meeting form. A meeting can also be created by clicking directly on any time slot on the calendar, which automatically fills in the date and time.
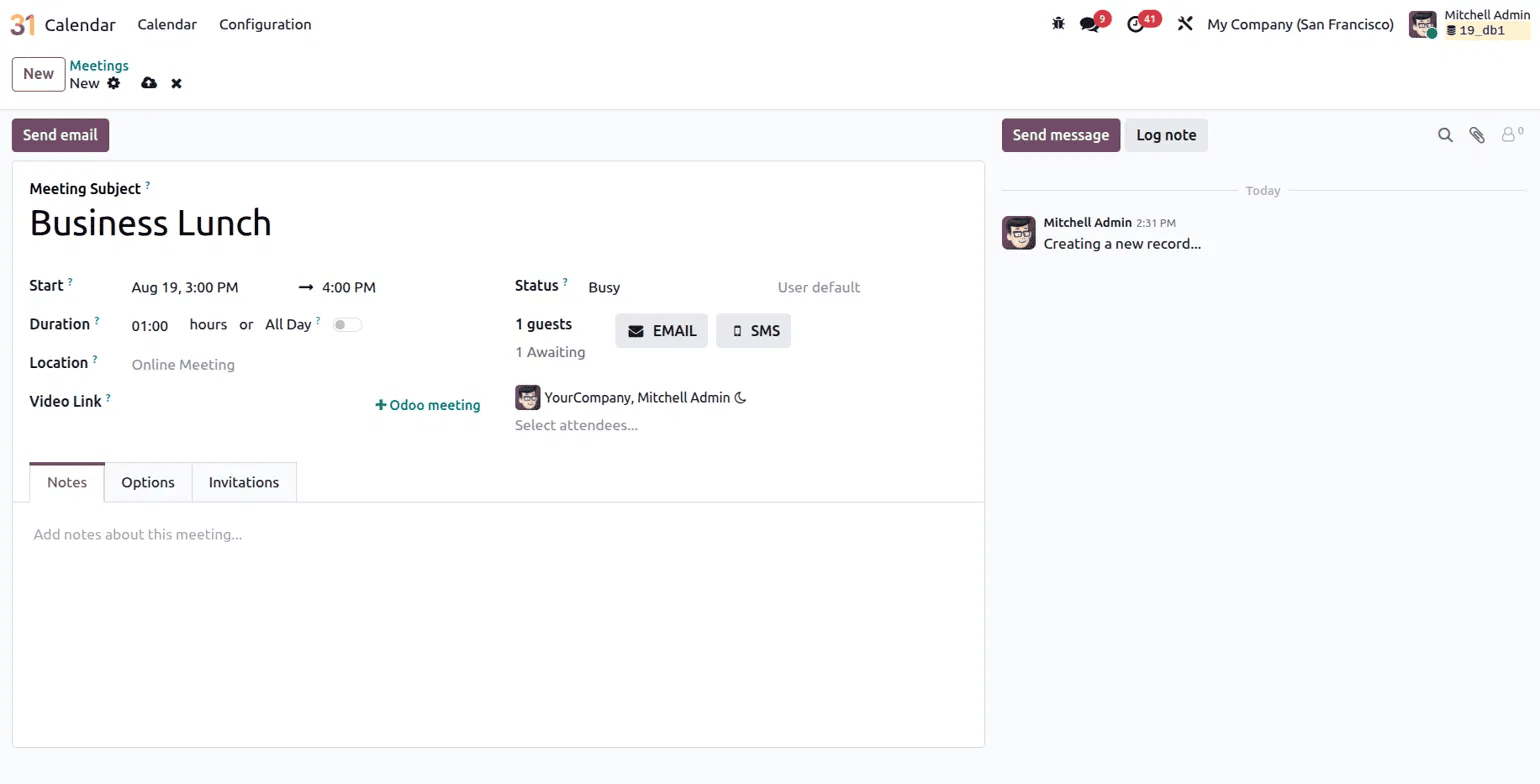
The meeting form contains all the fields needed to set up a complete meeting. The Meeting Subject field at the top is where the name of the meeting is entered for example, Business Lunch. The Start field captures the date and time the meeting begins, along with an end time. The Duration field shows how long the meeting will run, calculated automatically from the start and end times. There is also an All Day toggle which, when switched on, removes the time fields and marks the meeting as a full-day event.
The Location field allows a physical or virtual location to be entered. The Video Link field is particularly useful for remote teams; clicking the Odoo meeting option generates a video conferencing link directly within Odoo so attendees can join without needing an external tool.
The Status field shows whether the organiser is marked as Busy or Free during the meeting, and a User default option is also available. On the right side of the form, the number of guests is shown along with their response status; in this case, 1 guest is listed as Awaiting. There are Email and SMS buttons that allow invitations to be sent to attendees directly from the meeting form without leaving the record. The Attendees section below shows who is already added to the meeting and includes a Select attendees field to add more.
At the bottom of the form, there are three tabs: Notes, Options, and Invitations. The Notes tab is a free text area for adding any relevant information about the meeting, such as an agenda or instructions. The Options tab contains additional settings like recurrence for repeating meetings. The Invitations tab manages how and when attendees are notified.
Configuration - Settings and Reminders
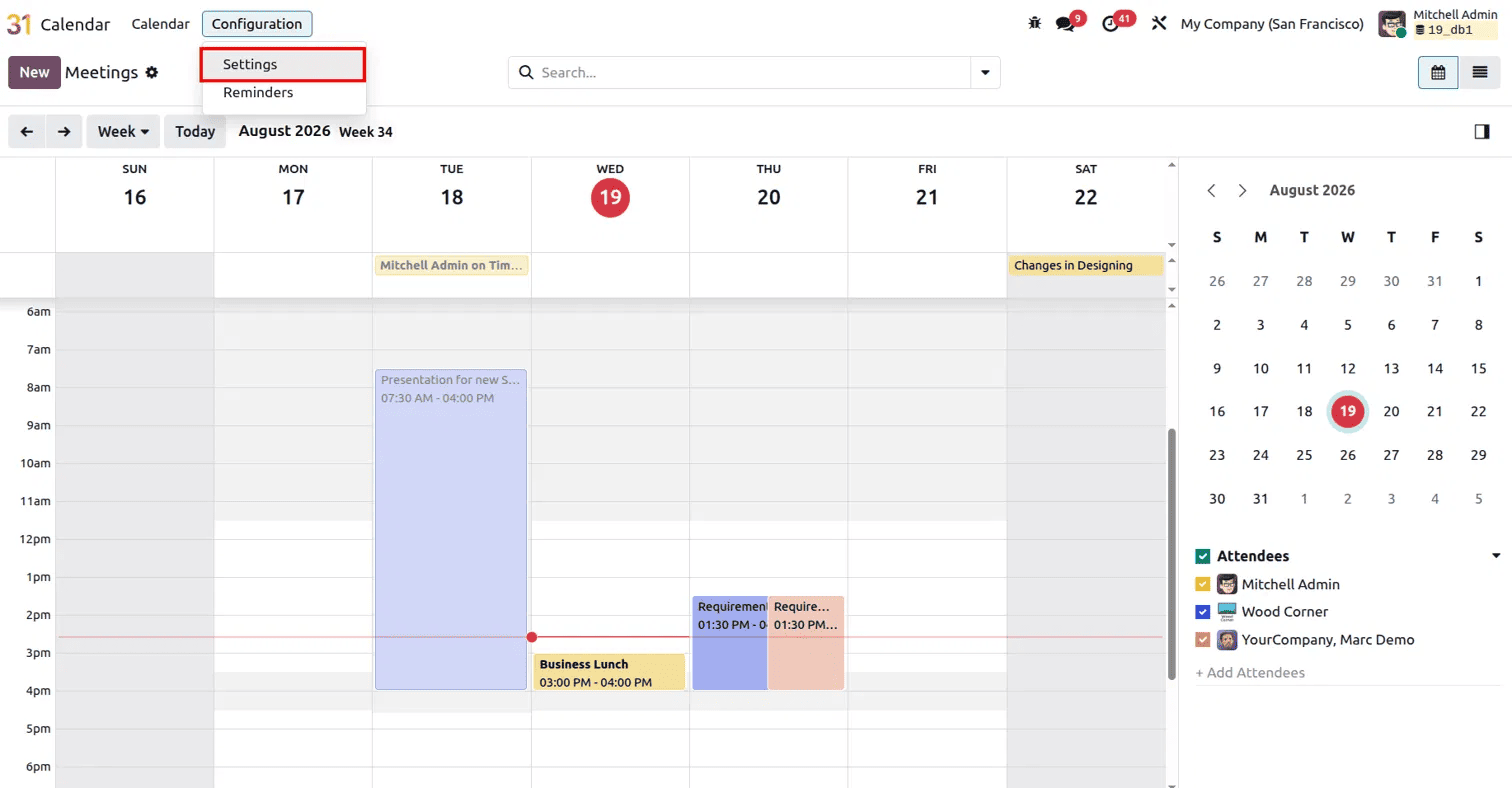
The Configuration menu in the top navigation bar contains two options: Settings and Reminders. These cover the key setup options for how the calendar behaves and how it connects to external calendars.
Calendar Settings
The Settings option under Configuration opens the Calendar Settings page, which is where external calendar synchronisation is managed.
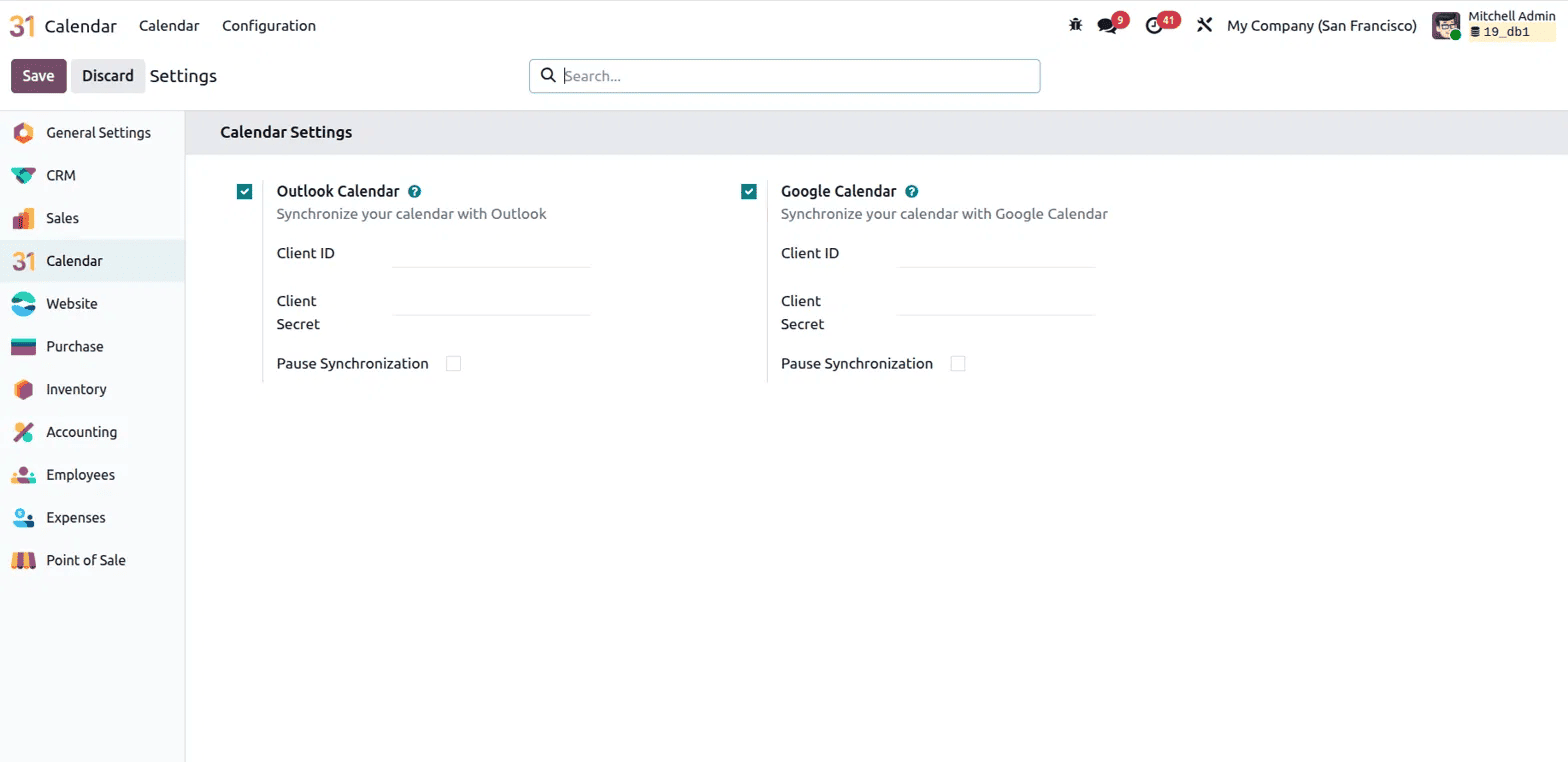
Two sync options are available: Outlook Calendar and Google Calendar. Both are enabled through the same process. Each requires a Client ID and a Client Secret, which are obtained from the respective platform's developer settings. Once these credentials are entered and saved, the Odoo calendar stays in sync with the external calendar, meaning meetings created in Odoo appear in Outlook or Google Calendar and vice versa. This is a valuable feature for teams where some members use Odoo daily while others primarily work from their email calendar.
Both options also include a Pause Synchronization checkbox. When ticked, the sync is temporarily stopped without removing the configuration, which is useful when maintenance or troubleshooting is needed without losing the setup entirely.
Reminders
The Reminders option under Configuration opens the Calendar Alarm list. This is where all the reminder settings for meetings are managed.
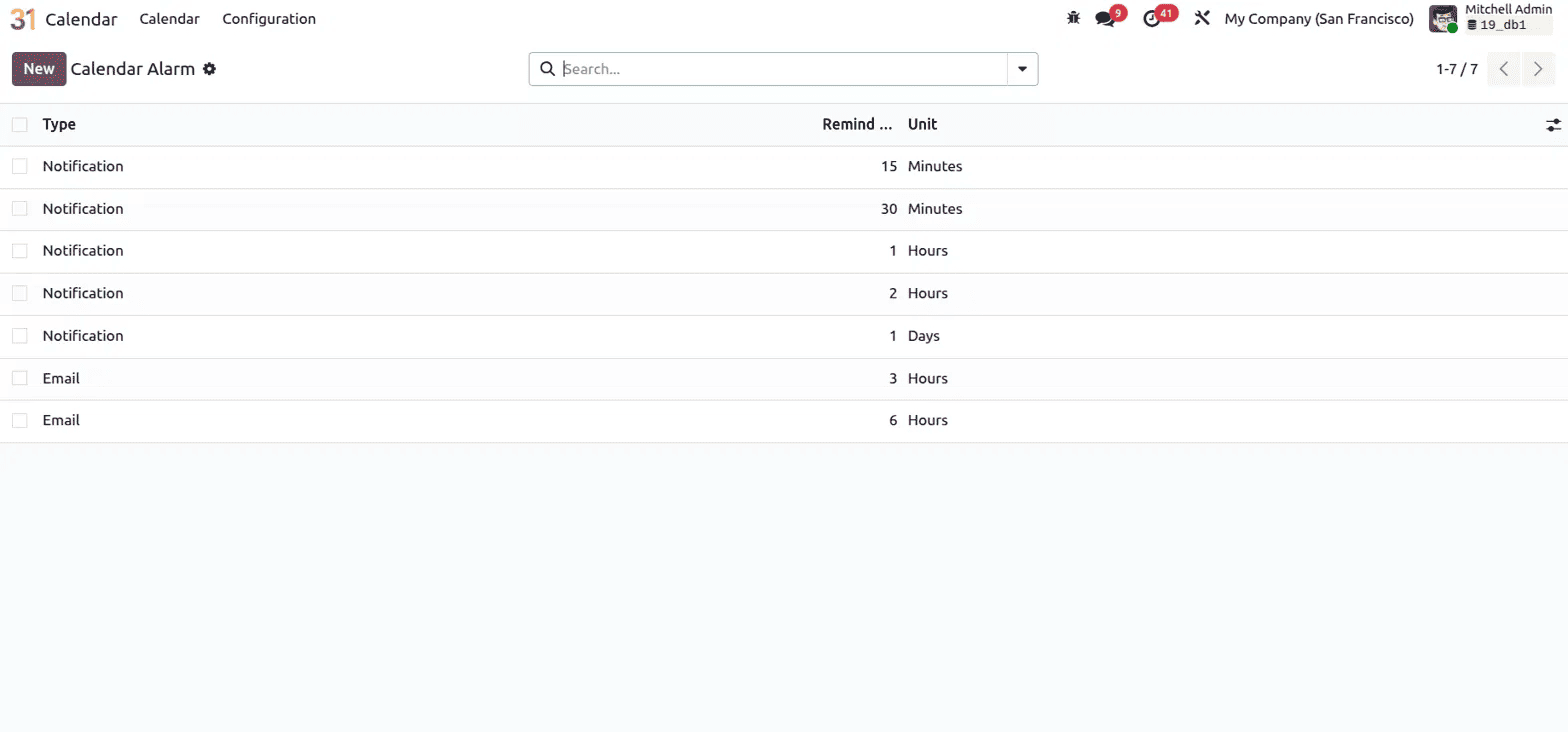
The list shows all existing reminder configurations with two columns: Type and Remind Before with its Unit. There are two types of reminders available: Notification and Email. A Notification sends an in-app pop-up alert to the attendee, while an Email sends a reminder message to the attendee's email address. The Remind Before value combined with the Unit, which can be Minutes, Hours, or Days, determines how far in advance the reminder is sent.
In the example shown, there are five notification reminders set at 15 minutes, 30 minutes, 1 hour, 2 hours, and 1 day before the meeting, and two email reminders set at 3 hours and 6 hours before. New reminders can be added using the New button at the top, giving complete flexibility over when and how meeting alerts are sent.
Clicking on any reminder in the list opens its individual record.
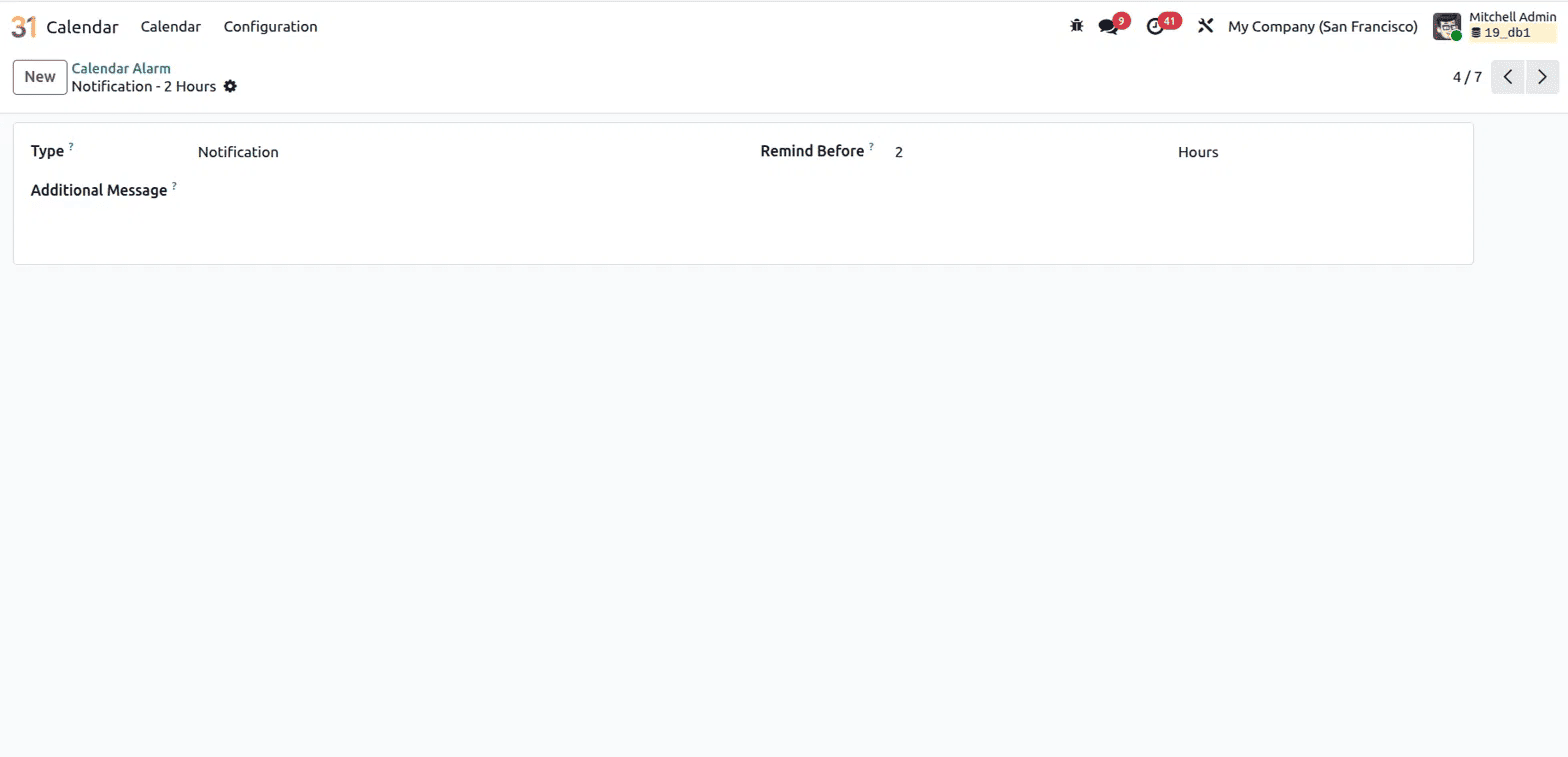
The alarm record is simple. It shows the Type of reminder, the Remind Before value, the Unit, and an Additional Message field where a custom note can be added to the reminder. This additional message appears alongside the standard reminder notification, making it useful for adding context like a meeting link, a preparation note, or a quick summary of what the meeting is about.
The Calendar module in Odoo 19 is a practical and well-connected tool that covers the full range of scheduling needs for both individuals and teams. The weekly calendar view gives a clear picture of what is happening across the team, the meeting creation form is detailed enough to handle everything from a quick call to a multi-attendee event, and the configuration options make it easy to stay in sync with external tools like Google Calendar and Outlook. The built-in reminder system ensures that no one misses an important meeting, with flexible options for both in-app notifications and email alerts. For businesses already using Odoo for their day-to-day operations, having the calendar integrated directly into the same platform removes one more reason to switch between tools.
To read more about Overview of Odoo 18 Calendar Module, refer to our blog Overview of Odoo 18 Calendar Module.