Managing employee salaries involves more than calculating basic wages. Salary attachments, deductions, advances, loans, and other adjustments must be recorded accurately to ensure correct payroll processing and compliance. Odoo 19 provides payroll features that help businesses manage these salary-related components systematically. By configuring salary rules and deduction structures, HR and payroll teams can automate calculations while maintaining clear records for each employee. Understanding how salary attachments and deductions work in Odoo 19 is essential for reducing payroll errors, improving transparency, and ensuring employees receive accurate payments. This blog explains the key concepts and practical steps for handling these adjustments efficiently within Odoo 19.
Firstly, ensure that the Payroll module is installed in Odoo 19.
Open the Payroll module and navigate to Employees > Employees to create a new one or select an existing employee in Odoo.
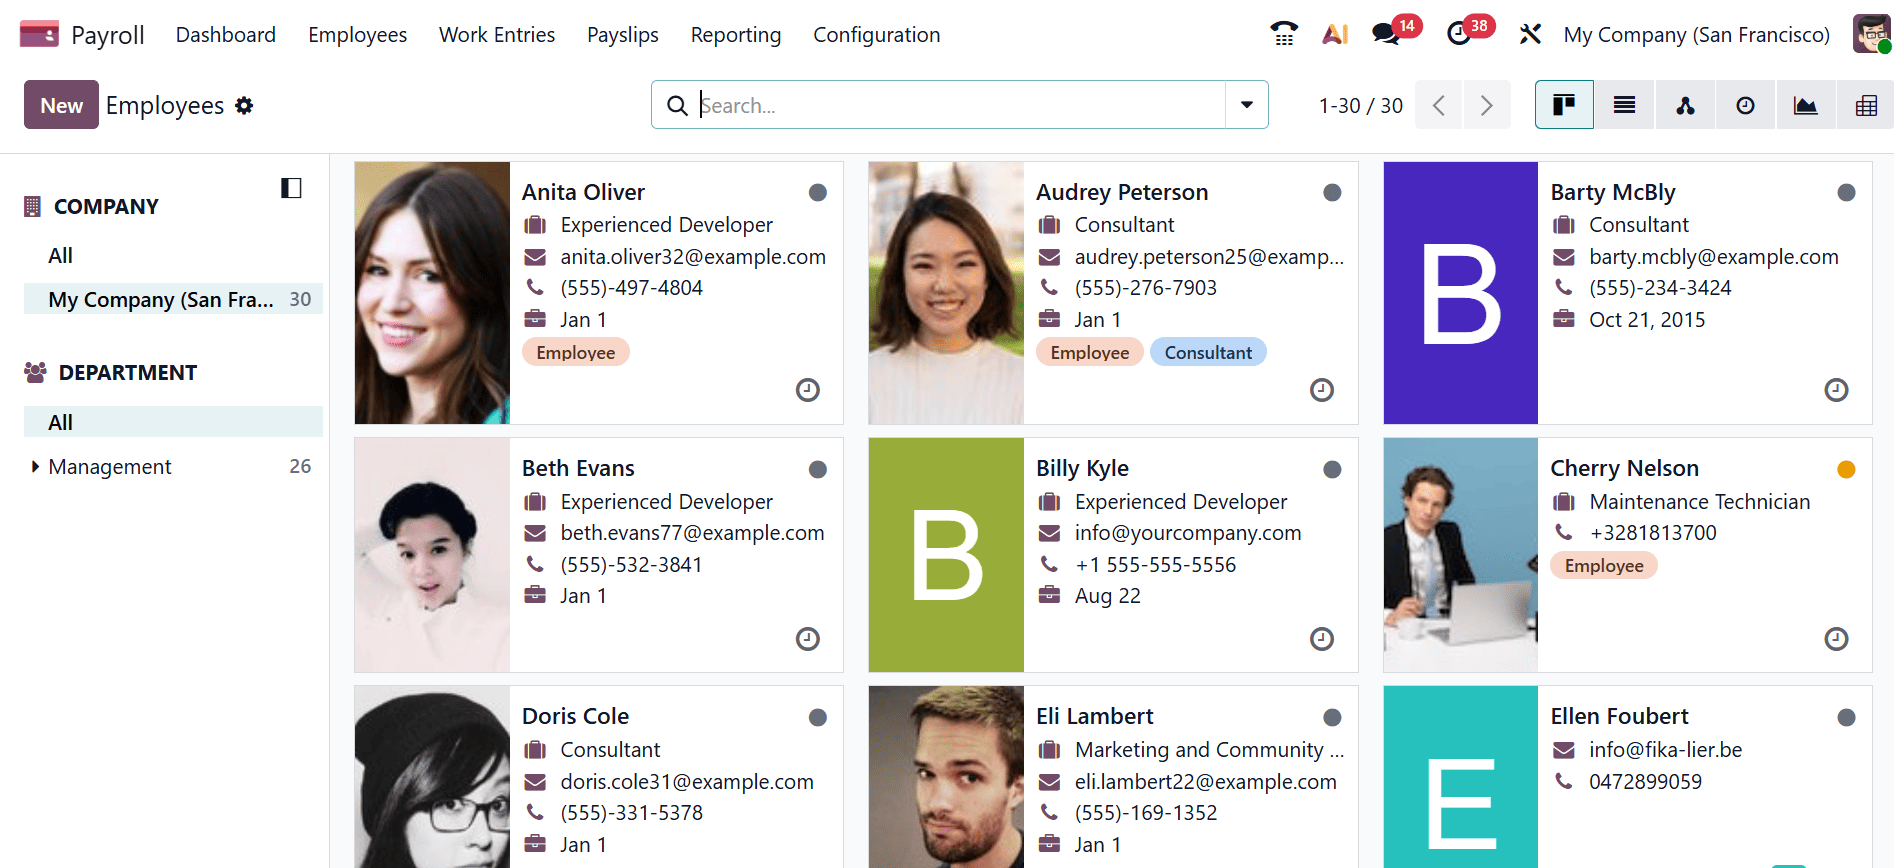
Select an existing employee as shown below. An employee form page will open where you can view the employee details.
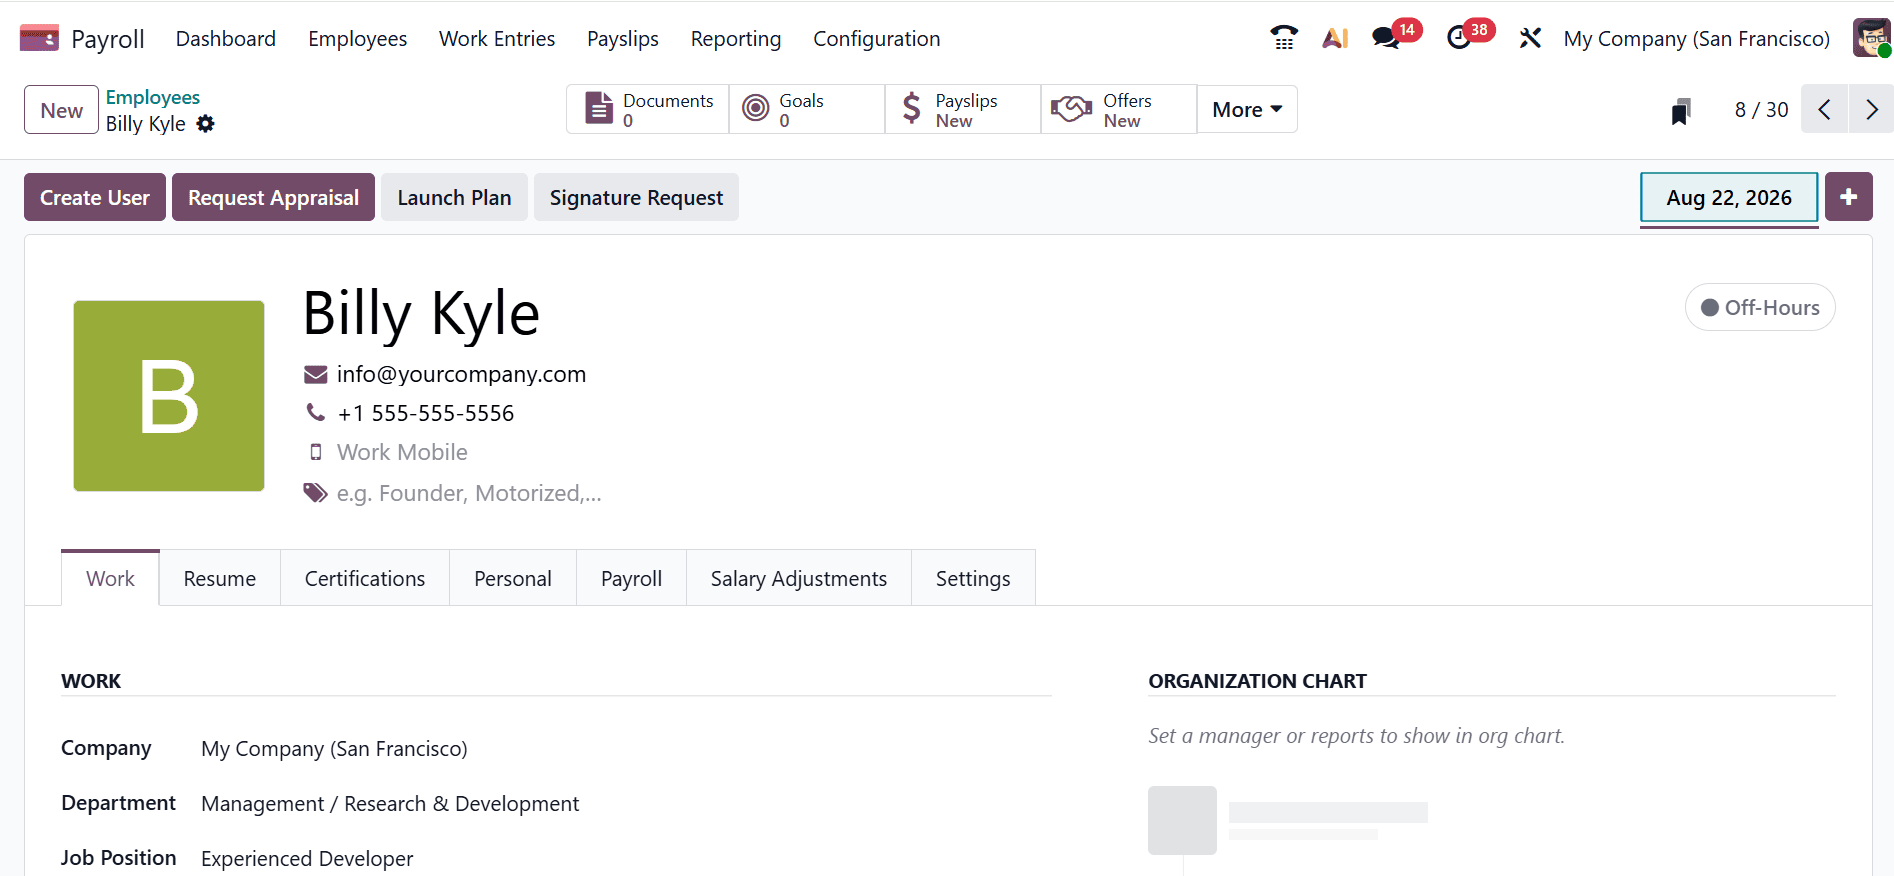
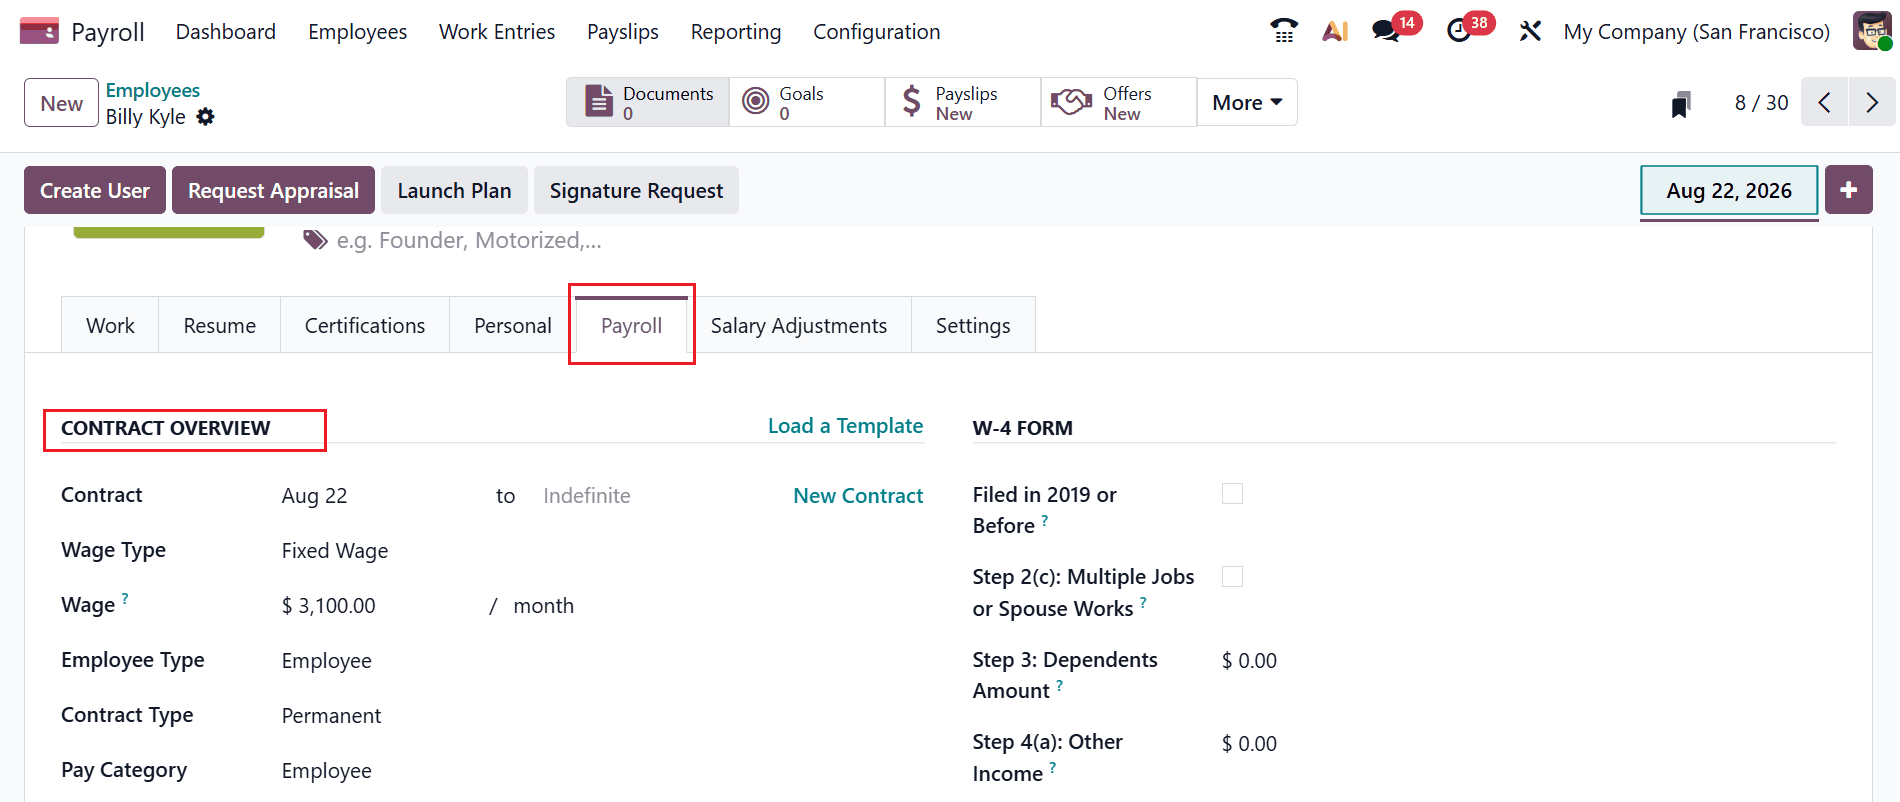
The Payroll tab provides an overview of the employee's payroll-related information and contract configuration. Before setting up salary attachments or deductions, make sure the employee's contract information is correctly configured. A running contract is mandatory to create a payslip for an employee.
Under the Contract Overview section, you can view the contract details, including Contract, Wage Type, Wage, Employee Type, Contract Type, and Pay Category.
In Odoo 19, salary attachments and deductions are managed through Salary Adjustments. Once the contract information has been verified, you can proceed to configure the employee's Salary Adjustment. To create a salary adjustment, open Employees > Salary Adjustments, click New, and enter the required adjustment details for the selected employee.

A new form page will open where you can add details:
- Employees: Select the employee or employees to whom the adjustment applies.
- Type: Select the appropriate adjustment type
- Payslip Amount: Enter the amount that should be deducted from each applicable payslip.
- Duration: Odoo 19 provides three duration options for salary adjustments.
- One Time: Use this when the amount should be deducted from only one payslip.
- Limited: Use this when an employee must repay a specific total amount over multiple payslips.
- Unlimited: Use this for recurring deductions that have no predefined end amount.
- Negative Value: Enable Negative Amount when the adjustment needs to be treated as a negative value in salary computation.
- Note: Describe the reason for the adjustment.
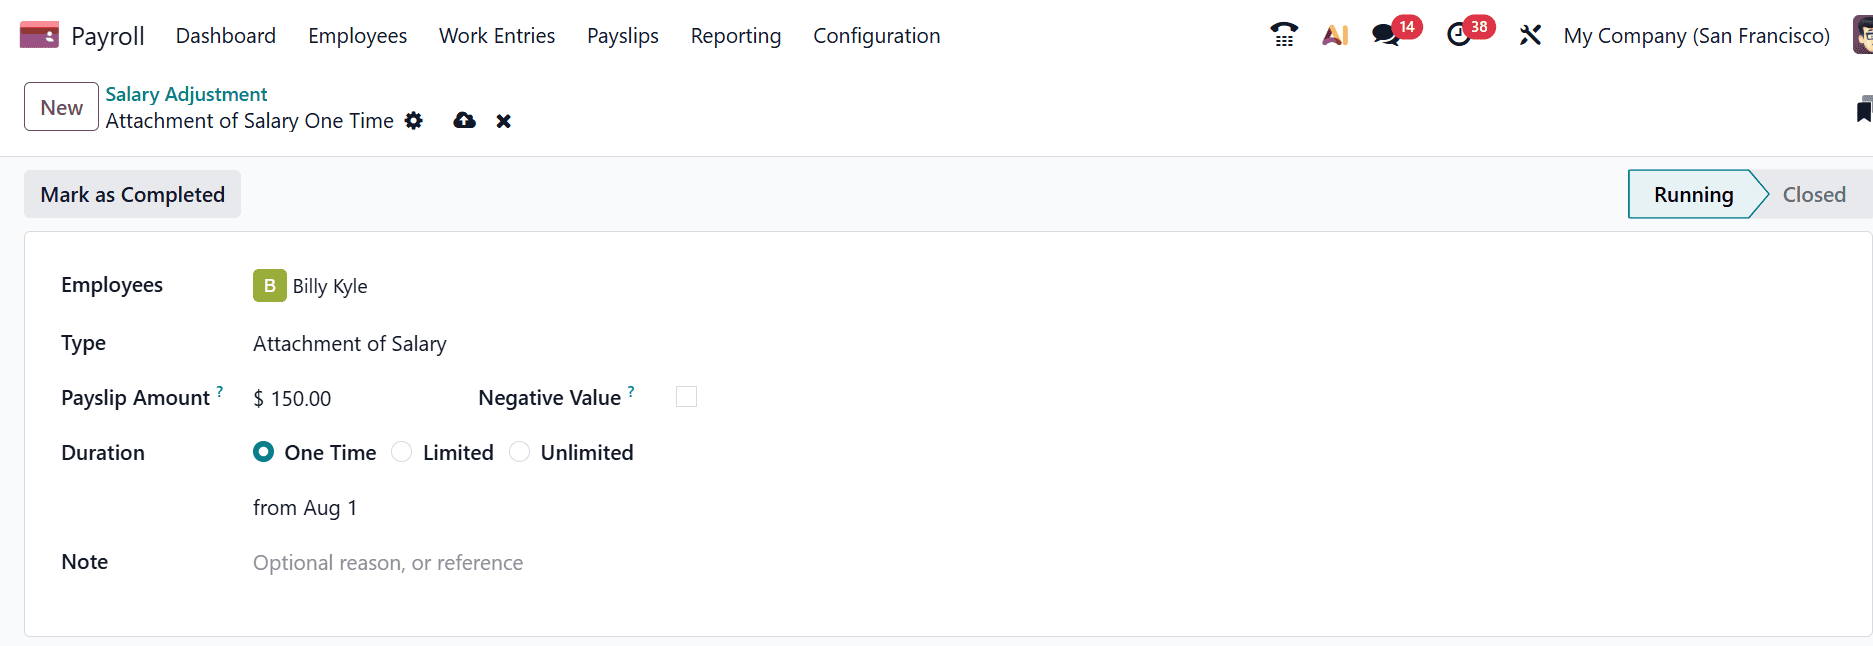
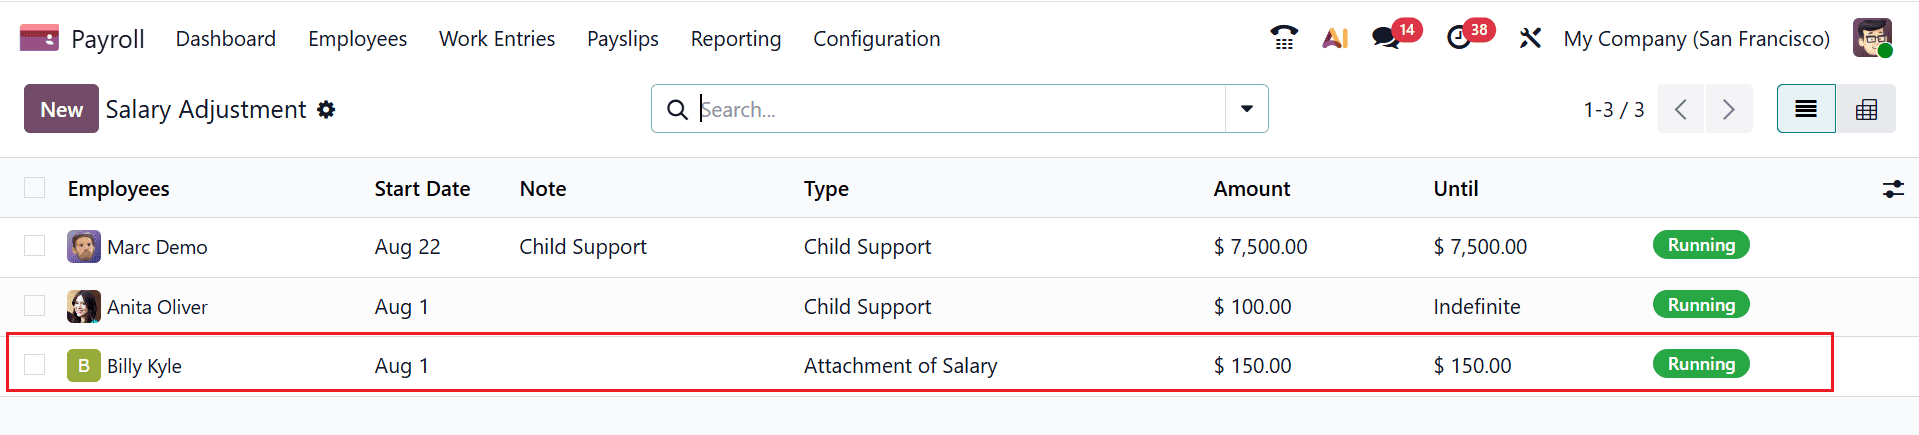
Here, you can see that the salary adjustment is in the Running stage.
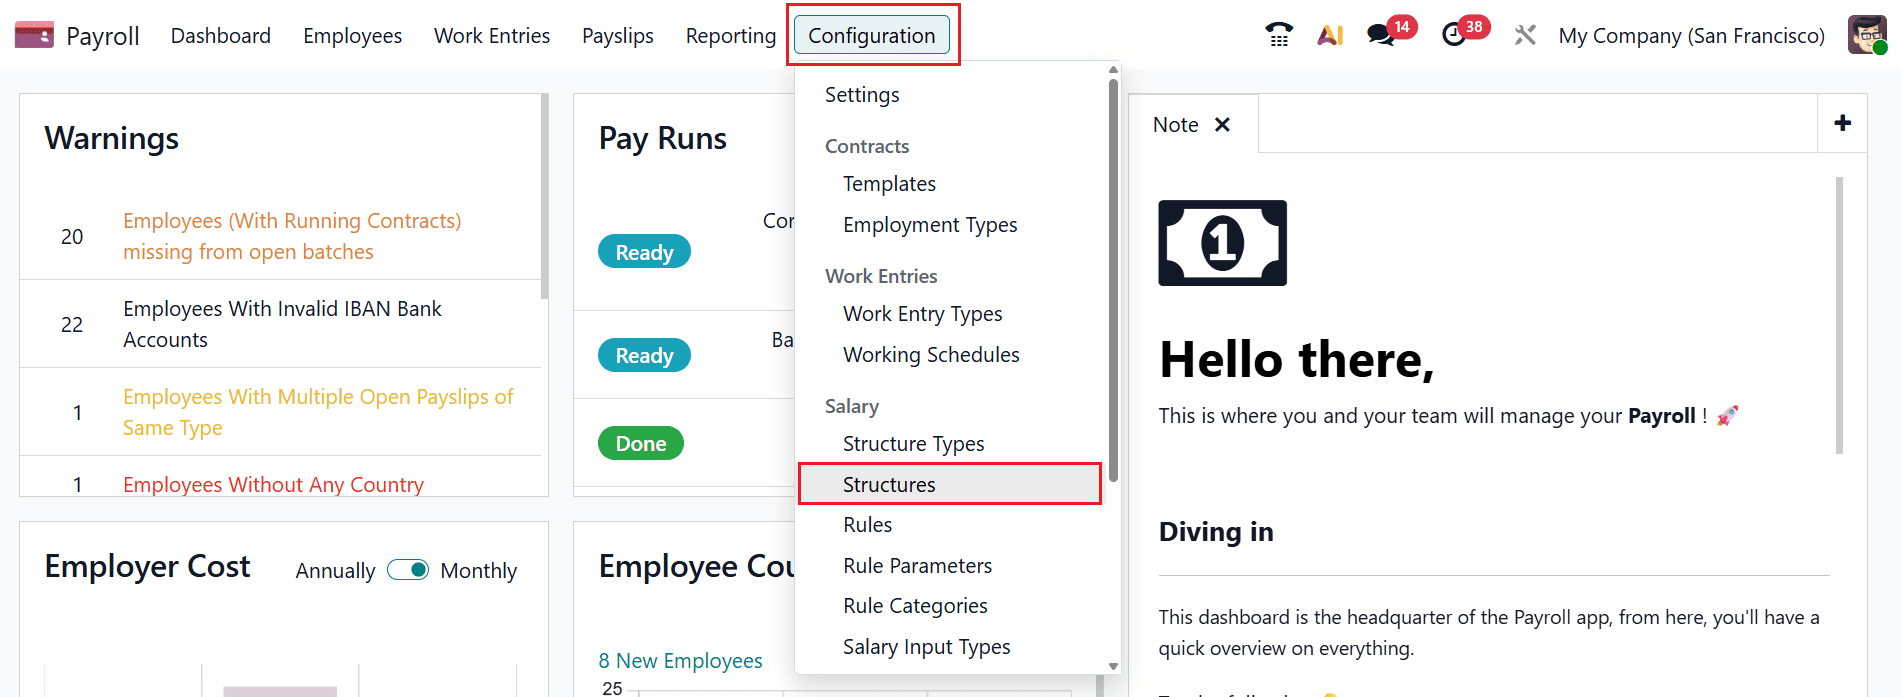
To find the salary structure, move to Configuration > Structure as shown below:
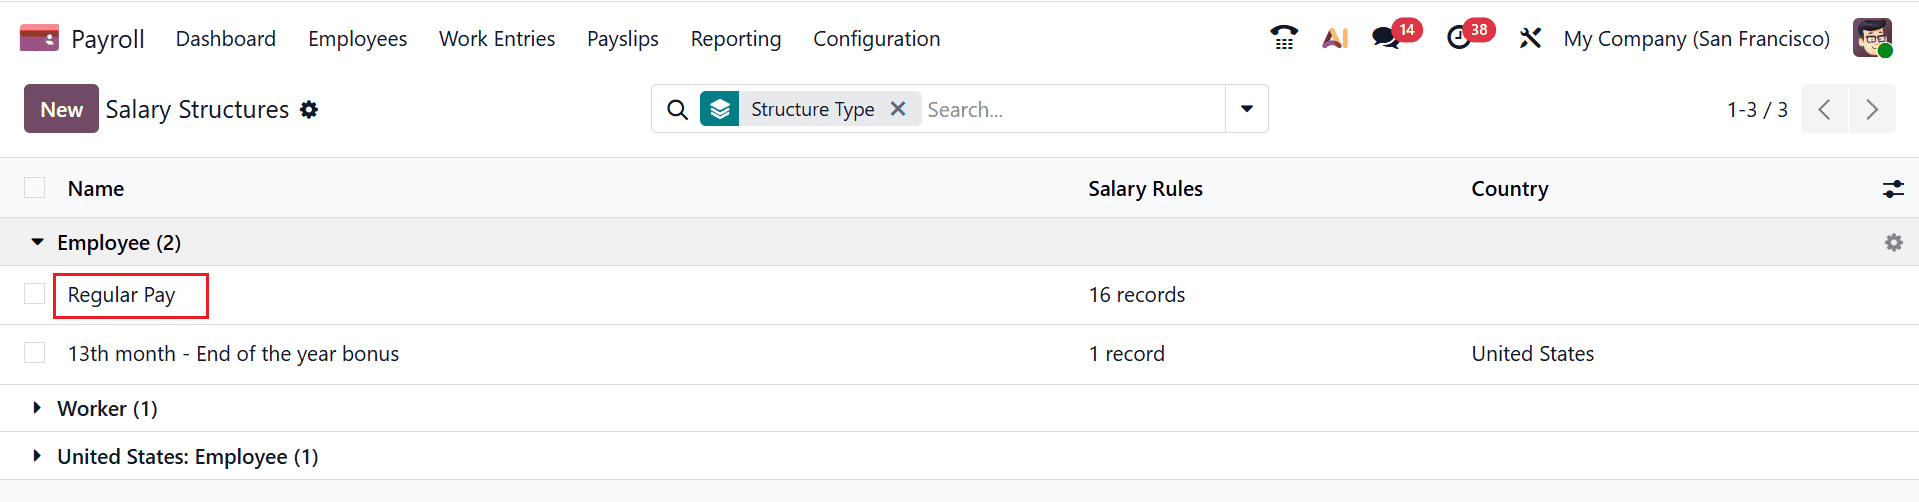
Under the Employee section, open the Regular Pay option as shown below:
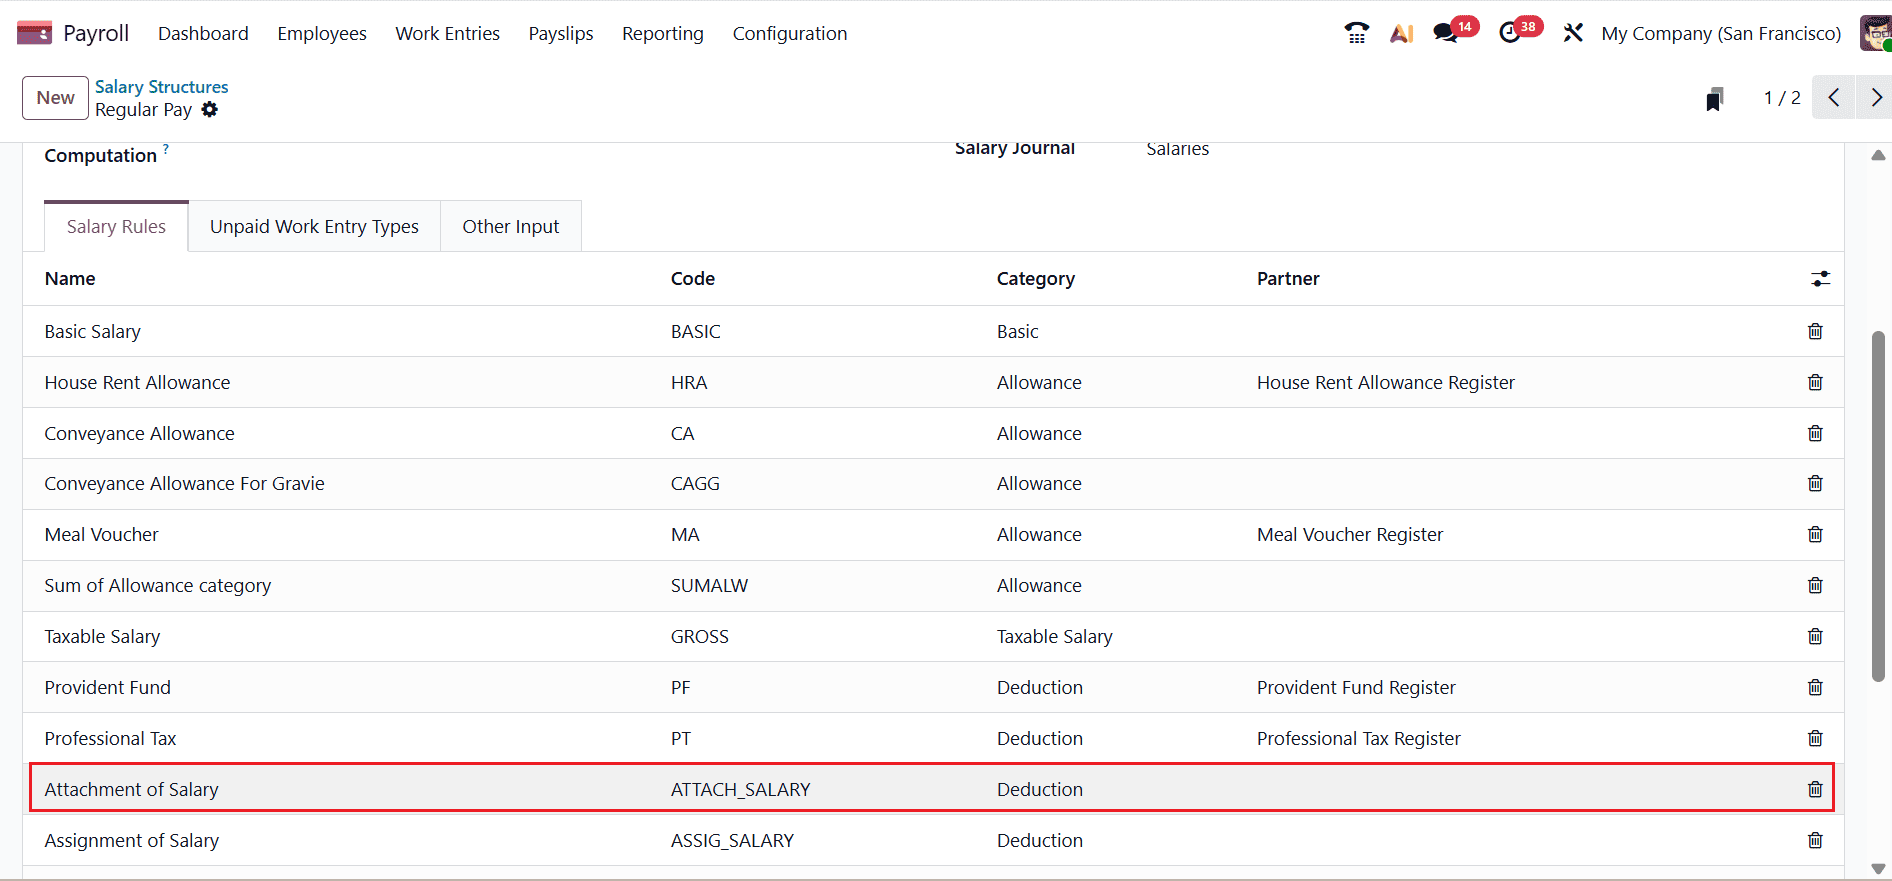
Under the Salary Rules tab, you can find different salary rules. Here, you can see that the Attachment of Salary is a Deduction.
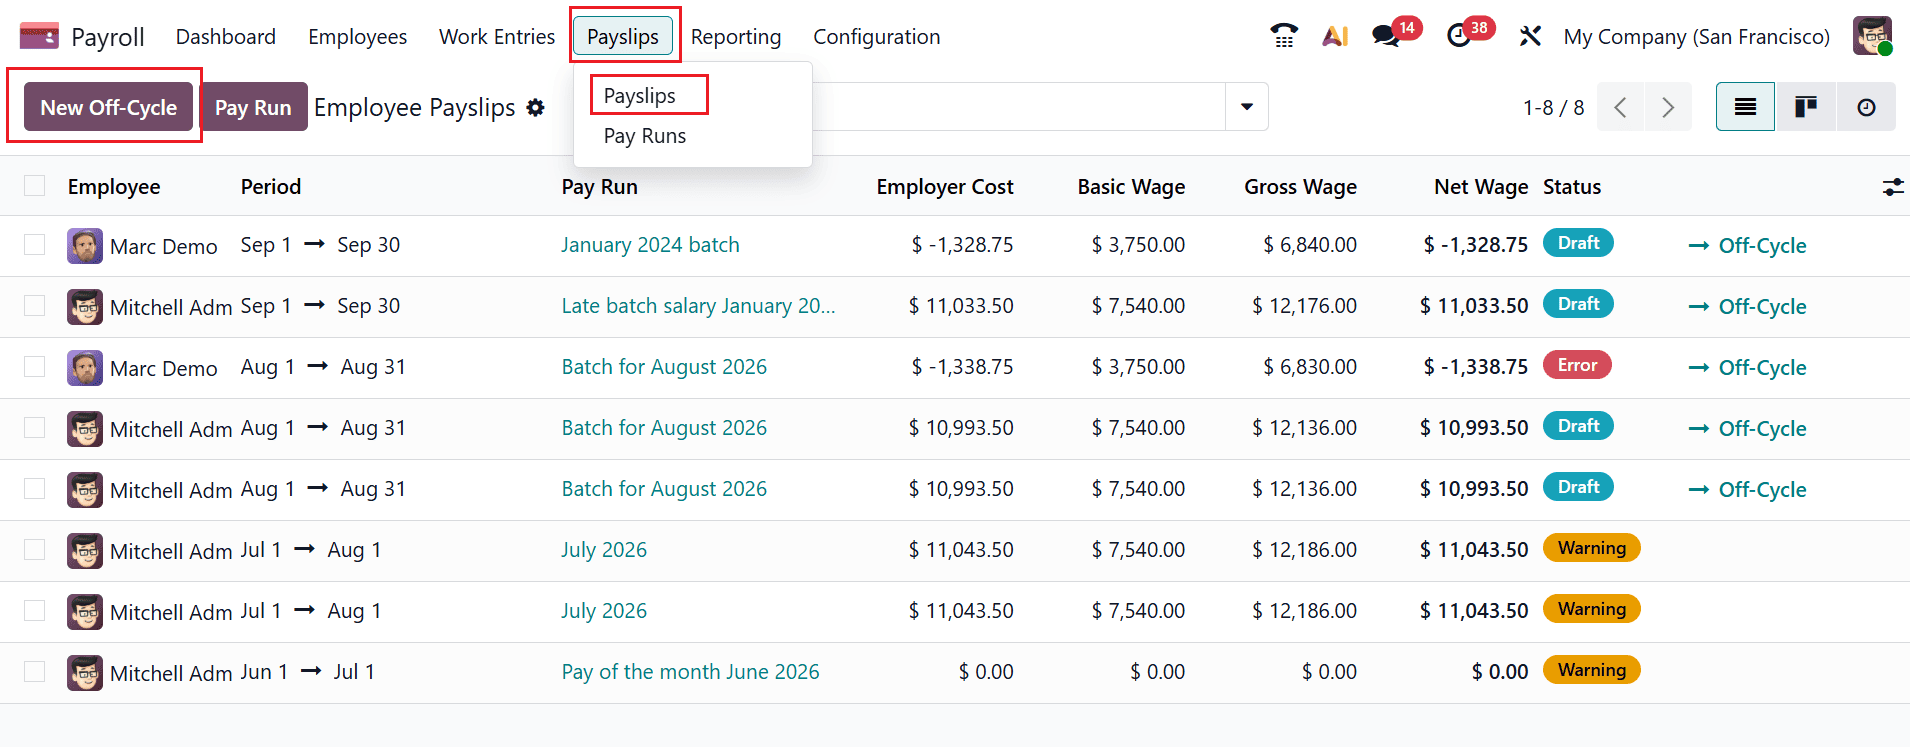
Once all the required details are configured, go to Payroll > Payslips and click New Off-Cycle to create a new payslip for the employee.
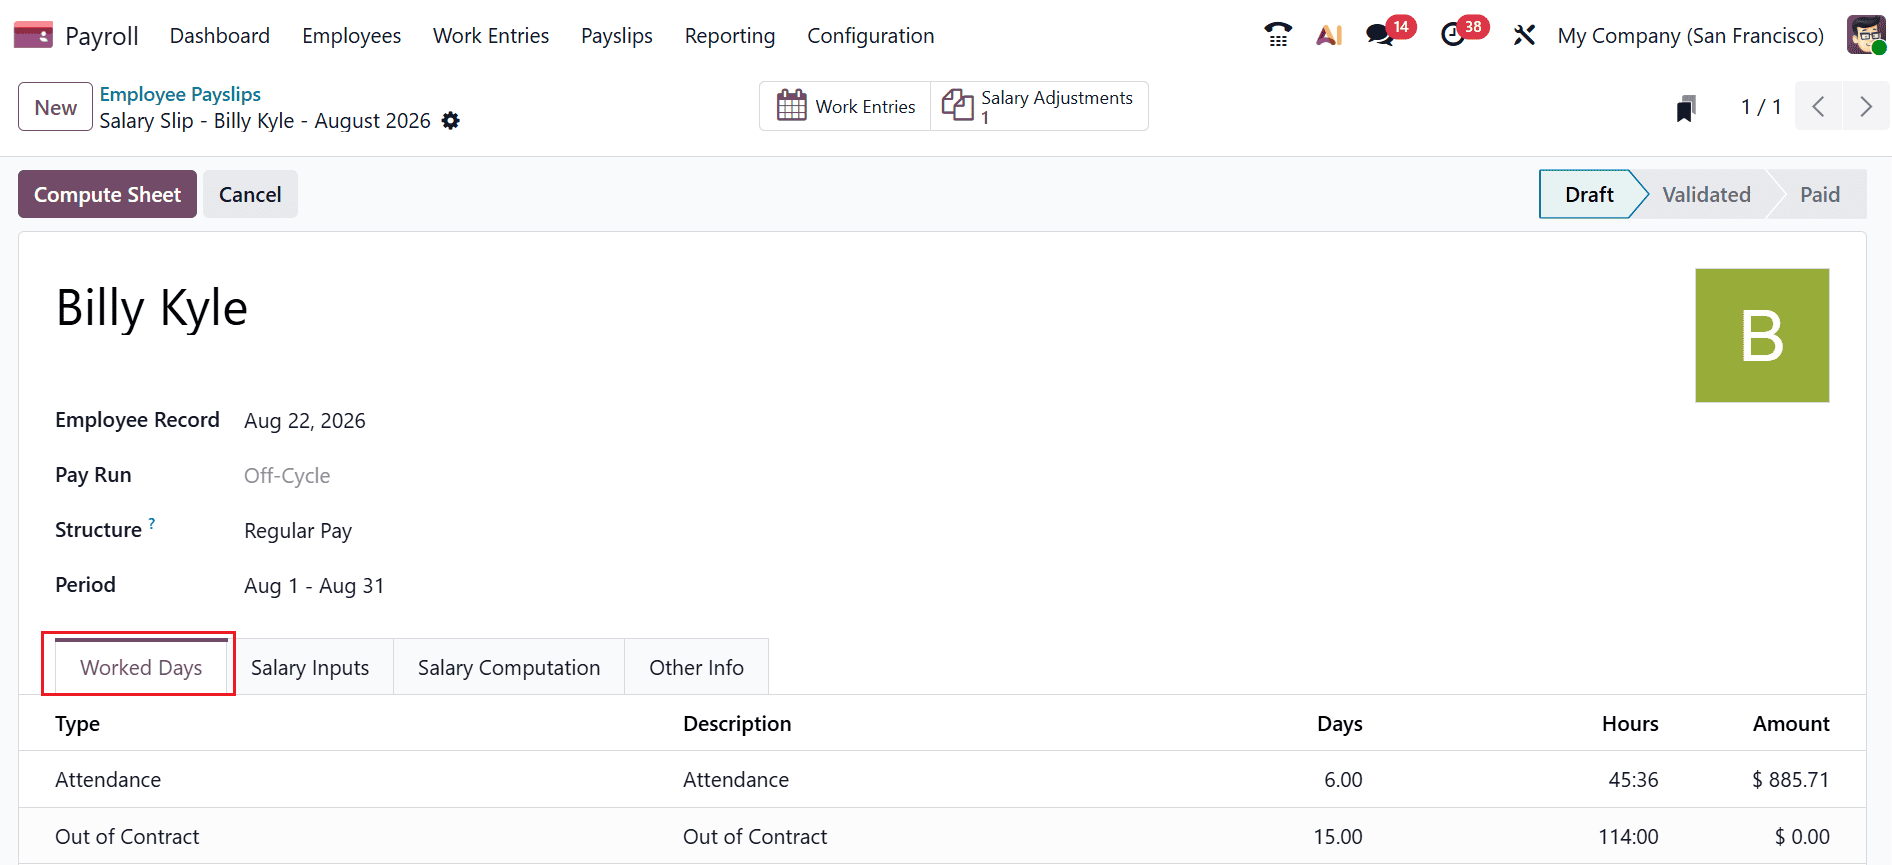
A new form will open where you can select the employee and view the relevant details, including the Employee Record, Pay Run, Structure, and Period. Under the Worked Days tab, you can find the employee’s number of working days, hours, and the amount of salary being received.
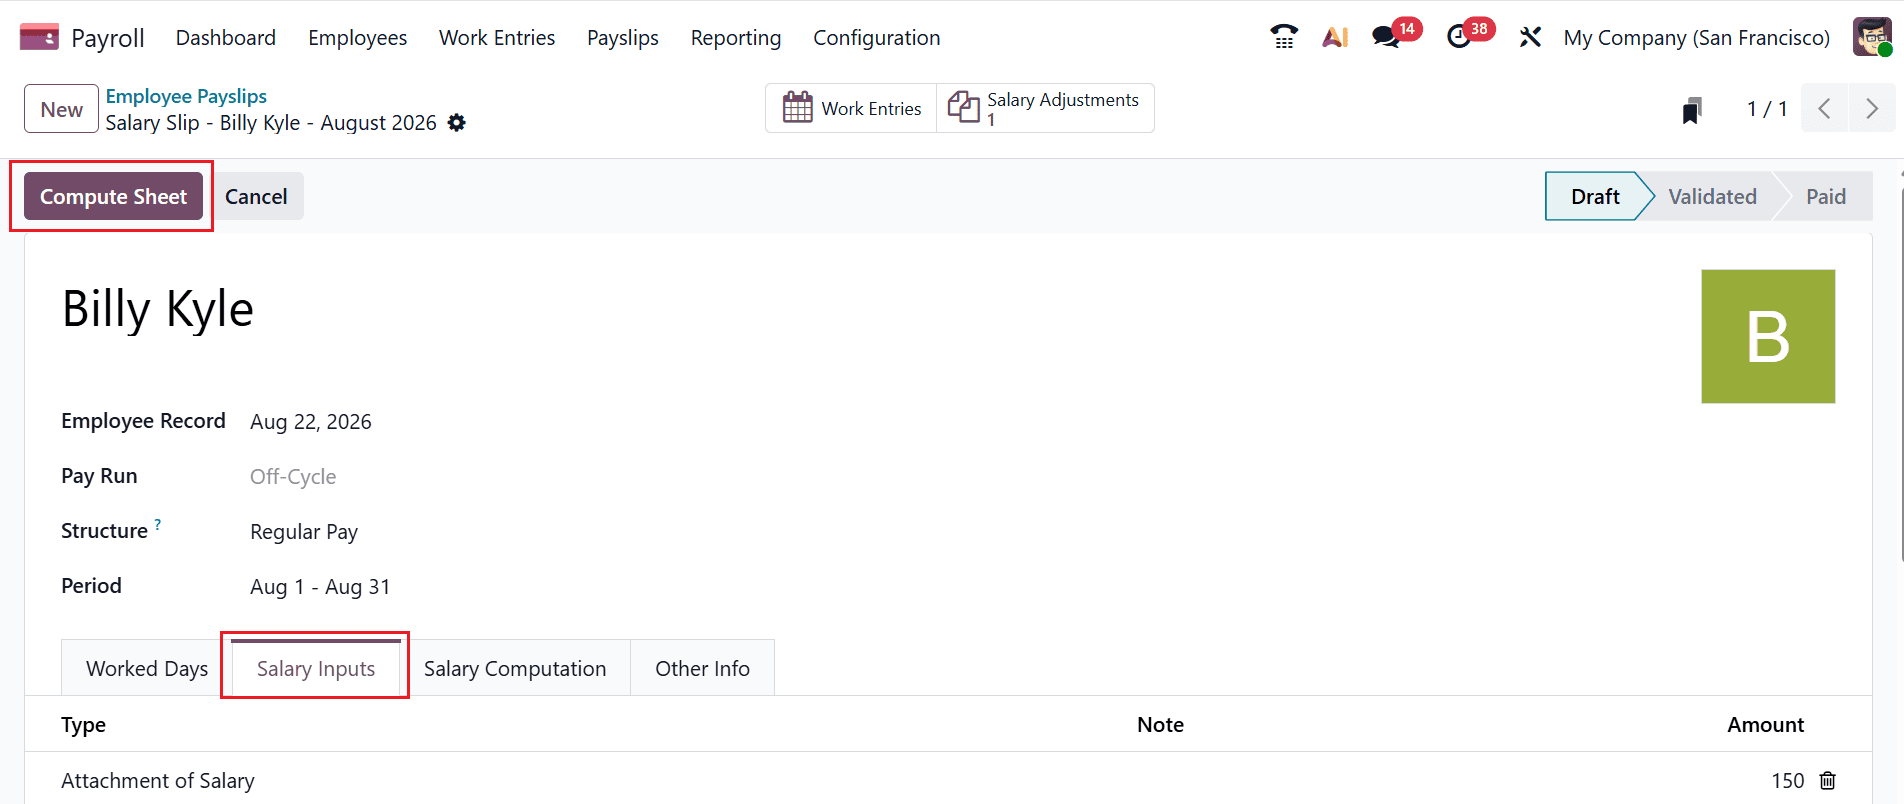
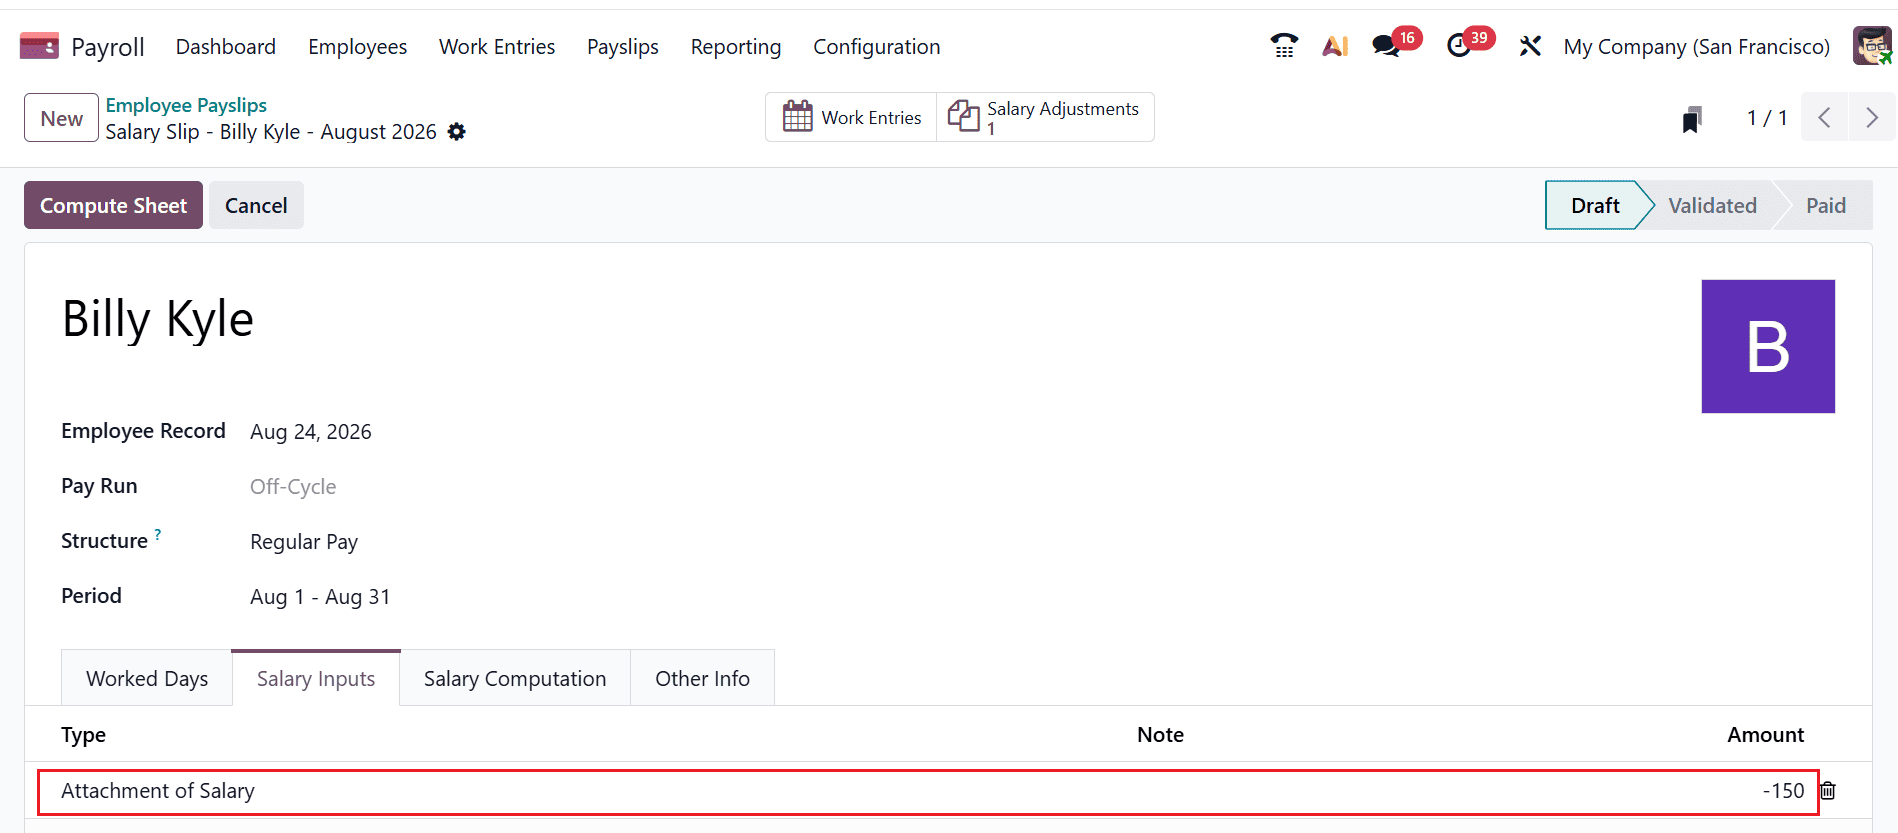
Under the Salary Inputs tab, you can find the additional payroll values. Here, you can find the salary input as an attachment of Salary with the amount. Then, click on the Compute Sheet button.
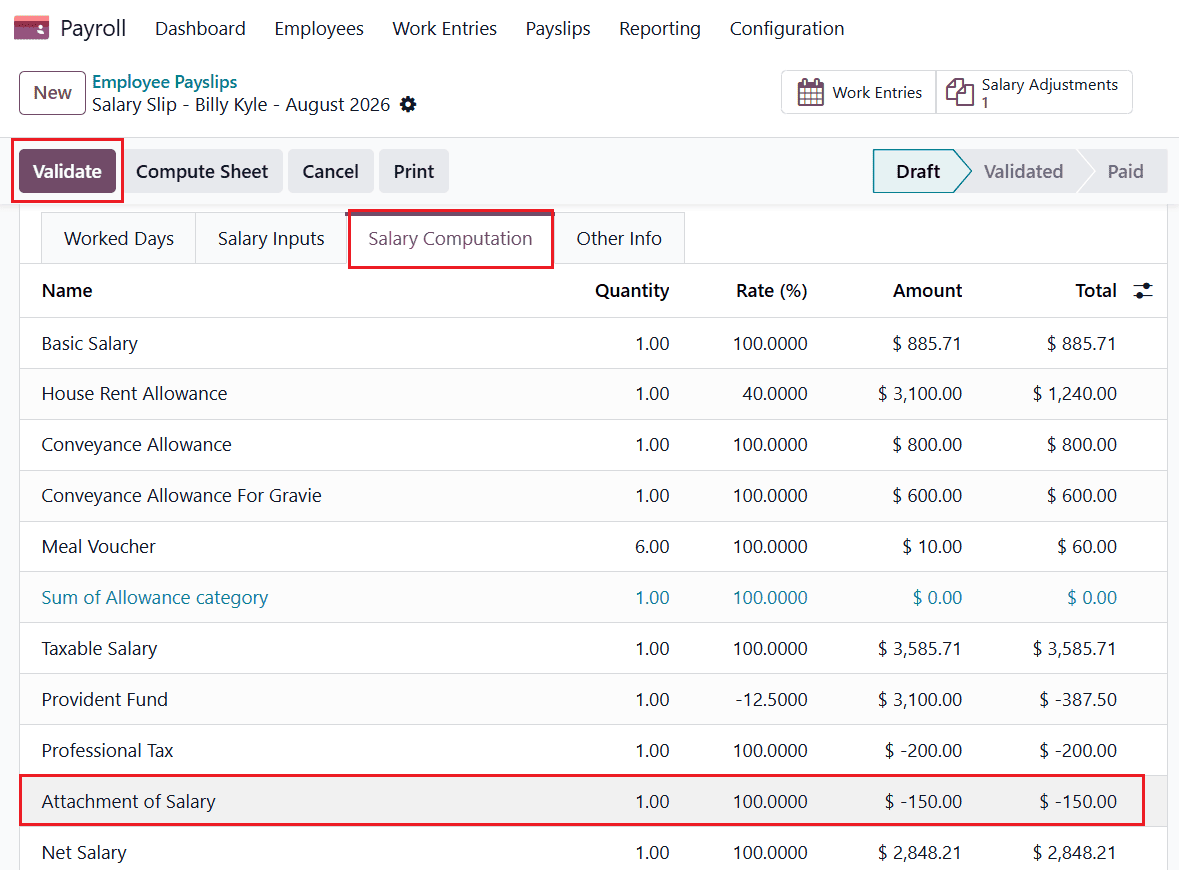
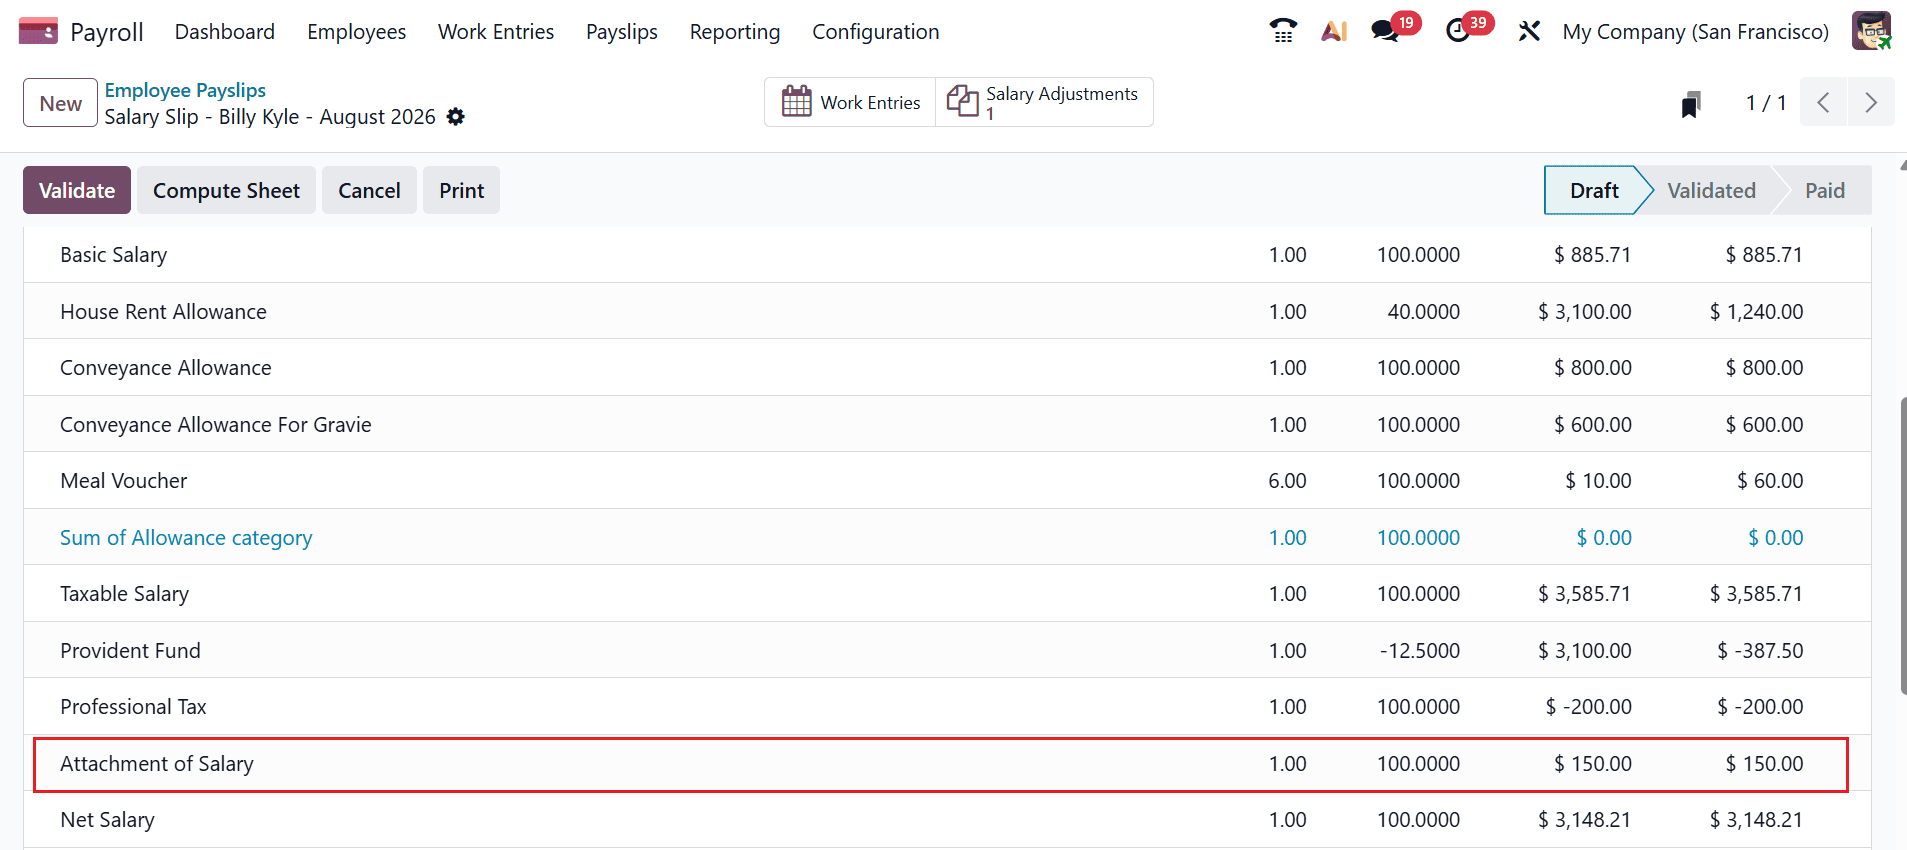
Under the Salary Computation tab, you can find the Attachment of Salary, which is a deduction of -150. It means the amount will be deducted from the employee’s salary. Then, click on the Validate button.
Then, it will move to the Validated stage from the Draft stage. Then, click the Mark as Paid button to finalize the payslip.
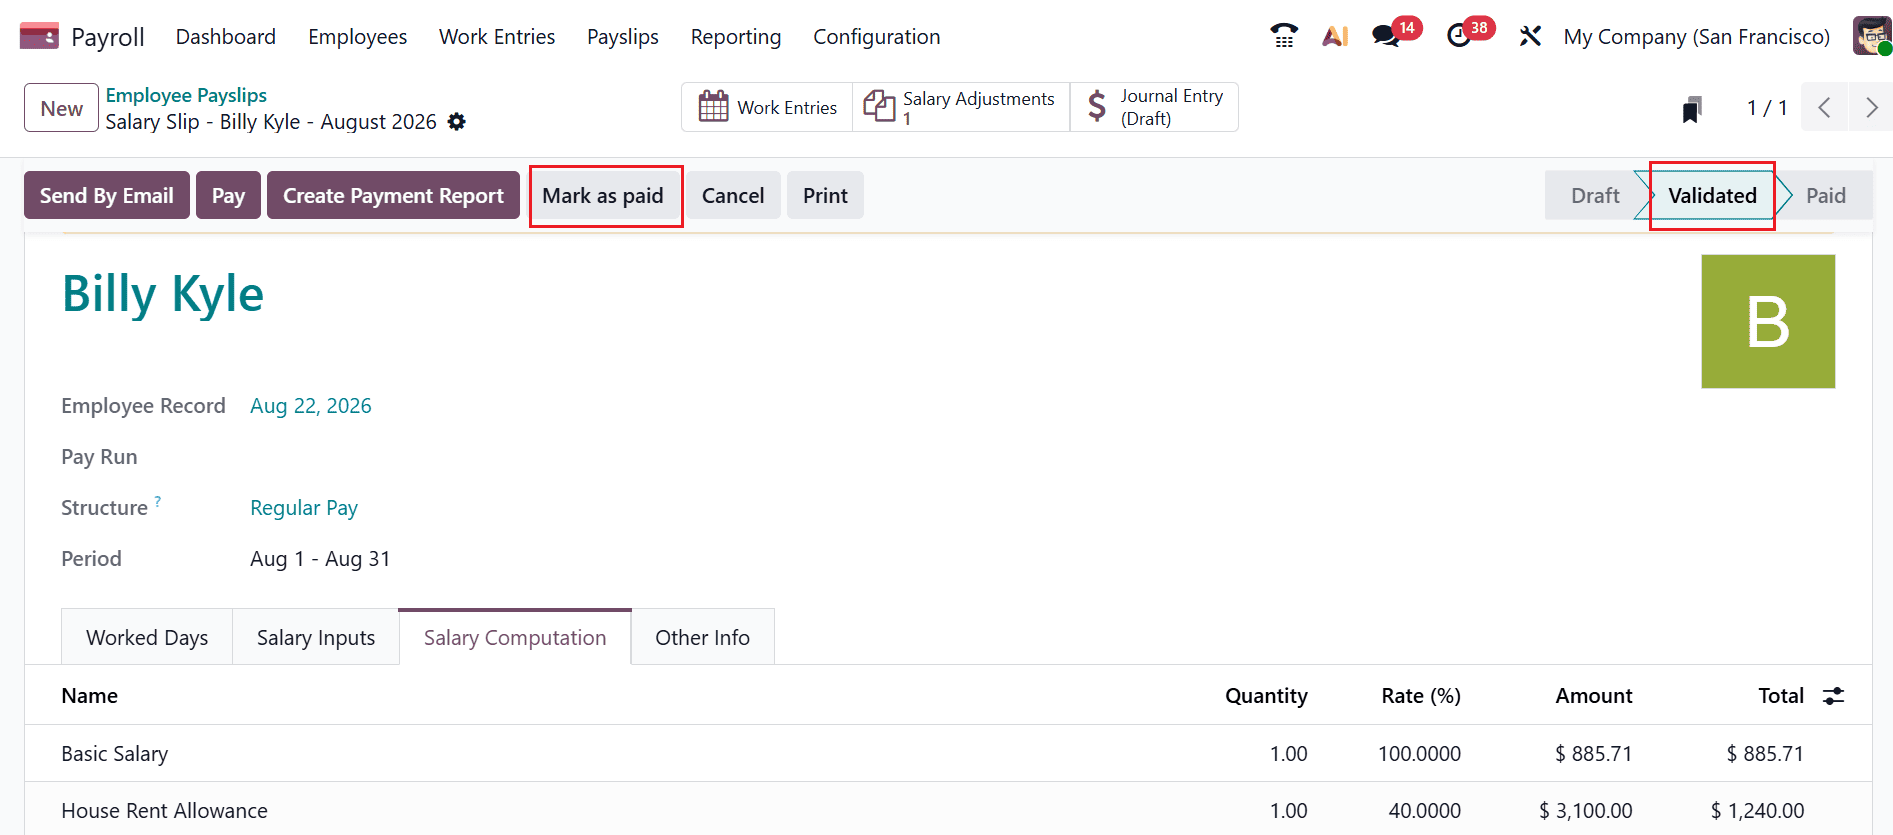
The payslip will then move to the Paid stage, where you can also view the employee’s salary slip, as shown below. To view the salary attachment details, click on the Salary Adjustments smart button.
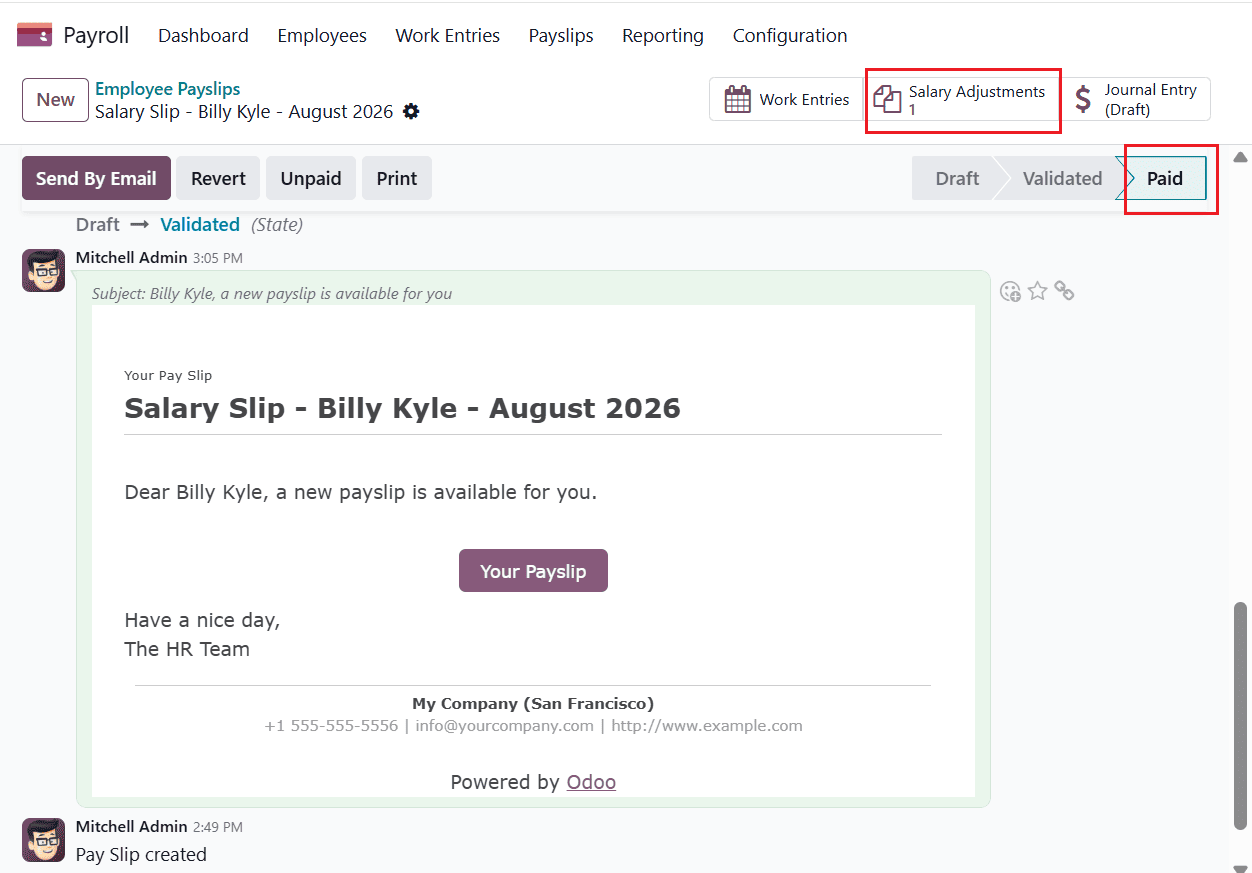
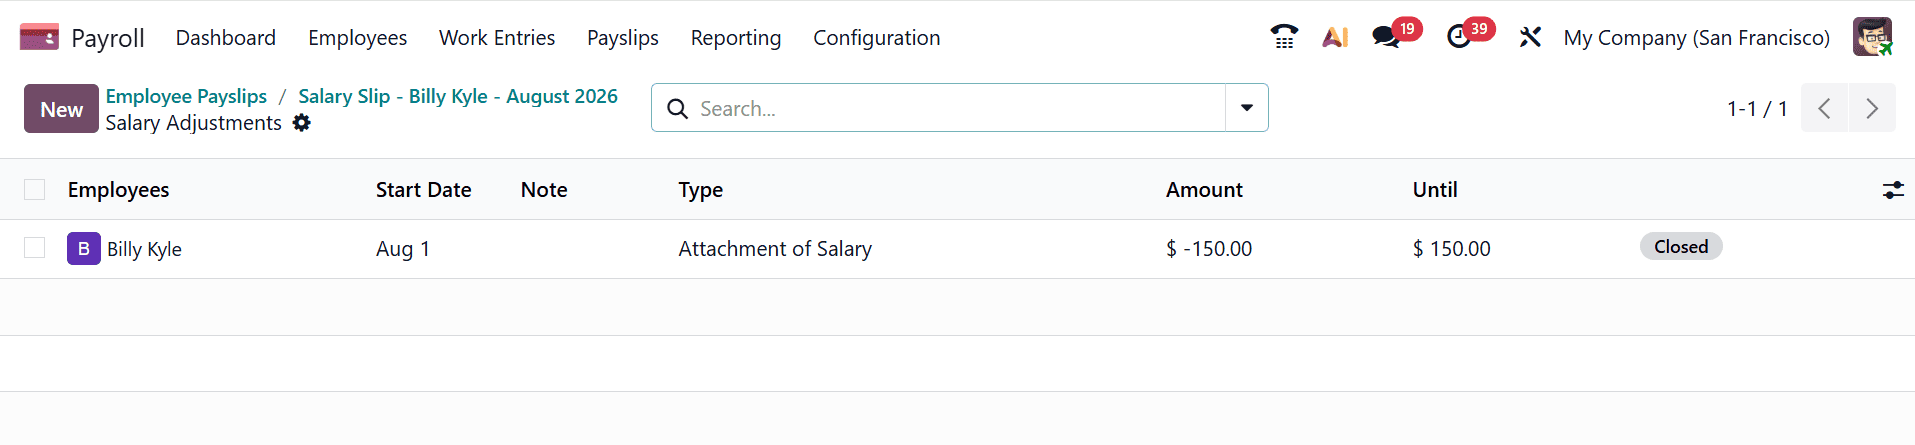
Here, you can find the salary adjustment details of the employee.
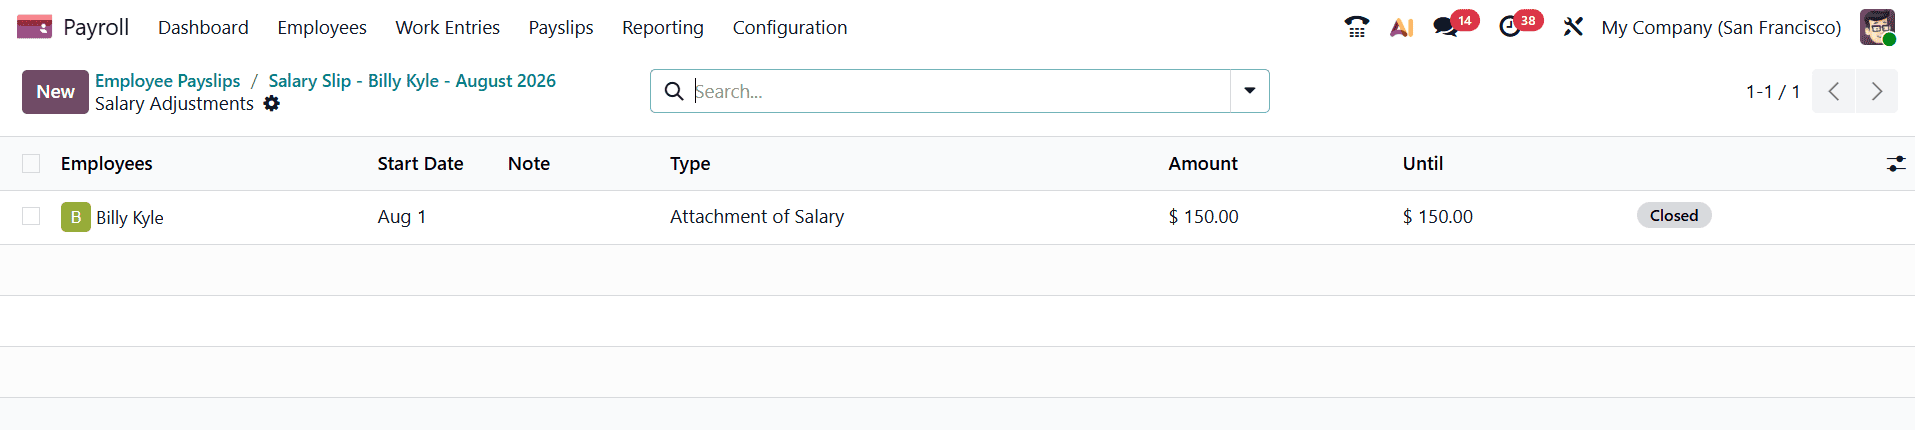
When you enable the Negative Value option in the Salary Adjustment form, the payslip amount will be taken into account as negative.
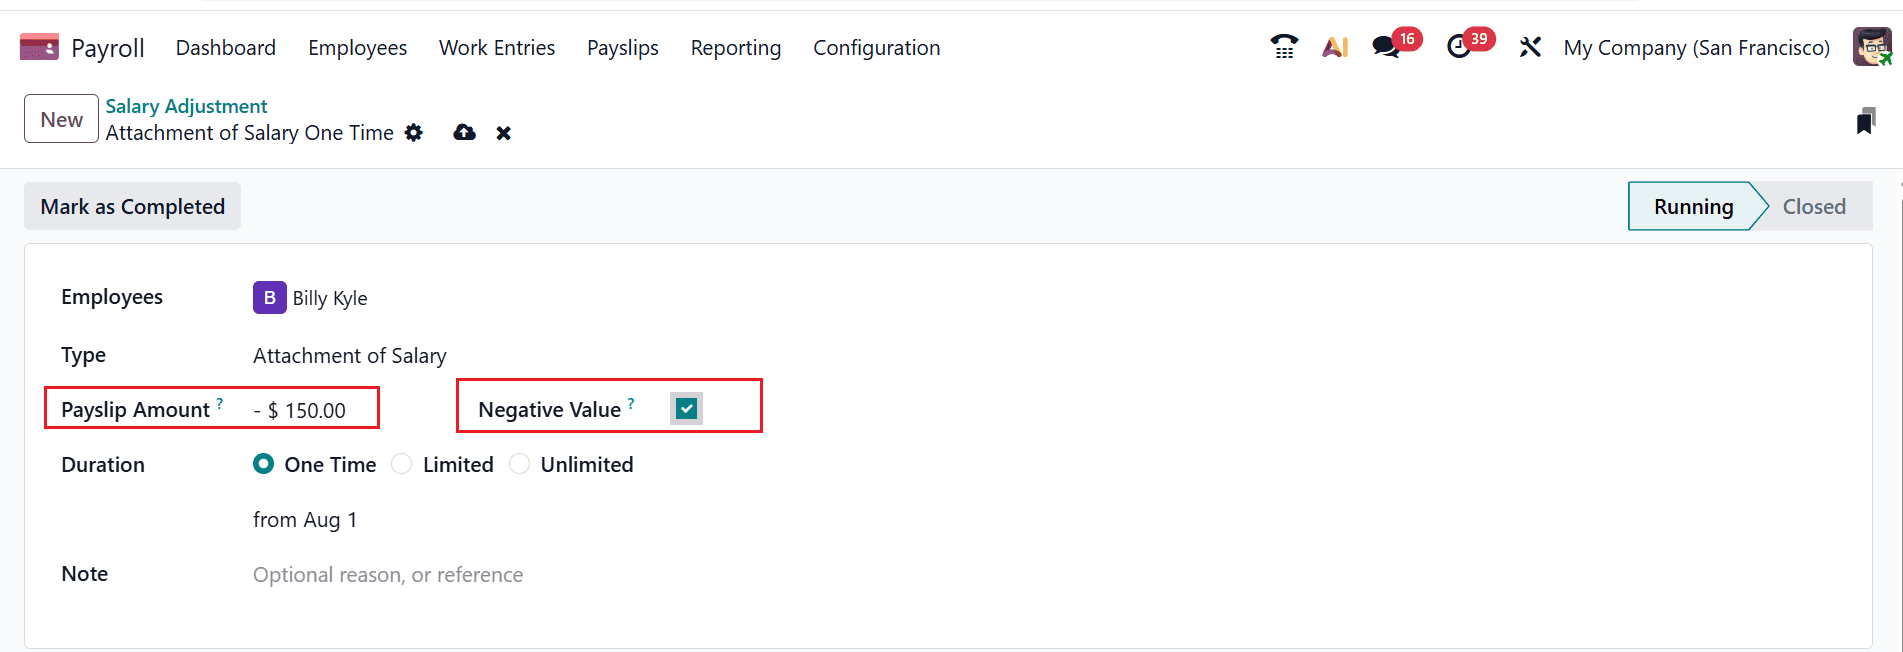
Then, navigate to Payslips > Payslips. Under the Salary Inputs tab, you can see the amount is in negative value. Then, click on the Compute Sheet button.
Under the Salary Computation tab, you can see the salary adjustment amount is in positive value as shown below:
Click on the Salary Adjustment smart button, where you can see the employee's payslip in a negative value.
Enabling Negative Value in Salary Adjustment allows you to enter a negative amount to reduce an employee’s salary. If the option is not enabled, users can enter only positive values, so deductions must be handled through separate payroll rules or adjustment methods.
Odoo 19 provides a structured and flexible way to manage salary attachments and employee deductions through salary adjustments, input types, and salary rules. By configuring the appropriate deduction type, assigning it to employees, defining the duration and amount, and linking it correctly to payroll rules, businesses can automate recurring or one-time deductions accurately. Odoo also tracks limited deductions until the required amount is fully recovered and automatically closes completed adjustments.
To read more about Overview of Salary Attachments in Payroll Odoo 18, refer to our blog Overview of Salary Attachments in Payroll Odoo 18.